Lenses & filters
Chinon AF 50mm lens User manual
User manual for Chinon AF 50mm lens. 9 pages in English. Read the original PDF, download or print a copy without registration.
9 pagesEnglish0.3 MB PDF
Loading your manual…Open PDF directly
Document details
- Brand
- Chinon
- Model / document
- Chinon AF 50mm lens
- Document type
- User manual
- Language
- English
- Pages
- 9
- File size
- 0.3 MB
- Category
- Lenses & filters
- Document date
- Not specified in catalog
Search available document text
Find a term, then jump to its page in the original PDF. Image-only pages may not be searchable; check the PDF for exact wording and diagrams.
Page 2 · Read text
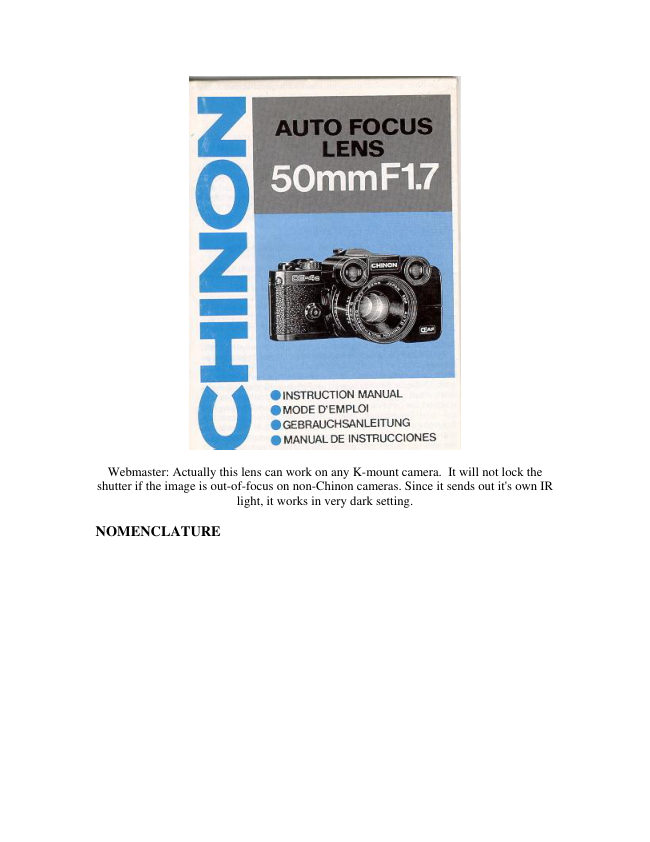
Webmaster: Actually this lens can work on any K-mount camera.  It will not lock the
shutter if the image is out-of-focus on non-Chinon cameras. Since it sends out it's own IR
                                light, it works in very dark setting.

NOMENCLATURE
View original page 2Page 4 · Read text
triangulation. A micro servo motor positions the receiving sensor which in turn positions
the lens in or out to the correct setting. All this technology takes place at lightning speed,
so the lens is correctly positioned at the press of a button.
Unlike other infrared auto focus systems that select predetermined focus zones, the
CHINON AUTO-FOCUS LENS is entirely stepless between 1 m (3.3ft) and infinity (oo).
Another key feature of the Chinon Infrared System is a cancelable prefocus lock that
allows you to position the focused subject anywhere in the viewfinder. To safeguard the
infrared system from ambient infrared sunlight, the infrared beam oscillates at the
frequency of 12,500 cycles per second.

Your new Chinon 50 mm auto focus lens is perfect when shooting under adverse lighting
conditions. With the 50 mm AF you do not have to worry about the often time consuming
task of focusing.

CARE OF THE AUTO-FOCUS LENS:
Your CHINON auto-focus lens is a precision instrument. Used with care, it will provide
years of service. Protect your lens from dirt, rain, dampness, and excessive heat. Avoid
touching the lens. To clean the lens wipe it gently with a soft lintless cloth or lens tissue.
Do not use eyeglass tissues as they might damage the coating. Occasionally clean the
autofocus windows with a camel hair brush. When you are storing the lens for a long
period of time (more than three months), always be sure to remove the batteries from the
battery chamber.

NOTE: DO NOT place your 50mm AF lens near a strong magnetic filed (i.e. TV, or
radio). This might permanently affect the accuracy of the AF system.


SPECIFICATIONS:
System: Infrared Automatic Focusing System (Capability of Manual Focusing)

Auto Focus Indicator: Built-in with red and green LED


Auto Focus Audible Signal with On/Off Control: Built-in (piezo ceramic buzzer)
View original page 4
Page 5 · Read text
Auto Focus Button: Built-in.
When depressing Auto Focus Button, automatically set the lens to the focus position and
indicate you by the green LED and audible signal.

Focus Range: Stepless operation from 1 m (3.3 ft) to no

Aperture Range: F/1.7 - F/22

Battery Check: Built-in

Battery: 3 AAA size Alkaline batteries (LR03: 1.5V x 3) operate the auto focus unit

Lens: Chinon F/1.7 50 mm multi-coated lens

Lens Construction: 6 elements in 5 groups

Angle of View: 46°

Filter Size: 58mm

Lens Mount: Chinon Bayonet Mount

Dimensions: 99(W) x 79(H) x 54 (L) mm ( 3 . 3 9 x 3 . 1 1 x 2 . 1 2 )

Weight: 425 grams (14.99 oz) without batteries


INSTALLING THE BATTERIES:
Turn the lock at the bottom of the auto focus unit to the "O" position and remove the
battery chamber cover (fig. 1). Insert three "AAA" 1.5 V Alkaline batteries (LR03) into
the battery chamber. Each battery must be positioned correctly to correspond with the
plus (+) and minus (-) signs indicated in the compartment (fig.2). After each battery is
positioned, lock the cover by turning to the "C" position.
View original page 5
Page 6 · Read text
NOTE: Since the batteries rapidly loose power at low temperature, we suggest that you
carry a fresh set of batteries. They should be placed inside your coat to be help warm.

BATTERY TESTING:
The battery condition can be checked by pushing the autofocus button (battery check
button) and holding it for 4-5 seconds. The battery check LED (green) on the focusing
panel will illuminate if the battery voltage is sufficient (fig.3).


NOTE: The battery check LED (green) on the focusing panel will not illuminate if the
batteries are installed incorrectly.

MOUNTING THE LENS:


                                           1. Remove the rear lens cap from Chinon auto-
                                      focus lens (fig.4).


                                            2. Remove the lens or body cap from your
                                  camera body (fig. 5).


3. Attach the auto-focus lens in the same manner as you would attach any other lens
(fig.6).
View original page 6Page 7 · Read text
AUTO FOCUSING:

                               Look through the viewfinder and center the
                                        subject by utilizing the split image with
                                   microprism collar in the viewfinder. Depress the
                                      auto-focus button, the focus ring will rotate
                                       automatically until the subject is in focus (fig.7).
                               The direction of rotation will be displayed on the
                                      focusing panel by a red arrow. When the camera
                                                 is in focus, the in-focus LED on the top of the
                                      auto-focus unit will light up and you will hear a
                                    "beep" sound if the sound signal switch is in the
                             "ON" position (fig.8). Once the lens is in focus,
                                        the lens will automatically stop and you may
                                 remove your finger from the auto-focus button.

NOTE: It is recommended when setting the auto-focus mode that apertures between F/4
- 22 are selected. For your convenience these lens opening are engraved in green. When
lighting conditions require larger lens openings we suggest checking the focus with the
focusing grid in the viewfinder. DO NOT cover the auto-focus windows with your
fingers. Otherwise, the lens will not focus properly.

The following subjects should be avoided when using your 50 mm AF lens in the auto
focus mode:

* Shiny subjects such as water surfaces or exterior of a car. Since the AF system sends
out a beam of infrared light, these surfaces will deflect the beam, resulting in improper
focus. These subjects can be focused either manually or by ensuring that the shiny
reflective surface is directly perpendicular to the infrared beam. You can manually check
the auto-focus operation in these situations by viewing the split image range finder.

* Subjects through a glass window. In most instances if the 50 mm AF lens is beyond 2
cm from the glass surface, the AF beam will not penetrate and incorrect focusing may
result.
View original page 7Page 8 · Read text
* Non-reflectable subjects (smoke, fog, etc.) Just as beam of light from a flash light will
pass through these subjects, so will the infrared beam of your 50mm AF lens.

Should you have to take pictures under the above conditions, you may focus the camera
manually or estimate the camera-to-subject distance.


FOCUS LOCK:
If you should desire to have your subject "off center" in the picture, first center the
subject and focus as previously described, then, remove your finger from the auto-focus
button. The focus will automatically lock. Next, recompose your picture with the subject
in the desired position in the viewfinder and depress the shutter release button (fig.9).


INFRARED PHOTOGRAPHY:
When using infrared film, an extra focusing adjustment must be made manually. After
focusing, note the figure that is adjacent to the green indication line on the distance scale
(fig 10 ) then' move that figure over to the red infrared mark engraved on the lens. This
adjustment is only required for black and white infrared film. When using color infrared
film, focus in the normal way.
View original page 8
Page 9 · Read text
NOTE: Read the
                                                               instructions packed with the
                                                              infrared film for further
                                                           information.


NOTE: All accessories can be used on your 50 mm AF lens, however, the following
three accessories are not recommended.

1. Close-up lens

2. Lens hood

3. Extension Tubes

NOTE: When the lens must be used with one of the above accessories, focusing must be
adjusted manually.

NOTE: Filters such as polarizes, starburst or any other type which requires rotation to
achieve desired effects, should be adjusted AFTER the AF lens has been focused.
View original page 9From the M. Butkus archive. Original publisher and archive notices are retained.
Check the model and edition against your equipment.
PDF verified 2026-10-10.