Sewing machines
A. G. Mason Family — User manual
User manual for A. G. Mason Family. 24 pages in English. Read the original PDF, download or print a copy without registration.
24 pagesEnglish26.8 MB PDF
Loading your manual…Open PDF directly
Document details
- Brand
- A. G. Mason
- Model / document
- A. G. Mason Family
- Document type
- User manual
- Language
- English
- Pages
- 24
- File size
- 26.8 MB
- Category
- Sewing machines
- Document date
- Not specified in catalog
Search available document text
Find a term, then jump to its page in the original PDF. Image-only pages may not be searchable; check the PDF for exact wording and diagrams.
Page 1 · Read text
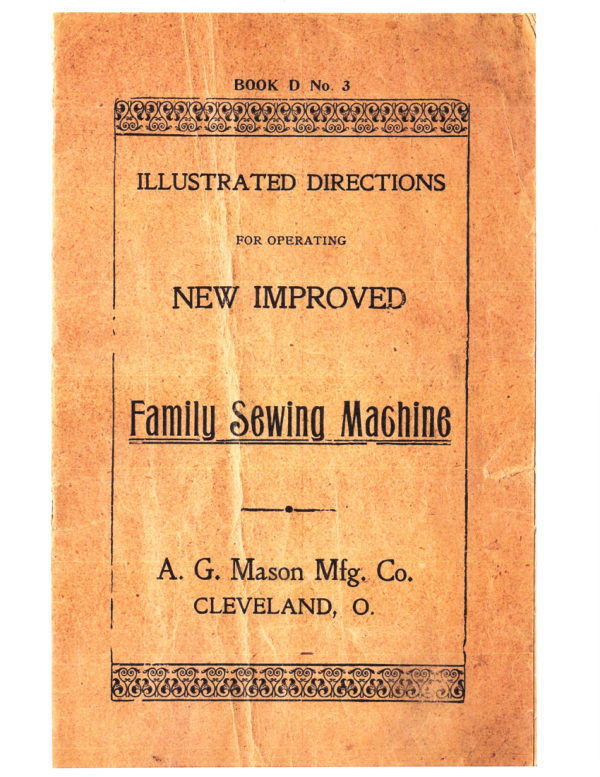
BOOK D No.           3


 ILLUSTRATED DIRECTIONS


            FOR OPERATING

  NEW IMPROVED


Family Sewing MaGhine


  A. G. Mason Mfg. Co.

    CLEVELAND, O.
View original page 1Page 2 · Read text
INSTRUCTIONS FOR OILING THE MACHINE.


The Arrow Indicates Places where Machine Head is to be Oiled.
View original page 2
Page 3 · Read text
DIRECTIONS FOR OPERATING

                  ...THE...

New Improved Family Sewing Machine.


    Before the Machine leaves our hands it has been minutely
inspected, and every mechanical defect corrected; it has been
tested with various sizes of thread and found to work satisfac-
torily in every respect.
   When unpacked the Machine should be found in complete
running order, as it came from the hands of the inspector.

     Instructions for Oiling the Machine.

    SEc. I. This is the most important rule to be observed, for
care in oiling the bearings insures durability and ease of motion,
and prevents premature wear.
     Oil all points indicated by arrows; raise the needle bar to
its highest point when oiling the place with mark X.
   To oil the Stand: Oil the bearings at each end of the
treadle and at each end of the pitman, and at each end of the
Drive Wheel Stud.After oiling both the Stand and Head of
Machine, run the same rapidly for a few moments with the
Presser Foot up, and the Shuttle out. Then wipe off all super-
fluous oil before commencing to sew.
      If these instructions are followed, the Machine will always
run freely. Should it become gummed from disuse, oil thor-
oughly with kerosene oil to soften the gum. Then wipe clean
and oil with best quality of sewing machine oil, as above in-
structed. Caution:Always use the best sewing machine oil.
 It this is done the Machine will always run lightly.
View original page 3Page 4 · Read text
To Work the Machine.


     SEc. 2. The first thing to be learned in running a sewing
 machine is the uniform motion of the Treadle. To do this, first
 unthread the Machine and remove the Shuttle by drawing out
 the front Plate, or Slide; and take it out. Raise the Presser
 Foot by drawing the Presser Foot Lifter, at the back of the
 Face Plate, to the right. Place the feet on the Treadle directly
 over the Cross-piece on which it rests, so that both heel and toe
may be used in turning the Machine; then take hold of the
 Hand Wheel and turn it toward you, allowing the foot to move
 freely with the motion thus imparted, and continue the motion
 by the pressure of the heel and ball of foot alternately until a
 regular motion is acquired; and until this is done sewing should
 not be attempted.
          To Set the Needle.


     SEc. 3. First loosen the Needle Screw by turning it toward

you, and insert the Shank of the Needle in the hole in the lower

end of the Needle Bar, pushing the Needle up as far as it will

go, with the flat side of the Needle toward the Needle Set

 Screw. Then tighten it in position. Follow instructions, and

it is impossible to set the Needle wrong. See that the Needle

passes down to the right in the hole in the Throat Plate and

centrally from front to back.
        To Wind the Bobbin.


     SEC. 4.  Slip the latch out of the notch in Hand Wheel, put
the belt behind the Bobbin Winder pulley into the groove of
same. Run the Winder until the top end of Thread Guide is
to the extreme right.  Pinch the end of thread between the
right hand end of Bobbin and Winder; now pass the thread
into slot at top end of Thread Guide, then down into sict at
bottom of same, then back of Winder to Spool Standard.
turn the spool on Standard until the thread is taut, then start
to wind, running the wheel in the same direction as in sewing;
you can fill the Bobbin without holding the thread.

                    2
View original page 4Page 5 · Read text
DIRECTIONS FOR THREADING.

                                   Take the shuttle in
                              the left hand, the
                                point toward you,
                                 holding it as shown
                             1 in illustration; drop
                                   the bobbin into the
                                       shuttle and pass the
                                      thread into slot, now
                            draw the thread to-
                               ward you from posi-
                                      tion 1 to 2 until the
                                    thread passes under
                           •the lipof tension
                                        spring, then pass the
                                     thread toward the
                               open end of shuttle.
                                The shuttle is then
                                   ready for use.

      To Put Shuttle in Machine.

    Sec. 6. Withdraw the front or back Plate Slide, and intro
duce the point of the Shuttle into the front end of the Shuttle
Carrier, drop heel of Shuttle to place, and close the slide.
Never run the machine with the slides open.

        To Remove the Shuttle.

   Open the front shuttle-slide to take shuttle from the ma-
chine. Do not undertake to turn the machine back on its hinges
for oiling with the rear shuttle-slide partly pulled out.
View original page 5Page 6 · Read text
To Thread the Machine.


    SEc. 7. Raise the needle bar as high as it will go. Place
the spool of thread on the spool standard. Draw the thread to
the left, and pass it into thread guide at top of face, then down

and from right to left back of tension releaser at lower end of

face. Now up through slot in end of take-up, then into slot at
lower end of needle bar and through eye of needle from left
to right, leaving about three inches of thread through needle.

     To Draw Up the Shuttle Thread.

    SEC. 8.Take hold of Hand Wheel with right hand, and
the Needle thread with left hand, keeping thread slack, so as
not to spring the Needle. Turn the Wheel toward you once
around, and pull up the Needle thread with your hand to draw
the Shuttle thread up through the Needle hole in the Throat
Plate. Then pass both threads under the Presser Foot toward
back of the Machine.


     DIRECTIONS
      FOR USING THE FOOT GATHERER

    Remove the presser foot and replace with
         the Gathering Foot.

             To GATHER, PUFF OR SHIRR
     Place the goods under the foot the same as
          in ordinary sewing.
     For fine gather use ashort stitch.
     To increase the fullness lengthen the stitch.
     For geater fullness tighten tension.
View original page 6Page 7 · Read text
To Commence Sewing.

     SEC. 9. With both threads between the Presser Foot
and Throat Plate, and laid back towards back Slide Plate,

place Prefer fundey Preing Froster Fochefred then
 Start the Machine with right hand on the Fly Wheel,
 always revolving it toward you.

        To Regulate the Tension.


     SEC. 10. The tension of top thread is adjusted by the
TensionScrew, turning it to the right to tighten, and to
the left to slacken, the pressure. Care must be taken in
 regulating the tension of the lower and upper threads. If
the tension on either thread is too tight, it will cause the
thread to break, and the seam will be puckered.  If there
is not sufficient tension, the thread will not be drawn into
 the fabric, but will lie in loops on the under side.  When
 both tensions are properly adjusted both threads are drawn
 to the center of the fabric, thus:


                               (Cut G.)
       If the Shuttle thread is very  tight,and theupper
 thread too loose, the under thread will lie straight, thus:


                             (Cut H.)
 because there is not sufficient upper tension to draw the
 under thread in.  On the other hand, if the Shuttle thread
 draws off too easily, and the upper thread is too tight, the
 under thread will draw up through the fabric, and the
 upper thread will lie straight, thus:


                           (Cut I.)
    If the Shuttle tension is too tight, loosen by turn-
ing the Shuttle Tension Screw (located near the point
of Shuttle) to the left. If too loose, turn to the right.
View original page 7Page 8 · Read text
To Lengthen the Stitche


    SEc. II. The Stitch Regulator Thumb Screw is at the

right front corner of the Bed. of the Machine under the Bob-
bin Winder. Attached to this Thumb Screw is an Indicating

Point following a scale.  To lengthen the stitch, move the
Thumb Screw to the right; to shorten it, to the left. Heavy
cloth or Woolens require a much longer stitch than light or
cotton goods.
         To Turn a Corner.     SEC. 12.  Stop the Machine without raising the Needle
 more than half way out of the work.  Raisethe Presser
  Foot and turn the goods in the manner desired, using the
  Needle as a pivot.
        To Remove the Work.
      SEC.    Have the Needle Bar at its highest point.
 Then with the fore-finger of right hand press on releaser
 lever at tension.

 Then raise the Presser Foot, take hold of your work
 straightwith yourback,leftkeepinghand theand toppullthreadit directlyin the slotfromof the


 thread cutter on the presser-bar andpull downward,
 which will cut the threads the proper length to com-
 mence work again.
         To Sew Heavy Goods.
    SEc. 14. To adjust the Pressure of the Foot on the
 Work:—At the top of the Machine, back of the Needle
•Bar, will be found a thumb screw, which, by turning to
 theright, increases, and to the left, decreases, the pressure
 of the Presser Foot on the work.Heavy goods require
 more pressure than light. Too much pressure will puck-
 er fine cloth, while too little pressure with heavy cloth
 will let the Presser Foot rise as the Needle ascends.
 Care should be taken to adjust the pressure correctly.
               To Hem.
    SEC. 15.  Raise the needle bar to its highest
 point, unscrew the nut just above the presser foot
 by turning tothe left, until the foot is loosened
        can be drawn off towards
 the Hemmer on in place of the Presser Foot, being
 sure that the Needle will pass through the
 of the hole, and then tighten it on the Bar with the
View original page 8Page 9 · Read text
Screw. Clip off the right hand corner of the cloth so that
it will get the roll more naturally.  Turn up the edge of
the cloth about one-quarter of an inch, insert it in the
Scroll, or mouth of the Hemmer, and push or draw it along
with any pointed instrument, until the Needle will enter it.
Let downthe Presser Bar, and, as you start to sew, pull
gently on the end of the threads, to help the work along
one or two stitches, until the Feed catches it.  Hold the
edge of the goods between the thumb and fore-finger of
the right hand while it is being hemmed. Keep the Scroll
of Hemmer just full, as it will leave a raw edge if there is
too much, or not enough, of the fabric turned in. Swing
the Hemmer to the right or left a trifle, as you may wish
the stitch nearer or farther from the edge, but be careful
not to have the Needle rub the side of the hole in the Hem-
mer.  In hemming curves, draw gently on the edge being
hemmed, resisting the Feed, and guide the work carefully.


                        (Cut J.)
             To Fell.
     SEC.16. The Hemmer is also a Feller.  Let one edge
 of the cloth
 the other.  pronest about tose qua, aret an inch pen the
 work and turn the wide edge on the narrow one.
 slip this edge into the Hemmer, which turns the raw edge
  under, and will operate as in hemming.
View original page 9Page 10 · Read text
WHITE GOODS.


     Hemming and Sewing on Lace.

   SEc. 17. Our Hemmer and Feller isnowmade
with the slot to the right of the Needle hole.
with the he here the dele and eh caring
the lace in this slot far enough so that the Needle
catch it,and it will be sewed on at the same time that
the hem is formed.Care should be taken to keep the
edge of the lace to the left of the Needle, so that the
Needle will catch it.
View original page 10Page 11 · Read text
Wide Hemming.


    SEC. 18. With each machine is furnished four foot hemmers of
assorted widths. They arecalled foot hemmers because they are
fastened to the presser bar of the machine the same as the regular
ewing foot.
    Select the width of the hemmer that you desire to use and attach
it to the machine as shown above. You will readily see that it can be
adjusted to the right or left a little so as to stitch as close to the edge
of the hem as desired, by loosening the set screw of the attachment
holder and swinging the hemmer to desired position. Take the cloth
In both hands, the right hand in front of the hemmer and the left,

behind. Insert the edge of the goods in ths scroll of the hemmer and

draw it back and forth a few times, while gradually feeding the cloth
Into the hemmer, so as to fill the scroll completely. When you have
the hemmer full, draw the cloth back towardyou to start the hem
near the end. Let down the presser foot and proceed as in narrow
hemming.
View original page 11Page 12 · Read text
(Cut P.)

            To Bind.
   SBC. 29. Attach the Binder to the Machine. Cut the
binding three-quarters of an inch wide (on the bias if con-
venient, pass it through the Binder, and place the fabric to
be bound between the upper and lower Scrolls of the Binder.
Guide the cloth with the left hand, let the binding glide
easily through the fingers of the right.  If the stitching is
too near or too far from the edge, move Binder a trifle to
the right or left, as occasion may require.
         To Bind Scallops.

   SEC 30   Proceed as per instructions for ordinary
binding. Bind around the scallop until the center ot the
scallop reaches the front of the Binder.  Then take hold
of the scallop next to you and swing it around to the left
until the right hand side of the scallop is on a line with the
part which has been bound, or Scroll of the Binder.
    (This makes almost straight work.) Care must be
used in holding the scallop in the Binder.
View original page 12Page 13 · Read text
How to Use the Tucker.


     Sec. 28. The Tucker attaches the same as the ruffler.
Loosen the adjusting screw K and move the gauge L
to the desired width of tuck, as shown by scale M. For
example set it at figure 1; now move the marker until
the pointer O is over figure 1 on its scale also.
tucks will then be one eighth of an inch wide and just
meet.  For space between the tucks, move the marker
to the left as much as the space desired.


    To COMMEnCE TUCkING, fold the cloth for the first
tuck and place it beneath thecreaser and lip L with
folded edge against the guide; drop the presser-foot
and sew as usual.
    The edge of the last tuck made should always pass
under the spur placed immediately in front of the mark-
ing blade. This will prevent the finished tuck from
passing over the marker and will greatly assist in
guiding the work.
    To tuck without marking, throw the lever up.
View original page 13Page 14 · Read text
HOW TO USE THE RUFPLER.
    SEc. 21. Remove the regular foot,and slip the
ruffer in its place with the forks of the lever A over the
shank of the needle set screw and fasten securely. Place
the goods to be ruffled between the steel blades F.
make a scant rufling, raise the adjusting block C by
turning the thumb-screw B, and shorten the stitch to
the desired length. The length of stitch should match
the size of gather or plait, so that they will lie even and
not pile up on each ther or be toofar apart.
make larger plaits, lower the block C and lengthen the
stitch to match. Ifthe ruffle is to be attached to a
 band, place the band below both blades.

                  To Make Plaiting.

    SEC. 24:  This is done with the Ruffler.  Adjust that attachment
to the machine as per instruction.  Cut the cloth to be plaited
inch wide, fold in the center and press it. Then pass it between the
rufler blades, having the edges or opening side of the fold to the
right, and the piece to which the trimming is to besewed under it,
next to the machine.  Adjust the Ruffler to make the longest stroke
of its blades, and proceed as in ordinary ruffling.  If the pointed or
scalloped plaiting is desired,move the piece to be plaited to the right
and left alternately while sewing. After the work is finished it should
be pressed on the wrong side.  With a little practicebeautiful edge
 trimming can be made.
                      12
View original page 14Page 15 · Read text
SHIRRING.
   SEC. 23. To do this kind of work,first loosen the separator
screw, removing the separator frame and blade from the ruffler,
supply in its place the shirring slide, which is thatpiece in the at-
tachment set that fits into themachine in placeof the front slide
                    plate has a guage on it which takes the
place of the separator blade.  The object of having the shirring slide
is to do away with all side obstructions so that the operator can gather
in the middle of a wide piece of goods instead of on one end only.
     , In shirring, it is always best to run a small tape underneath the
goods to be shirred, the same as you would a band of ordinary ruff-
       This fors a stay and greatly strengthens the work.
    The tape is run through one of the guages in the slide and re.
quires no attention.

        To Make Scallop Ruffling.

     Place the goods in ruffler just the same as for mak.
ing large pl ats, except to remove gauge 4 from ruffler
and shorten the stitch of machine.  While sewing
move the goods to the right and left alternately and
 far enough to make the scallops of desired depth. Scal-
lops can be made ofuniform length by counting the
same number of stitches between each alternate move.
 ment to the right or left.
                   18
View original page 15Page 16 · Read text
(Cut L.)
            To Braid.

          Remove the Presser Foot,andput on the
 Braider Foot in place of it.  Let the braid pass through the
 front opening on the Foot into the Needle hole, and proceed
 as in usual sewing.  The pattern should first be stamped
 on the goods, or printed on writing paper, and then basted
 to the cloth. Guide the cloth with right hand, holding the
 braid in left hand to keep it from twisting.
     To Embroider with Chenille.

    SEC. 33. Wind the chenille on Bobbin, drop the Bob-
bin into the Shuttle as usual, loosen Tension Screw of the
Shuttle so as to remove alltension, and place it in the
Shuttle Carrier. For your upper thread use silk the same
color as your chenille, sewing with a tight upper tension so
that it will draw the under thread or chenille till it can just
be seen through the cloth. Have the pattern you wish to
embroider stamped upon the wrong side of the cloth, which
will be uppermost in embroidering, and follow the lines of
the pattern and fill in solidly with shades or colors as you
may desire.   It is always best to wind separate Bobbins
with the various colors of chenille you intend to use. When
the work is properly done the chenille embroidery will stand
out beautifully, having all the appearance of stuffed work.

                   14
View original page 16Page 17 · Read text
(Cut N.)
               To Quilt.

   SEC. 27.Pass the Quilter through hole in Presser Bar,
adjust the Quilter Guide to the right of the Needle, accord-
ing to the desired space between seams, and high enough
to allow the goods to pass freely under it, and then fasten
the Quilter securely by the screw.  In starting to quilt, use
outer edge of cloth for the first guide, or else crease the cloth
on right, and let the Quilter Guidefollow the crease;
quilt the remainder by keeping the Guide in a line and over
the seam last stitched.
    NOTICE:— Large quilts should be made in squares or
sections and then sewed together. In quilting squares or
diamonds the seams should be on an equal bias.
          To do Hemstitching.

   SEc. 25. Fold blotting paper or othersoft paper
 which can be readily torn, until you get a thickness cor-
responding to the opening desired in the hemstitching
 Put one of the pieces of goods under the paper, and the
other above.   Then place all under the Presser Foot and
sew through them.  After being sewed both pieces will be
doubled back and forth to crease them well exactly on the
line of stitches. Then fold all four edges in the same direc-
 tion, and hold firmlywhile you tear out the paper.  Re-
 move the other half of the paper and open the hemstitch•
 ing one edge of each, or either piece may be cut and passed
through the Hemmer, or a row of stitching can be passed
 alongside the hemstitch and the double edge finished of
as you choose.
                   15
View original page 17Page 18 · Read text
General Remarks.

      If the directions heretofore given are closely followed
 no difficulties are likely to arise.   Therefore a little extra
 time with the directions in the commencement may save
 hours of perplexity.
    Breaking of the upper threadmay be caused by the
 Machine being threadedwrong, or the tension being too

 coarse for the NeedlingNeedle — orround uneven, or the
 Throat Plate may be rough, the Needle may be defective
 or not properly set.  (See directions for setting the Needle.)
 Or the Presser Foot may be set so that the Needle rubs
 against it, if so, loosen the Screw and move the Foot.
 the Shuttle Carrier may be set so close to the Shuttle that
 the thread cannot pass freely around it; if so, loosen the
 Screw and move the Carrier back a trifle
     If the under thread breaks, it may   caused by the
 Shuttle being threaded wrong,or by the thread getting
 over the end of the Bobbin in the Shuttle, or by the Bobbin
 being loosely or unevenly wound or wound too full so as
 not to turn freely in the Shuttle, or by too much tension on the
 thread.  (See foregoing directions as to threading Shuttle,
WindingBobbin,Shuttle Tension, etc., etc., to obviate
 difficulties of this kind.)
    Breaking Needles is likely caused by pulling the work,
sideways, which should never be done. See to it
 that the Needle is properly set according to directions.
The needle may, however, break in trying to sew ex-
traordinaryheavy seams when the pressure on the
presser-foot is not heavy enough.
    Never run the Machine with the Presser Foot down
 unles you have cloth between it and the Feed, as it would
 materially injure both the Presser Foot and the Feed
 Teeth.
     Never run the Machine with the Shuttle in the Carrier
 unless the slides are closed.
      If the Feed does not work properly, see if lint or dirt has
 not become matted aroundthe Feed Point, or Feed Bar.
 Turn the Machine back and examine it. The Teeth of the
 Feed should be slightly above the Plate when it is at
 its highest point.
  • Missingstitches may be caused by the Needle being
settoo low, or being bent so as not to run close enough

so all for the Ne the threeNeverrayusebeaNeedleNeedle withwith aa blortooblunt or
bent point.
                     16
View original page 18Page 19 · Read text
, the upper thread loops, increase the upper tension.  If the lower
       ...crease the Shuttle tension. Looping withsilkor linen is usually
      caused by the thread being too course for the Needle.

          Puckering of the goods is caused by too much tension on either the
       upper or lower thread, or by too much pressure on the Presser Foot.

           To sew flannel or bias seams, use a fine stitch and as slight a tension
      as possible, so as to leave the thread loose to stand the strainof stretch-
       ing the goods.
           In Sewing Harsh or Starchy Goods, it would be found anadvan-
       tage to rub white soap along where the seam is to be, as the Needle pene-
      trates more easily.

          If the Belt becomes loose, unhook the Belt,cut off about half an
      inch, punch a new hole in it in the same direction as the old one, and
      replace the hook firmly. The Belt should always be as loose as it is pos-
       sible to have it without slipping.
                                                   the presser-foot not
       restingI he evenlystite neareupon netheterrie,fabricst mad, becaused by       being high
     enough, or by the stitch being too short, or by pulling the cloth,or by
      using too fine a needle with too coarse or uneven thread.

          If necessary to write for more complete instructions always send
      small sample of the sewing, and mention plate number of your Machine
       This will enable us to suggest a remedy.


Cone Bearing (not Ball Bearing) Box Top and
  Drop Stand Castings and Parts. From 5 000,000.

      In ordering always give the NUMBER of your Machine,
          which you will find on the back sliding plate, also
            NAME AND STYLE OF MACHINE.

107207 ScrewScrewin inlowerlaserend adornof pitmar.......treadeando 03   516
       socket inbalance                    816VAL beerSUICYto connect cableto lever.... 188
811 Screw to fasten guard and braceto
                           02           No. 515..
 816 Screw in upper end of pitman..              519 Nut for adjusting stud.
                                       520Double pulleyfor cable complete.
                                          ncat carrer sios Jatc
              castor.                       522 Head carrier •top plate, not
223 BalanceFit castor...wheel st       cone.                 notched.
    Ball in upper end of pitman..           623 Headcarrier hinge squareplece...
    Socket in balance wheel...                       Head carrier hinge long Diece.......
     Stud in treadle..                        530 Drip pan for box tops, drops and
        cadle ro                                     cabinets.
                            02  531 Spring
     Wood pin in box top table..                      OT 531ing bottoms...
                            50         Pitman iron for bor ton and dron  20
     Bracein forheadcarrierbox top forad drop..slotted stop 02                                         drop.....
 614 Cable..                    20                                    I drop.....1
                                                                   60
                                            13009 Balance wheel for box top & drop1 60
                                              1310 Balance wheel stud and back cone,
                                                      box toa and dro?........        20
                      17
View original page 19Page 21 · Read text
PRICE LIST OF. PARTS. JULY lst, 1903.
             FROM MACHINE No. 5,000,000.
No.                            Price.  No.                                  Price.
 200 Take up screw for needle bar bush-     293 Eccentric screw.              02
          ing..........                   -... UL           aring in middle of1018.       10
201 Screw to adjust upperend of face
                        02      Take-up spring.
203 Screwplate...       the following     300Washer  298.           heartcam   needle                 Washer to adjust take-up spring.
           so area, t cos to bed and 392               Feed......
       to 391.                02       Feed hook...
204 Screw to fastenattachment holder
                                            Feed spring.
205 Screw to fasten gib on inside offace 02          reed bar block.
206Screw to fasten feed spring                  Rubber headed tack
     and  fasten feedand feed hook            Bobbin..
         to feed                 cket to bed           Bobbin
       and shuttle carrier oncycle..              Spring on 324...
 207 Lake-up screw            to feed     333 Head on324...
          and to middle bearing of     388 Needle plate.                  20
                               341 Washer for 302, 304,
                             take-up
        bearing on lower end of pitman...  03  342 Attachment holder             40
 209 Screw to master                        "aus Presser foot.....
                               344 Braider.
        lere to dafastensten seo it trendietreadle halebal-           emmer and fel
      auto       and to fasten cone on      145.
       treadle rod.....             02  002                                      Feed bar.... 210 Screw to fasten face platetoarm. 03  363 Screw to adjust           of face
     Scre  to fasten arm        plate,
       and bob bin win   to             364 Set      fasten dress guard and nrace 10     365     screwto 228.
                            02  360 Thread cutter....
           to fasten socket in       03  367 Heart cam                        05  372
214213SetSposcrew to shuttle lever cone and     1018                           40
       1000......              02  374 Roller stud for lower end of eccen-
215 Screw to needle Diate and to Taster              itle connection....         1007 to feed bar...                 390Bobbin winder worm
 216 Screw to fasten ball in upper en          391 Bobbin         rm gear
                                                 Bobbin winderwinder cam.
     Treadle rod nut...                      393
                                      535 Screw to hold 391 and 392
                                      395 Bobbin
                     stud front                    Springon395....
     Ball in treadle balancewacch            397 Screw to fasten 395                          8988
                               399 ClutchHand wheel (not illustrated
                                  403      to fasten clutch
     DULLECT...
     Screw to fasten                 432 Shuttle complete..
                                             naulte tension some
                                                 434 Shuttle carrier..

                     for lower end of          Take-up block
                               448 Washer for take-up nut.
243 Heart roller stud                  455 sotted ston or rena
                                                  Friction washer for           02
     Gauge....Gauge                                       8000   500
216 Screw to fasten hinge to bed                                    02
249 Elbowlever.                  1001       washerfor stitch regul
250 Centre for 249.                                    tor cam.
    Washer   ballof 249..                  1002 Stitch indicator washer.
252 Socket for 250.                    1003 Stitch indicator            08
      need card....                20  1004 Stitch regulator              25256Screwto fasten255 and 372 on      $95 Stitch regulator       nutand
      lower arbor                            for1004.                   08
257 Lower arbor.                    1006 Feed bar stud...
200 Upper arbor                                Feed bar stop.               05
     Presser bar                               Thread guide..
     Presser spring.
                                                                       disk...
                                                     1cusion ccicase
      Presser val                                     Tension spring..
     resser                                          Tension nut...
     Presserbar lifter
     Screw to fasten 455..                         Rear shuttleslide.
      Lake up screw in 268                          Pront shuttle slide
           on inside of face.                            Face (not illustrated).
     Needle bar.                                                               SU
               bushing,                                                          .2 50
                 and clamp.                   aried thumb scre ta pid hend
      iNccule scicw                                   cow......
284 0111eTensiot sure                         Balance wheel stud and back
286 Shuttle lever.                   1219213 Plate in table for 1212.
                                   63  Nut for eccentric screw 338.        02
             ICYCL
    Screw in end of 287.
     Lake-up screw for sauctie leve
      Eccentric.... .........               40
29,1
In ordering always give tie NUMBER               which you will find
View original page 21Related documents and language editions
From the ISMACS International. Original publisher and archive notices are retained.
Check the model and edition against your equipment.
PDF verified 2026-10-11.