Film cameras
Praktica Super 1000 User manual
User manual for Praktica Super 1000. 16 pages in English. Read the original PDF, download or print a copy without registration.
16 pagesEnglish1.5 MB PDF
Loading your manual…Open PDF directly
Document details
- Brand
- Praktica
- Model / document
- Praktica Super 1000
- Document type
- User manual
- Language
- English
- Pages
- 16
- File size
- 1.5 MB
- Category
- Film cameras
- Document date
- Not specified in catalog
Search available document text
Find a term, then jump to its page in the original PDF. Image-only pages may not be searchable; check the PDF for exact wording and diagrams.
Page 2 · Read text
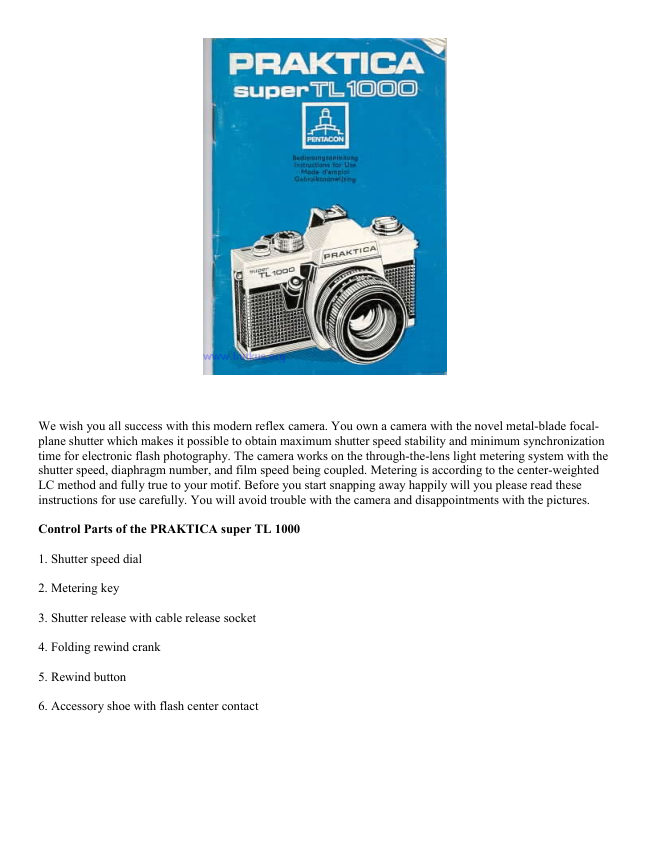
We wish you all success with this modern reflex camera. You own a camera with the novel metal-blade focal-
plane shutter which makes it possible to obtain maximum shutter speed stability and minimum synchronization
time for electronic flash photography. The camera works on the through-the-lens light metering system with the
shutter speed, diaphragm number, and film speed being coupled. Metering is according to the center-weighted
LC method and fully true to your motif. Before you start snapping away happily will you please read these
instructions for use carefully. You will avoid trouble with the camera and disappointments with the pictures.

Control Parts of the PRAKTICA super TL 1000

1. Shutter speed dial

2. Metering key

3. Shutter release with cable release socket

4. Folding rewind crank

5. Rewind button

6. Accessory shoe with flash center contact
View original page 2
Page 4 · Read text
11. Film speed dials

12. Diaphragm operation selection switch

13. Distance setting ring

14. Depth-of-field scale

15. Diaphragm ring
View original page 4
Page 5 · Read text
www.butkus.us


16. Rewind catch

17. Cartridge chamber

18. Metal-blade focal-plane shutter

19. Filth sprocket

20. Support

21. Take-up spool

22. Film loading mark
View original page 5
Page 6 · Read text
23. Wire brackets

24. Eyepiece mount with accessory holder

25. Rewind release

26. Battery compartment with battery inserted

27. Tripod thread

Opening the camera back

Pull rewind button (5) up to the stop, the back is unlocked and is hinged open. The exposure counter (9) resets
to zero automatically
View original page 6
Page 7 · Read text
www.butkus.us

Film loading

Insert the cartridge and observe that wire brackets (23) do not stand upwards. Turn at the knurled spool disk, if
required. Pull the film leader to the green mark (22) and pass it under support (20) so that the teeth of film
sprocket (19) engage in the film perforation.


Should the film be heavily warped, put a wire bracket on it by turning the spool disk. Push rewind button (5) in
again by turning it a little, if necessary.

Closing the back

The back locks automatically when you press it to the camera body at the latch side.


Setting and winding the shutter

Rapid wind lever (8) has a dead stroke of about 15 deg. till the mechanism engages. (This makes for safety at
series exposures.) Swivel lever (8) to the stop, move it back and release the camera by depressing the shutter
release (3). Repeat the process and finish up by winding the camera. The automatic exposure counter (9) will
now read exposure 1.
View original page 7
Page 8 · Read text
(webmaster: All 35mm manual load camera lose 2 frames due to the loading system. Point and shoot and
other models many not waste this "leader" and that's why they may get 2 or 3 extra shots from a roll)


Film speed setting

Automatic control demands setting of the film speed. Pull the knurled ring of the shutter speed dial (1) up and
turn it till the DIN or ASA film index on dial (11) meets the white mark (10). The ring locks at the desired value
when released.

(Webmaster: you must do this for each roll of film if different speed is used. This controls the exposure meter,
so not making this change will make your negatives too dark or too light.)


Shutter speed setting


Symbol       for electronic flash photography (about 1/l25 sec)

Setting B      for time exposures; the shutter remains open as long as the shutter release is pressed

1 see to 1/15 sec  (orange) for low light photography; a tripod is required
View original page 8
Page 9 · Read text
www.butkus.us

1/30 sec to    (white) for satisfactory light photography 1/l000 sec


                                      0

Turn shutter speed dial (1) till the desired speed matches the orange triangle. (Webmaster: currently the
photo show the camera set to 1/30 sec.)

Diaphragm setting

Set the desired diaphragm number on diaphragm ring (15) of the lens opposite to the mark on the lens mount.
When lenses with automatic pressure diaphragm (ADB) are used, the diaphragm remains fully open and closes
to the set value only when the shutter release is pressed. As soon as the shutter has finished running down, the
diaphragm opens again.


Depth-of-field can be checked already on the viewfinder image when the diaphragm operation selection switch
(12) is turned from A (automatic) to M (manual), or by actuating the metering key (2).

Automatic exposure control system
View original page 9Page 10 · Read text
There are two modes of light metering to apply:

        1. Metering by altering the diaphragm number at the lens with pre-selected shutter speed (the preferred
      method for general objects in satisfactory light). (Webmaster: This is called Aperture Priority)

        2. Metering by altering the shutter speed and pre-selected diaphragm number (recommended for low
        light photography with a certain depth-of-field required). (Webmaster: This is called Shutter Priority)

Metering at pre-selected shutter speed

Set the shutter speed, press metering key (2) and turn diaphragm ring (15) till the pointer visible in the
viewfinder is centered in the circular mark. Overexposure is indicated with the pointer resting in the ( + ) range
while underexposure is indicated in the ( - ) range. Turning of the ring opens or closes the diaphragm
accordingly for balancing object brightness with the combination of shutter speed, diaphragm opening and
ASA/DIN film speed.

Metering at pre-selected diaphragm number

Set the diaphragm number, press metering key (2) and turn shutter speed dial (1) till the pointer visible in the
viewfinder is centered in the circular mark. Overexposure is indicated with the pointer resting in the ( + ) range,
while underexposure is indicated in the ( — ) range. Do not try to set any intermediate shutter speed between
the indexed positions. Should you not succeed in attaining a perfect balance, you can make a precise correction
by turning the diaphragm ring (which may, of course, may be set to intermediate values, too).

Metering with lenses without automatic diaphragm

Lenses of this kind are used in the following way: Set the diaphragm to its smallest diaphragm number, focus
the lens and balance the system by stopping down.


Range of the automatic exposure control system

Outside the range (given in the below Table) the metering system is ineffective and the pointer is in its rest
position below the circular mark in the " - " range. Metering cannot be made with the shutter set to "B" or

symbol        .
View original page 10Page 11 · Read text
www.butkus.us


1. Signal

2. Image brightening Fresnel lens

3. Circular ground glass area

4. Pair of metering wedges

5. Microprism screen

6. Meter needle with circular mark

Focusing

Focusing is possible as to metering wedges, the microprism screen, or the circular ground glass area.

Focusing with the metering wedges

Turn the distance setting ring until definite outlines of the picture fractions are correctly opposed to one another.
View original page 11
Page 12 · Read text
Focusing on the microprism screen

Maximum sharpness is attained when the image in the microprism screen area is clear and does not flicker.

Circular ground glass area

Turn the distance setting ring of the lens mount until the image appears clear and distinct within the ground
glass field. This is the method to choose in macro and microphotography and when using lenses with a
relatively small aperture (diaphragm value higher than F4).

Depth-of-field scale

The depth-of-field covered by a certain diaphragm setting can be read on scale (14).

Example: Distance 3 meters, diaphragm number F8 depth-of-field extends from 2 meters to 5 meters.


For additionally checking the depth-of-field in the viewfinder depress metering key (2) and set the diaphragm
operation selection switch (12) to M, resp.

Infrared photos require a slight correction of the focus; let the determined distance meet the infrared mark on
the lens.

Releasing and winding

Please note before pressing the shutter release:

        1. The signal is visible in the viewfinder on the left; camera not ready for snapping - swivel the rapid
      rewind lever (8) to the stop.

        2. For shutter speeds of 1/15 seconds and slower use a tripod and a cable release. Press shutter release
        (3) smoothly but not suddenly right across the easy going section. Swivel the lever again for winding
        after exposure.
View original page 12Page 13 · Read text
www.butkus.us


Film changing

Observe the exposure counter for the number of pictures you can take with the film in your camera (12, 24 or 36
exposures). After the last exposure, press rewind release (25) (it locks), tilt the folding rewind crank (4) out of
rewind button (5) and turn it not too fast in the direction of the arrow (indicated on the crank (4). You will feel
the end of rewinding by a somewhat increased resistance with subsequent easy running. Pull the rewind button
up to the stop, unlock the camera back and take the cartridge.


Lens changing

Any lenses having the international M 42x1 PRAKTICA thread (Webmaster: Pentax thread mount) can be used.
Grip the lens body and unscrew in counter-clockwise direction; screw in the other lens in clockwise direction to
the stop.
View original page 13
Page 14 · Read text
Flash photography

The PRAKTICA super TL 1000 has been designed for synchronization of flashbulbs and electronic flash units.
Flash units provided with a center contact are pushed into accessory shoe (6). Set the shutter speed dial either to
:g or f.

The firing circuit is closed only during the period of the shutter running down. Observe the guide number of the
flash unit and make the aperture or distance calculation (use the calculator disk of the flash unit).


(Webmaster: most current flash units are "automatic", you set the camera to it's "flash" or "sync" speed, which
on this camera is 1/100 sec. [ most are 1/60 ], check the back of the flash unit you will use and it will have a
chart. Depending on the ASA of the film the flash will show an F-stop to set the lens diaphragm to. The flash
will also show you the range in distance you can photograph. This is usually 4 feet to some 15 feet or
more. Some flash units have two or three F-stops to choose from. Depending on the power (size) of the flash,
that determines the F-stop and longest distance from your subject.)

The use of flashbulbs

For fast burning flashbulbs the speed dial is set to the symbol or to a shutter speed longer than 1/30 sec.
View original page 14
Page 15 · Read text
www.butkus.us


The use of electronic units Synchronization is only at the symbol    which corresponds to a shutter speed of
about 1/125 sec.


Battery replacement

The automatic exposure control system is powered by a mercury oxide battery type PX 625 or another type
meeting the same specification, of a rated voltage of 1.35 V.

(Webmaster: this is a mercury battery, not available for sale in the U.S. Check my web page for Mercury
Battery Replacements.  There are several options.

Unscrew the cover of the battery compartment (26) with a coin, note the plus (+) and minus ( - ) marks, insert
the battery correctly and screw the cover of the battery compartment in again. Battery service life is about 2
years.

Do not try to charge the battery or put it into the fire - it might blow up!
View original page 15
Page 16 · Read text
Care of the camera

Operation according to instructions and proper care are essential preconditions for trouble free function of this
precision instrument. Protect it from shocks, blows, dust and moisture; clean cartridge and spool compartments,
film track and camera back with a soft brush in suitable intervals. Do not excert any pressure onto the shutter
blades and do not touch them with your fingers. Dust the mirror with a soft brush only if absolutely necessary.
Clean the battery contact ends in intervals of 6 months and remove the battery from the camera when not
required for at long time. We recommend you protect the camera in cold weather. When not used, shut the
eyepiece by means of the delivered protective cap.

The PRAKTICA super TL 1000 is available with various lenses.

Please observe the recommendations contained in this booklet. Handling the camera carelessly or contrary to
instructions may lead to damages which, we regret to say, are not covered by our guarantee.

Our consistent efforts to improve our products may lead to some slight deviations of the PRAKTICA super TL
1000 from the present details.
View original page 16
From the M. Butkus archive. Original publisher and archive notices are retained.
Check the model and edition against your equipment.
PDF verified 2026-10-10.