Film cameras
Sigma SA-300 User manual
User manual for Sigma SA-300. 57 pages in English. Read the original PDF, download or print a copy without registration.
57 pagesEnglish3.5 MB PDF
Loading your manual…Open PDF directly
Document details
- Brand
- Sigma
- Model / document
- Sigma SA-300
- Document type
- User manual
- Language
- English
- Pages
- 57
- File size
- 3.5 MB
- Category
- Film cameras
- Document date
- Not specified in catalog
Search available document text
Find a term, then jump to its page in the original PDF. Image-only pages may not be searchable; check the PDF for exact wording and diagrams.
Page 2 · Read text
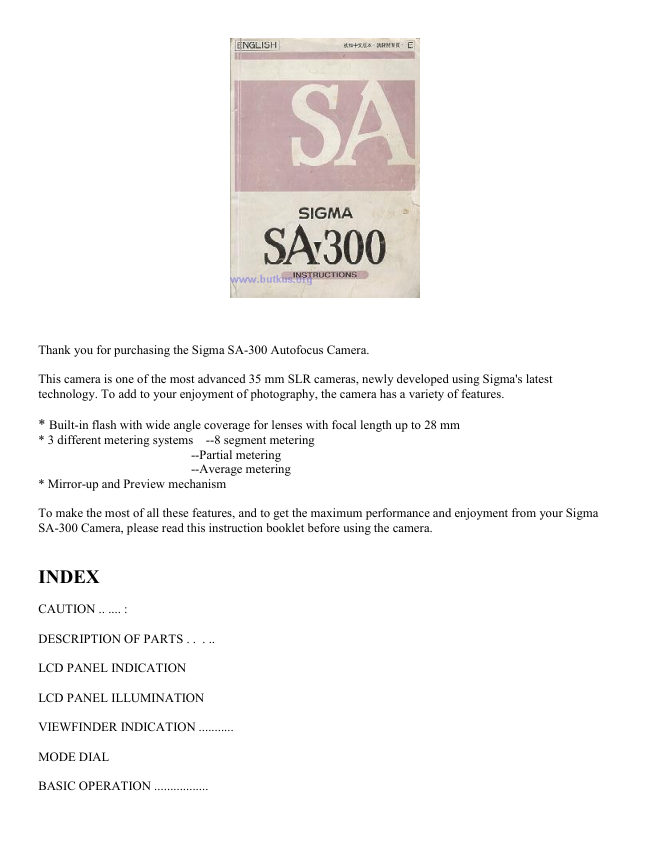
Thank you for purchasing the Sigma SA-300 Autofocus Camera.

This camera is one of the most advanced 35 mm SLR cameras, newly developed using Sigma's latest
technology. To add to your enjoyment of photography, the camera has a variety of features.

* Built-in flash with wide angle coverage for lenses with focal length up to 28 mm
* 3 different metering systems   --8 segment metering
                                 --Partial metering
                           --Average metering
* Mirror-up and Preview mechanism

To make the most of all these features, and to get the maximum performance and enjoyment from your Sigma
SA-300 Camera, please read this instruction booklet before using the camera.

INDEX

CAUTION .. .... :

DESCRIPTION OF PARTS . .  . ..

LCD PANEL INDICATION

LCD PANEL ILLUMINATION

VIEWFINDER INDICATION ...........

MODE DIAL

BASIC OPERATION .................
View original page 2Page 3 · Read text
PREPARATION

ATTACHING THE CARRY STRAP ...

HOW TO USE THE FINDER CAP

INSERTING THE BATTERY

CHECKING THE BATTERY

MOUNTING AND REMOVING THE LENS

HOLDING THE CAMERA

SHUTTER BUTTON

INSERT THE FILM

SETTING THE FILM SPEED MANUALLY

PRINTING DATE AND TIME ...

BASIC OPERATION ......

TAKING A PICTURE BY * MODE ....

REWIND THE FILM ............................

UNSUITABLE SUBJECT FOR AUTOFOCUS ..........

FOCUS LOCK .....................

FOCUS MANUALLY .................

USING THE BUILT-IN FLASH .............

RED-EYE REDUCTION .........................

PRECAUTIONS FOR USING THE BUILT-IN FLASH ...................

OPERATION OF DRIVE MODE ........................

CONTINUOUS SHOOTING

SELF-TIMER ....................

REMOTE CONTROLLER MODE . . .

FIXED AND SELECTABLE FUNCTION IN THE " * " MODE ..............
View original page 3
Page 4 · Read text
ADVANCED FUNCTIONS ..............

SELECTING THE AF MODE ...................

SELECTING THE EXPOSURE MODE ..

P PROGRAM AE PROGRAM SHIFT .
S SHUTTER SPEED PRIORITY AE ..............

A APERTURE PRIORITY AE

M MANUAL OPERATION

BULB SETTING

SELECTING THE METERING

AE LOCK...

AUTO BRACKETING ..

EXPOSURE COMPENSATION

BUILT-IN FLASH

MIRROR UP

OPTIONAL ACCESSORIES

REMOTE CONTROLLER RS-11 AND RS-21

PANORAMA ADAPTOR PS-300

EXTERNAL FLASH EF-

PHOTOGRAPHY TIPS ....

SNAPSHOT PHOTOGRAPHY

SCENERY

PORTRAIT

MOVING SUBJECT

CLOSE-UP PHOTOGRAPHY.

NIGHT SCENES

WARNING INDICATIONS
View original page 4
Page 5 · Read text
DEPTH OF FIELD

INFRARED PHOTOGRAPHY

REPLACING THE DATA BACK BATTERY

RESETTING THE CALENDAR/CLOCK

PRECAUTION DURING USE

SPECIFICATIONS


** Caution - Read this section before using the camera

* The built-in flash in this camera includes a high voltage circuit. To avoid electric shock or burns, do not
attempt to disassemble the camera. If the outside shell of the unit is broken or cracked, do not touch the
mechanism inside.

* Do not use this camera with any external flash unit other than the Sigma EF-430, which has special contact
pins on the hot shoe. This flash is offered as an optional accessory. Other external flash units may damage the
camera's circuitry or may not work properly.

* This camera is not waterproof. When using the camera in the rain on near water, keep it from getting wet. It is
often impractical to repair internal electrical components damaged by water.

* To avoid any chance of lithium battery explosion, the battery pack should not be disassembled, recharged,
short-circuited or exposed to fire or water.

* As with any camera, it is best to check all functions and shoot a test roll of film before using the camera for a
wedding, a trip abroad, or for any irreplaceable photographs.

* Please carry a spare battery when you use the camera in a cold environment, in the field, on a trip, or when
taking many pictures at one time.
View original page 5
Page 6 · Read text
DESCRIPTION OF PARTS


When you press the Exposure Compensation/Drive Mode Button and Flash Mode Metering Mode Button
simultaneously, the LCD Panel will illuminate for about seconds.
View original page 6
Page 9 · Read text
If you press both buttons simultaneously again, the illumination will disappear.
If you press any button or turn the dial while Illuminating the LCD, the illumination will continue for an
additional 6 seconds.
During the charging of the built in flash, the LCD will not Illuminate.

At very low temperatures you that due to the nature of the LCD it may take slightly longer to respond - this is
not a function problem, but a characteristic of LCDs.

BASIC OPERATION


                                     1. Insert the battery
                                    Insert the battery into the chamber,
                                  aligning the + and - marks as indicated


                                     2. Mount the lens
                              Align the red mark on the camera's mount
                               with the alignment dot on the lens. Engage
                                  the lens in the mount by turning the lens
                               clockwise until it clicks into the locked
                                    position.


                                     3. Set the lens switch to the AF position.
View original page 9Page 10 · Read text
4. Set the mode dial to the "*" position.
Turn the mode dial while pressing the lock button.


 5. Insert the film
Insert the film and align the tip of the film with the Film Position Mark. Then close the back cover.


6. Align the subject in the AF frame


7. Press the shutter button


ATTACHING THE CARRY STRAP

1. Undo the strap end.
2. Thread Finder cap on the strap.
3. Then attach the carry strap as shown.
View original page 10
Page 11 · Read text
HOW TO USE THE FINDER CAP

When using the self-timer or remote control, please cover the finder eyepiece with the Finder Cap.
Remove the eye cap from the finder.


Insert the finder cap onto the finder.


INSERTING THE BATTERY

This camera uses a 6 V 2CR5 Lithium Battery. Without a battery, the camera will not function at all.


                                         1. Be sure the mode dial is on the
                                   lock position. Then open the battery
                                compartment by pushing the latch in
                                     the direction of the arrow.


                                         2. Insert the battery into the
                                 chamber, aligning the + and the -
                               marks as indicated.
View original page 11Page 12 · Read text
3. Close the battery cover until it
                                       clicks and locks closed.


CHECKING THE BATTERY


Turn the mode dial to the "*" position or one of the P. S. A or M positions while pressing the lock button. The
battery mark will appear on the LCD panel.


                                     The battery strength is good.

                                     The battery strength is
                                        weak. Keep a spare battery or
                                              replace the battery in
                                           advance.

                                                          If the mark blinks, the battery
                                                         is very low and the camera is
                                             not operable.


The battery mark remains visible while the camera is in use.

To conserve the battery, the camera will switch itself off after 6 seconds of not being operated. However,
it still is possible for the shutter to be released accidentally. If the mode dial is set on the "L" position,
the shutter cannot be fired.
View original page 12Page 13 · Read text
MOUNTING AND REMOVING THE LENS.
 This camera uses the SA type bayonet mount. For ordinary lenses use the inside bayonet mount (type SA-IB)
and for Super Telephoto lenses use the outside bayonet mount (type SA-OB). The mounting methods are same
for both type of mounts.

Remove the Camera's body cap and I lens mount cap.


Align the red mark on the camera's mount with the alignment dot on the lens. Engage the lens in the mount by
turning the lens clockwise until it clicks into the locked position.


To ensure proper connection, please do not press the lens lock button while mounting the lens.

To remove the lens, press the lens lock button and turn the lens counter-clockwise until it stops.

Gently remove the lens from the mount.


**On the mount surface of the lens, there are a number of electric contacts. Please keep them clean to ensure
proper connection. To avoid damaging them, be sure to place the lens with its front end down when it is off the
camera.

HOLDING THE CAMERA


Even the slightest movement of your body, while pressing the camera's shutter release, may cause camera shake
and a resulting blurriness of your photograph. To avoid this we suggest the following:
View original page 13
Page 14 · Read text
Hold the camera steady with your left hand supporting the bottom of the camera and the lens. Keep your left
elbow close to your body and place your eye as close to the viewfinder as possible. Firmly grasp the camera's
grip with your right hand and then lightly place your right index finger on

SHUTTER BUTTON


                                                                           |

The shutter button of the SA-5 camera has two positions. When you press the shutter button "Halfway Down",
the camera's Autofocus and Exposure System activates. Then you press the button "All-the-way Down", and the
shutter will release to take a picture.


 Before you start to take pictures, we recommend that you operate the camera without film to become familiar
with the "halfway down" position and other operations of the camera.

INSERT THE FILM

When you load and unload the film, please avoid the film or film cartridge from being struck by direct sunlight.
The SA 5 camera is compatible with the DX system. When you use a film with DX codes, the camera
automatically sets the correct speed of the film. If you happen to use a non-Ding film, please refer to none 17 to
set the film speed manually.


1. Turn the mode dial to the "*" position while pressing the lock button.

2. Push the Back Cover Latch down and open the Back Cover.

3. Place the film cartridge into the film chamber.
View original page 14Page 15 · Read text
4. Push the cartridge in firmly, and align the tip of the film with the Film Position Mark.

5 Check to be sure that the film sprocket holes are properly engaged with the teeth of the film transport sprocket
wheel.

6. Close the back cover, pressing firmly so it is securely locked. The film will advance automatically to the first
frame and the LCD film counter will display the number "1". Also, the film speed set by DX system and
"ISO/DX" mark will be displayed on the LCD panel for about 6 seconds. Please check that the film speed is
correctly set.

7. If the film has not been loaded properly, "Err" and the film mark will blink on the LCD panel. Open the back
cover and re-load the film. The camera will not operate while the "Err" is displayed on the LCD.

If the mode dial is set to the "L" position, the camera will not advance the film. When you load the film,
be sure to set the mode dial to other then the "L" position.

You can check whether there is film in the camera and the type of film and number of exposures, by using the
film window on the back cover.


                            Before you first load any film: please
                            removers the protective sheet which is
                                inserted on the film chamber.
                         The shutter curtain is very delicate,
                               "precision components" - which moves at
                             high speed. It can be easily damaged by
                             touching or pushing it with your finger while
                              loading film.
                         The pins in the film chamber read the DX
                               film cords. Please them the clean to insure
                             proper contact.

SETTING THE FILM SPEED MANUALLY
When the camera automatically sets the speed of the film by DX codes, the LCD shows "DX" after the film Is
loaded.  If you use the film other than DX codes, set the film speed manually.
View original page 15Page 16 · Read text
1. Insert the film. If the film is DX coded, I the LCD shows " DX " and its film speed, or if the film is non-DX-
coded, the LCD shows "lSO 100" after the film is loaded. The film speed will automatically set itself to ISO
100 if you do not set the film speed manually.

2. Set the mode dial to AF ISO.

3. Turn the A-dial to set the desired film speed. When you set the film speed manually, the DX will disappear
on the LCD panel even if you use the DX coded film.


4. Turn the mode dial to the desired exposure mode.

You can check the current film speed setting when you set the mode dial to the " AFISO " position.

When you load a new film cartridge, the previous film speed setting will be released and reset to ISO 100
or the DX speed for the new cartridge.

PRINTING THE DATE AND TIME


You can select from 5 types of data by pressing the "MODE" button.
View original page 16
Page 17 · Read text
The data that appears in the Data Back LCD will
                                 be imprinted on the picture unless the MODE is
                                          set to OFF.


                              The word "PRINT" is not part of the data and will
                                    not imprint on the picture.


                              The data may be somewhat less distinct when
                                 backgrounds are red, orange or yellow, or when
                                      the subject is very bright.


                                Depending on the film speed and temperature,
                                           legibility of the printed data may vary.

                                               If the Data Back LCD becomes light and difficult
                                        to read, please replace the battery in the data back.


The SA-5 camera has many features. This part describes the basic camera operation using Full Automatic Mode
"*" and the functions you can use in this mode.

TAKING A PICTURE BY THE * MODE
The "*" mode is full automatic operation mode. The camera will automatically control the focus, the exposure
and the film advance.


                                            1. Set the mode dial to the "*"
                                         position while pressing the lock
                                         button.
View original page 17Page 18 · Read text
2. Set the lens switch to the AF
position.

To avoid damaging the AF
mechanism, please do not turn the
focus ring manually while in the AF
mode.


3. Align the subject In the AF frame


4. When you press the shutter button "Half-
way", the camera will focus automatically, and
the shutter speed and aperture speed are
displayed in the viewfinder and on the LCD
panel.

5. Then you press the shutter button "All-the-
Way", the camera releases the shutter and
automatically advances the film.


6. To conserve battery power, set the mode dial
to the "L" position when you are not using the
camera.
View original page 18
Page 19 · Read text
7. The flash mark blinks in the viewfinder to
                                 warn of a slow shutter. When this occurs use
                                          tripod or flash.


The AF Auxiliary Light will turn on automatically as you focus on a dark area. Effective distance is up to about
4 m.

To conserve the battery, the camera will switch itself off after 6 seconds of not being operated. However,
it still is possible for the shutter to be released accidentally. If the mode dial is set on the "L" position,
the shutter cannot be fired.

REWIND THE FILM


                                           1. If you use DX coded film with 12, 20, 1 24 or
                                 36 exposures, the number in the film counter
                                          will blink when the remaining frames becomes
                                           less than 3.


                                           2. After the last frame has been exposed, L the
                                  camera will automatically rewind the film. After
                                        the film is completely rewound, "End" will
                                     appear in the LCD. Open the back cover and
                                 remove the film cartridge after the "End" mark
                                        appears.
View original page 19Page 20 · Read text
3. If you want to rewind the film before the last
                                      frame, you can do so by pushing the rewind
                                      button located at the bottom of the camera.


While the film is rewinding, the counter counts backwards.


PRECAUTIONS

If you open the back cover before the film is completely rewound, the light falling on the film will destroy your
pictures. Do not open the back cover until the "End" appears on the LCD panel. If you open the back cover
accidentally, on rare occasions the camera will become inoperable, LCD panel shows "Err" and the film mark
blinks. If this occurs, rewind the film by pressing the rewind button.

If the rewind motor stops while rewinding the film due to low battery power, do not open the back cover.
Replace the battery and press the rewind button. You should open the back cover only after "End" appears on
the LCD panel.

This camera reads the film's number of exposures from the DX code and will I rewind the film automatically
after the last frame is exposed. However, if you use the film with a length other than 12, 20, 24 and 36 (such as
10 or 18 exposures) or non-DX codes film, you may take extra frames but they may not be developed or printed
by the laboratory.

UNSUITABLE SUBJECT FOR AUTOFOCUS

The autofocus mechanism is a high precision instrument and very useful. However, it is not perfect. Some
types of subjects may "fool" the autofocus mechanism. This can happen if the subject Is similar to the
following examples. In these cased, use "focus lock" (next page) or focus manually.
View original page 20Page 21 · Read text
FOCUS LOCK


Occasionally when the main subject does not fall within the focus frame in the viewfinder, or the subject is
unsuitable for the autofocus system, you can lock the focus distance temporarily.


                                           1. If the subject isn't in the focus frame
                              when you compose the picture, the
                                  camera will focus on the background.
View original page 21Page 22 · Read text
2. Move the camera so the focus frame is
                             L around the subject and press the shutter
                                      button "Half-way". Be careful not to press
                                      "All-the-way".


                                           3. When the focus indicator lights, the
                                      focus is locked. Hold the shutter button
                                   "Half-way" while you compose the
                                         picture the way you want it. Then press
                                        the shutter button the rest of the way to
                                       take the picture.  If you remove your
                                         finger from the shutter button, the focus
                                      lock is cleared. You can refocus the focus
                                      lock any number of times.


FOCUS MANUALLY

If the subject is unsuitable for use with the autofocus system and hard to use with the focus lock, you can focus
manually.


                                           1. Set the lens switch to the
                      MF position. (switch is
                                       located on lens by lens
                                  mount)
View original page 22Page 23 · Read text
2. While looking through the
                                           finder, turn the focusing ring
                                on the lens until you get a
                                          clear sharp image.


                                           3. When you use a lens with
                                                   its maximum F-number
                                    wider (smaller number) than
                                       F5.6, press the shutter button
                                  "Halfway" while focusing.
                               The focus indicator will light
                              when perfect focus is
                                           attained.


USING THE BUILT-IN FLASH


When you press the shutter button "Half-way", and the flash indicator in the viewfinder blinks, the camera has
determined that the shutter speed will be very slow or the subject is strongly back light. In this case, we
recommend that you use flash.


                                           1. Press the Flash Pop-up Button. I The built-

                                          in flash will pop-up and          will
                                         indicate on the LCD panel.
View original page 23From the M. Butkus Camera Manual Library. Original publisher and archive notices are retained.
Check the model and edition against your equipment.
PDF verified 2026-10-10.