Film cameras
Stereo Realist Reference guide
Reference guide for Stereo Realist. 18 pages in English. Read the original PDF, download or print a copy without registration.
18 pagesEnglish2.8 MB PDF
Loading your manual…Open PDF directly
Document details
- Brand
- Stereo Realist
- Model / document
- Stereo Realist
- Document type
- Reference guide
- Language
- English
- Pages
- 18
- File size
- 2.8 MB
- Category
- Film cameras
- Document date
- Not specified in catalog
Search available document text
Find a term, then jump to its page in the original PDF. Image-only pages may not be searchable; check the PDF for exact wording and diagrams.
Page 2 · Read text
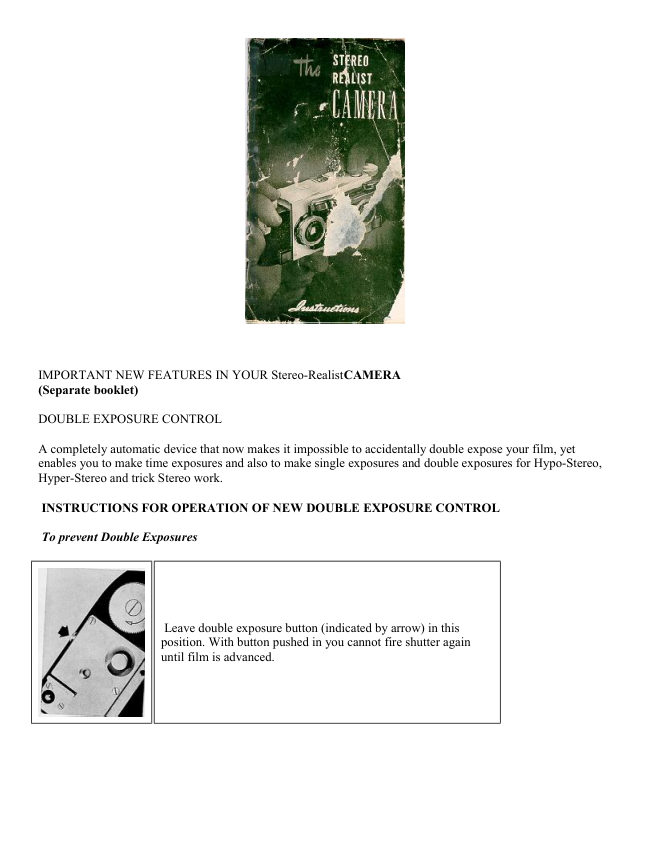
IMPORTANT NEW FEATURES IN YOUR Stereo-RealistCAMERA
(Separate booklet)

DOUBLE EXPOSURE CONTROL

A completely automatic device that now makes it impossible to accidentally double expose your film, yet
enables you to make time exposures and also to make single exposures and double exposures for Hypo-Stereo,
Hyper-Stereo and trick Stereo work.

INSTRUCTIONS FOR OPERATION OF NEW DOUBLE EXPOSURE CONTROL

To prevent Double Exposures


                    Leave double exposure button (indicated by arrow) in this
                         position. With button pushed in you cannot fire shutter again
                          until film is advanced.
View original page 2Page 3 · Read text
www.butkus.us


To take Single Exposures -

1. Cap left lens.
2. Wind the shutter.
3. Expose first picture.
4. Cap right lens.
5. Then without transporting film for next picture pull double exposure button out and release.
6. Wind the shutter.
7. Expose second picture.

For Time Exposures you must


                                   1. Pull double exposure button out and off center so button remains in
                             extended position.
                                   2. Take time exposure.
                                   3. Be sure to release double exposure button when you are through taking your
                             time exposure(s).


To take Intentional Double Exposure -

 1. Wind the shutter.
 2. Expose picture.
 3. Then without transporting film for next picture pull double exposure button out and release.
 4. Wind the shutter.
 5. Expose picture.
You have now made an intentional double exposure. Camera will return to automatic double exposure
prevention after each intentional double exposure.
View original page 3Page 4 · Read text
DEPTH OF FIELD SCALE


                         An important feature of your Stereo-REALIST. The Depth
                                      of Field Scale indicates the maximum range of sharpness,
                              from the nearest point to the farthest point, that may be
                                  obtained with your REALIST camera for each particular
                                     picture taking condition.

                               The Depth of Field Scale consists of two sets of numbers
                                      opposite the distance scale on your focusing knob. The lower
                                           set of numbers, below near on the scale, indicates the near
                                       distances at which your camera lenses are in sharp focus,
                                  depending upon the f stop number you have chosen. The upper
                                           set of numbers, above far on the scale, indicates the far
                                         distances, depending upon that same f stop number. The
                                                                            Digitally signed by Mike Butkus          corresponding upper and rawer numbers on your Depth of Field
                                                         DN: cn=Mike Butkus, o=Butkus camera manuals, ou=butkus.org,
                                                              email=mike@butkus.org, c=USMike Butkus                 Date: 2023.05.18 09:43:41 -04'00'          Scale indicate the range of sharpness in your picture in their
                                          relation to the distance scale.


  HOW TO USE YOUR DEPTH OF FIELD SCALE

  A good stereo picture is sharp from the nearest to the farthest point. When you take a stereo picture, you are
   trying to exactly duplicate the scene as your eyes see it. The pictures you take should be just as sharp as the
   actual scene. The Depth of Field Scale helps you obtain this over-all sharpness.

   The Depth of Field Scale indicates the maximum range of sharpness, from the nearest point to the farthest
    point, that may be obtained when taking a picture of a given subject.

   The depth of field is dependent on two variables, the f stop you have chosen and your distance setting. The
   range of sharpness is found by using the same upper and lower number on your Depth of Field Scale as the one
   used for your f stop opening. in some instances, it may be necessary to estimate the depth of field numbers
  when they are between those marked on the scale.

  EXAMPLES:


                                               If after using your rangefinder, the arrow indicates on the
                                     distance scale that you are 10 feet away from your point of focus,
                               and the f stop you have chosen for the proper exposure is f:5.6,
                                     the range of sharpness for

                                         that picture will be from 7 feet (between 5 and 8) indicated on the
                                 lower range of numbers, to 17 feet indicated on the upper range of
                                 numbers. if you choose f:l6 as your f stop for the same distance
                                  (10 ft.) your picture range of sharpness will be from 5 feet to
                                           infinity.

                                               If you are 3 1/2 feet away from your subject, the maximum range
                                    of sharpness for that subject is from approximately 2 1/2 feet to 5
                                         feet at f:l6.
View original page 4Page 5 · Read text
www.butkus.us

It is important remember when taking close-ups with the subject extremely close, that the range of sharpness is
greatly reduced. in these cases, small lens openings are recommended to yield the greatest possible depth of
field.

You will sometimes be forced to use a certain lens opening because of light conditions. For instance, you are in
the mountains, the light is very bright, you have chosen an exposure of 1/50th of a second with a lens opening
of f:8. The Depth of Field Scale can now be used to bring your maximum range of sharpness to infinity by
moving infinity on the distance scale opposite 8 on the upper range of numbers. if you will note on the lower
range of numbers, 9 feet is opposite f:8— indicating the range of sharpness is from 9 feet to infinity in ail
pictures. it is best to check the distance of a near object in your picture to be sure it is not closer than 9 feet.

 Another way to use your Depth of Field Scale would be to find the distance of the nearest object and the
farthest object with your rangefinder. Let us say, the normal exposure is 1 /50th at f:6.3 and the nearest object is
at 5 feet and the farthest distance is infinity. Then the f stop you could use would be f:l6, which would require a
shutter speed 1/5th of a second. in this particular instance, a tripod or similar support must be used.

Imagine you are taking a flash picture, there is a chair in the immediate foreground at 5 feet, a wall at 15 feet,
and a group of people behind a Able at about 8 or 9 feet. Try f 8—this gives you a setting on the upper range of
numbers on the Depth of Field Scale of about 11 or 1 2 feet, when setting 5 feet on the distance scale opposite
number 8 on the lower range. if you go to f:11 on the scale, you have the correct lens opening or f stop for a
near distance of 5 feet and a far distance of between 15 and 25 feet.

The Depth of Field and Hyper focal Table found on page 17 of your instruction book will give the complete
range of sharpness for all distances.*

NOTE: There is not a sharp breaking off point between what is sharp and what is not sharp. Some leeway can
be allowed before your pictures will become out of focus.

EXPOSURE TABLE
This convenient index, for basic exposures most open encountered when taking color pictures outdoors, is
located under the lens cover.
View original page 5
Page 6 · Read text
STEREO REALIST

The first American made, precision
built, true stereoscopic camera.

Foreword

 if you are, as the owner of a new Stereo REALIST one who is about to use a stereoscopic camera for the first
time, a rare thrill is in store for you. Your Stereo REALIST

 - pictures will be so natural, so real, that you will almost expect them to come; to life.

On the other hand, if you are one of the many persons who have taken stereoscopic pictures in the past, it is
probable that you have been limited to black and white film. Yours is now the new thrill of full color
complemented by the third dimension—a technical achievement resulting in complete realism.

 Stereoscopic (and let's not call it "stereopticon," which i s something else) photography is not new. it is, in fact,
as old as photography itself, and the principles of stereoscopy were known long before that. As early as the
sixteenth century, diagrams were drawn incorporating the elements of binocular vision and three dimensional
seeing.

 In the Stereo REALIST therefore, we claim nothing new i in principle. You will, however, find your REALIST
to be a precise, well designed, high quality camera correctly incorporating the long known principles of
stereoscopy, and at the same time taking full advantage of the latest developments in materials, lenses,
mechanical design and color film.

We are proud of the Stereo REALIST. it is not the result I of casual or hurried designing. We are confident you

 I will take pride in its ownership and experience much pleasure in using it.

DAVID WHITE COMPANY


Why we see stereoscopically

We see stereoscopically or with the "third dimension" because we have two eyes. Close one eye and the ability
to judge distance or depth is lost. Each of our two eyes sees things from a different viewpoint and this
difference in viewpoint, however slight, is one of the tools used by our brain to read the third dimension into
things seen by the eyes. Also, the closer an object is to the eyes the more they have to converge or "toe-in" to
see it. In exactly the same way as the range finder on a camera operates, this "human range finder" helps to tell
us the distances to the objects we see.

The stereoscopic camera takes a pair of pictures, one picture corresponding to the viewpoint of each eye. When
these pictures are viewed in the stereoscope, the left eye seeing the left picture and the right eye the right
picture, the same factors of difference of viewpoint and convergence are present that were present when
viewing the original scene, and we are able to interpret depth as well as though we were again actually seeing
the original scene.
View original page 6
Page 8 · Read text
12. Matched objective
                                                                            lens

                                                                            13. View-finder
                                                                           objective

                                                                            14. Shutter speed
                                                                               setting ring

                                                                            15. Diaphragm setting
                                                                        ring
                                                                                                - mechanically couple.

                                                                            16. Shutter winding
                                                                           lever

                                                                            17. Distance scale

                                                                            18. Film wind release

                                                                            19. Range-finder eye
                                                                         piece

                                                                            20. View-finder eye
                                                                         piece


specifications of the STEREO-REALIST - MODEL ST41

BODY - Die cast aluminum, aluminize finish.

EXPOSED METAL PARTS - Satin chromium.

LENSES - Matched Cooke type coated anastigmat lenses of 35 mm. focal length, f:3.5, Iris diaphragms
mechanically coupled.

SHUTTER - Gear retarded, ring set, winding, behind the lens type with speeds of 1, 1/2, 1/5, 1/10, 1/25, 1/50,
1/100 and 1/150 second, plus time and bulb.

SYNCHRONIZER—Built-in silver contacts—uses either 5 or 20 millisecond delay flash lamps (SM or No. 5
or equal) or strobe flash. Bulbs may be inserted before or after winding shutter. Contact to attachment for
photoflash is through attachment clip on top of camera.

VIEWFINDER - Direct vision, reverse Galilean type with objective lens midway between camera lenses
completely eliminating viewfinder parallax. image is erect and unreversed.

FOCUSING - Internal by means of milled wheel at right end of camera body. Range - 2 1/2 feet to infinity.
Distance scale appears on face of focusing wheel for convenience in calculating flash exposures and in setting
camera on the hyper focal distance.
View original page 8Page 9 · Read text
www.butkus.us

RANGEFINDER—Coupled, split field military type. Magnification unity. Exceptionally wide base.

LENS COVER—Phenolic plastic - may be closed with filters in place. Caps viewfinder, automatically
prevents exposures with lenses capped.

FILM TRANSPORT—Automatic spacing and positive locking of both winding knob and film sprocket.

FILM—20 or 36 exposures 35 mm. film in standard film magazines. Takes 16 pairs on the 20 exposure roll
and 29 pairs on the 36 exposure roll. It is wise to familiarize yourself with any new piece of equipment before
attempting to operate it. Therefore, before actually loading your new Stereo REALIST with film and taking
pictures, we suggest that you study the following instructions carefully and learn the purpose and operation of
the various controls with which the camera is equipped. Practice holding the camera before a mirror, watching
particularly the position of your hands.

Lens cover

The plastic lens cover of your REALIST is designed to protect its lenses against damage and dust. To open—
simply lift up from the bottom edge. A snap spring holds the cover in either the open or closed position. Since
the cover in the closed position caps the viewfinder, there is no danger of forgetting to uncap the lenses.

 Setting the diaphragm


                                                    The iris diaphragm regulates the
                                                                    size of the opening which admits
                                                                        light to the camera. To set, rotate
                                                                 the rim of either lens to the
                                                                required setting. (See figure 1.)
                                                            Since the diaphragms of the two
                                                                 lenses are mechanically coupled
                                                                         this will automatically set both of
                                                     them alike. information regarding
                                                             proper diaphragm openings for
                                                               various conditions is provided
                                                                    further on in this manual.


Setting the shutter speed


                              The Stereo REALIST provides ten shutter speeds— 1, 1/2,
                                         1/5, 1/10, 1/25, 1/50, 1/100, and 1/150 seconds, plus time (T)
                                 and bulb (B). When set on "bulb," the shutters remain open
                                      as long as the release button is depressed.

                          On "time," the shutters open when the release button is first
                                     pressed and close when it is pressed a second time. To set the
                                        shutter speed rotate-the ring around the viewfinder objective
                                       lens to the speed setting desired. (Figure 2.) Only the
                                  denominator of the fraction is shown: for example, 50=1/50
                                      of a second.
View original page 9Page 10 · Read text
Winding the shutter


                             The shutter should not be wound until after the proper speed
                                       setting has been made. To wind - move winding lever to left as
                                        far as it will go and then release. (See Figure 3.)


Shutter release


                              The shutter release button is located on the left side of the
                                    too of the camera. (Figure 4.) This position makes

                                     (Figure 4.) This position it easy to operate with the index
                                       finger of your left hand. Adjacent to the shutter release
                                    button is a socket for the cable release. Any American type
                                   with straight thread can be used.


Range finder


                                The coupled rangefinder of the REALIST makes accurate
                                      focusing quick and easy. Looking through the rangefinder
                                      eyepiece (right hand aperture at the bottom of the camera
                                     back) select any vertical line in the view and rotate the
                                      focusing knob (Figure 5) with the second finger of the
                                            right hand until this line in the upper part of the split field
                                   matches the line in the lower part of the field. See
                                    diagrams below.

                            When taking pictures including considerable distance
                                       (over 100 feet) as well as foreground objects, it is
                                       advisable to set the focus on the hyperfocal distance. This
                                           setting gives the greatest possible depth of field. (See
                                    Table on page 17.) With the camera set on this distance
                                       everything will be sharp from one-half the hyperfocal
                                        distance to infinity. If no foreground objects are included,
                                      focus the camera on infinity.
View original page 10Page 13 · Read text
www.butkus.us


        3. Holding film magazine in
        the left hand, insert 3. end of
       film firmly into slot in take-
      up spool. (See Figure 11.)


   4. Holding right thumb on spool
   to prevent film pulling out, move
  film magazine to left end of
  camera and drop into its recess,
  allowing film to pay out from
  magazine as necessary.
  (See Figure 12.)

  CAUTION: Do not pull any
  more film from the magazine than
  necessary. To do so may result in
  fogging the first picture on the
   roll. Push rewind knob down.


  Figure 13 Shows film in proper
  position ready for winding (after
  camera back is replaced.) Note
   that edge of film is even with
  lower end of take-up spool so that
   entire bottom edge of film is
   parallel with bottom of camera.
View original page 13Page 14 · Read text
5. Replace camera back. in doing
                                                                              this, insert end with wide latch at
                                                                                left end of camera and swing
                                                               closed as though it were hinged
                                                                (Figure 14). Turn lock on bottom
                                                                of camera to lock position.


 6. At this point it would be well to check the shutter . and make certain that it is closed. Then, holding thumb of
left hand on rewind release button, turn winding knob in direction of arrow until exposure counter clicks. This
indicates that the film perforations have engaged the sprocket and started rotating it. Now release button and
continue to turn winding knob until it locks.

7. Press wind release button again and start to turn . film winding knob. Remove thumb from wind release
button and continue winding until the winding knob locks. Film for the first exposure is now in place.

8. Set counter dial on number 1, turning it counter clockwise. You are now ready to make your first exposure.


                                   9. After each exposure, the shutter trip signal on top of camera
                                (Figure 15) will show red. Repeat direction 7 to move unexposed
                                film into position. After you have done this, the signal will show
                              white indicating that the camera is ready for the next picture.


Caution: As with any camera using 35 mm. film magazines, the exposed film must be rewound back into the
magazine before it can be removed from camera. It is important thereafter the exposure counter indicates you
have made the 16 or 29 exposures (depending on which length of film you are using) not to continue winding
film' since to do so would tear it from the magazine and necessitate darkroom unloading.

Unloading


                                          1. When you have finished taking exposure number 16 (or 29 in the case
                                     of the 36 exposure roll) turn rewind release so that the dot is on "R"
                                      (rewind). (See Figure 16)

                                          2. Turn rewind knob in direction of arrow and continue turning until all
                                      the film is rewound back into the magazine. When the counter stops
                                     operating you will know that this has been accomplished.

                                         3. Remove camera back.

                                          4. Pull up rewind knob and remove film magazine. To reload, repeat
                                    loading instructions.
View original page 14Page 15 · Read text
www.butkus.us


Care of your Stereo Realist

Keep your camera clean. Brush out the interior occasionally with a soft brush to remove dust. Remove any bits
of film that may become lodged in the take-up spool slot or any other place.

 It is necessary that the lenses be kept clean. Be careful not to touch them with your fingers. They may be dusted
with a soft, clean, camel's hair brush or cleaned more thoroughly by breathing upon the surface and gently
wiping with lens tissue. Do not attempt to remove any of the lenses.

 Cameras in need of repair or adjustment should be returned to the manufacturer.

Mounting your pictures


                                        For use in the Stereo REALIST Viewer, the pictures
                                          taken with the REALIST Camera must be mounted in
                                             the form of slides 1 5/8 x 4 inches in size with the
                                             individual frames on 2

                                           1/2 inch centers. We recommend that you obtain the
                               REALIST mounting kit and do this simple task
                                              yourself. This kit contains a device for cuffing the film
                                                   strip into individual frames, a jig for mechanically
                                            ailgning the pictures and heat sealing them to the
                                        masks. These supplies are also available separately
                                      from your dealer.

                                                        If you prefer to have your pictures mounted for you,
                                        send them to the David White Company, using the
                                             printed forms supplied for that purpose (one such form
                                                       is included with your camera) and carefully following
                                             the directions. Your pictures will be returned to you in
                                         cardboard mounts ready for viewing. For more
                                       permanent protection they may be easily removed from
                                            these mounts and bound in glass in the conventional
                                way without special apparatus.
                                        (I'm guessing they are out of business !)


Two types of masks are available for mounting Stereo REALIST slides. The "regular" mask is for general use
and produces an apparent "window" at a distance of approximately ten feet while with the "close up" mask,
which is used for portraits and other close-up pictures, the window appears about three feet distant.


General suggestions

When taking a picture, whether with a stereo camera or a single picture camera, there are only two things to
determine and set distance (focus) and exposure (shutter speed and diaphragm).
View original page 15Page 16 · Read text
The coupled rangefinder of your REALIST makes the setting of the focus easy and quick. Instructions for the
operation of this control have been given on page 7 Be sure that you fully understand the matching of the split
field and take a little extra time and care to be sure you have the exact focus each time. The result will be
definitely better pictures. When the view being photographed includes distant objects of importance (over 100
feet) best results will be obtained by setting the focusing dial to the hyper focal distance for the diaphragm stop
being used. (See table on page 17) All objects will then be in focus from one-half this distance to infinity.


The other setting - exposure - is made up of two things: the size of the opening which admits the light
(diaphragm stop) and the length of time the shutter stays open (shutter speed). The exposure required will
depend upon the sensitivity or "speed" of the film being used and the amount of light falling upon the subject
being photographed. The film speed may be found from the instruction sheet that comes with the film or from
tables published by the film or exposure meter manufacturers. The amount of light is best determined with a
photo electric exposure meter, although various calculating charts are available which work fairly well under
ordinary conditions.

 Having determined the film speed and the amount of light, you have the choice of any of the combinations of
diaphragm stop and shutter speed settings which give the proper total exposure. In deciding which to use,
consider the type of the subjects with little or no motion permit slower shutter speeds and smaller diaphragm
openings, giving greater depth of field; that is, sharpness through a longer range of distances. (Table on page
17.) Moving objects require faster shutter speeds in order to "stop" the action.

Remember, the smaller the diaphragm opening (the smaller openings have the larger numbers), the greater the
depth of field; the faster (or shorter) the shutter speed, the better motion will be stopped. You will soon gain
enough experience and judgment to enable you to choose the proper combination of these two factors to suit
any set of conditions.

The instructions up to this point apply equally well to either stereo or single picture cameras. In the matter of
composition, camera angle and viewpoint, however, the stereoscopic camera offers much greater range and
flexibility. Since the picture seen in the viewer will be so nearly like the original, anything that looks good to
you in life will make a good picture. At will, you may hold the camera level, point it up to include tall buildings
or point it down for close-ups of flowers. Aim it in any direction you would look with your own eyes and you
capture what your eyes saw. Since you are now photographing things in their true spatial relationship you may
let objects occupy their normal positions in space. Often your pictures will be more interesting if you purposely
include foreground objects such as trees, flowers. or fences.
View original page 16
Page 17 · Read text
www.butkus.us


In composing your pictures, take them from the viewpoints that look
good to you at the time, with the assurance that they will look the same
later when you view them in the stereoscope. You are no longer bound
by rules of composition designed for flat pictures. Yours is now a new
experience in photography with almost limitless possibilities. In the
stereoscope you will see not a picture but the thing itself really created
in all its original I beauty.

 It has not been the purpose of this booklet to present a complete
treatise on taking pictures, but instead to explain the operation of the
Stereo REALIST Camera. For further information we suggest that you
read one of the many available books on the general subject of
photography.
View original page 17
Related documents and language editions
From the M. Butkus Camera Manual Library. Original publisher and archive notices are retained.
Check the model and edition against your equipment.
PDF verified 2026-10-10.