Film cameras
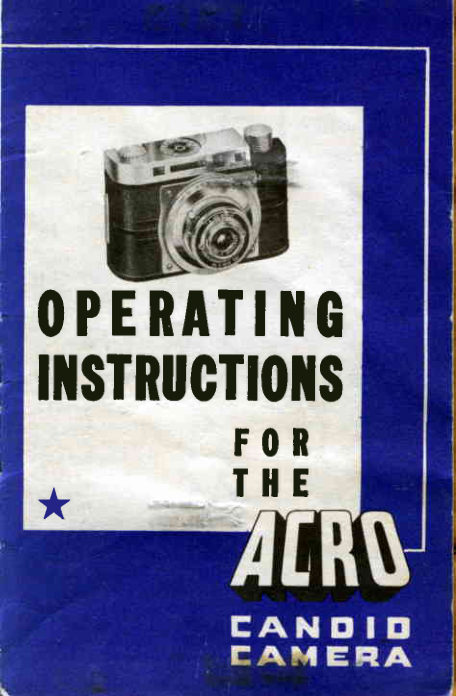
Acro candid camera User manual
User manual for Acro candid camera. 8 pages in English. Read the original PDF, download or print a copy without registration.
8 pagesEnglish1.2 MB PDF
Loading your manual…Open PDF directly
Document details
- Brand
- Acro
- Model / document
- Acro candid camera
- Document type
- User manual
- Language
- English
- Pages
- 8
- File size
- 1.2 MB
- Category
- Film cameras
- Document date
- Not specified in catalog
Search available document text
Find a term, then jump to its page in the original PDF. Image-only pages may not be searchable; check the PDF for exact wording and diagrams.
Page 3 · Read text
Always  remember  to  load
                      your  camera  in  the  shade.
                    Never let bright  light  hit  the
                            film  roll, before or after snap-
                       ping your pictures.
                        Hold back of camera toward
                       you, and push the lock button
                      which   automatically   releases
                        -rhe--$ack.    Pull  back  away
from camera.
  Make  sure  the  empty  spool  is  in  the  left-hand
compartment  with   its  notched end engaged  in  the
winding knob.
  Place  the  film   in  the  right-hand  compartment.
Break the seal on the  roll.  Now slowly  pull  the red
paper toward the empty spool.  Insert tapered end of
the paper in the broad side of the slot in the spool.
Fold   it  over.  Turn  the winding knob a few turns
to  the  right  so the  paper  starts  to  roll  onto  the
empty spool.
  Return  the  back  to   its  proper  position  on  the
camera; gently snap it in place. Be sure it  fits snugly.  The  important  things  to watch  in  this  operation         ItIIr
                         theseare the red windows. In                               openings,                                      you see                                                         that       I                      your                                                   posi-                                  film                                             is  in  proper
                            tion.  Turn  the winding knob                         slowly  until  the  figure   I  on     4I
                        the  red  paper  protecting  the
                           film appears in  the center of
                        the lower red window marked                         A.  The camera is now readv     lI1"
                            for use.
  As soon as you have snapped your  picture, im-
mediately turn the winding knob  until the number  I
reappears in  the window  marked  B.  You  are now
ready to snap the second picture.  The same process
 is repeated for additional  shots.


                           www.orphancameras.com
View original page 3Page 4 · Read text
When number 8 appears in the center of B window
 you  are  taking  your  l6th   picture,  completing  the
 roll.
  Now  turn  the winding  knob  until  the  roll  of  film
 (including  the red paper protecting   it)   is  entirely
 wound on the left-hand spool.
   In  the shade again open back  of camera (same
 operation as when loading), and remove the  roll  of
 film.   Seal the  roll  with gummed tape you  will  find
 on the end of the roll, so that  it cannot unwind.
  As an extra precaution against fogging the film be
 sure to close the round  slide over the red windows
 after each winding.
                      F O C U S  T H E  L E N S  b y
                          turning  the large  ring behind
  H(lW TO      thein  feetshutteris  directlyuntil  thebelowdistancethe
   TAKE       red dot on the range finder or
                          viewfinder.
  PICTURES       If  the  focus  is  set  at  in-
                                 finity,  everything 30 feet and
                    beyond is in focus.
                     Move  pointer   "J"   to  the
                       stop  (F.  3.5, 4.5, etc.)  and
  SETTII{G    pointer   {58"  to   the  speed
   THE         ing(I1200,to thel/100,light etc.)conditions.accord-
  SHUTTER    Keep   the  camera   firmly
                        against the face with the view-
                           finder close to the eye. Frame
the subject you are photographing  within  the view.
finder.  Make  sure the camera  is held  level;  not
tipped at any angle.  When photographing children,
dogs, etc., best results are had by holding the camera
down level with the center of the subject.
View original page 4Page 5 · Read text
0@ BUM ETERI L T - I N  E X P O S U R E
   SH U T T E RS P E E DI N D I -
   CATORc                                                                              /l-
   HIGHSPEEDTRIPLEANA.
    STIGMATICLENS@
@ VIEWFULL VISIONFINDEREYE LEVEL
                                      'q


    BUILT-IN SUPPORTFOR.
    TAKINGTIME EXPOSURES
    R,ANGEFINDER@o
    TRI PODSOCKET@
   cABLERELEAsEsocKErGJ                          www.orphancameras.com
View original page 5Page 6 · Read text
i
                      Take  snapshots  with  your     I
                     back to the sun, with the sub-
                                    fully                                       lighted.                                            This  in-   LIGHT        ject                                                                                         If    I.f                                  clear,                                   sharp  pictures.                       sures
  c0ilDrTl0t{s light  shines into the lens, your
                         pictures may be indistinct.
                        Press down on the  shutter
                        release with steady, even pres-
sure. Do not jerk the camera  in your eagerness to
snap the pictures.
                              In  taking  time  exposures,
                                 first move the exposure indi-
                                      "T".   This  lever  is  TIMEAND   cator  to
   BUtB      onnametheplateouteras rimyou abovelook  intothe
  EXPOSURES   the lens.                    Do not  hold  the camera  in
                       your hand when  taking  time
exposur€s.  Pull   built-in  camera support  into  posi'
tion and  rest the camera on a firm  table  or similar
support  to  prevent movement  or  better   still  use a
trip-od.  The use of a cable release is recommended.
After  properly  framing  your  subject  in  the  view'
finder, press the shutter release to open the shutter.
After  the correct time has elapsed again press the
release to close the shutter.
  On bulb  (B)  keep the  finger on the shtrtter re-
lease until  the correct time has elapsed, removing the
finger closes the shutter.
                   The Model R has a built-in
                     exposure meter of the extinc-
                          tion  type  that makes  it  pos-
                          sible  to  determine  instantlY
                        the  correct  exposure  for anY
                        subject,  indoors  or  out.     It
                       covers film speeds from 3 to 200.
View original page 6Page 7 · Read text
rcl
   Exposures from  l/200   to 2 seconds, and lens stops
   from F. 3.5 to F.18.
     To  read  the  meter, hold  the  camera  out  about
   twelve inches from the eye aiming  it  at the subject
   and a  little  bit down so that the light from the sky
     will not give a false reading.  Shade the back with
    the hand to exclude as much outside light as possible.
   From  left  to  right each number  is darker than the
 -_ one preceding it.  Use the last number that  is easily
   readable for determining the proper exposure. Using
    the calculator dials on top of the rangefinder, turn
    the upper  dial so that the light  reading  at the top
    lines up with the speed of the film being used. Refer-    to the bottom scales to find the desired shutter speed
    lined up with the proper lens stop to be used.
     For example: Suppose the light meter reading is 6
   and the film being used has a speed of. 24.  Turn the
   movable dial  until  the  light  reading  of 6 lines up
.   with the film speed of 24.  The resulting exposure is
     ll2lth  second with a stop of F. 8.   It  is advisable to
   use smallest stop possible with  the  proper  shutter
   speed, for instance: with the above meter reading and
    film speed the exposure at F.5.6  will be 1/50 second
    but a picture made at F. B will be sharper because of
    the increased depth of focus.
                         The  rangefinder  window   is
                               at  the  left end  of  the range-
                             finder  next  to  the  winding
                         knob. Place the window close
                               to the right eye and turn the
                     Range Finder Knob  at  right
                           side  of Camera with  thumb
                              of  the  right  hand  until  the
   upper and lower images match. The red dot on the
   case then points to a figure on the knob indicating
    the proper lens setting for that distance
                               www.orphancameras.com
View original page 7Page 8 · Read text
GUARAlITEE
     This  Acro Camera  is guaranteed against de-
      fective material and workmanship, for a period
      of 90 days, and  is limited  to replacement of
    such defective parts or material found  to be
     defective at Factory, upon return of the Camera
      to the Factory, at Chicago, Illinois, plus 25c to
     cover handling and mailing.  This guaranty is
     given in  lieu of  all other guarantees, express
      or implied.
      Naturally, we are desirous of your getting the
          f ullest  satisfaction  and  pleasure from  your
     Acro  Candid  i,amera;  therefore,  if  you  will
      follow  the sirnple irr-ctructions outlined  in  this
      booklet, you can help yourself in obtaining the
      finest possible pictures.


ACR0SCfEltTlFtCPR0ltuCTSC0.
         1414SOUTHWABASHAVENUE
       CHICAGO,ILLINOIS
View original page 8From the M. Butkus archive. Original publisher and archive notices are retained.
Check the model and edition against your equipment.
PDF verified 2026-10-10.