Film cameras
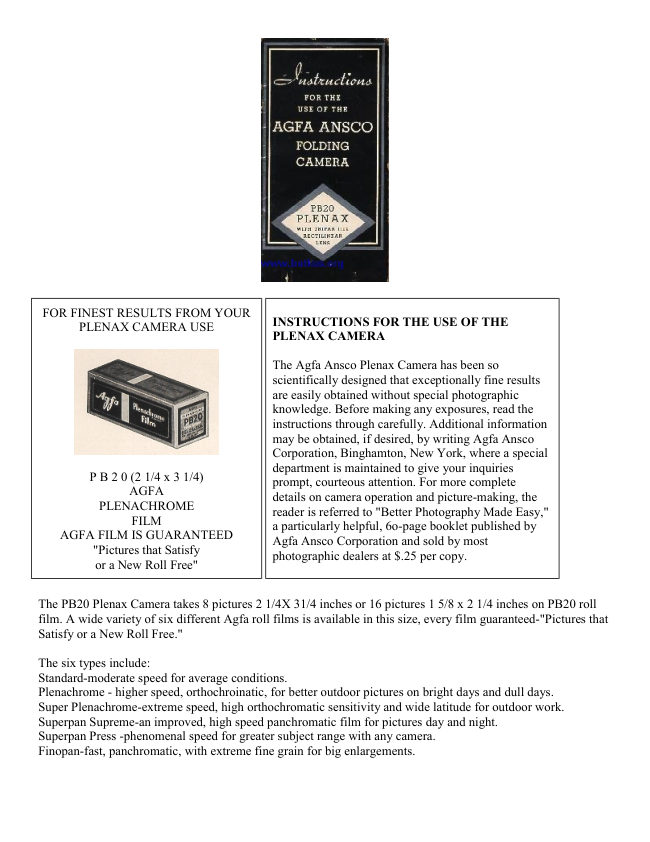
Agfa Ansco PB20 Plenax User manual
User manual for Agfa Ansco PB20 Plenax. 9 pages in English. Read the original PDF, download or print a copy without registration.
9 pagesEnglish1.0 MB PDF
Loading your manual…Open PDF directly
Document details
- Brand
- Agfa
- Model / document
- Agfa Ansco PB20 Plenax
- Document type
- User manual
- Language
- English
- Pages
- 9
- File size
- 1.0 MB
- Category
- Film cameras
- Document date
- Not specified in catalog
Search available document text
Find a term, then jump to its page in the original PDF. Image-only pages may not be searchable; check the PDF for exact wording and diagrams.
Page 2 · Read text
FOR FINEST RESULTS FROM YOUR
                             INSTRUCTIONS FOR THE USE OF THE     PLENAX CAMERA USE
                           PLENAX CAMERA

                                    The Agfa Ansco Plenax Camera has been so
                                                  scientifically designed that exceptionally fine results
                                             are easily obtained without special photographic
                                        knowledge. Before making any exposures, read the
                                               instructions through carefully. Additional information
                                may be obtained, if desired, by writing Agfa Ansco
                                           Corporation, Binghamton, New York, where a special
                                         department is maintained to give your inquiries
       P B 2 0 (2 1/4 x 3 1/4)                                         prompt, courteous attention. For more complete
           AGFA                                                 details on camera operation and picture-making, the
       PLENACHROME                                            reader is referred to "Better Photography Made Easy,"
            FILM                                          a particularly helpful, 6o-page booklet published by
   AGFA FILM IS GUARANTEED                                     Agfa Ansco Corporation and sold by most
           "Pictures that Satisfy                                          photographic dealers at $.25 per copy.
           or a New Roll Free"


The PB20 Plenax Camera takes 8 pictures 2 1/4X 31/4 inches or 16 pictures 1 5/8 x 2 1/4 inches on PB20 roll
film. A wide variety of six different Agfa roll films is available in this size, every film guaranteed-"Pictures that
Satisfy or a New Roll Free."

The six types include:
Standard-moderate speed for average conditions.
Plenachrome - higher speed, orthochroinatic, for better outdoor pictures on bright days and dull days.
Super Plenachrome-extreme speed, high orthochromatic sensitivity and wide latitude for outdoor work.
Superpan Supreme-an improved, high speed panchromatic film for pictures day and night.
Superpan Press -phenomenal speed for greater subject range with any camera.
Finopan-fast, panchromatic, with extreme fine grain for big enlargements.
View original page 2Page 3 · Read text
THE AGFA ANSCO PLENAX
                               CAMERA
                                WITH TRIPAR RECTILINEAR LENS
                                                    Explanation of numbers on opposite page.
                                  CHECK OVER THE CAMERA WITH
                                                 FIG. I BEFORE YOU BEGIN
                                                             1. Opening release button. Press in to open
                                                   camera.
                                                             2. Platform. Pull down after releasing catch
                                                                     (r) until side-arm braces (3) lock.
                                                             3. Side-arm braces. See that braces lock
                                                and hold platform rigid.
                                                             4. Closing release button. Similar button is
                                              on opposite side of camera. With the
                                                camera held between the thumb and middle
                                                          finger of the left hand, press the release
                                                      buttons on both sides simultaneously. With
                                                        the right hand, move platform upward until
                                                       securely closed as indicated by clicking of
                                                               latch.
                                                             5. Vertical footrest.
                                                             6. Focusing scale for various distances.
                                                             7. Diaphragm adjustment lever for
                                                         controlling amount of light entering lens.
                                                             8. Shutter adjustment lever for varying
                                                           shutter speeds.


9. Finger release for operating shutter. Press downward to make exposure.
10. Socket for addition of cable release for operating shutter. A cable release for this camera is available from
the Agfa Ansco Corporation if desired.
11. Brilliant finder. Turn for horizontal pictures. Return to vertical position before closing camera. Swing mask
marked "16" upward to obtain range of view for full sized pictures.
12. Bellows.
13. Winding knob for advancing film.
14. Tripod sockets. (Only one shown-other on front of platform). Remove screws with small coin to insert
threaded screw on tripod head.
15. Release catch for opening back.
16. Direct view finder, for full-size or half size pictures.

TO OPEN THE CAMERA
To open the camera, hold it in the palm of the left hand and press the opening release button (11, Fig. r) with the
left thumb. With the right hand, pull down the platform (2) until the side-arm braces are locked firmly in place.
View original page 3Page 4 · Read text
TO CLOSE THE CAMERA
Be certain, first, that the half-size mask on the brilliant finder (II) is down and that the finder is in a vertical
position.
To close the camera, grasp it in the palm of the left hand and simultaneously press the two closing release
buttons (4) with the thumb and middle finger. With the right hand then move the platform upward until it is
securely closed as indicated by a clicking of the latch.
Repeat the operation of opening and closing the camera until you can do it easily and deftly. Never force the
camera at any point. If any obstruction is encountered, stop at once and determine what is in the way.

FOCUSING
The focusing scale will be found on the face of the lens mounting, next to the lens, and will be identified by the
series of figures running from 5 to 100, as may be seen in Fig. 2. If the object to be photographed is 15 feet
away, revolve the lens barrel until the figure 15 is opposite the indicating line above the word "Tripar" on the
lens barrel. Distances from the lens to all objects from 5 to 10o feet should be estimated approximately and set
off on the scale. For subjects at a distance of 10o feet or greater, the indicating line should be set at 10o.
To use the camera as a fixed-focus camera, set the lens barrel at 15 feet. When camera is used as a fixed-focus
camera, set all indices on figures in red. Sharper pictures will result, however, if the lens is focused according to
the index.


                                           Lens Mounting
                                THE SHUTTER
                                           The shutter is the mechanism which actually
                                           makes the exposure when taking a picture.
                                              Simply expressed, it does nothing more than
                                                uncover the lens for a very short period of
                                                  time so that light from the object
                                                photographed may pass through the lens and
                                                        project an image upon the film. However, it
                                                does this uncovering job with a very high
                                                  degree of accuracy and with a suitable range
                                                         in speed. Thus the portion of light admitted
                                                  through the lens may be a very small one,
                                                such as that when the shutter is operated at
                                              one hundredth of a second, or a larger
                                                      portion such as that when the shutter is
                                                    operated at a twenty-fifth of a second.

                               TO REGULATE THE SHUTTER SPEED
                                            Along the top of the lens mounting (Fig. 2,
                                               page 7) is a row of figures and letters-T, B,
                                                   100, 50 and 25. T means Time, B means
                        Fig. 2                                                   Bulb, and 100, 50 and 25 indicate 1/100,
                                                  1/50
                                              and 1/25 second respectively.


To set the shutter for any of these speeds, move the pointer (8, Fig. r) to a position directly over the desired
figure. In the shutter illustration, Fig. 2, the shutter is set for 1/25 second, the standard snapshot speed, and
shown in red on the dial.
View original page 4Page 5 · Read text
In addition to these figures on the front plate of the shutter, identically corresponding figures will be found on
the top of the shutter as an aid in changing the settings without moving the camera from the waist-level position
when focused on a subject.
The shutter is operated, or "tripped," by the finger release (g, Fig. r) or by a cable release if such has been
added. Care must be taken when the release is pressed down in making an exposure not to jar or move the
camera. If the camera is moved, a blurred picture will result. Holding the opened camera in the palm of the left
hand, its back held firmly against the body for support, practice the shutter operation until you are certain
exposures can be made without moving the camera.
When the shutter is set for 1/25, 1/50 or 1/100 second, a single pressure on the release
lever trips the shutter, opening and closing it.

When the shutter is set for B or Bulb (a term surviving from the days when the shutter was operated by a rubber
bulb), it stays open as long as the lever remains depressed, and closes as soon as the pressure is released. Bulb is
used for comparatively short time exposures, as for example, when light conditions do not permit the use of an
instantaneous exposure. Since it is impossible to hold the camera perfectly still in the hand for any length of
time, the instrument must be used on a tripod or other firm support when Bulb exposures are made. This is true
of all expo
exposures longer than 1/25 second.

When set for T or Time, one downward pressure opens the shutter, following which a second pressure is
necessary to close it. In other words, the lens remains open the full time, however long, between the two
operations of the lever. T is used for interior work and longer exposures, such as may be counted with the
second hand of a watch. Bulb or Time exposures should never be made of moving objects. The addition of a
cable release is especially valuable for time exposures to prevent danger of moving the camera.

THE DIAPHRAGM
The diaphragm is an adjustable circular opening within the elements of the lens which controls the amount of
light passing through the lens. When the diaphragm is adjusted so that the full aperture of the lens is utilized, it
is said to be "wide open." When the diaphragm is adjusted to its smallest opening, it is said to be "stopped
down."
This diaphragm is operated by means of the lever, (7, Fig. 1), also shown on Fig. 2 set under the numeral r6.
This lever is connected with a pointer on the opposite side of the
shutter which moves along a similar row of figures on the flange at the top of the shutter. Thus, the diaphragm
setting may also be read from above while holding the camera at waist level.
In order to view the operation of this diaphragm, set the shutter speed on Time and press down once on the
finger release. Then, with the shutter open, move the diaphragm lever at the bottom of the shutter back and forth
slowly, and you will be able to observe the change in the size of the opening as the lever moves.
The stops or settings indicated along the bottom of the shutter face plate and along the top flange are standard
openings in the Focal or "f System," and are of known exposure value regardless of the size or make of camera.
They are referred to as f:1111, f:16, f:22, f:32.

PROPER EXPOSURE
In figure 2 the stop indicator is set for opening f:16. With bright sunshine and a speed of 1/25 second, this is the
opening for average pictures on Plena chrome Film. For twice as much exposure, which will be necessary on
gray or cloudy days, the diaphragm may be opened to f:111. For half as much exposure, which will be required
when taking pictures with intense sunshine, the speed may be increased to 1/5o second or the diaphragm
opening reduced to f:22. It is evident, then, that the lower the number, the larger the opening, and of course, the
larger openings let through more light, giving greater exposure within the same shutter speed.
View original page 5
Page 6 · Read text
In general, close-ups require a greater exposure than distant scenes; winter conditions necessitate longer
exposures than bright summer days. Pictures taken with extremely in
tense light, such as sunlit beaches and brilliant snow scenes will require less exposure than normal.
Greater detail will result in your negatives when a smaller diaphragm opening is used. With the camera focused
at 100 feet and the diaphragm set at f:11, everything from 17 feet to Infinity will be sharp and in focus. When
the camera is focused at i00 feet and the diaphragm set at f:16, everything from 13 feet to Infinity will be in
focus. Thus it is seen that the depth of focus, or the range of distance over which the picture is sharp and in
focus has been increased by reducing the opening of the diaphragm.

THE FINDER
The Plenax camera is equipped with a brilliant finder for locating the subject with the camera held at waist
level.
The brilliant finder requires little explanation. When making 16 exposures to the roll it is used with the small
mask marked r6 down. When full-size exposures are being
made, the mask must be raised upward and to the front in order to utilize the entire finder.
When making full-size exposures in the vertical position, read the finder as shown in Fig. 3, and when taking
pictures in the horizontal position, swing the finder go degrees to the left and read it as shown in Fig. 4,
disregarding the portions indicated in the cuts by white space.
Always remember to lower the mask and return the finder to the vertical position before closing the camera.
Otherwise, they will become jammed and possibly thrown out of alignment.


                                           Incidentally, it must be understood that in the exposure of
                                           half-size pictures, when the camera is in the vertical
                                           position, horizontal half-size pictures are taken, and vice
                                          versa. This point will be better understood when the
                               mask for reducing the film size is described at a later point.


THE FOOTREST AND TRIPOD SOCKETS
The vertical footrest (5, Fig. r) is for taking Time or Bulb exposures when a tripod is not available. The footrest
is easily extended by pulling it out at right angles to the platform, after which the camera may be set upon a
table, ledge, or railing for support.
In order to use the tripod sockets (14, Fig. I) it is necessary to first remove the plug screws. This may be done
with a small coin, after which the tripod is screwed securely into place. The screws should be replaced after
removal of the tripod in order to protect the interior of the camera against dust or other foreign matter which
might prove injurious to the shutter mechanism.
The vertical tripod socket is located in the center of the camera platform; the horizontal socket is on the camera
side plate below the film winding knob.
The vertical footrest or a tripod should always be used for exposures longer than 1/25 second rather than
attempting to hold the camera in the hands.
View original page 6Page 7 · Read text
LOADING THE CAMERA
                              To load the camera, it is first necessary to open the back
                                  which is held by a catch (r5, Fig. I) at the top under the
                                        handle.
                                        In order to release this catch, hold the camera in the left
                                      hand, platform side in and handle to the top. Then lay the
                                          fingers of the right hand across the camera handle and
                                         exert an upward pressure upon the under front edge of the
                                     long metal catch (Fig. 5). When this catch has been
                                          released, continue with a backward pressure to swing the
                                     hinged camera back downward.
                                    Repeat the operations of opening and closing the back until
                                 you can operate the catch easily and deftly.


                       THE MASK FOR HALF-SIZE PICTURES
                                    Before loading the camera it is essential for you to
                                     determine the size of pictures desired for the particular roll
                                     being loaded. You have the choice with the same roll of
                                           film, between loading the camera for 8 full-size pictures or
                                           for r6 half-size pictures.
                              Upon opening the camera back for the first time you will
                                         notice a black rectangular frame (I, Fig. 6) between the
                                        film rollers (2, Fig. 6). This frame or mask determines the
                                          size of the exposure made on the film. When it is in place,
                                         the picture size is reduced by half, and i6 exposures to the
                                                roll are obtained. When the frame is lifted out and entirely
                                 removed from the camera, 8 full-size exposures are
                                      obtained from one roll.


Due to the fact that the film is stretched on top of this mask, decision as to the picture size should be made
before the camera is loaded, for it is necessary to continue this size picture until after the roll has been fully
exposed.
Upon the removal of the mask for full-size pictures, care should be taken to place the metal frame where it will
not become lost or bent. However, a new mask can always be bought from your dealer.
View original page 7Page 8 · Read text
INSERTING THE FILM
                                 With the back open you are now ready to load the camera
                                     with film. Note that the fresh roll goes into the lower
                                  chamber at the opposite end of the camera from the
                                   winding knob. In the chamber at the knob end, you will
                                         find an empty metal spool. It is onto this spool that the film
                                                  is wound as used, so that when all exposures are taken it is
                                              this top spool which is removed from the camera for
                                           finishing.
                                                       It should be remarked at this point that the small, compact
                                          size of your Plenax Camera requires film wound on the
                              new small metal spool, designated by the Agfa Ansco
                                      Corporation as PB20. Be sure to ask for the thin metal
                                         spool, as this camera will not accommodate film wound on
                                         the ordinary larger wooden film spool.


               To load the film into the camera, first swing up the spool carrier for the lower
                    or empty chamber until it is at right angles to the camera. Holding the two ends
                    of this carrier slightly apart (being careful not to bend them permanently out of
                      position), drop the fresh spool into place, taking care that it is inserted right end
                   around. In other words, be certain that the pointed end of the paper will come
                 from the top and not the bottom of the roll, and that only the red or green side
                    of the paper will show, the black side being toward the lens.


After being certain that the two pins set in the carrier ends are engaged in the spool end holes, swing the carrier
and film down into place in the chamber. Break the sticker which seals the roll, remove the Agfa Film guarantee
slip, and carry the end of the paper across the back of the camera, and across the black metal mask if it is being
used. Permit the paper to pass over the two metal rollers (never attempt to thread the film under these rollers)
and thread the pointed end into the slot in the empty spool as shown in Fig. 7.

Be very certain that the paper is centered on the upper spool in order that it will wind evenly. Now give the
winding knob a few turns, sufficient to bind the paper and assure its firm grasp by the upper spool. Close the
back of the camera by swinging it upward into place until a click indicates that it is locked securely. Never open
the back of the camera from this point until the roll has been completely exposed.
Swing open the No. I Peephole cover (Fig. 8), and continue turning the winding knob slowly until the figure I
appears in this lower peephole. An indicating hand and row of dots will be seen shortly before this first figure
appears in place.
The camera is now ready for the first picture.
When using Panchromatic film, which is sensitive to red light, be sure to keep the red windows covered at all
times except when winding the film.
View original page 8Page 9 · Read text
If eight full-size exposures are being taken and the masking frame has been entirely removed from the camera,
only the No. I or lower peephole is used throughout. In which case, immediately after taking the first picture,
wind again until figure 2 appears in the lower peephole, and so on until the roll has been completely exposed,
after which continue to turn the knob until the red or green paper is completely wound off onto the spool at the
knob end of the camera.
Where sixteen half-size exposures are desired and the masking frame has been left in the camera, both the No. r
and No. 2 peepholes are used. The first exposure is made with the figure I at the lower window. After a picture
has been made with the film in this position, the winding knob is then turned very slowly (only about one full
turn of the knob necessary) until the figure I appears at the upper or No. 2 peephole. For the third exposure the
figure 2 is at the lower window, for the fourth it is moved to the upper, and so on until all sixteen exposures
have been made. In other words, one exposure is made with each of the eight numbers at both windows.

UNLOADING
When the film has been completely wound onto the knob spool, open and swing down the hack of the camera.
Pull out the winding knob until the upper spool carrier is free to be moved upward from the chamber.
Fold under the pointed end of the red or green paper, and seal the spool with the sticker which will be found at
the loose end. This is to prevent unrolling and fogging of the film after it has been removed from the spool
carrier.
With the fingers, separate the ends of the spool carrier slightly and remove the exposed roll from the camera. It
is now ready to be developed and printed. Transfer the empty spool to the upper chamber, remembering to push
the winding knob back into place. The camera is now ready for the insertion of a fresh roll of film in the manner
already described.

CAUTIONS
Your Plenax Camera may be loaded or unloaded in daylight, but not in direct sunlight.
Before , loading the camera, make certain that the shutter is closed.
In starting the red or green paper at the time of loading a fresh roll, always see that it is even, fitting the spool
neatly. Otherwise, it is likely to climb up one end of the spool, causing the protective paper to tear and possibly
fogging the film.
Also, always make it a practice to wind to the next number immediately after taking a picture. In this way
double exposures are prevented.


Always hold the camera level and perfectly still when making the exposure.
Keep the lens of your Plenax Camera clean. A dirty lens or rain or mist on the front lens will cause fogged or
cloudy pictures. To clean the lens, use a soft linen or cotton cloth.
Do not let the sun shine directly on the lens when taking a picture. If photographing towards the source of light,
hold your hand or hat above the lens as a shade, but sufficiently high to prevent its being included in the picture.
Select your background carefully. A good subject can be spoiled by such backgrounds as telephone poles,
clapboard houses, etc. Keep your backgrounds simple. A background of foliage is usually unobtrusive and
pleasing.
Portrait attachments, color filters, and cable releases which are available for Plenax cameras greatly increase
their versatility.
View original page 9
From the M. Butkus archive. Original publisher and archive notices are retained.
Check the model and edition against your equipment.
PDF verified 2026-10-10.