Film cameras
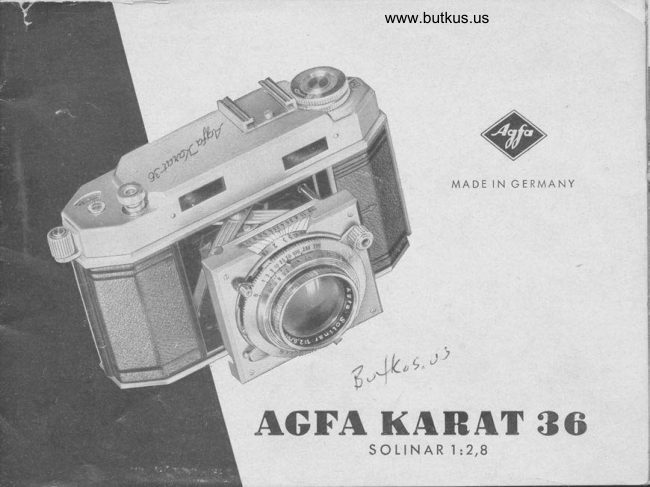
Agfa karat 36 User manual
User manual for Agfa karat 36. 38 pages in German. Read the original PDF, download or print a copy without registration.
38 pagesGerman2.7 MB PDF
Loading your manual…Open PDF directly
Document details
- Brand
- Agfa
- Model / document
- Agfa karat 36
- Document type
- User manual
- Language
- German
- Pages
- 38
- File size
- 2.7 MB
- Category
- Film cameras
- Document date
- Not specified in catalog
Search available document text
Find a term, then jump to its page in the original PDF. Image-only pages may not be searchable; check the PDF for exact wording and diagrams.
Page 1 · Read text
www.butkus.us


                      MADE IN GERMANY


       6AL"'
AGFA KABAI 86           SOLINAR 122,8
View original page 1Page 3 · Read text
Film lndicotor


 Accessory Shoe


  Ropid Winding Lever


    Film Counter


     Finder Eyepiece


       Rewind Button

          Lock for
        Comero Bock
View original page 3Page 5 · Read text
AGFA KARAT 36

   lieferbor ouch mit                              verkriigbor ook met
   ovoiloble olso with                             kon erhollos dven med


                                mm AGFA SOLAGON    122.0i 50

                                mm AGFA  SOLINAR     l:2.8 150


l4l dehsch - 0253      AGFA CAMERA WERK MUENCHEN
View original page 5Page 6 · Read text
www.butkus.us


DEAR READER  I
We would like you to moke friends with your new Korot 36, ond we therefore invite
you to go corefully through this instruction booklet with us.
It will be well worth your while, for once you ore fomilior with the vorious operotions
                                                                                 36of your comero, you will soon toke successful pictures. The designers of the Korot
hove tried from the outset to moke the comero os fool-proof os possible. But remember,
otl the sqme, thot you ore hondling o precision instrument which needs o certqin
omount of core in monipulotion.
Devote o little time to your new componion right from the beginning. Stort off without
o film in the comero. Try focusing on vorious distonces, ond operote the ropid winder.
                                                                  confidence inAfter only o few ottemps, you will be surprised ot the feeling of
hondling the comero   so essentiol for toking octuol pictures loter on. Your Kqrot 36                     -                          of 35 mm. film for 36 or 20 or. 18 exposures 24x36 mm. uses the stondord cossettes
(opprox. 1 x1t/2 inches).

4
View original page 6Page 7 · Read text
OPENING THE CAMERA
BACK

To open the comero bock, pull out
the smoll proiecting lotch (Fig. 1) in
the direction of the orrow. This is
eqsier if you press the bock ond
bgdy togelher'in the some wqy <ts
when closing the comero loter on.
No* open the bock, preferobly withthe cqmero lying lens down on
something soft.


                  FIGURE  I
View original page 7Page 9 · Read text
Fold_up the hinged flop (Fig._2) over the sprockel wheel, ond you ore reody to iood
the film. When inserting the fresh cossette    preferobly in subdued light           pullout the rewind knob. When the cossette is- in position, push the knob bqck,--fullyturning
ii slightly ot the some time so thot it engoges the core of the cqssette spool (Fig.3).
Now guide the norrow tongue ot the beginning of the film into the slit of the foke-up
spool. Push in the film up to the second perforotion hole, hooking the smoll tooth of
the spool into the perforotion to onchor the film.
View original page 9
Page 10 · Read text
www.butkus.us

FIGURE 4


Turn the toke-up spool until the film is tout
(Fis. a).
Only obout o 3/e inch length of the Iwll
wi.dtb of the film should protrude from
the cossette.
View original page 10
Page 11 · Read text
Now you con close the comero
bqck. But first fold d,own the
hinsed flap in the middle of the film
trqck over the film. The film must be
properly centred between the sides
of the film chqnnel, with the per-
forotion holes engoging the teeth
of the sprocket wheel.
Close the bock by firmly (but not
forc.ibly) pressing  it ogoinst the body
until the lock engoges (Fig.5).


                   FIGURE 5
View original page 11Page 12 · Read text
www.butkus.us

Finolly, set the film counter to "A" by pressing o finger on the milled button ond
turning it clockwise (Fig.6).
View original page 12
Page 13 · Read text
oPEN ING TH                  F.cAIERA: You.con only work fhe ropid winder rvhen the lens
           sprlng:r^-::l"f:*-ilour (rn cotdq::l1io1,forweother youpicruremoy rokins-hove toere's9ossistthe-rotchit by o gentler".rro*pull).i[LSeer"nlFig.7.#;"i-i;

                                                                                                                          l1


I
View original page 13Page 14 · Read text
www.butkus.us

                                      FIGURE 8


Now you con get the looded film reody'qsfor the first exposgle. -lu$ .bock the ropid                                                                           (F-iq,8)..This odvonces the;;;";  *itn-i"Ji thumb or index fing.9r    for os.it will g"
frlm ond oi tti" some time outomoticdlly tensions the shutier. Fully depress the releose
button with the tip of your index finger (Fig.9).


12
View original page 14Page 15 · Read text
Moke onother blind. gxposure in the some woy;  i. e. wind ond releose. The film counter
now points to the division before No.1
View original page 15
Page 16 · Read text
www.butkus.us

THE DOUBLE EXPOSURE LOCK
The Korot 36 contoins o clever locking mechonism which prevents double exposures
ond blonk fromes. After every exposure the releose button is locked, o.nd..only works
ogoin ofter the film hos been odvonced by one frome by meons of the winding leverl

THE SHUTTER
The movement of the winding lever ot the some time outomoticolly tensions the Compur
shutter. The shutter speed should therefore be set beforehond.
                                                                                the resislonce                                                                           fensioned,                                                                                            of the                                                                                       is                                                         the shuller                                          Once                                                  setting.                                 second        This                         the 1/aoo                        for               is essentiol
                                                                        setting                                                                                   shulter speed                                                                                        to 1/roo second.                                                                         the                                              when                                    hord                                              ld ovlrcome                                    ii-very         Uuiif-in                           ipring                odditionol
                                                                                       50To.100set the shutter speed, furn the outside milled ring with the figures 1 2 5 10 25    250 500 on it iFig. i01. These numbers signify froctions of o second; for instonce,
2 stonds for o rlz seco-nd,50 for 1/ro second, ond io on. Set the required speed.ogoinst
the block triongulor index mork on the neighbouring milled ring,(1/ro second in our
illustrotion). Th; "8" setting serves for time exposures with o tripod.
All the scoles of the Korot 36 con, incidentollY, be reod off from obove.
The Synchro-Compur shutter of the Korot is speed .synchronized, ond, corries o floshsocket for conneciing o flosh coble, os well os o synchionizing  lever with two po^sitions,
"X" ond "M" (see iliustrotion on poge 16). Th.is qllows the.use..of oll types of. flosh. qtthe fostest shutter speeds. How ii works'is described in detoil in ihe speciol section
on Speed Synchronizotion on poge 26.

14
View original page 16Page 19 · Read text
APERTU RE _ SHUTTER SPEED  DEPTH OF FIELD                                 -
Tosetthe operture, move the operture lever (Fig. l1). This moves o smoll poinier over the
operture scole corrying the following operture numbers, 2.8 4' 5.6 8  'll   16
APERTU RES. Before choosing the right operture we hove to go into o little moredetoil obout the woy it works. The roys -oming from the subieci firit meet the lens oper-
ture which ot o lorge opening lels thiough o i'ot, ond qt o smoll opening o litile, of'the
light folling,on  it. The omount of light tionsmitted  is, however, olwoys"only o froction
of thot reo-ching ihe lens.
The fig.ures on the operture scole os listed obove ore so orronged thot, beginning with
the full opening  f 12.8, eoch succeeding number holves the effeitive light pdssed."
EXPOSU RE TIME. The omount of. light required to reproduce o given subiect on
the film is fixed. The exposure time ond operture ore therefore dependoit on eoch other.
In choosing the operture qnd shutter speed we hove to preserve this relotionship:
High ope.rture numbers coll for slow shutter speeds (long exposure times) ond low oper-
ture numbers need fost speeds (short times).
For instonce, your exposure toble moy indicote on-exposure of 1/,x second of operture  8.
lf, however you wont to use l/so second to ovoid comero shoke, the operture must let
more lig,ht through to the lens to compensote for the shortened'exposure time. There-
fore set  it to the lower number 5.6.


                                                                                              17
View original page 19Page 20 · Read text
www.butkus.us

DEPTH OF FIELD. In oddition to the exposure, the operiure olso determines the
zone of shorpness in front of, ond behind, the focused distonce. Smoll opertures
(stoppinq down) oppreciqbly increose this zone of shorpness, giving whot is colled
                                                                                                                                                 isi;."i,i djpth of fie|il. The depth of field olso increoses the.forther oyoy the subiec-ff-rom. the cqmero. The operiure ond the distonce focused on ore therefore the two
foctors governing the defth of field. The resulting zones of shorpness for the vorious
settings ore given in the toble on poge 35.
Controry to the illustrofions on the inner poges of this instruction booklet the new model
of Koroi 36 hos, insteod of o depth of held ring, o depth of field indicotor os shown
in the figure below.
Two sets of operture numbers ore orronged symmetricolly. to -the left ond. right of thefocusing morli. The corresponding divisi5ns, [ointing to ihe focusing-scole, show. th.e
limits oT the zone of shorpness of ony settingj. ln oul illustrotion the focusing scole is
set to l0 feet.
                                By following thethe lineslines correspondingcorresponding toto thethe
                                  twolwo figuresfigures B, we thus see thot the depth of
                                              field of operture 8 extends from 6 to qbout
                                 20 feet, or ot operture  ll  from 5 to obout
                                      30 feet.
                                  For the soke of clority the indicotor hos
                                  been colculoted for o circle of confusion of
                                              1/soo inch (0.05 mm.). The figures given ore
                                          therefore on the generous side, ond for more
                                         occurote work thevolues of the Depih of Field
                                     Toble (pog" 35) should be used.
View original page 20Page 21 · Read text
To increose the reodiness for oction of the Korot under'good lighting conditions ond to
simplifyfheuseoftheoperturesettings,thecomerocorriesoTWO-POINTSETTING.
 I you set ihe pointer of the operfure lever to the red dot between 8 ond 11, ond thefocusing- s^cqlg to the l0 feet or 30 feet mqrk    olso in red   you obtoin the followingdepth of field zones:                        -             -
           Focus on 30feet: Everything shorp from l5feet to CC.
           Focus on l0feet: Everything shorp from Z to 15feet.
GETTING READY TO SHOOT
THE COUPLED VIEW
AND RANGEFINDER

The view ond rongefinder
is very eosy to use. Hold
the eye close to the eye-
piece, ond get hold of the
focusing lever with the
second ond third fingers
of the left hond (Fig. 12).


           FIGURE 12
View original page 21Page 22 · Read text
www.butkus.us

                                                                                                     F rG. r3/r4


 lf you pull this lever up or down, you will notice thot the imoge seen through the eye-
pi6ce is split horizontolly in the middle. As soon os the two holves ioin up, the comero  is
focused otthe correct distonce os shown by Figs. 13 qnd 14. The distonce is olso shown in
the smoll cut-out on the lens ponel. You con, of course, equolly well focus in the reverse
order: estimofe the distonce, set the lens, ond check through the rongefinder whether the
setting is correct. With horizontol shots focus on verticol lines, with verticol shots on
horizontol lines of the subiect.


20
View original page 22Page 23 · Read text
THE PARALLAX ERROR. The finder shows o reduced imoge of the subiect qs it will
oppegr on the.film.. With close-ups, however, the view of the finder does noi correspond
exoctly with the film imoge, becouse the finder is situoted obove the comero lens. In
 proctice this is only noticeoble with subiects between 3 ond 6 feets owoy. To compen-
sote for.the.error, goinJ the c-omero slig.htl.y up for horizontol shots, ond'turn it sligjhtly
in the direction of the finder for verticol pictuies.

THE EXPOSURE
Just before toking the picture.check the setting of the operture, shutter speed, ond
distonce. Pull out ihe ropid winding lever once more os for <is itwili go, or described on
poge 12. This odvonces the film counter to No. 1, tensions the shutter, ond of the some
time odvonces the film by one frome.
     The rewind knob turns every time you odvonce the film, do not therefore hold it
      while winding.

HOR IZONTAL SHOTS
Fig.12 shows the best woy of holding the Korot 36. Grip the comero with both honds,
leovin-g the r.ight i.ndex._finger free to operote the releose button, while the finger tips of
the left hond hold the focusing lever for ony lost-minute focusing odiustmentithot'moy
be required.
View original page 23Page 24 · Read text
www.butkus.us

                               FIGURE 15


                      UPRIGHT SHOTS
                                                 Fig.'15 shows the mosi convenient position
                                            of the honds for uprighf pictures. Moke sure
                                            thot the left hond holds bock the lid of the
                                           ever-reody cose to prevent itfrom obstructing
                                          the lens. With both cqmero positions  ii is up
                                     to you whether you put the left or right
                                  eye to the finder eyepiece; the importont
                                         thing is to stond firmly, hold the comero
                                                 steo"dy, ond smoothly cind gently press the
                                          releose button right home.


22
View original page 24Page 25 · Read text
FIGURE'16


CLOSING THE KARAT
Pull bock the lotch, o1d pu,$ the.lens ponel bock into the body pressing evenly on theleft ond right hond edgei (Fig. t6).
View original page 25
Related documents and language editions

From the M. Butkus Camera Manual Library. Original publisher and archive notices are retained.
Check the model and edition against your equipment.
PDF verified 2026-10-10.