Film cameras
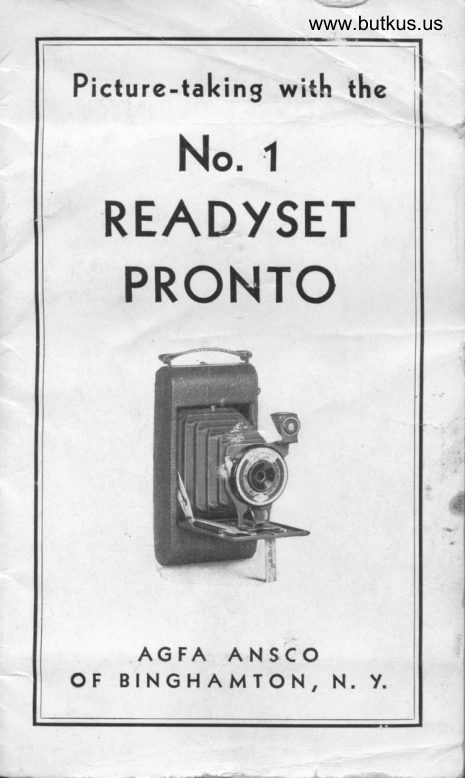
Agfa No. 1 Readyset Pronto User manual
User manual for Agfa No. 1 Readyset Pronto. 12 pages in English. Read the original PDF, download or print a copy without registration.
12 pagesEnglish1.6 MB PDF
Loading your manual…Open PDF directly
Document details
- Brand
- Agfa
- Model / document
- Agfa No. 1 Readyset Pronto
- Document type
- User manual
- Language
- English
- Pages
- 12
- File size
- 1.6 MB
- Category
- Film cameras
- Document date
- Not specified in catalog
Search available document text
Find a term, then jump to its page in the original PDF. Image-only pages may not be searchable; check the PDF for exact wording and diagrams.
Page 3 · Read text
www.butkus.us
   NO.    READYSET   PRONTO

     PARTS OF THE
          1 READYSET PRONTONO.
 1. Catch for locking platform to body of camera'
                                               Reverse 2.  Finder, in position for vertical pictures.
       it for horizontal pictures.
 3, Indicator for setting shutter at Instantaneous or
     Time.
  4.   Shutter.
   t.   Finger-holds for pulling out lens standard and
      retiring same to close camera.
   6.  Tripod socket.
  7.   Footrest for pictures by Time exposure.
   8.  Stop to which lens standard must be pulled out            5!
      to take pictures.                                              {
  9.  Side-arm brace. A similar brace is on the other
        side.
 10. Shutter trigger.
  I 1. Catch for bpck.
 12. Key for winding film.
View original page 3Page 4 · Read text
Venmo @mike-butkus-camera  Ph. 2083
PayPal Name  Lynn@butkus.org      www.PayPal.me/lynnbutkus
View original page 4
Page 5 · Read text
PICTURE-TAKING           \TITI{    THE

        INSTRUCTIONS FOR USE
fHE   No. 1 Readyset Pronto camera is daylight-  I   loading. This means that it can be loaded prac-
tically anywhere except in the open sunshine, which
should always be avoided when putting in or taking
out the film.   If   it  is not convenient to load the
camera in the house or on the veranda, step under
the shade of a tree or into the shade of a doorway,
or, if out in the open, turn so as to shade the opera-
tion with your own body. The point is to avoid the
intensity of unobstructed sunlight.
      TO OPEN THE CAMERA
T.\O OPEN the No. I Readyset Pronto, pull out the  I    footrest (7, Illustration 1) until  it  is at right
angles with the body of the camera. This unlocks the
platform, which may now be lowered; when it is at
right angles with the body of the camera the side-
arms will catch and hold it firmly in position.
  Now, grasp the finger-holds at the base of the lens
standard  ( t,  Illustration  1 ) and pull out standard
 along the track as far as it will come (Illustration  l).
The camera is now focused and no further attention
need be paid to the front extension until  it  is time
to close it.
       LOADING THE CAMERA
''fO  LOAD the No. 1 Readyset Pronto first remove  I   the back by releasing the catch at top (11, Il-
 lustration 1). In the spool-holder carrying the wind-
 ing key you will find an empty reel. In the opposite
 spool-holder snap a fresh roll of Agfa All-Veather
View original page 5Page 6 · Read text
www.butkus.us
        NO.    READYSET  PRONTO


                      www.butkus.us
                               Illustration  2
      Film (Iliustration 2) and carcy the protective paper
n      across the back of the camera, threading  it into the        slot in rhe empty spool.
l


                             Illustration 3
      Be sure the paper winds over, with red or orange                 .
       side out (Illustration j),  and that it  is centered  o-.,
      the receiving spool. Give a few half rurns, jtr*
      enough to bind the paper. Now, pur rhe b"ck'on
       again so that it holds at the bottom first,-th"snap the       catch at rhe top, and wind the key until      hgrrr"
View original page 6Page 7 · Read text
ry

PICTURE-TAKING           \7'ITFI     TI{E

1 appearc in the red peep-hole in the back of  the
camera. The camera is now ready for taking  the
first picture.

     WIND AFTER EACH PICTURE
TMMEDIATELY  after taking each picture, wind I  film until the nexr number appears in the peep-
hole. After taking the sixth picture, turn the key
until the roll is completely wound onro the key spool.
Then open the back, and, sealing the roll with the
sticker found in the empry chamber, remove it for
finishing. '$/hen the empty spool has been transferred
to the opposite chamber, the camera is ready for
reloading with Agfa All-Veather Film.

      TO CLOSE THE CAMERA
aLOSING the camera is merely the reverse of open-\.i   ing is. Grasp the finger-holds ar rhe base of the
lens standard  ( t,  Illustration  I ) , and push lens
standard gently back along the track into the body
of the camera as far as it will go.
 Now holding the gamera in both hands with the
lens towards you, pfss backwards (i.e. towards the
back o1: the camera) with the thumbs pressed on
side-arm braces, (9, Illustration I ) until they release                   {
at top, whereupon, by pressing the platform gently          \
against your chest, it will readily close.. To lock the
platform to the body of the camera, raise foorrest,                        I
 (2, Illustration 1) to right angles with camera, press
platform firmly into position, and lower footreit.

                         6

                    i-,t.,-P,"";  ;:r*.
View original page 7Page 8 · Read text
www.butkus.us      NO.   REF"ADY SET  PRONTO

             THE FILM TO USE
    tf1HE No. I Readyset Pronto takes pictures 2f, x 3l
        I    inches. and in it mav be used roll film of any
      reputable make. Ve strongly recommend B 2 Agf'a
     All-Veather Film for the best results. Its high speed,1l     wide latitude, and all-weather qualities are to your
     advantage. And don't forget rhat Agf.a film is guar-
                                                                        f.ree." I    xngssd-"pictures that satisfy ot a new film     There is a guarantee bond with every roll.

               Pointer set for                 Pointer set for
               snqpshots                  time exposureg


                 ,            Illustration 4
     TO SET AND OPERATE THE SHUTTER
     FJa "     HE Illustration 4 explains the setting of the shut-                         set the pointer (3, Illustration 1)  I      l-   ter. Simply
 /    ,o Instxntaneous or Time, as desired. Vith the pointer                                      necessary only to de-  f'    set for Instantaneous, it is now  I    press the shutter-trigger  ( 10, Illustration 1).  '    opens and closes the shutter for a snapshot exposure.This
      Just press gently down until you hear shutter click.
View original page 8Page 9 · Read text
PICTURE-TAKING              \7'I T H   TI{E

  Vhen the pointer is set on Time, one pressure on
the shutter-trigger opens the lens and a second pres-
sure is req.tireJ to close it.  Thus a Time exposure of
any duraiion can be made. For taking Time expo-
                                                           asures it is of course essential that the camera be on
tripod or other firm support, such as a table-top 9r
                                                    thefoit,-.tpor.rr"which will prevent movement of it while            is in progress. Time exposures are called for
 *h.n.rr., the light on the subject is not bright enough
to give sufficient exposure with a snapshot, 2s, for
 example, indoors.
  Try both Instantaneous and Time actions until you
are thoroughly familiar with them before loading
 your camera.
        TAKING SNAPSHOTS
 f N TAKING snapshots, hold the camera'firmly  in
 I  both hands with lens pointed towards subject,
 which, if a figure, should not be closer to the camera
 than 10 feet. Have the sun shining on the subject-
 not on the camera. That is, keep the sun either behind
 you or at one side of you as you take the picture'
 Vith  the pointer set for Instantaneous' locate the
 subject in the finder (2, Illustration 1) and- press the
 shutter-trigger. Immediately after taking the picture
 this way, wind the film until the next number ap-
 pears, after which the carneta is ready for another
 exposure.
  A word as to the finder (2, Illustration 1).  This
 is reversible so that pictures may be taken with the
 camera held in either vertical or horizontal position.
 To bring the finder into position for horizontal pic-
View original page 9Page 10 · Read text
www.butkus.us
       NO.    READYSET   PRONTO


4


4aI


       Above-finder image as read Above-finder image as read
      when camera is in  position when camera is in  position
        for vertical pictures. Disre-  for horizonral picturei. Dis-
       gard position of image repre- regard position of image rep-
        sented here by white space.   resented here by white space.
                            Illustration I
       tures, simply pivot it around so that you can looh
    down into  it while holding the camera on its side.
       Illustration  i  explains how the view is seen in the
      finder, and should be read according to how the
     camera is held, whether for veruical or horizontal
      pictures. Lenses and mirror of finder may be cleaned
      occasionally by releasing back of finder.

       FOR THE BEST RESULTS FOLLOW
             THESE SIMPLE RULES
           l.  Never use force if parts seem to jam. proceed
           carefully and find cause for obstruction.
      2. Have camera in shade when loading. See that
           shutter is closed first.
View original page 10Page 11 · Read text
NO.    READYSET  PRONTO

                                                                                                                             j
                                                                                       -1  3.  Attach paper leader of new film to empty spool
     firmly and evenly. Fasten back securely.                                                                                .tj
                                                                                                                                                          I 4.  \[ind film to next picture immediately after
     taking a picture.
  t.  Do not let the sun shine on the lens.       1
 6.  Never make a time exposure while holding the                I                                                                   '{    camera in the hands.  -
 7,  Hold the camera level.                                                                          -l
                                                                                                          I
  8.  Hold camera steady when taking a picture. The
      slightest movement will cause blur.                          j
 9.  Don't try to get too much in one picture. Have                           1
     subject correctly placed in finder. Be careful
     that finder does not cut heads of persons. Take
     standing figures with camera held vertically,
     groups with camera held horizontally.
10.  Have your pictures developed soon after the   4
     film is exposed.
11.   Smile   and your subjict will smile too.                                                                                   .,d.tI           -                        A72.  Select a good finisher.
73.  Your camera has cost good money. Take care
     of it.
74.  Vherever you go, take your camera along. And
     don't forget that there are wonderful pictures
     to be had at all times around the home.
1t.  Use Agfa All-Veather Film. The size to ask
     for is B 2.
                                       *

                        IO


                                                          i*t
View original page 11Page 12 · Read text
www.butkus.us
THIS GUARANTEE BO N D
\TITH EVERY ROLL OF AGFA

      roilrc,;/,tLl'AL
      all-weather filn


              This Aglq All-\9eother Film          hss been mqnuf qctured
          undervery exqctingtesti,qnJ  I
           !o sure gle we of the user's
           sotisfqction thqt it is sold
            with the  f ollowing guqrsntee:
                            lf the results  f rom this film do
           not suit you, no lnqtter whoge
        moy be the lqult,  fill in your
           nqme,etc.,on  the reverseside
          of this gucrontee ond mqil
             to Agfq Ansco, Binghqmton,
           N. Y., with thc complete set
            of negotives, upon reeeiptol
          which we willsend you post-        pqid q new roll  |rce oj
          chqrge, together with sug-
            Eestions of reql help to you
          ln obtqining good pictureg
          wlth your cqmerq.


 Ask for 82 Agfa all-weather film
View original page 12From the M. Butkus Camera Manual Library. Original publisher and archive notices are retained.
Check the model and edition against your equipment.
PDF verified 2026-10-10.