Film cameras
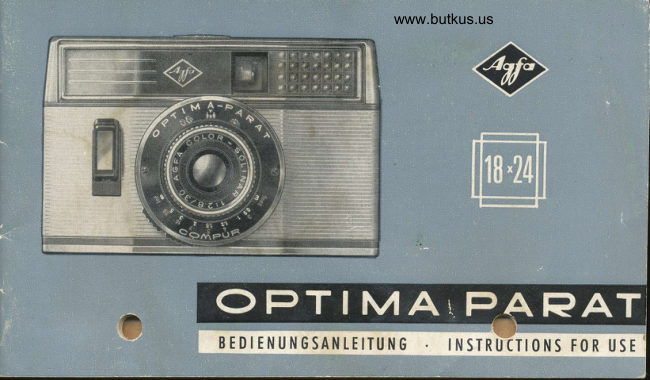
Agfa Optima parat User manual
User manual for Agfa Optima parat. 39 pages in English. Read the original PDF, download or print a copy without registration.
39 pagesEnglish7.2 MB PDF
Loading your manual…Open PDF directly
Document details
- Brand
- Agfa
- Model / document
- Agfa Optima parat
- Document type
- User manual
- Language
- English
- Pages
- 39
- File size
- 7.2 MB
- Category
- Film cameras
- Document date
- Not specified in catalog
Search available document text
Find a term, then jump to its page in the original PDF. Image-only pages may not be searchable; check the PDF for exact wording and diagrams.
Page 3 · Read text
/.ie6ez ploto$zean)

         Mit der neuen Agfo Optimo Porot hoben Sie eine volloutomotische Comero
          mit dem neuen Aufnohmeformot 18x24 mm erworben. Frei von komplizierten
         Hondgriffen k6nnen Sie sich gonz ouf lhr Motiv konzentrieren, denn diese
          kleine und elegonte Comero rechnet, denkt und hondelt ouch fiir Sie. Noch
           Einstellung der Entfernung geni.!gt ein Druck ouf die Mogische Auslosetoste.
             Gr(ines Signol im Sucher: Freie Fohrt fiir die Aufnohme.
                                                                        .|8x24        The Agfo Optimo Porot-o fully outomotic comero for the new       mm.
          Tinioture size-is now yours. Free from ony complicoted monuol operotions
        you con concentrote entirely on the subiect becouse this smoll ond elegont
        comero colculotes, thinks ond octs for you. After setting ihe distonce oll you
.        need do is press the mogic releose button. The green signol in the viewfinder
        meons "oll cleor" for your photogroph.


                         1
View original page 3Page 4 · Read text
www.butkus.us
Dqrqn sollten                                           erreicht wird. Der Leucht-
                                              rohmen im Sucher erinnert        Sie denken:                                                                 stets on diese Totsoche.

                      A point to remember
                                                        Unlike the stondord 24x36
                                        mm. minioture size, oblong
                          lm Gegensolz zum Kleinbild-   photos in the 18x24 mm.
                       formot 24x36 mm erzielen    size ore obtoined by hold-
                     Sie dos meist bevorzugte   ing the Optimo Porot ver-
                        Querformot mit der Optimo-    ticol ond upright photos by
                             Porot 18x24 mm durch Hoch-   holding the comero hori-
                            stellung der Comero, woh-    zontol. The luminous frome
                        rend dos Hochformot durch    in the viewfinder will  re-
                        Querstellung der Comero   mind you of thi.(Il
View original page 4Page 5 · Read text
So einfqch ist dqs Filmeinlegen

Dos Einlegen des Films konn bei Togeslicht erfolgen;
es soll iedoch nur im Schotten, zumindest im Korper-
schotten, vorgenommen werden.                       I
I  Zundchst Comerortickdeckel  6ffnen. Hierzu Rie-         www.butkus.us   gef in Richtung Beschriftung ,,euf" driicken. Riick-
   deckel (s. schworzer Pfeil in Abb.1) obziehen.
  Neue Filmpotrone mit Bohrung zur Riickspul-
   kurbel weisend einlegen. Die Mitnehmergobel
  muB in die Potronenbohrung fossen.
   Rondelring der Aufwickelspule so weit drehen,
   bis einer der beiden breiten Schlitze mit der
   kleinen Nose oben liegt. Den ous der Potrone
  herouSenden Filmonfons in Richtung Aut'                                          2
View original page 5
Page 6 · Read text
www.butkus.us
   wickelspule ziehen; dobei mit onderer Hond
   Potrone festholten.
4 Filmonfong in den Schlitz der Aufwickelspule
   schieben; dqs in der Abb. wei3 gekennzeichnete
   zweite Perforoiionsloch  ist in die kleine Nose der   3
   Aufwickelspule einzuhcingen. Lesen Sie bitte ouf
   Seite5Punkt5weiter.                                                                                  Digitally signed by mike butkus
                                                                                                         DN: cn=mike butkus, o=orphancameras,
                                                                                                                        email=mike@butkus.org,                                                                                                                           c=US                    mike butkus ou=29,Date: 2020.09.02                                                                                                                                           15:47:30 -04'00'Looding lhe cqmerq is so eosy
The comero con be looded in doylight, bul olwoys
in the shode- ot leost in body shodow.
I   First open the comero bock by sliding cotch
   towqrds the lens. Remove comero bock (see block
   orrow in figure 1).
2  Insert new film cossette so thoi iis hole engoges   4
   with the rewind cronk.
View original page 6Page 8 · Read text
www.butkus.us

 Continue pressure on ihe boseplote,     und bis on dos Comerooberteil  heron-
 slide the bock right home underneoth       fljhren. Achten Sie dqrouf, doB der
the top plote ond set the cotch to      R[]ckdeckelrond unter dos Oberteil
 "lock".                                              gleitet. Sodonn Riegel euf ,,2u" stellen.
Anschlie0end Aufwickelspule weiter-
drehen, dobei keinesfolls Zohlscheibe   Wichtiger Hinweis
om Unterteil festholten. Der Film  ist                                Jede Pockung eines Kleinbildfilms trdgt
richtig eingelegt, wenn er stroff in der   eine deutliche Kennzeichnung hinsichtlich
Filmbohn liegt und die Zohne des   der Aufnohmenzohl. Do Kleinbildfilme
Tronsportrodes souber in die Perforo-    bisher meist f[]r dos Formo| 24x36 mm
tionslocher  ein greifen.                 verwendet wurden, ist deren Filmlongen-
                                 ongobe ouch nur ftlr dieses Formot ous-
Sobold 1 cm der vollen Filmbreite ous    gelegt. Mit lhrer Optimo Porot erholten
der Pqtrone herousrogt, Comero schlie-    Sie ober ein um die Holfte verkleinertes
f}en: R0ckdeckel (Riegel ouf ,,ouf',) mit    Formot, ncimlich 18x24 mm. Folglich kon-
den Seitpfonten in die Nut setzen   nen Sie mit lhrer Agfo Optimfrot
                                                     ->
View original page 8Page 9 · Read text
ouf einem Film                        been used for the 24x36 mm. size ond
   mit der Angobe 36 :72 Aufnohmen,    so the length of such films hos been col-
ouf einem Film                            culoted on the bosis of this size. How-
   mit der Angobe 20 : 40 Aufnohmen,    ever, your Optimo Porot gives you o pic-
ouf einem Film                             ture holf the size of the stondord frome,
   mit der Angobe 12 :24 Aufnohmen      i.e. l8 x 24 mm. This meons thot your Op-
unterbringen. Sie erhqlten olso fi.ir den   timo Porot gives you
gleichen Filmpreis die doppelte Aufnoh-                                      72 exposures on o filmmenonzohl.                                          morked os hoving 36 exposures,Diese Erklorung bitten wir besonders beim                                      40 exposures on o filmEinstellen des Zohlwerkes zu beochten,                                          morked os hoving 20 exposures,dos wir ouf Seite 7 beschreiben.                                      24 exposures on o film
                                          morked os hoving l2 exposures'
lmportont                              In other words you receive double the
Every pockoge of 35 mm. film is cleorly   number of exposures for the some price.
morked with the number of exposures.    Pleose beor this point in mind when set-
ln the p f    rinioture films hove mostly    tins the film counter, descr,jlJ on pose7.      b/
6l
                                                                                                                                                                                                                                                                                                                                                                                                                                                                                                                                                                                                                                                                                                                                                                                                                                                                            Il
View original page 9Page 10 · Read text
www.butkus.us

Ziihlwerk einstellen
An der Bodenolotte der Comero befindet sich dos Zdhlwerk. Es zdhlt
rijckwdrts und gibt lhnen die jeweils noch verbleibende Aufnohmen-
onzohl on. Auf der Zdhlscheibe befinden sich drei Dreiecke, und zwor
ieweils eines vor den Zohlen 72, 40 und 24. Je noch Longe des eingeleg-
ten Films isf nun dos dozugeh6rige Dreieck dem Morkierungspunkt ge-
geniiberzustellen. Die kleine Rdndelscheibe ldBt sich nur in Pfeilrichtung
drehen.Comero -die GegenBereitschoftstoscheWitterungseinflijsseoder derundReiBverschluBbeutel.Verschmutzung schiiizt lhre
Setting the film counler
In ihe boseplote of the comero  is the film counier. This counts bockwords
ond shows you lhe number of exposures still left on the film. On its diol
ore three iriongulor morks. one eoch before the numbers 72, 40 ond 24.
The oppropriote triongle should be set ogoinst the fixed doi, occording
to the length of lhe film. This is done by turning the smoll milled disc
only in ihe direction of the orrow.-An ever-reody cose or ihe procticol
                 your comero ogoinst the weother ond dust.zip pouch Off"r
                                    e
View original page 10Page 11 · Read text
Filmtronsport                              Sollte sich der Schnellscholthebel  nicht
                                     bewegen lossen, muf} zuvor noch die Aus-
Do beim Filmeinlegen der Filmonfong    l6setoste betotigt werden. Ausl6sung und
durch die Lichteinwirkung unbrouchbor    Filmtronsport besitzen eine wechselseitige
geworden ist, miissen vor Aufnohme-    Sperre, domit weder Doppelbelichtungen
beginn 5 bis 6 Leerscholtungen gemocht   noch Leerscholtungen m6glich sind.
werden. Die Zcihlscheibe  rilckt noch iedem
2. Filmtronsport um einen Strich weiter.
                              Wenn Sie beim Filmtronsport den Schnell-
Schwenken Sie mit dem Doumen den    scholthebel ous Versehen zu frtih los-
Schnellscholthebel noch rechts bis zum    lossen, schnellt er in seine Ausgongs-
Anschlog und lossen Sie ihn in seine Aus-    stellung zur0ck. Der Hebel ist donn noch-
gongsstellung zurujckgehen. Sodonn Aus-   mofs noch vorn bis zum Anschlog zu
l6selosie bis zum Anschlog noch unten    schwenken.
driicken. Diesen eben beschriebenen Vor-
gong    Schnellscholthebel betotigen undouslosen-     wiederholen Sie, bis die dop-    Achtung ! Beim Filmtronsport dreht sich diepelte der -ouf der Filmpockung genonnten    Scheibe der Riickspulkurbel meistens mit; sie
Aufnohmezohl vor der Morkierung steht    dorf doher wdhrend der Beicitigung des Schnell-
(siehe unlF-. Abb. S.7).                        scholthebels nicht behiindert
     b                                          ffn.I
View original page 11Page 13 · Read text
until ihe mork is in line with the requiredFilmemp{indlichkeit einstellen                                   ASA/DIN number.Die noch beiden Seiten drehbore Rcindel-
scheibe wird mit Hilfe einer Miinze so weit Wo liegt lhr Motiv?                  gedreht, bis der Rond-
                morkierung die ent-    Drei Symbole erleichtern die Entfernungs-
                 sprechende DIN- bzw.    einsiellung. Siellen Sie bitte ie noch Mo-
               ASA-Zohl gegenijber-    tiv die schworze Einstellmorke ouf eines
                     steht. Dos ist die Vor-   der drei Symbole, die rechts nochmols
                 oussetzung  fiir richtig   vergro0erl obgebildet  sind.
                     belichtete Aufnohmen.    Folls erforderlich, konnen Sie notiirlich
                                  ouch die Dreieckmorke ouf iede belie-
Setting the film speed                bige Stellung zwischen zwei Symbolen
To obtoin correctly exposed photogrophs    drehen.
the film speed must first be set on the
comero.                        www.butkus.usThe speed of eoch film is morked on
the cqrton. Use o coin to iurn the disc
View original page 13Page 14 · Read text
www.butkus.us
                                             triongulor mork io ony posiiion between
                                    two symbols.
                                           Entfernung des Aufnohmeobiektes
Genoue Entfernungsongoben von 0,9 m                           Focusing symbols
bis m       finden Sie ouf dem unteren Teil                   4A(\\des      Einstellrings.                                                                                                                llill          AQ     weiBe Zqhlen : Meler                                                      Portroit   *rfGruppe          Ferne
      grijne Zohlen :  feel                         r,B0 m          3,50 m              (Lo ndschoft)
                           (engl. MoBongobe)
Foeusing                       Close-ups Groups        Lo ndsco pes
                                                                                                   fr. (3.5 m.)  m (infinity)Three symbols focilitole focursing. De-    6 ft.  (l .B m.) l2l,
pending on the subject you should sei    Additionol focus settings from 3ft. (0.9m.)
one of the three symbols reproduced in   io rc will be found on ihe lower port of
enlorged form on the right to the block   the focusing ring:
index mark.                                     green figures :  feel,
lf necessory, you con of course set the             whiie figures :  merres.
                   Q                                                                                                                                                                                                       'il
View original page 14Page 15 · Read text
Cqmerqhaltung
Wichtig fiir schorfe Bilder ist eine ruhige    Frir Querqufnqhmen holten Sie die Op-
Comeroholtung. Nehmen Sie doher lhre   timo Porot so wie Abb. A bzw. B demon-
Opfimo Pqrot in beide Hdnde. Cqmerq    strieren. Wdhlen Sie die fOr Sie beque-
gerode holten, noh ons Auge nehmen   mere Holtung und l6sen Sie donn mit
und nicht verkonien. Dos Fenster des Be-   Doumen oder Zeigefinger ous.
lichtungsmessers (unterhqlb der R0ckspul-
kurbel) dorf dobei keinesfolls obgedeckt   Abbildung C zeigt lhnen die Comero-
werden.                                   holtung bei Hochoufnqhmen.


12
View original page 15
Page 16 · Read text
www.butkus.us

Der Leuchtrqhmensucher               ero stroight withoui tilting it, moking cer-
 Beim Blick durch den Sucher erkennen Sie    toin thot the exposure meter window (be-
zwei Leuchtrohmen; der oufJere ist bei   neoth ihe rewind cronk) is not occiden-
Aufnohmen mit dem Stondord-Obiektiv,     tolly covered.
der innere bei Aufnqhmen mit dem Vor-   For oblong piclures hold the Optimo
sotzobiekiiv Telepor zu verwenden. AuBer-   Porot os shown in figures A ond B.
dem erkennen Sie im dufJeren Leuchtroh-   Choose the position which you find io be
men noch zwei kleine Striche. Wenn Sie   more convenient ond use either thethumb
mit dem Stondordobiektiv Nohoufnohmen    or the index finger to releose the shufter.
(unter I m) mochen, bilden diese Striche    lllustrqtion C shows you how to hold
die obere bzw. seitliche Bildbegrenzung.   the comero for upright photogrophs.
Holding the cqmero               The luminous frome
It is essentiol to hold your comero steody   Looking through the viewfinder you will
to obtoin shorp pictures. You should    see two luminous fromes; the outer one
therefore toke your Optimo Porot in both    should be used when toking photogrophs
honds, closeAthe eye, holding the com-   with the stondord  lens, whifthe inner

                                                                                                                                                                'r3
View original page 16Page 17 · Read text
one is for photogrophing with ihe tele-   Noch dem Anvisieren des Aufnohme.
photo otlochment Telepor.                   molivs Comero co. 1 Sekunde v6llig ruhig
You will olso notice two smoll lines in    holten, domit sich dos MeBinsirument ein-
ihe outer luminous frome. These indicote    spielen konn.
the uppermosi ond side limits of the pic-   Sodonn Cqmero-Holtung nicht mehr ver-
ture oreo for close-ups (less ihon 3% ft.   dndern und Ausl6setoste longsom her-
                                              unterdrOcken. Wird om Druckpunkt Signol :  I m.) with the stondord lens.
                                       grUn sichlbor: ,,Freie Fohrt" fijr die Auf-
Achtung! Die Automotik isl nur donn ein-   nohme. Ausl6setoste bis zum festen An-
gescholtet, wenn dos A genou in dem    schlog herunierdrilcken.
Fenster steht.                                Bleibt beim longsomen Druckpunktneh-
                                 men dos rote Signol sichtbqr:
Motiv qnvisieren    qusliisen           Stop
                   -                                               -   loslossen, do Lichi nicht ousreicht.Wenn Sie. die Comero                    so wie die Abbil-   Ausl6ser
dung B Seite l2 zeigt ons Auge nehmen,    Nole: The outomotic m echo n ism  is only
sehen Sie om unteren Rond des Leucht-    connected when the A  is exocily  in the
rohmens           Sionot.                  middle of ihe window.
       fotes14                 o
View original page 17Page 18 · Read text
www.butkus.us

Viewing the subiect
When holding the comero in the monner
shown in illustrotion B, poge 12, o red
signol will be visible oi ihe lower edge
of the luminous frome.
First line up your subieci ond then hold
the comero obsolutely steody for obout
I second to give the exposure metei time
to reoct.
Then press the releose buiton down slow-
ly wiihout oltering the position of the
comero. A green signol oi the first pres-
sure point meons "oll cleor" for lhe
photo. Then press ihe shuiter releose
right down.
lf the red signol oppeors on toking the
firsi pressure, siop ond remove your fin-
ger from the shutter releose os ihere is
not enough  light.              t                                                                        't5
View original page 18
Page 19 · Read text
Belichtungshinweise                      storke Kontroste oufweist und es gilt, ein
                                        im Verholtnis zu seiner Umgebung kleines
Wenn es bei Gegenlichtoufnohmen  dor-   Motiv richtig zu belichten. Eine Person im
ouf onkommt, eine Durchzeichnung der   hellen Kleid vor einem dunklen Wold-
Schottenportien zu erholten, empfiehlt es   hintergrund wiirde ohne Nohmessung
sich, bei Benutzung der Automotik die    ilberbelichtet sein. In solchen F6llen gehi
DIN-Skolo on der Comero um 3 DIN zu-  mon mit der Comero bis ouf einen kur-
rtickstellen. Wollen Sie ouf Umkehrfilm   zen Abstond on dos Obiekt heron, driickt
(2.B. Agfocolor Umkehrfilm CT l8) bei   die Ausl6setosie bis zum Druckpunktbedeckter Sonne, olso bei geringeren    holt sie dort fest    geht zum Aufnohme--Konlrosten, photogrophieren, so stellen    stondpunkt zuruck-, und l6st ous.
Sie um etwo 2 DIN zuriick. Hoben Sie z. B.
einen Agfocolor-Umkehrfilm CT l8 ein-   Exposure tipsgelegt, so miissen Sie ouf l6 stott ouf                                                                                    thel8 DIN einstellen. Vergessen Sie ober  Where cleor detoil is required in                                                                                ogoinstnicht, noch erfolgter Aufnohme die ur-   shodows of photogrophs tokensprlingliche DIN-Zohl wieder einzustellen.   the light, it is odvisoble to reduce the                                         film speed setting on the comero by
Eine sogenonnte Nohmessung ist zu emp-   obout 3 DIN or its ASA equivolent whenfehlen, rl"   ,or Aufnohmeobiekt ollzu    using the outomotic meclglm.

l5                                                                                                                                                                                                 ,T
View original page 19Page 20 · Read text
www.butkus.us
1
            lf you wish to photogroph on reversol   tonce from the subiect ond press down
         film (e.9. Agfocolor Reversol Film CTlS)   the releose button to the first pressurej        with on overcssl sky, i.e. under condi=    point. Hold it ihere ond return to your
         tions of low conirost, reduce the setting    originol position to toke the photogroph.
       by opprox. 2 DlN. For on Agfocolor Re-
         versol Film CT 18 this would meon o re-    Blitzen    kinderleicht         duction from 18 to 16 DlN. Do not forget     '1. Blitzleuchte-      (2. B. Agfolux M oder Agfo         to set the originol film speed ogoin ofter       Tully M) wird in den Einschiebeholter
        moking the exposure.                                      (2) des Comerqoberteils geschoben; do-
      When o very controsty subiect hos to be      mit ist der Blitzkontokt mit dem Ver-
        photogrophed ond it is wished to obtoin       schluB hergestellt.
         the correct exposure for on obiect which       Automotik ousscholten: Hierzu Stellgriff
           is smoll in comporison with its surround-           (7, siehe Abb. S. 19) noch links bewegen
         ings, o close-up messurement should be      (Comero von oben betrochtet), bis dos
        token. lf it is nof .done, o womon in o       Blitzzeichen im Fensfer sichtbor wird.
                                                                                                  1/so Sek.          light dress in front of o dork wood (to      Konstonte VerschluBzeit ietzi
        give on exomple) could eosily produce      Enifernung einstellen. Es empfiehlt sich,
        over-exposure of the film. In such coses     ouch hierbei die Symboleinstellung zu
       opprooch        comerq to o short dis-     bevorzugen               lt1the                                              4;
I                                                                                                                 17
View original page 20Page 21 · Read text
4.  Einen besonderen Komfori bietet Ihnen   nohme bzw. Leitzohl 14 ftlr eine Portroit-
   lhre Optimo Porot bei der Blenden-   oufnohme gewdhlt.) Durch diese Leitzoh-
   einstellung noch der ouf der Blitz-    leneinstellung ist die fUr diese Aufnoh-
     lo mpenpolkung o ngegebenen Leitzohl:   men erforderliche Blenden6ffnung  (in un-                                                                          und                                                                             eingestellt                                                       Blende 8)                                                    Beispiel                                         Film-   serem                    verwendete                die   o) Leitzohl                  filr                                                                                  Blitzzeichens                                                                 des                                                      Fenster unterholb                                                in dem                     Lompenpockung                        o uf                     keit      empfi ndlich                                         oblesbor. Zwischenwerte konnen selbst-     oder Blitzer oblesen.
   b) Leitzohl ouf Cqmero iibertrogen:    verstdndlich ouch verwendet werden.
      Rechts neben dem Fenster mit dem    Vergessen Sie bitte nicht, noch dem Blitzen
      Blitzzeichen finden Sie dos Leitzoh-   wieder den Automotikring ouf ,,A" mit
       lenfenster. Mit Hilfe des Stellgriffes    Hilfe des Stellgriffs (71 zurickzudrehen.
        (8) ist die ermittelte Leitzohl quf den   Wenn Sie ein Elektronenblitzgeriit   (2. p. Agfg-                                                                Verwendung des Agfo                                                                        die                                                                                            ist                                                       tron) onschlie8en,      senkrechten Indexstrich einzustellen,                                                                      6793                                                                                        erforderlich.                                                             Typ                                                   ZwiichenstOckes     und zwor ist bei GruPPenoufnoh-
     men die Leitzohl neben dos GruP-
     pensymbol und bei Portroitoufnoh-
     men neben dos Kopfsymbol zu stellen.
       (ln Abbildung rechts unten wurde
     Leitt  32 fiir eine Gruppenouf-
View original page 21Page 22 · Read text
www.butkus.us

                                                                        J.  Set the disionce preferobly using ihe
                                                 symbols.
                                         Reol convenience is ofiered by your
                                   Optimo Porot when setting the lens
                                             operture occording to the guide num-
Flqsh mqde very eqsy                     ber indicoied on the flosh bulb corton.
l. Attoch o floshgun (e.g. Agfolux M or      o) Reod guide number from flosh bulb
  Agfo Tully M) by its foot to ihe oc-         corton or floshgun, toking into oc-
   cessory shoe (2) on top of fhe comero;         count lhe speed of the film used.
  . ihis mokes the flosh conioct with the .  shutter.                                    b) Set guide number on lhe comero.                                       The window for setting the guide
2. Disconnect ihe outomotic mechonism        numbers is on the ring ond situoied
   by moving the setting key (7, see illus-         to ihe left of the window for the
   trotion obove) to the left until the flosh           flosh symbol (looking ot the comero
   symbol oppeors in the smoll window       from obove). By meons of setting
   (comero seen from obove). Shutter         key (8) ihe guide number deiermin-
   sOeed ilqlw constont ot                                   1/go sec.          ed should be set og;zlt the ver-

                                                                                                                                                                             ,|?
View original page 22Page 23 · Read text
iicol index line, i.e. for phologrophing o   exomple). Intermediote volues con olso
group of persons the guide number is set   be used.
next to the group symbol while for por-   Do not forget to reiurn the setting key (7)
troii photogrophy the poriroit symbol    to ihe A [:  outomoiic) position ofier hqv-should be used. (ln the illustrotion below    ing mode the flosh exposure.
the guide number 90 wos chosen for lqk-  When using on eleclronic floshgun (e.9.
ing o group photo ond guide number 45   Agfotron) ihe Agfo Adopier Iype 6793,for q portroii.) This guide number selting    will be necessory.
gives the exqct lens siop required for lhe
poriiculor film speed ond sublect dis-
tonce ond con be reod off in the smoll
window below the flosh symbol (f.8 in the   Zeitqufnohmen
                                werden besonders bei unbeweglichen
                                        Obiekten bevorzugl, z. B. Reproduktionen
                                   von Bildern, Schriftstiicken oder Briefmor-
                                          ken. Auch bei Nochioufnohmen sind sie
                                                     rheisl erforderlich.
                           Mon bewegt hierzu die schworze  Griff-
                                           toste (7) noch links (Com5 von oben
                                                         vt
View original page 23Page 24 · Read text
www.butkus.us

                                      Time exposures
                                         ore preferobly used for photogrophing
                                                    motionless obiects os when reproducing
                                                           pictures, documenis or stomps. They ore
                                                   olso required for night phoiogrophy.
         betrochtet), bis dos B im Fenster sichtbor
        wird. Die Auiomoiik  ist donn ousgeschol-   Move the block key (7) until the B is vis-                                                      ible in the smoll window (comero seen          tet. Sodonn stellt mon mit Grifftoste  (8)                                              from obove) ond use the block key (8) to        die Blende ein, die im oberen Sichtfenster
       oblesbor ist. Bei Einstellung B bleibt der    set ihe lens stop which con be reod off                                                        in lhe smoll upper window.        VerschluB solonge offen, wie die Auslose-
        toste noch unten gedrtjckl wird.         On ihe B seiiing the shutier remoins open
                                            os long os the releqse button is pressed.        Lcingere Verschlu0zeiten ols l/so Sek. soll-
       ten Sie nicht qus freier Hond ouslosen.    Longer shutter speeds thon 1/30 sec. con-
        Stotiv und Drohtousl6ser sind doher un-    noi be used without supporting the com-
        bedingt zu empfehlen. Der Drohtousl6ser-    ero, ond o tripod ond coble releose ore
       onschluB befindei sich on der Unterseite    then necessory. The coble releose socket
       der Ausl6setoste (,l0).                                  is ot lhe lower end of ihe r-r^ose buiton.
                                                                                                                          !    c                                                                                               2lt
View original page 24From the M. Butkus Camera Manual Library. Original publisher and archive notices are retained.
Check the model and edition against your equipment.
PDF verified 2026-10-10.