Film cameras
Alfon Multi Dedicated User manual
User manual for Alfon Multi Dedicated. 16 pages in English. Read the original PDF, download or print a copy without registration.
16 pagesEnglish1.4 MB PDF
Loading your manual…Open PDF directly
Document details
- Brand
- Nikon
- Model / document
- Alfon Multi Dedicated
- Document type
- User manual
- Language
- English
- Pages
- 16
- File size
- 1.4 MB
- Category
- Film cameras
- Document date
- Not specified in catalog
Search available document text
Find a term, then jump to its page in the original PDF. Image-only pages may not be searchable; check the PDF for exact wording and diagrams.
Page 1 · Read text
www.butkus.us


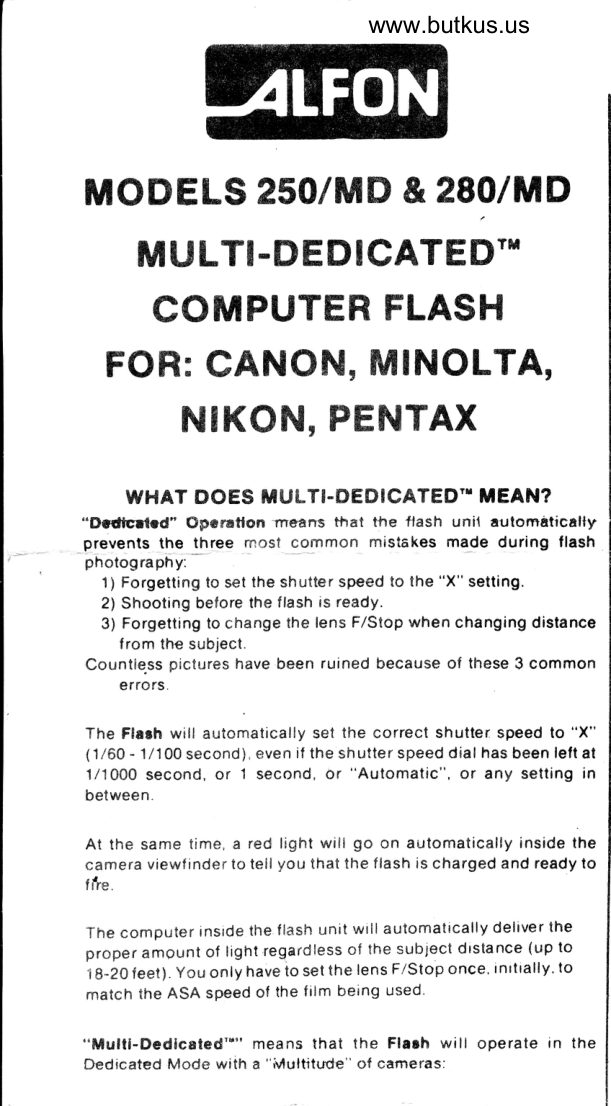
MODELS 250/],lD & 280lMD
   MULTI-DEDICATED'"
   COMPUTER FLASH
 FOR: CANON, MINOLTA,
     NIKON, PENTAX

   WHAT DOES ]TIULTI.DEDICATED'. iIEAN?
 "Dtdlsd.d" Oporatlon rneans that the ffash unil automaticalfy
 prevents the three most common mistakes made during flash
- !hotogratht,-
    1) Forgetting to set the shutter speed to the "X" setting.
    2) Shooting before the flash is ready.
   3) Forgetting to change the lens F/Stop when changing distance
     from the subject.
 Countle.ss pictures have been ruined because ol these 3 common
       errors.

 The Flrth will automatically set the correct shutter speed to "X"
 (1/60 - 1/100 second), even if the shutter speed dial has been left at
 1/1000 second, or 1 second, or "Automatic", or any setting in
 between.

 At the same time, a red light will go on automatically inside the
 camera viewf inder to tell you that the  f lash is charged and ready to
   f ite.

 The computer inside the flash unit will automatically deliver the
 proper amgunt of light regardless of the sublect dtstance (up to
 18-20 feet). You only have to set the lens F/Stop once, rntttally' to
 match the ASA speed of the film being used'

 "Mulll-Dedlc8ted"" means that the Flalh will operate in the
 Dedicated Mode with a "Multitude" of carneras:
View original page 1Page 3 · Read text
I


                                                                                                                                                                                                                                                                                                                                                                                                                                                                                                        ---.-j.'.;-Il,-.*
       Canono : A-1, AE-1, AV-1, AT-1

           Minoltac' : XG-Series (XG-1, XG-7, XG-9, etc.)
                    XD-Series (XD-5. XD-1 1, etc.)

       Nikon@ : EM.FE

        Pentax@ : ME Super, MV-1, MV

         Also Fits All Non-Dedicated, Hot-Shoe Cameras

        The Alfon Flash Unit operates on each of these cameras just like the
         Dedicated Flash Unit made or sold by the camera's manulacturer.
        For the Canon A-'l and AE-1. however, it is not necessary to
          accurately adjust the ASA Dialon the llash unit (this is an important
        and required step when using Canon's own flash unit). Instead, the
        camera lens F/Stop is simply set once, initially, to match the ASA
         speed of the film being used.

       THE FLASH IS FUILY INTEGRATED. NO ADAPTERS OR CORDS
       ARE NEEOED.

      FULL COiIPATIBILITY WITH ALL IION.DEDICATED
      HOT-SHOE 35mm CAMERAS:

        Thr flmh unll cln bc ured on etl Hot-Shoc, Non-Dcdlcetcd 35mm
        clm.n!. A rync cod lr nol rvelleblc.

          HOW TO LOAD THE BATTERIES:
       Open the Battery Door by sliding the door down. Insert "AA"
          Alkaline Batteries according to the 1+; and (-) symbols in the battery
         compartment. Close the door.

         Follow c.?ofully the (+1 and (-) symbols shown inside the baltery
         compertment. The flash unit will not charge  if the batteries have
        been inserted incorrectly.

        CAUTION:
       DO NOT USE Ni-Gad (Rechargeable) or low-cost carbon (so-
           ctlled "Hoavy Duty") batteries.
View original page 3Page 4 · Read text
www.butkus.us


                               Digitally signed by mike
                         butkus
                       DN: cn=mike butkus,mike        o=orphancameras, ou=29,
                         email=mike@butkus.org,
                     c=US
                           Date: 2018.12.10 11:10:21butkus -05'00'

     1. Battery Compariment Co\rer
    2. On/Oll Switch
     3. Ready Lamp
    4. Exposure Table
    5. Hot Shoe
    6. Locking Ring                     "$W,#r
      7. Multi-Dedicated Switch (Optional)
    8. Notch For Optional Zoom Lens
View original page 4Page 5 · Read text
HOW TO USE THE FLASH UNIT


 1. PREPARE THE FLASH        t

    Ins-tall the batteries.  l? your  f lash rs equipped with the optional
   Multi-Dedicated switch then please adjust  it to match your
   camera. Flash models without the switch willadlust themselves
   automatically  to match your cimera:                             -

  2. Install lhe Flash on the Camera
  The orr ofl swrtch shorrld be al "ofl lred area rlQt showtng)
   belore rrrslallrng or removlt'lg the  f lash  f rom lhe cantera Also lhe
   knurled lockrrrg rrng should be all lhe way up Hold the  f lash ttntt
   close to rlsloot and slrde the flash lool tnto lhecamera shoe utrttl
     rt stops  lf the contact prns "catcfr on the edge ol the shoe yotl
  may use the trp of a penol to push the prns up Or you may wrggle
   the flash gentlv untrl the foot slrdes rn all lhe way  lf tlash is rrot
  pushed c:ompletely all the way rnto the camera shoe. lhe  f lash
  may larl to operate correctly. Ttghten the knurled lockrng rrng
   until  rt locks the flash securely rnto the hot-shoe  . Now you may
   turn the llash swrtch lo "on" (red area showtng).                                   \t


3. Walt For Ready-Llle

   After turnrng the switch to "on", you will hear a faint humming
   sound-the   f lash capacitor  is being charged. After 8 - 1O seconds
   (with fresh batteries) the Ready-Lite on the rear of the flash
   should go on. Also, a "Flash-Ready" signal will go on in the
   camera's viewfinder.
View original page 5Page 7 · Read text
4. Adfutt the Camera Seltlngr

    A. Lens Aperture (F/Stop):
 when using a conventional non-computer elqbtronic flash unit,
the lens aperture is set according to the output (Guide Number) of
the unit and the camera-to-subject  distance. In computer flash the
aperture is set first and the flash output is controlled automatically
by the computer sensor.

   You must adjust the lens F/Stop according to the:
      -Film ASA Speed.
      -Flash computer power setting: Red or Blue dot.
   Find the correct F/stop from the redlblue exposurc table
    ("Auto") on the rear ofthe frash ,*diro
                                         280/rD
   Example:   Film:        100 ASA     1OO ASA
              Computer: Red Dot     Red Dot
                  Lens F/Stop: F/4             F/2.9
   Erample:   Film:        4OO ASA     4oo ASA
                ComF,uter.* Blue Dgl-.*   Blue Dot
                  Lens F/Stop: F/1.t            F/,t1
   use th6 red setting to obtain maximum flash range. Use the Blue
    setting to obtain maximum depth of field.
View original page 7Page 8 · Read text
www.butkus.us


   orr- m


1. Computer Sensor
2. Computer Switch
3. Red Dot
4. Blue Dot
5. White Dot
6. Red Exposure Tabte
7. Blue Exposure Table
View original page 8
Page 9 · Read text
B. Shutter Speed:
   The shutter speed dial should be set to "Auto" (Automatic
   Exposure) for most pictures. However, you may leave it set
    at any other speed, except "B". When ine ftash is ready, the
    shutter speed will automatically change-over  to "X".

lmportant: for Non-Dedicated cameras be sure to set the shutter
speed dial to "X" (usually 1/6O second). Read your camera
manual under "flash".

  C. Lens Focus:
   You must, of course, adjust the lens for the correct distance.
   The "Maximum Ftash Range" of the flash unit on automatic
    operation can be determined from the calculator.
             Blue Setting: 12 feet  Maximum 4.0 mebr)

             Blue Setting: 12 Feet
    Pictures taken at distances greater than the maximum Flagh
   Range will be underexposed  (too dark).
   The minimum distance for Automatic (Computer) operation
     is 3 feet. Pictures taken at closerdistances  will be over€xpot€d
    (too light). Switch over to "manual" control (lhe,.white" lefiing
   on the computer selector switch) for such gituation!.

 I{OTE: The maximum and minimum operating ranger rtry
        unchanged tor ail fitm speede (ASA).
View original page 9Page 10 · Read text
www.butkus.us


5. TAKE THE PICTURE
    Before taking the next picture be sure to wait for the Ready
      Lite to go on again
    For best results, wait an extra 10-'15 seconds after the Ready
      Lite goes on before taking a picture.
        lf you are nol taking another picture soon, remember to turn
    the on/off swrtch to "off". This will extend the lile of your
      batteries.

6. Speiial Sltuations
     A. Non-Flash Photography with the Ftash Attached:
     When the llash switch is turned to "off",'the camera returns
         to normal, non-flash. Automatic operation (or Manual) You
       may, therefore, leave the flash attached to the camera even
         d uring outdoor Photog raPhY.
   B Flash at Large Distances:
       For taking photos beyond the Auto Flash Range (18 feet
       max), please switch the Computer Power Control to white
        (manual). Use the Manual Exposure Calculator on the rear
        of the flash unit to find your F/Stop.
      Example:  Film:             1OO ASA
                         Dista nce:           40 feet
                       F/Stop:                  F/2
      Be sure to re-adjust the F/Stop every time you change the
        shboting distance.
View original page 10Page 11 · Read text
C. USING GUID€ NUMBERS TO CALCULATE EXPOSURE
         lf your   f ilm speed or your camera-to-subject  distance is not on
     the Exposure Calculator, please proceed as follows:
     Divide the "Flash Guide Number" (you will find  it in the table
     below) by the "camera-to-subiect  distance". The result is your
     F/Stop.
    FLASH GUIDE NUMBER
                                    = LENS F/Stop
     Camera-to-Subiect  Distance

     Examole:
              Distance: 10 feet    Film: 160 ASA
          GN Table Shows: 86
             To  f ind F/Sto'p: Divide 86 by 10 = F/8.6

     Examole:
               Distance: 50 feet    Film: 400 ASA
         _ GN Table Show' 136
                          136                F/Stop =               2.1
                           - 50

     Guide Numbers in Feet (ASA-FEET):
ASA Fllm Speed 25 50 64 80 100 125 160 200 400 800
             34 48 54 60 68 76 86 96 136 192
View original page 11Page 12 · Read text
www.butkus.us     Guide Numbers in Feet (ASA-FEET):
ASA Fllm Speed 25 50 64 80 100 125 160 2OO 4OO 800
GN          34 48 s4 60 68 76 86 96 136 192

D. CAMERAS WITH AUTOMATIC LENS SETTING ("Auto Flash"
    Feature)
   Some cameras have an automatic feature which sets the correct
    lens aperture (F/Stop) as you focus.
    All you have to do is set the correct guide number (see table
    above) on the camera's Guide Number Scale (see your camera
    instruction manual).
   Remember to set the Flash Computer Selector Switch to the
   "WHlTE" (Manual) Position.

 7. HOW TO USE THE OPTIONAL ZOOM LENS

   The 3-position zooin Iens delivers proper nghting coverage when
    using camera lenses of focal lengths  f rom 35mm to 85mm.
   The zoom lens has 3 "click" positions at:
     A) Closed position "W" -Wide Angle - 35mm lens
      B) Middle position "N" -Normal  - 50mm lens
     C) Extended position "T" -Telephoto  - 85mm lens
    Simply set the zoom lens to the setting that comes closest to the
    focal length of your camera lens.
   The "Maximum Flash Range" of the flash unit is increased by 2
     feet when used at the Telephoto ("T") setting:
     Red computer setting: 20 feet maximum (6 meter)
      Blue computer setting: 14 feet maximum (4.3 meter)
   The camera lens (F/Stop) should always be set according to the
    redlblue calculator dial regardless  of the  f lash zoom lens position.
    The zoom lens can be removed  f rom the  f lash unit by  f irst moving
       it to the "T" position and then pulling out the rcar ol each zoom
    track until  it snaps out of the notch on the flash unit.
   The Zoom Lens can be re-installed but  it is not an easy task'
View original page 12Page 13 · Read text
(250/280!HELPFUL HINTS

1. BATTERIES
   o Check batteries   f or  f reshness when you purchase them. (Most
    stores have a batlery tester).
    . Turn switch to "OFF" between pictures.
   o Replace batteries when recycling time exceeds 30 seconds.
   r Remove the batteries  if not using flash for a long time.
   r Loading The Batteries: Please be careful when inserting the
    batteries. Pushing them in too forcefully will bend the flash
   contacts downwards and prevent them  f rom making contact with
   the batteries.  lf this happens, simply lift the tips of the flash
   contacis gently with your  f inger or with a pe,ncil.
   o lf Your Flash Unit ls Not Charging Properly:
     -Be sure your batteries are  f resh Alkaline type batteries.
     -Be sure the batteries are properly inserted, and the switch is
     "on" (red area must be showing).
    -Check to see if the battery contacts are "collapsed" (bent
    downwards too much). Lift them  if necessary.
     -1ry a different brand of batteries. There are differences
     between batteries.
    -Donl-use reCFaifiEaU'Ie (Ni-Clad) batteriff'They could
    damage the  f lash unit.

2. BACKGROUNDS:
   - Keep your subject close to the background. Try to use a bright    colorf ul backg round
    -- Avoid dark walls or large halls.
   -  Flash pictures taken at night outdoors will be dark. Open the    lens aperture setting one or two exlra F/Stops.
View original page 13Page 14 · Read text
3. DISTANCE              www.butkus.us
   When shooting at dista nces greater than'l 5-20 feet. wa it an extra
    10-'15 seconds after the Ready Lite goes on. This allows the unit
    to become   f ully charged.

4. lf Your Flash Unit Does Not Flash
    r First - Remove the flash unit  f rom the camera.
   o Check proper placemenl ol batteries.
   o Ctreck ON/OFF Switch (red area visible means "ON").
    .  lf you can hear a humming norse. wait a while longer.
   o lf Ready Lite  f inally comes on (after 30 seconds or nrore) - you
    need fresh batteries
   o lf in doubt about your batteries, ask your Photo Dealer to test
   - theo lor you             .;>+

   Remember: The Flash will not lire if the  f lash onloff switch is at
    "off"

5. BEFORE YOU GO ON A TRIP OR BEFORE YOU TAKE ANY
  ESPECIALLY IMPORTANT PICTURES:
   Please shoot one roll and check the results.
6. Sometimes people's eyes appear red in flash pictures. This is
   most common when your subject has blue eyes. You can
   minimize the red reflections by turning on all the lights in the
   room. Then ask your subject to look directly at one of the room
    lights (this will cause the eye pupil to close slightly, th us red ucing
   the amount of ref iection).
View original page 14Page 15 · Read text
7. You can keep your  f lash capacitor operating at peak efficiency
   by letting the flash unit charge up about once a month and liring  il
   several times.


SPECIFICATIONS

    -Guide Numbers: 34 - (ASA 25)
         68 - (ASA 100)
    -Auto F/Stops: F/4 & F/5.6 (ASA 100)
          (and ManualSetting)
    -Auto Range: 3 - 18 feel (1-5 meters)
         (3-20 feet with Zoom)
    -Shoe Lock: Positive-GriP screw
    -Siroe Contact Pins: 5
    -Power Source: 2 "AA" Alkaline cells
    -Flash Speed: 1/1000 to 1/30,000 seconds
            Time: 9-1 0 seconds (Thyristor: 0.5-8 sec.)    "Recycle   -Number of  f lashes: UP to 200
    -Weight: 5 oz. (w/o batteries)
    -Battery Door: "Easy-Slide"
    -Size: 4" High x 2'/o" Wide x 2" Deep
View original page 15From the M. Butkus archive. Original publisher and archive notices are retained.
Check the model and edition against your equipment.
PDF verified 2026-10-10.