Film cameras
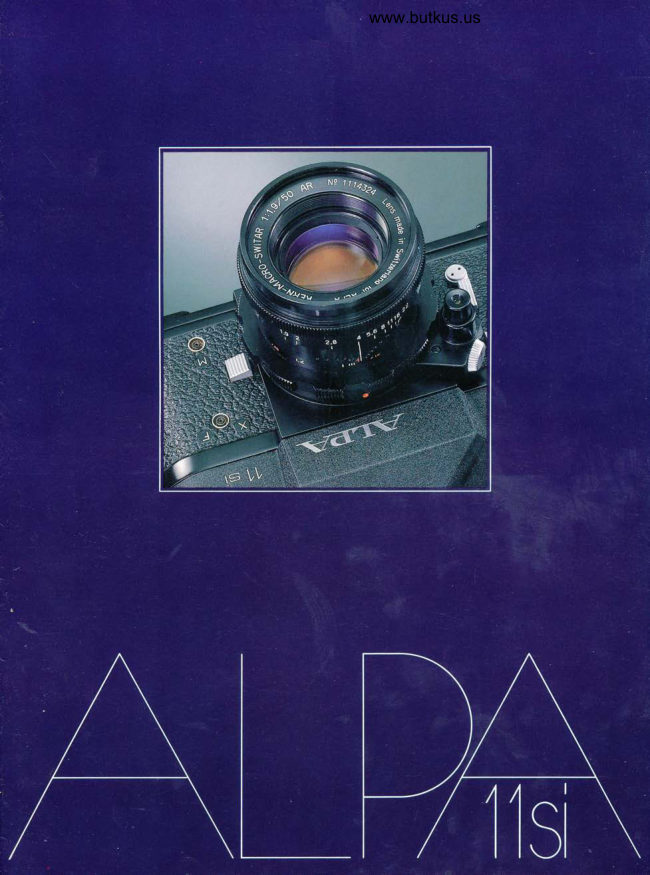
ALPA 11Si User manual
User manual for ALPA 11Si. 20 pages in English. Read the original PDF, download or print a copy without registration.
20 pagesEnglish8.4 MB PDF
Loading your manual…Open PDF directly
Document details
- Brand
- Alpa
- Model / document
- ALPA 11Si
- Document type
- User manual
- Language
- English
- Pages
- 20
- File size
- 8.4 MB
- Category
- Film cameras
- Document date
- Not specified in catalog
Search available document text
Find a term, then jump to its page in the original PDF. Image-only pages may not be searchable; check the PDF for exact wording and diagrams.
Page 4 · Read text
www.butkus.us

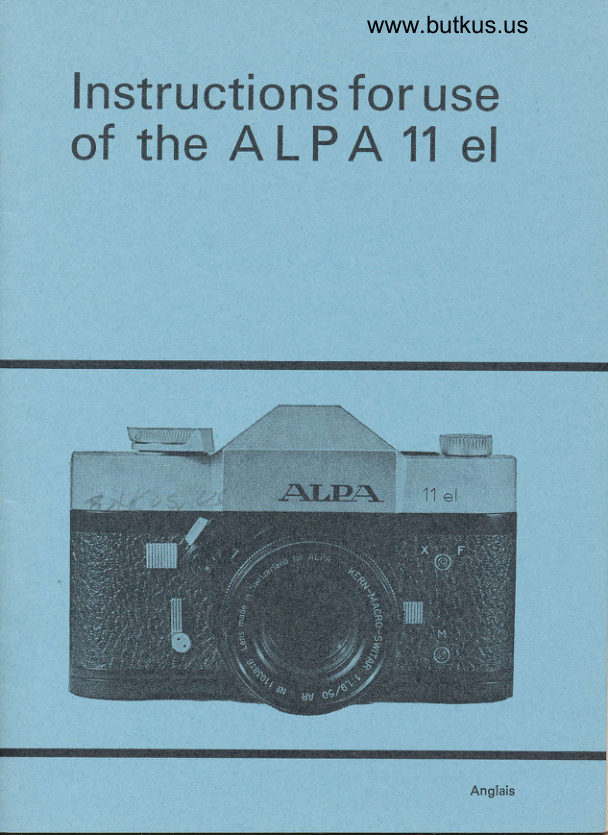
   Instructions
   for use of the
  ALPA 11 el


Poor results or even damages are often    Replacing the delicate galvanometer with
caused by ignorance of the equipment.    quivering needle, this shockproof meter
We strongly recommend that you study    gives you easier, faster, more sensitive
these instructions carefully, so as to get   and far more precise exposures-up to
the best results with your ALPA.          1/1Oth of an f/stop - and eliminatesMost of the instructions apply also to the    most meter repairs.
ALPA 11s, with exception of the sections   The ALPA body is a light-weight, com-
         about release lock, selftimer,    pact die-cast of great strength and long-
           mirror lock, and M synchro-     lasting rigidity. The ALPA 11 el has a
             nization.                         pentaprism for eyelevel viewing, and an
The ALPA 11 el and the unlimited ALPA    instant-return mirror which reacts even
system of photography are the results of      if the shutter release is kept depressed.
more than 30 years of research and devel-   Any slight vibration accompanying the
opment to meet the evergrowing demands    return occurs only after the exposure  is
of the creative photographer, as well as    completed, and cannot affect the sharp-
of scientific and industrial photography.    ness of the picture. A film-type reminder
                                                               is on the back of the camera (F,tig.12).
                                                All controls are easily accessible and can
                                      be operated even if wearing gloves.
                                             Every feature has been planned for fool-
                                            proof operation.

A. GENERAL DESCRIPTION

The Swiss ALPA 11 el is a 35 mm single-   B. EXTERNAL CONTROLSfens ref lex camera (24x36 mm, 18x24
mm or 17 x22.5 mm) with through-the-
lens light matching meter. The precise,
shockproof solid state electronic  circuit    1) Winding the film
has six transistors, a yellow light for over
and a red light for under exposure, visible
both below the groundglass and on top   The winding lever A (fig. 1) cocks the
of the ALPA.                                     shutter, advances the film, and counts the
View original page 4Page 5 · Read text
The speed may be set whether or not the
                                                 shutter is tensioned. The range of speeds,
                                            evenly spaced, is the standard: B, 1, 1/2,
                                                1/4, 1/8, 1/15, 1/30, 1/60, 1/125,1/25O,
                                       1/500,1/1000 sec. B may be locked for T
                                        time exposure. To keep the shutter open,
                                           the release lock V (fig.2) must be moved
                                             to its innermost position.

                                                Setting B allows you to make time exposu-
                                                 res of any length, the shutter staying open
                                      as long as the release button is pressed
                                           (D, fig.2). A cable release with locking
                                      screw is very useful for long exposures,
                                    and when the equipment is on a tripod.
                                   The release button should also be locked
                                          in position B with shutter open, if any
                                                   special shutter is used instead of the focal-
                                           plane shutter of the camera.
                                      lmportant: when long shutter speeds are
                                              used, for example 1 sec, with automatic-
                                    diaphragm lenses, either the  shutter
                                             release must remain pressed throughout
                                           the exposure, or the automatic diaphragm
                                       must be disconnected.
                               The speed 1/60 sec is marked in red
                                       because it is the fastest speed which will
                                            synchronize with electronic flash; if any
                                                   faster speed is used only part of the frame
                                           willbe exposed.
Fig. 1                                 The shutter speed is, of course, chosen to
                                        take into account any movement of the
                                              subject. Factors to be considered include
                                   the speed, distance, and direction of
                                    movement of the subject; the focal length
                                                   of the lens used is also important, as is the
                                way the camera is being supported. Forexposures. The short travel of only 160"   maximum sharpness, use as short a speed
and operation of the three separate func-    as possible.tions give a slight resistance. lf the lever
is not wound fully to its stop the shutter
release is blocked. Remen'lber, therefore,
to move the lever fully round (but without
forcing  it).


                                    3) The shutter release
2) Setting the shutter speeds

To set the shutter speed turn ring P (fig. 1 )   The release button D (fig. 2) is situated
to the required speed, shown by the red   on the front of the camera. The finger
line of the transparent disc, without going    squeezes the button while the thumb
past the black sector (do not force it).    presses against the other side of the ALPA.
View original page 5Page 6 · Read text
www.butkus.us


                                                                                                                                                                                                                                 Digitally signed by mike butkus
                                                                                                                                                                         DN: cn=mike butkus,                                             mike               o=orphancameras, ou=29,
                                                                                                                                                                                       email=mike@butkus.org, c=US
                                                                                                                                                                                                     Date: 2019.08.26 19:49:02                                                butkus            -04'00'

 Fig.2


This arrangement minimizes risk of camera    very short focal lengths for example). To
shake. The thread in the release button   do this, simply slide down knurled lever E
takes a standard cable release. Lenses with     (tis.2).
automatic diaphragm have their own    Double or multiple exposures are made as
release buttons which in turn depress that    follows: after the first exposure press the
of the camera. When taking a rapid succes-     shutter release while winding (to tension
sion of pictures,  if this button is not    the shutter without winding the film), letreleased before winding, the film will    the shutter release go  f irst, then the winding
not.be advanced, and the last exposure     lever, raise the mirror by means of E, andmade will be spoiled by another, partially    make thesecond exposure. Do notforgetto
fogged because the mirror will not have   move E back again afterwards to lower
returned.                                   the mirror for viewing.The shutter lock V (fig. 2) in its inside
position blocks the shutter release while
light readings are made.  lf a cable release
is fitted the lock is not effective.
Note:  if the release button is pressed very   4) The self-timer
slowly the mirror may flip up before th6
actual exposure is made. This does not
affect picture quality.                      The ALPA 11 el has a self-timer (R, fig 2).
It is sometime useful to be able to lock the   This delayed-action release can bs set
mirror in its raised position (when using     according to the length of delay required.
View original page 6Page 7 · Read text
Fis. 3
                                                      2,5
                                                      5


lf the lever is moved fully round the delay    synchronization sockets (fig. 2). The upper
is about 18 secs; if moved only 90o the    contact XF is for electronic flash at speeds
delay is about 6 secs.                   up to 1/60 sec; a shorter speed than this
First wind the shutter, then the lever R.     will give only a partially exposed frame.
The delayed action is started by pressing    This contact can also be used for special
the shutter release button. lf you wish to    short-peak  f lashbulbs, but  if these are used
be in the picture, you have time to take    the manufacturer's instructions must be
up position.                               followed carefully as this kind of bulb is
lmportant: when using the self -timer with     really disigned for between-lens  shutters.automatic-diaphragm  lenses, the  lens   The lower M contact is for use with flash-
must be used pre-set or the picture will   bulbs specially made for  focal-plane
be taken at full aperture only. lf the self-    shutters; their long peak allows short
timer is used with the shutter set at B,     shutter speeds.
the exposure time will be 3 secs. This
known exposure can be very useful under
poor light conditions or with  small
apertures.
The smooth release of the self-timer  is
useful also if you have no cable release.
Use a fast speed in such circumstances for
photographing in  difficult conditions
without risk of camera shake.         C. FRAMING AND
lf the self-timer has been set but is then not     FOCUSI NGrequired, it can be disengaged by shutter
lock V and then keeping button D pressed
while lever R is allowed to return to its
original position.
                                   1) Framing
5) Flash synchronization
                                     The image of the screen is reinverted and
The ALPA has two standard co-axial    measures exactly 23x35 mm, i. e. Tz mm
View original page 7Page 8 · Read text
www.butkus.us
  less on each side than the 24x36 mm    the middle of the screen. Choose a definite
  frame. This matches the window of slide     detail in the subject and focus the lens
  mounts, so that there is no cut-off in pro-      u ntil th.e image of the line across the range-
  jection. The image on the screen of'the     finder is.in perfect alignment; the subjict ALPA half frame cameras measures                                                                                 is. novy sharply focused (figs.3 and 4).  exactly 18x24 mm or 17x22.5 mm.       The clear ring helps yo'u 1o identify the The screen  . i.r.gg is magnified, to give    object you are focusing on. In photo-  trte-stze wrth the standard 50 rmm    mic.rography the aerial image is focused  lens, and even with small diaphragm    and it is necessary to see it-clearly at the openings the entire image is bright into   same time as one of the lines             is,                                                                             -'that  the corners - most useful-for composition,     without parallax (fig.    ). focus, depth-of-field.                                  Both semi-circular                                                          prisms                                                                              aopear                                                                              will An.optional               0.7 x eyepiece reduces magnifi-     uniformly                                                            bright under                                                                normal                                                                                   conditibns.
  catton, so that persons with deep-set eyes    Under certain circumstances (smaller lens
 or wearers of glasses can see the entire     a,pertures, close-up photography) one of  field. Even with small f/stops,'etc. telephoto    the semi-circular prisms may appear to be
 lenses and bellows or tubes,               shaded. In this case you can'ilign your
 The viewfinder has a rotatable bayonet-    image between the other, briqht Srism of mounted rubber eyeshield cup which     the split-image and the clear q'[ass'rinq.
 excludes extraneous light, and which can    The scales indicated by the croiss are uieful
 be replaced by a magnifier or a right-angle     for comparison (figs. 3 and 4), especially
 viewfinder.                                          In photomacro- and micrography. People with eyesight needing correction
 can fit special lenses into a mount fixed in
 the eyepiece. The powers available are:
 -4, -3, -2, -1, +1, +2, +3, and +4 diopters.                              b) by microprism

                                            Microprisms are actually a large number of
                                              small rangefinders which show clearlv the
                                               smallest mistake in focusing; as long as
                                     the focus is wrong the image is -very
                                                blurred. As soon as the focuJ is correct
                                              the image snaps into clarity.
 2) Focusing on the screen

The ALPA 11 el has a screen which
combines a split-image rangefinder with
a circular zone of microprisms. The lens isfocused by means of the ring which turns   3) Focusing by distance scale
the lens in its helical mount. Sharpness is
controlled over all the screen by means of
one of the systems mentioned below.                                     AIIALPA lenses are calibrated for distance.
                                                           It is thus possible to select a certain                                            distance.by                                                                       .t/sing the scale (for example                                          w-hgn using  f lash). Estimating.the distance
a) by rangeiinder                              of the subject,  it is set on the scale, taking                                        into account the depth of field. Thi;
                                    method is useful when it is impossible toThe groundglass screen has a built-in    focus, either when there is no iime (as atrangefinder formed by a pair of prisms    a sporting. event) or if it is too dark (whenwhich appear as a pair of semi-ciriles  in    using  f lash etc. )  .
View original page 8Page 9 · Read text
D. TOADING AND
                          UNLOADING


                                    1) Loading


                                       The ALPA 11 el is opened by the key M
                                                                (fig. 5), on the bottom of the camera. Lift
                                      the key and turn it to the right (fig.5).
                                    Remove the back by pulling on the key.
                                         Hold the film cassette in the right hand and
                                                 insert the film leader in the slot of the
                                          take-up spool (fig.7). Take care to push
                                           the film well into the slit marked with an
                                          arrow so that the edge is against the lower
Fig. 5                                       flange of the spool; the leader is held by
                                           a tooth. Pull out enough film to enable the
                                             cassette to be put in its chamber, and
                                      engage the rewind lever into the cassette
                                                      (fis.8).
Fis. 6
                             Remember to  check the  correct
                                 winding before closing the camera.
                                        Replace the camera back and lock it by
                                           turning r16s key to the left; wind and
                                                release the shutter two more times while
                                            noting that the central screw of button F
                                                           (fig. 2) is turning while the shutter is
                                           being wound.
                                       The frame counter C (fig.7)  is automatically
                                      disengaged when the camera back is
                                        removed.  lt advances to zero after three
                                         windings of the film as mentioned above.
                                         Note: if a partly exposed film is removed
                                       from the camera, the number of exposed
                                       frames should be noted before opening
                                      the back, so that the film can later be
                                               inserted without loss of a frame.
                             Do not forget to set the film speed on the
                                         exposure meter; depress the outer ring of
                                          the speed dial P (fig. 1) and turn the black
                                       index mark until it is opposite the ASA
                                         speed of the film  (f ig. 1 0). For easier setting
                                               of the speed the dial can be put to one end
                                             of its scale.
View original page 9Page 11 · Read text
2) Rewinding the exposed film


                             When the frame counter shows 19 or
                             35 exposures (according to the film
                                               loaded), wind to the next frame carefully
                                             to avoid tearing the perforations or pulling
                                           the film from its cassette altogether - this                                    would make rewinding impossible. When
                                               definite resistance to winding-on is felt
                                           the film is used up and is rewound after
                                        pressing the rewind release knob O
                                                            (fig. 6) which disengages the sprockets.
                                                                It is not necessary to keep your finger on
                                                this button. Pull out the rewind crank F
                                                            (fig. 2) and turn in the direction of the
                                        arrow (fig. 10). The film will offer a slight
                                                   pull against the rewind, until suddenly the
                                           crank begins to turn freely. The camera can
                                         then be opened and the cassette removed.
                                    Take care not to press the rewind knob
                                      except when rewinding.  lf pressed by
                                              mistake during exposure of a film, advance
Fig. 10                              the film one frame to re-engage the
                                                  sprockets,


Fig. 11

                            E. ALPA LENSES


                                   1) Ghanging the lens

                                To change the lens, press the button O
                                                            (fig. 2) and turn the lens to the left.
                                                Position the new lens so as to line up the
                                    two red dots, push it gently into the body,
                                  and turn to the right until it clicks into
                                                   position.
View original page 11Page 12 · Read text
www.butkus.us
 2) ALPA lenses


ALPA have chosen an incomparable   The transistorized circuit receives informa-
 range of lenses from the best manufac-     tion from two Cds cells which measure the r:urers   Kern, Kinoptik, Angenieux,     light coming through the lens, while a
 Schneider, Zoomar and Zeiss.                  third cell compensates for any stray light
 Each lens is individually factory-tested by    entering the system through the viewfinder.
ALPA to very rigorous standards. Focal   The electronic circuit lights the lamps:
 lengths available range from 24 to 600 mm,    yellow indicates overexposure, red under-
 and their bayonet mounts have remained     exposure. When both lamps are lit at once,
 standardized for more than 20 Vears.          exposure is correct. The two cells integrate
Among this selection of lensbs are two    readings from the screen, with center
 designs which are exclusive to ALPA - the    weighting, to give highly accurate exposurefamous Kern Macro-Switar f 1.9/b0 mm    co ntro  l.
 (the standard lens of the ALpA), and the
 Kinoptik APOCHROMATS.


                                     2) Methods of use


                                Two methods are possible

                                      a) The shutter speed is set, depending on
F. EXPOSURE READINGS        thefilm subjectspeed when(fig. 1).changingRememberfilmsto (fig.6).sef the
                                        Lock the shutter release by sliding lever V
                                          towards the lens. Press the shutter release
                                         (D) to allow the meter and diaphragm to
                                            operate. While keeping pressure on the
                                             release turn the aperture ring u ntil the
                                        lamps visible in the viewfinder and in the
                                             accessory clip are both  lit.
                                                                                lf the subject is in focus, just slide back the1) Basic principles                        lock V and take the picture.
                                          Note: in its outermost position the lock V
                                      makes the meter inoperative but allows the
                                                shutter to be released (useful for repeated
                                         exposures of an identical subject).
                                          ln the center position the meter ope-
The meter system has a very wide ranqe of    rates at half pressure on the shutter
sensitivity (1.6 - 400,000 a'sb). Curre-nt is     release, which also operates the automatic
9lpplied. by one Mallory PX 28 battery    diaphragm, and the shutter is released at
(Eveready 544).                                       full pressure.
View original page 12Page 13 · Read text
In the innermost position, next to the lens,   When reading the meter in the accessofy   both the shutter and the meter are blocked.    clip, it  is gbod practice to cover the
   This last position allows the shutter to be    vidwfinder with the hand or a lenscap.   kept open after it has been released: open    ln other circumstance, to keep out un-                                                                                          intense   th6 shutter at B setting, and slide the lock   wanted light when working in
   toward the lens. The shutter is closed again     illumination, the smallsliding cover for the
    after the exposure simply by sliding the    meter-window, on top of the camera, may
    lock back again.                         be closed (G, fig. 12).
   Note: if the release button is kept depres-
   sed with the lock as just described, while
    the shutter  is tensioned, the blind stays open
    fully at shutter settings between 1/30th
   and B, and partially so at all other settings.
   b) The aperture is first set, according to
                                   opening,                                   the                      Choose                     of field.    required            depth
                                  press                                          the   4) Direct meter readings                        V, then                   with              shutter   bldck the
    release and find the correct time by turning
    the speed dial. Slide back the lock, check
    the focus, and take the picture.
    Note: remember the cells are very sensitive
   and that to get both lamps lit at once may    Film speeds   Range of shutter speeds
    require the diaphragm to be set at an  ASA    DIN   fastest    slowest
    intermediate stop value. The shutter can
   be released  if one of the lamps is not fully      lit: at some light levels the system is so        3          (6    1/60 1  second
                                                                                                                D    sensitive that  it may be difficult to get both       6(ASA)    (s    1/125 1       lit. The error in such case will not exceed      12        (12    1/250 1      )    1/5 to 1 /1Oth of an  f -stop  I                  25        (15    1/500 1      )                                              50        (18    1/1000 1      )                                             100         (21    1/10OO 1/2   )
                                        200       (24    1/1000 1 /4    )
                                                                                                   D                                          400        (27    1/1000 1 /8                                          800        (30    1/1000 1 /15  )                                                                  1 600        (33    1/1000 1/3o D
                                                                                                                D                                         3200        (36       1 /1000 1 /60                                         6400        (3e    1/1000 1/125 >
   3) lmportant note

                                                                          lf the speed required is outside the scale
   Another point to remember is that, like    registered by the system  it is easy to    the human eye, the cells have to get used    estimate  it  because ASA ratings are
   to darkness and are "blinded" by very    directly proportional to shutter speeds    intense light, so that they continue to   and f stops (except for a few maximum
     register  it for a short time. Therefore when     apertures on certain lenses).
    passing from a very bright subject to a dark     For example, if an exposure  ot'l /1000 sec
   one. allow the meter to rest for a few     is required with a 25 ASA film a direct
   seconds. lntentional over- or  under-    reading will not be obtained - the fastest    exposure is, of course, always possible.     speed for this film is 1/500 sec. lf the   The eye should be kept as close as possible     correct stop at 1/500 sec was, say, f 5.6,
                                                                                                                1 /1000,    to the eyepiece during exposure readings    the shutter speed is halved to
    (especially if wearing glasses), to minimize    therefore the aperture must be doubled,
    the effects of stray reflections entering the    tof4.
    viewfinder. lt is well compensated for by    Sometimes 1 sec on the speed dial is not
    the third cell but this compensation might    long enough: in this case the film setting
    be insufficient in extreme circumstances.       can be altered instead of the shutter speed.

10
View original page 13Page 15 · Read text
2) Clean the film channel and pressure-
   plate occasionally with a piece of lint-free
   cloth.
  3) Never oil the mechanism. The shutter
   will work for many tens of thousands of
   exposures without lubrication.
  4) Never try to dismantle the ALPA your-
    self. This requires not only expert know-
   ledge but also specialtools. Your guarantee
  becbmes void if the ALPA is serviced by
   any unauthorized Person.
  5)  lf you are so unlucky as to drop the
   camera into the sea, it must be thoroughly
   rinsed in several changes of fresh water
   before being dried. lt must then be sent
   without delay to an authorized dealer or
   to the factory.
   6)  lf your camera is lost or sto len advise the
   fdctory at once of the serial numbers of
   body and lens. We strongly recommend that
   you insure your ALPA equipment.
   7) When inserting a film, either a new one
   or one reloaded by yourself, check that
   the lips of the cassette are not too tight, and
    that the film comes out easily.
      It is a good idea also to check that there are
   no loose velvet threads hanging from the
    cassette; these can easily become trapped
    in the film window and make shadows on
     all your pictures.


12
View original page 15Page 16 · Read text
www.butkus.us


         SWITZERLANID


         PIGNONS S.A. CH -1338 Ballaigues


Printed in Switzerland 5/01 51 /516.731G8                                            Haefeli
View original page 16Page 17 · Read text
ALPA 11 si


Mode d'emploi ab1696
Ku rzgebra uchsa n  I eitu ng
Brief instructions for use
Brevi istruzioni per I'uso
Breves instruccionas para el uso
View original page 17
Page 18 · Read text
www.butkus.us
FRAN9Af S         DEUTSCH
A l'exception du systdme 6lec-        Mit Ausnahme des elektronischen
tronique de la mesure de l'exposi-        Belichtungsmess-Systems ist  die
 tion, l'ALPA 11 si est en tous points      ALPA 11 si in allen Punkten mit der
semblable au moddle 11 el. Son ma-         11 el identisch. Die Handhabunq  ist
 niement est donc identique, m6me         dieselbe, selbst was die Beiich-
en ce qui concerne ? mesure de l'ex-        tungsmessung  betrifft. Der augen-
 position. La diff6ren( ? apparente 16-         scheinliche Unterschied besteht in
                                                                              3side dans le fait qu.. le 11 si est        der Tatsache, dass die 11 si mit                                             Leuchtdiod.gn versehen ist: die gelbepourvu      de                    lumineuses: la        3 diodes                                                                      grune                                     bedeutet                                                    Uberlichtung,                                                          diejaune      qui            signifie                    surexposition,                                                la          zeigt                                                      die korrekte                                                             Belichtung                                                                                 an,                                                                       undverte qui signifie exposition correcte          die rote die Unterbelichtung.et la rouge qui signifie sous-        Der wirkliche Unterschied-ist daher
exposition.                            im innern verborgen. Die ALPA 11 si
                                                             ist mit einem elektronischen SystemLa diff6rence r6elle est donc interne.                                          versehen, das aus 2 Silizium-ZellenL'ALPA 11 si est 6quip6 d'un systdme                                                    fur die Belichtunqsmessunq und aus6lectronique comportant 2 cellules          einer CdS Zelle lum Ausqleich des
au silicium pour la mesure de l'expo-          Einfalles von Fremdlicht 6urch dassition et une cellule CdS pour la         Okular besteht. Der Mess-Spielraum
compensation de la lumidre parasite        der durch Silizium-Zellen wahroe-
pouvant entrer par l'oculaire. La      nommen wird, reicht von O.O1 bis
gamme d'6clairement percue par les       10OOO0 Lux.
cellules si s'6tend de O.O1 a 1OOOO0         Dies bedeutet, dass alle Verschluss-
lux.                                       geschwindigkeiten wirklich mit allen
                                        Filmempfindlichkeiten  gekuppelt
Ce qui signifie que toutes les vites-         sind. In weniger technischer Spra-
ses sont r6ellement coupl6es d tou-        che bedeutet dies, dass es nunmehrtes les sensibilit6s. En clair,  il est        moglich geworden ist, in einer Reihe
maintenant possible de mesurer en       wie folgt zu messen: von 1/1000
continu du 1/1OOO S avec une sensi-        Sek. bei einer Filmempfindlichkeit
bilit6 de 3 ASA d 1 S avec un film de        von 3 ASA bis zu einer Sekunde mit
6400 ASA   !                                  einer Filmempfindlichkeit von 6400                                ASA (DIN 39).
De plus, les cellules si ne pr6sentent          Zusiitzlich weisen die Siliziumzellen
plus l'inconv6nient du temps de 16-       den Nachteil des verspdtet in Aktion
ponse (accoutumance progressive d         tretens (progressives Gewohnen an
de faibles niveaux d'6clairage) ni de       schwache LichtverhSltnisse und des
m6moire (6blouissement aprds un        Geddchtnis-Effektes :   geschockt
6clairage intense). La mesure est         sein nach Aufnahme eines starken
instantan6e quel que soit le niveau          Lichtstrahles) nicht mehr auf. Die
de l'6clairement.                       Messung erfolgt augenblicklich wie                                       immer die Beleuchtungsverhaltnisse
La compensation op6r6e par la 3e        auch seien.
cellule a 6t6 elle aussi am6lio16e oar        Der Umfang der Ausgleichsmoglich-
la sensibilit6 du systdme, d tel point         keiten der dritten Zelle wurde durch
qu'elle peut m6me atteindre plus de          die vergrosserte Sensibilitat des Sy-
lOOo/o dans certains cas oir l'6clai-       stems ebenfalls verbessert, je so-rage parasite est plus intense que        weit perfektioniert, dass sie soqar                                   mehr als lOOo/o erreichen kann, dTescelui atteignant l'objectif.                                                    in gewissen Fdllen, wenn das Streu-
                                                licht intensiver ist, als das Haupt-
                                                              licht, dass das Objektiv erreicht.
View original page 18Page 19 · Read text
I
ENGLISH            ITALIANO

 Except for the electronic system of       Ad eccezione del sistema elettronico
 exposure measurement, the ALPA        di  misurazione  dell'esposizione,
 11 si is in every aspect similar to        I'ALPA 11 si d simile in ogni punto al
 model 11 el. lts handling is therefore        modello 11 el. llsuo maneggiamento
 identical, even where the exposure      C dunque identico, perfino in quel
 measurement is concerned. The ap-        che concerne la misurazione  dell'e-
 parent difference resides in the fact         sposizione. La differenza apparente
 that the 11 si has 3 light-omitting          risiede nel fatto che  il 11 si d munito
 diodes: yellow one denoting overex-           di 3 diodi luminosi:  il giallo significa
 posure, green one the correct ex-         sovra-esposizione,  il verde significa
 posure and the red denoting under-          esposizione giusta ed il rosso signifi-
 exposu re.                                  ca sotto-esposizione.
The real difference is thus internal.        La differenza reale d dunque all'in-
ALPA 11 si has an electronic system          terno. L'ALPA 11 sid munito di un si-
 with 2 silicium cells for measuring       stema elettronico che comprende
 exposure, and a CdS cell for com-       2 cellule al silicio per la misura del-
pensating parasitic light which          l'esposizione ed una cellula al CdS
 might enter through the view finder,         per la compensazione  della luce pa-
The range of light levels detected by           rasita che potrebbe entrare attraver-
the si cells covers a range fr:om O,O1       so l'oculare. La gamma d'illumina-
and 100OOO lux.                             zione percepita dalle cellule al silicio
This means that all the speeds are         siestende da 0.01 a lOOOOO lux.
definitely coupled with all the sen-        Cid significa che tutte le velocitd
sibilities. In fact it ist now possible to       sono accoppiate a tutte le sensibi-
measure continuously from 1/1000             litd. In chiaro, adesso d possibile ef-
sec with a sentivity of 3 ASA to 1 sec         fettuare una misurazione continua
with a film of 6400 ASA   !                      dal 1/1OOO sec. con una sensibilita di
                                 3 ASA a 1 sec con una pellicola diMoreover, the si cells no longer pre-                                     6400 ASA    !sent the inconvenience of response
time (progressive sensitization to           Inoltre, le cellule al si non presenta-
weak lighting level) nor of memory        no pi0 l'inconveniente del tempo di
(saturation after intense lighting).         responso (adattazione progressiva a
Measure is instantaneous whatever              livelli deboli d'illuminazione) ni quel-
the level of lighting.                                lo della memoria (acecamento dopo
The compensation brought about by        un illuminazione intensa). La misura-
the 3rd cell has also been improved          zione d instantanea a qualsiasi livello
upon by the sensitivity of the system              d'illu minazione.
to such an extent that it can reach        La compensazione effettuata dalla
more than lOOo/o, in the event that        3a cellula d stata anch'essa amelio-
parasitic lighting is more intense          rata a mezzo della sensibilitd del si-
than the light reaching the objective.        stema a tal punto che essa pud rag-
                                         giungere  il lOOo/o in certi casi dove
                                                 l'illuminazione parasita d pii intensa
                                                       di quella che raggiunge l'obiettivo.
View original page 19Page 20 · Read text
www.butkus.us
ESPAwOI-

 Excepto el sistema electr6nico para
 la medida de exposici6n, el ALPA
 11 si es absolutamente semejante  al
 modelo 11 el. Su manejo queda pu6s
 el mismo, tambi6n para la medida de
 la exposici6n. La difer6ncia aparente          Aq reside en le hecho de que el ALPA
 11 si posee 3 indicadores luminosos:
amarillo significa sobreexposici6n,
verde exposici6n correcta, rojo ex-
 posici6n    i nsuficiente.
La diferencia real es solamente in-
terna. El modelo ALPA 11 si posee un
sistema electr6nico con 2 c6lulas al       lmage du viseur, avec le d6poli et
 silicio para la medida de la exposi-           les 3 signaux lumineux (LEDS).
ci6n y una c6lula CdS para la com-
pensaci6n de la luz par5sita podien-
do entrar por el ocular. La intensidad        Ansicht des Suchers mit Matt-
de la luz medida por las c6lulas se         scheibe und den Belichtungssignal
extiende de O.O1 a lOOOOO lux. Esta          (LEDS).
ventaja permite el uso de todas las
velocidades para todas las sensibili-
dades. Es decir que ahora se puede        Viewer image, with groundglass and
medir en continuo 1/1OOO seg. con          the 3 signals (LEDS).
una sensibilidad de 3 ASA y hasta  1
seg. una sensibilidad de 64O0 ASA   !
                                                                       ll visore col vetro smerigliato ed   iAdem6s, las c6lulas si pueden dar        3 segnali luminosi (LEDS).una medida instantdnea para cual-
quier intensidad de luz sin presentar
las desventajas conocidas del tiem-       lmagen del visor con cristal esme-po de repuesta (par luz floja) y de           rillado y los 3 indicadores luminososmemoria (deslumbramiento des-         (LEDS).
pu6s de una iluminaci6n intensa).
ta compensaci6n lograda con la ter-
cera c6lula ha estado tambi6n mejo-
rada. La sensibilidad del sistema ac-
tual permite una compensacion de
mds de lOOo/o en ciertos casos de luz
par6sita mds intensa que la que llega
alobjetivo.


                                                                                                                                                                                                               f mprim6 en Suisse 5/218/1/8.76
                                                         Gedruckt in der Schweiz 5/218/1/8.76
                                                                Printed in Switzerland 5/218/1/8.7 6
                                                      Stampato  in Svizzera  5/218/1/8.7 6
                                                   Estamoado en Suiza 5/218/18.7 6
View original page 20Related documents and language editions
From the M. Butkus archive. Original publisher and archive notices are retained.
Check the model and edition against your equipment.
PDF verified 2026-10-10.