Light meters
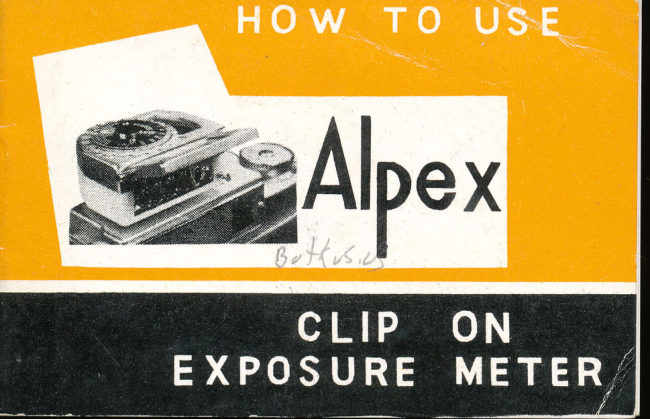
Alpex Exposure Meter User manual
User manual for Alpex Exposure Meter. 15 pages in English. Read the original PDF, download or print a copy without registration.
15 pagesEnglish1.6 MB PDF
Loading your manual…Open PDF directly
Document details
- Brand
- Alpex
- Model / document
- Alpex Exposure Meter
- Document type
- User manual
- Language
- English
- Pages
- 15
- File size
- 1.6 MB
- Category
- Light meters
- Document date
- Not specified in catalog
Search available document text
Find a term, then jump to its page in the original PDF. Image-only pages may not be searchable; check the PDF for exact wording and diagrams.
Page 2 · Read text
ALPTX CLIP OII TIPOSURT lilTTTR
    Double Range; for High and Low Reflected-l-iSht
     -ettu.trins  a-hir Alp"" Cli@            frrf"i"L  the,
, accessory shoe of your camera, you can use your camera
 as a built in meter one.   And you can use this meter
  alone, too.
 -  The specification of the Alpex CIip on Exposure
                 Meter are as follows.
     Film Exposure Index Scale....lSA 6 to ASA 6400
                              or DIN 940 to 38/10
     Scale of Shutter Speed.  .I/2sec. to 14000 sec.
     Scale of Diaphragm Stop.   f/L ta t/45

   .<'
View original page 2Page 3 · Read text
Scale of Light Values  2 to 19
Polaroid numbers     2 to  I
Scale of Cine        8 to 32
   Acceptance ASA Class B

           0PERATtll8 r1{ST RUCTl0ll
                        1. Turn the ASA (DIN) Index
                       Dial (C) until properASA (DIN)
                     index of film used appears in
                     cither the Exposure index Win-
                  dow ([:White or B:Red).
               -?-
View original page 3Page 4 · Read text
ASA (ntN) Wind.orzof \Mhitu I6 to'  '  '  '  ' ' (Black number)                             inru 9/rc to(Black number)
                             Ig to'  '  '  '  ' ' (Red number)   ASA (DIN) Window of Red                             lDINl0/10to(Red number)
2. Aim the meter towards the subject from camera posi-
tion.  Then take thc readings on the Light Scale (F)
indicated by the Needle (E).  When the front cover is
closed, read the closed number on it.
3. Move the Outer Dial (G) to  correspond the index on
the Light Scale at the Connecting mark (H).
4. After setting the Outer Dial (G) anv two marks opposite
each other     combination of shutter speed on the ASA
index Dial (I) and f-stop on the Outer Dial    are the
correct exposure.
                                                 ,
View original page 4Page 6 · Read text
after you set the Outer Dial.
    b. Dark Scene: Where the meter need'le does  ribt
move far enough to obtain a reading. Push the button (J)
to open the Front Cover, and take the readings using red
numbers.
     c. The middle line of each f-number on the Outer
Dial shows the middle f'number of each other.
    d- Shoe: This clip on Exposure Meter can be attach to
any type of camera by moving the Shoe (M).  Loosenning
the Screw (N), the Shoe moves to "a" line, and remove
the Screw and down to the Hole (P),   it moves to "b"
line. (See illust. Pase 6)
                  -5-
View original page 6Page 7 · Read text
e. Zero-Adjustment:  If the
                        Needle does not return to zero
                              position,    when no light is
                         directed toward it. Shut out all
                        light from   light-window with
                   your hand, and turn the zero
                         Adjusting Screw (O) slowly by
                        small screw driver until the'Ne-
                         edlb comes to zero line.

         HOW TO DO USEFULLY
   For correct exposure take the  readings by holding
the meter 3 or 4 inches from the subject.
                   -6-
View original page 7Page 8 · Read text
For the contrasty scene, the
 safest method to take readings
 the average of the lightest and the
darkest part of it.  And if inte-
rested in a particular part scene,
take it from the important part of
the scene
    In this method, taking care
that the meter does not read its
own and your shadow.

-7  -
View original page 8Page 10 · Read text
Wiien using a filter for your camera' dvide the
                                                                            set         cxposure ii"rcle>< of the film by the filter factor, and
          the result in the exposure index window.
tl
View original page 10Page 12 · Read text
FOR, COLOR PICTl|RES
               The permissible limits of the
               exposure for the color film is very
               narrow. However the meter tech-
                nic is same as for black-and-white
                   film so you set the exposure index
               accordingly. Usually, the base of
             the exposure means the lightest
              part of the subject. The result
                   will be found most satisfactory by
               having the lighting contrast (the
                key-light and the fil-inJight) ud-
                 justed with in 1 :4.
           -11 -
View original page 12Page 13 · Read text
Specification of Alper Clip on erposure meter,
    Direct
                                        Setting ASA ex-
                                      posure index of the
                                               film used, You use
                                        the shutter sPeed on
                                          the connecting mark,
                                                      it is the correct [-
number, the needle pointed on the iight scale.
Example; When you use the film, ASA exposure index
                                                    connecting          is 100, the shutter speed on the
View original page 13Page 14 · Read text
mark is l/725 sec.
   The f-number, in this case,  is pointcd
on the light scale by the needle. And it  is
not need to turn the outer dial.
View original page 14
Page 15 · Read text
c A uT l01l
   However shock resistant your Alpex Clip on ex-
posure meter iS, it must still be handled carefully.
   Do not jerk the meter suddenly or drop it.  It  should
not also be subjected to prololged extreme temperature
and moisture.


                                     Printed    Japan.
View original page 15From the M. Butkus archive. Original publisher and archive notices are retained.
Check the model and edition against your equipment.
PDF verified 2026-10-10.