Photography reference
Amateur photo - seneca cameras Product booklet
Product booklet for Amateur photo - seneca cameras. 42 pages in English. Read the original PDF, download or print a copy without registration.
42 pagesEnglish3.3 MB PDF
Loading your manual…Open PDF directly
Document details
- Brand
- Various brands
- Model / document
- Amateur photo - seneca cameras
- Document type
- Product booklet
- Language
- English
- Pages
- 42
- File size
- 3.3 MB
- Category
- Photography reference
- Document date
- Not specified in catalog
Search available document text
Find a term, then jump to its page in the original PDF. Image-only pages may not be searchable; check the PDF for exact wording and diagrams.
Page 3 · Read text
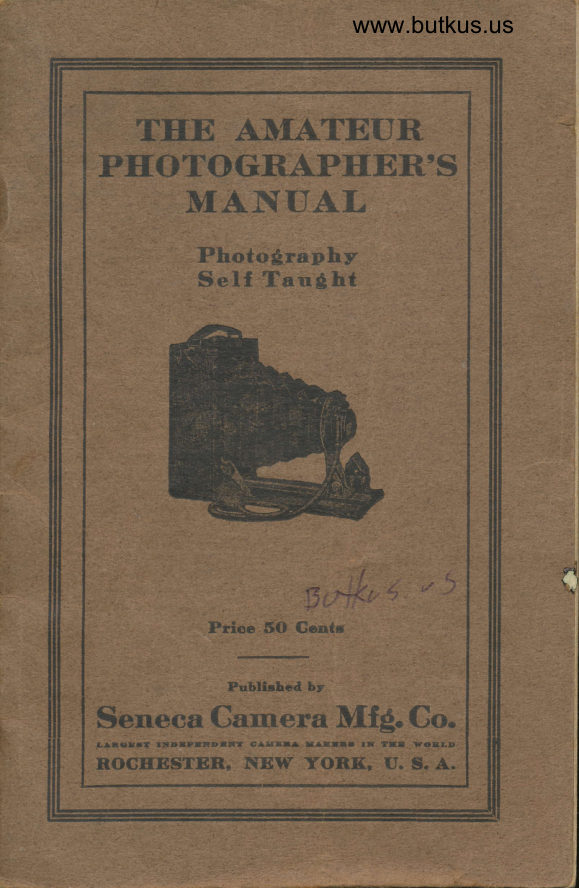
THE ANIATEUR,
PI{OTOGRAPHBR'S
   MANI]AL
        Photo€,raphy
        Self TauS ht


                                                                                    ;l !
                                           ff,'"i     i-' .."-'.{.:
           Prioe 5O Gentc

                Publishcd by
Seneca Carnera Mfg. Co.
LlBeraT    r^.cDrPrt.DrlfT   GAUrll    .xlnrl.         rlt  TII    ryor.L[
ROGEESTER. NEW YORK, U. S. A.
View original page 3Page 4 · Read text
www.butkus.us
   Trrn Sror,sECA
Hxp$sunro MBTn:I€
Junt tho.Thln8.ftir lhe Seilnner as            l* !.qr &FsrldJ
    lf,'cll as Belnt o' Glreat EeIp io       iihc Advcnoed Aorteul or    dl@h                  ' ProfesrEloaal
   Ta op*rate the -Seneca Expoeur+
Mcter it is only necessrry to turn the dirk
 until the pointers or index letters indicatc
the condiltionr of lighU subject, platc, dia-
phragm siop, etc. Tlrc figuree ir, the          s€@6llq
margin corresponding then indicete the         affiCGd.raqi'.cocorrcct .cxposure. The meter measures           'rM.i-r*Fia_
4s/ax272in"h"t.  Just fits the poclet.
     Tellr whut diaphngra orstop to use UMIR Al"[ 00illHTi0NS,
       - Tclls what length of time to maLe thc cxposure UIDIR Atl
00f{D[lnils.
    Use eny ol thc lee<iing maker of plater or film-fast plates,
rlow plates. irochrometic  plates. orthcchromatic  plates, non-
halation plater. The prcper expolure is noted for all   you
can't miss e picture if the exposura meter is ured. Thinl- what
that meanr !
   The Seneca Erporure Meter lreats Tfff $UBJI0T, u'hich
nay include Sea Viewr, Open Landscaper(without  loreground)
averagc Landscapcs (with foreground). Street Sccnes, Buildingr,
Groups, Portraits in shaCe. Indoor Por.raits end lntericrs.
        1,10ffi
dull.        vc_ry-d-t,l.|,.--  latensc-- -- .-suulighL bright, faint chadow cart by sua"     Mffi{m Al{D ilouR"
    Int fouf; stAs0ills.
      Iilf nATf USfD-lt i= aH given in a {er,t'rimple trbles thar
rnf cfrild can undcntand and succersftilly operate r camera by
tt3rng:t,
         Price, Foatpaid, 25 Centr
SENECACAMERA MFG:CO.
         Rochester, N. Y., U. S. A
View original page 4Page 7 · Read text
THE AMATEUR PIIOTOGRAPHER'S MANUAL


      PRBFACE

l:-lE    have issued this little book for the information of
I W  I those who desire to become acquainted with the| *       | processe.s of photography, from the time the plate
lHHrtf or film is exposed, thr-ough the variorrs. steps,-t6 theI itiiiiiffi | hnal_mountrng of the photograph on the card.i-=l           It is obvious that the ability required to press a
 button,            then send a bundle of plates or film to a develop-        -and ing establishment  is of no high order. A person whose ac-
 quaintance with photography has been limited to this childish
 operation is.not an.ama.teur,.but p mere machine; he can
uever experience the absorbing interest and keen satis-
 faction which the real amateur feels. He bears about the
same relation to the latter that the press feeder of a print-
ing office does_ to the cultivated artist whose skilled fihgers
have engraved the plate  !
    Moreover, the photographer whose knowledge has been
confined to pressing the button, can never hofe to make
good picture-s, excepting through an occasionally lucky
chance, and he can neaer know to ulrct e.rtent the boor
results he gets may be due to his own def ective knowlidse.
   On the other hand, a practice in the develoDment bfpictures improves the owner's knolvledge of hij camera.
Every. picture taken reveals some new possibility, shows
some important detail with which he_can relrew his expe-
rience. He soon learns to feel that love and interest ior
his subject_yhiqh only personal effort and personal success
can give. He discovers new mysteries dailv. and learns to
understand his instrument and its possihiiiiies. His pic-
tures soon begin to show the thought and handiwork of
the artist, and he becomes a membef of the Guild of Ama-
teur Ph-otographers-a charmed circle which th,e presslhe-
bu,tton-fiend can nez)er hope to enter.
    There are few branches of industry which have not in                                   I
                                         3                                                                                                                                                                                                                                                                                                              II
                                                                                                                                                                                                    {
                                                                                                                                                                                                                  I
                                                                                                                                 il)I
View original page 7Page 8 · Read text
www.butkus.us
   THE AMATEUR PHOTOGRAPHER'S MAI{UAL
 recent years called on photography for aid. There is, tfiere.
 lore, a commercial value in the knowledge of this fascinat.
 ing subject which an intelligent man cann'ot afford to ignore.
 M-any _recent improvement.s have been made by ama-teurs,who discovered them while learning the praitice of thti
 art, and there i.s no limit to the rich possibilities, whether
of aesthetic enjoyment or of practical advancement.  that
the earnest learner may himself hope to achieve.
    The volume begins by-giv.ing the reader a short descrip.
tion of the essentials of photography; the cafir€fdi tia
 plate holder, and the dry plates, the-film pack adaptei and
 the film pack, with a word as to the lens.- He is then told
how to arrange a dark room and to Drepare the olates for
 exposure. The method of using the cimera is-then ex-
plained, and important directions-are given for taking land.
 scapes.
    The amateur is advised to begin with landscafes, Not
only are the restdts very pleasing, but the chancei of suc-
Jess for the begirrner are greatest, aud the lack of €Ipg--of,rience is not so keenly felt in this as in other classes
work.
    Following the directions for exposure in taking land-
scapes, are concise and clear suggestions and explanations
for developing, printing, toning and mounting.
    Having thtrs accustonred himself to prepare ftis ohoto-
graphs, the operator will then be prepaicd- to advance to
those processes d.emanding greater knowle.dge and experi-
ence, viz.:-interiors, portraits, and flashlights. Coupled
qith the.practice,lle will..alrcady have gail"--d in prepaiing
his out-door work, he will obtain very satisfactory results-,
   The book eoncludes with a number of suggestive hints
and a collection of formtrlas whose intrinsic and economic
value will at onee be recognized by practised arnateurs, and
which beginners will do welt to cir-efully note.
   In conclusion, the reader is requested to remembef
that no uflnecessary directions have been given. Indeed
we are frank to adrnit that we have necessarily been unable
to treat the subject at strfficient length becauje of the lim-
ited s_pace at our disposal. We trust many of our readersmay become so interested in photographv that thev will
desire further to investigate this a6soibing subject. To
such we would recommend the excellent series of. Photo.
Il[iniature publications, and we know of no bettefliterature on photographic subjects.,
View original page 8Page 10 · Read text
www.butkus.us
   THE AMATEUR PHOTOGRAPIIER'S MANUAL
of cameras, or the pneumatic shutter, which is generally
found on those of a higher grade.
    These latter shutteis arJ usually adjustable to sptreds
varving from one one-hundredth part of a second to one sec-ondl aid to time exposures. All pneumatic shutters are
fitted with either iris or revolving diaphragms, generally
the former. The newest type of shutter is automatic in
its action, and does not require to be set before being
released.
    The Finctef, assists the operator in properly locating
the view on the plate, and is generally attached to the
bed of the camera.    Focusing Scale. If the object to be photographed be
near at hand, judge the distance as nearly- as possible and
secure the fiont io that the pointer is directly over the
                                                         feet.                        scale,                       which indicates          on the        figureDroDer'   ^If                                    one hundred                                  than                       distant-more           object                   is far       thi
feet-bring the arrow to the point on the scale marked G,
which means "general focus." On some -focusing-scales,where there is nb G mark, 100 is its equivalent, and is used
for all objects one hundred feet or more distant.
           THE LENS
    Ifowever the prospective purchaser ffiay suit his fancy,
he must recognize- this as a fact :  Without a good lens he
can never hope to be successful.
   The exterior of a camera may prove very deceptive.
Many of the unfortunate victims of cheap cameras whose
appearance was similar to those of a high grade have dis-
covered, too late, that the lens, the soul of the camera, has
been sacrificed to other parts relatively of much less im-
portance. A customer will be best secured in this matter
by depending on the guarantee of a reputable manufacturer.
   Two kinds of lenses may be necessary: One, the Rec-
tilinear, which is a double lens, best answers general
requirements, and can be obtained at moderate cost. In
confined positions, such as interiors, narrow streets, or in
photographing high buildings, this lens will not answer,because the field which it covers, about 50 degrees, is not
great enough. For such work it will be necessary to use a
Wide Angle lens, which generally has an angle of from 80
to 90 degrees..
  A perfectly clean lens is essential to the best results,and it is therefore advisable occasionally to examine the
View original page 10Page 11 · Read text
THE AMATEUR PIIOTOGRAPHER'S MANUAL
 objective. Should  it require-aery clearring, this should be done with a soft linen cloth,       slightly"'moistened with alco-
 Itol. The lens may be unscr-ewed' fr5m the        to facil- itate the work. Both surfaces of each combination"u-eri   should
 be cleaned. This method  is- pre{erable to using chamois.
    Lenses should never be kept rn a temDerature of
 unusual warmth or left exposed io the direct rays of the
 sun' as this may cause the cement between the combinations
 to soften or deteriorate.
       THE PLATE HOLDERS
     Plate holders should be strong and absolutely imper-
 vious t9 light. They are cases which protect the drv plates
 frorn the light- while being conveyed tb and from tlie^carn_ era to the dark room.
   A number of extra plate holders, at least six, will be found convenient, as they obviate frequent changing
        THE DRY PLATES
    These are the prepared sensitive plates on which the
 picture is taken, and which are afterward develoo"a- ittto negatives.            Fo-r instantaneous work a rapid plate is-r,"..s-                 - sa.ry,              landscapes      but for                    and                                                             plate                              work                                                                  i slower                             general-will           better                                                     it will give                    results, as                                 allow                                more                                                           latitud'e                                                                in exposure.
  .  .$rv reliable brand o{ dry plates may be used, but bestot all are the color-sensitive plates, known variouslv as
Orthochromatic and Isochromitic, which in combi"i,-ion
with the Ray Filter, render the color values of nature-'
     THE FILM PACK ADAPTER
    There is- only one adapter to be used no matter what
                                 Seneca- Light Tight (hinge_ l1-,"t1 you havg-that is theless) Ad_apter. Th_is adapter is daintily fashionda of alum-
inum and cherry. Interchangeable- witli the plate holdeii; itrs easily loaded and manipulated and is ibsolutely lighitight.
            .fHE FILM PACK ,                  I
   This is a well-known device for holdine 12 sheets"a"aof film .in a             package, each - sheet being               'fo,arrarged so             -that th-ey _can be successiv-ely"u,if.r-aprese.nt.agxposure. This is the best method yet d6viied I'or-;.i;;film.
View original page 11Page 12 · Read text
www.butkus.us
       TIIE AMATEUR PHOTOGRAPHER'S MANUAL

       shourd ,n" ,1IP'3f55"fr3P,5  artinciar right,-dry    other than that from the ruby lamp, strike the sensitive
    plate           -previous. to its development,  it will be rendered unfil    for photographic purposes.
      The first essential, therefore, is absolute freedom from
    any- light excepting the rays from the ruby lamp. A closet
    witF 4 tightly fitting door (felt can be plac-ed over the edges   and the keyhole) will be found to make an excellent dark
   r99mr bu! as running water is desirable, though not essen-
    tial the bath-room makes a very good substltute for the
    dark room of the professional studio. If the room has a
   window, extraordinary precautions should be taken.
    -  The operator is now ready to begin work. After enter-    ing he should first close the <ioor an-d wait a few moments
    until the eyes have become accustomed to the darkness; if   any light enters it can then be readily detected and
    excluded.
       FILLING THE PLATE HOLDER
      One of the first steps in making                               a photograph is to filt                                                            -   the plate holder with dry plates.  Enter the dark room,
   close the door and dust the plate holders thoroughly with
   a brush. Then light the ruby lamp, and lock the door to
   avoid interruption.
       Place the lamp before you, and, holding the plate by
   the edges, carefully and slowly brush it withl cambl's hai-r
   brush. Do not brush the plates briskly, for this will create
    el,:ctrical action, and will attract dust,-which results in pin-
.  holed negatives.
      Hold the plate so that the rays of light from the lamp
   will fall acroSs it.  It will be observed- that one side ii    glossy, the other dull. The dull side is the sensitive side
   and should _alyays be placed outward. Having filled the   holder, carefully replace the slides of the holder-and cover
   the box of plates before opening the dark room door.
        \   OPERATING TI{E CAMERA         If a tripod -camera, or a hand camera with tripod   attachment is being used, first set up the tripod and then
    secure the camera to it by means of the screw-which passes
   through the tripod into ihe tripod plate on the bott6m of
   the camera.
      See that the front of the camera comes directlv over
   one leg of the tripod, and place the legs as nearly eiuidis-
                                       t
View original page 12Page 13 · Read text
THE AMATEUR PIIOTOGRAPHER'S MANUAL
  tant. as possible; this affords the operator plenty of room at
 the bacll.
     Care must be taken that the camera is leael, otherwisc
 larallel ztertical lines zpill not be reproduced as such on the
 ground glass, ercept zaith the oid of the swing bach.
   By attaching a level to the camera, a true level may be
 quickly and accurately obtained.
        THE SWING BACK
    fn certain confined situations, the operator will some- times find it impossible to include all that he desires on
 the upper portion of his plate, even by taking advantage of
 the rising front movement. It then becomes necessary to tilt the camera upward. It will be noted that when this
 is done, the parallel vertical lines in the object appear con-
vergent on the ground glass.
    This can be corrected only by the use of the swing
                                          glass must be brouglii!".k, by means of which the giouidinto the perpendicular position. Onlv when the sround
 glags. (and consequently the plate) is in a perpendicular-beposition, will converging or pylamidal effects    avoided.
         important that the focus be secured after adjust- -   It ising the swing back, and great care must be irercisia in
lroferly dividing the focus. It is advisable, and in some
 cases essential, to use the small stops in the shutter in con-nection with the swing back.                                   w 5                               !44y:                                                                    .''    CHOOSING THE POINT OF                      VIEW
   Laudscapes. Much of the success of a landscape
photograph depends upon the proper choice of the point bf
view. Before deciding upon this, look well at the-subjectas it appears Jrom all-points                                  -available, and study carefullythe vierv as it appears on the ground glass. Remembe-r
that the photograph will show eiactly what is seen there  I
therefore pay particular attention to the avoidance of anv
features that will detract from the beautv of the pictur6.
Observe especially the foreground, as this is thi most
p.rominent part of the picture, and should always be attrac-
tlve.
                                               exercise                                                           of
                                               log into anjudicious-  Theretasteis much; thus,- opportunitythe.introductionhereofforantheold
otherwise barren and uninteresting foreground miy trans-
form the scene into a very pretty bit oI landscape photo-
graphy.
   The introduction of human figures adds strength and
View original page 13Page 15 · Read text
THE AMATEUR PHOTOGRAPHER'S MANUAL
     achromatic lenses have a curved field with the larger open-
      1qss,,.and..tha! the best results are therefore seiured by     dividiug the Focusi that is, by focusing, not on the center
     of the plate, bLi on that part-of the ground glass lying mid- .   Way between the center-and the edge. Th"is is imp"ortant,j;^,f    ag it brings                out                    the                          best results                                 thaiare                                             to be                                            had'from                                                                                                        i '': t  given               These                          instructions         lens                                                               portfaits.                                     not apply                            do                                                 to
          STOPS OR DIAPHRAGMS
                    Jocus       The              correct                        having                                                                                                   -    -                                                                    -' the fiext step          decide     is       to                        stop             on the                           to b"e                                      been_used.obtained,'
       Here the novice. mirst rely on a few simple rrrles, until
     experience has taught him the opening besi suited io the     subject in hand, and those at which t-he lens woit i-risi    under varying conditions of lieht.          It is obvious that the smaller the opening through
                     passes,    which           the                 light                           the                                   less liglrt                                            will                                                       ,"iit,                                                                         tfi. ti;;;:;      given                 hence            time;                        the                             smaller                                            stop,                                   the                                                    must                                            the longer     f    be        the          exposurg                  and                           vice                                   versa.
       For landscapes arrd.interiors a smail stop will give the
     best. results;^!6 o\.12 is .a very goo{ stop-f;;-i;dr.;p;,.: work, while for a ligh-ted interior,? is noie tob ,-;tt;;i      co.u.rse, in a                 -dimly-lighted interior, a larger stop than 64.   wil! be found necessarv.
              portrait work i.large stop, or even the full opening     _. .,Fqr    ot the lens, m'st be uscd and a short exposrlre given,btherl
    wise. the subject is apt to move before the "exposure is     finished.
       Depth of rocus is evidenced when objects in the field    of view which are close                       by t_h.- camera, u"d oiiti"i"t;..ii   as lvell, af! appe$ sharply- defin-ed on'the ground gi"i. ii    the same time. Depth-of focus is sometimei desira6le, and
    often equ{{v-undesirable. The smaUer the stap iseri,Ttri
     g-reater- will be the resulting dcpth of focus. When'it is    desired to subordi'ate all but one or ieveral objecis ir the    picture,-focus on the objects to be emphasized-;rrd expose    with a large opening.                                              . Ag instances oi this iind, portiaits
   and gro.ups might be cited.  . Do not get the impr&s'ion that     everlzffu1ng on your negative mtrst be sharp. The best
     artists of the day secure "atmosphere,, in iheir work-    Iandscape as well.-as other classes-by the judici,ols use of     tlre targe stops.
                         decided'upon-and_                                         adjusted                                                                      stop,                                                the    close,  \!.fenthe shutt.eryou. have(or-                                              place                     cap the                                                                               plat6.                                                the                                     lens) ;'-'''holde-r-in'position.                           camerai                   Moit                                                  patt.tn                                                            are                                              laie                                 bt-thena
View original page 15Page 16 · Read text
www.butkus.us
    TIIE AMATEUR PIIOTOGRAPIIER'S MANUAL
         rvith               spring-actuated                             ground_glass              .a                                       frame; T1d"                                                     be                                                           this                                                                    if the     case,          simplv                    fo.rce.the                           ground_gli;;-ir;;';ui'                                       *ougn                                                  "iv.*                 pl-ate to inserr          the                     horder, aTloiling-it                                    to spilni                                               nJ.t carefully draw the pla.te.'hoid"i-.iii. nearest the front of the camera. As an-additionql safetu.ard against any light entering round the prate horder, i; is ;;fi*io"til'iz,  tne
 focusing .cloth oaer .tke boch of tirc-camera, and allow it to f1!l    o1 either                             partiiuiaily                 side,'urebeing                                                    oiti..t ilr"                                  -#";--;;;;;..at.iut-io side.from           which                             irife-                               h;;                                                         ''di"l'                                                           ur" required exposure, and carefuiiy r.jta.. the slide. *iti,  il.," reverse         side outrvard.                  The                            ot6er- ptute--    in tni  t 6ta.i'-uynow     be exposed                             *uy.                   in the ."-.
      THE UNIFORM SYSTEM
 ,   Ih.g diaph.ragms_of most shutters are graduated accord- trg to the uniform system of the photog"riphi. s".i.i"Great_pritain. The graduations-"na-irt?ii-iqi,iiJr*ii  "ri"the "F" value system"are as followi:
   11. 9. No. 4-F-;- 8      U. S. No. &:F._32  u. s. No. 8_F:_11.31 U. s. N;: ris_F+41.2+  p. S. No. 16-F--16  U. S. ryo. ZSO-f'+64-  U. S. No. 32-F+22.62
    In the Uniform System each successive smaller stop
requires twice as long an exposrlr",               iinrii.o"ai^-tions, as-the ne_xt largrr, in order to ""a"iiu-"proAu.. it.  ii-.   ,trfton the.plate.        relative values of'the .*po.rr"i i.quit"dwrtn the drtterent-The  stops are therefore indicated by thegraduation.
 ,   lxamgles: -(a).  With the 16 stop, two seconds wasround to De correct exposure. Supposing that the stop    i.      lg be used, the proper.exposur"'wlttr"ttris tp;";     iiFtour trmes           that                require{                      wjth                           the                                       larger, this 6eing                                                                              -eigi.,ithequotient             of.         64 diviiled                 by                                 Exposrire'requireJ:                     16.
seconds.(b.) With the 32 stop, four seconds was the correct
exposure. Supposingthat the stop 8 is to be used, the cor-rect     -exp-osure rrnder the same conditions would tien be rlof the first, this                  .being the quotient of S Oiviaid by 5i..L.xposure requrred: one second.
            EXPOSURE
 -  Landscapes. One of the most difficult oroblems ofphotography is_to determine the propei ti-.  i5i-.*porrr..It rs a,-ge-neral rule that the time of exposure must be
gol-erned by the intensity and actinism oi the light and
                                      t2
View original page 16Page 18 · Read text
,
                            www.butkus.us
       THE AMATEUR PHOTOGRAPHER'S MANUAL
       the optician to make a lens embracing a wide-angle that
        will produce a sharp image with a large aperatuic. No
        definite statement can be made as to the siZe of opening
       necessary to secure good defrnition, as this depends largely                                                I
      on the nature of the subiect and whether it includes obiects       q
       situated in more or less separated planes.
          Exposure Meters.  Several devices of this class are
                                                                                                                                                                                                                                                                                                                                                                                                                              I       offered under different names, and are of varying degrees
      of conrplexity. They will be found very helpful to the                      .n
       beginner, for whom the process of "getting experience" is
       often very costly. See front inside cover for description
      and price of the Seneca Exposure Metef
             DEVELOPING                                                      i
         Have the following articles ready  2
            The Ruby Lamp,
            The Developing Mixture,
             The "Hypo" Solution.
         The last is a solution of hyposulphite of soda, I  lb. to       a pint of water.
        -  Have trays for each of these. Each tray shorrld at all       times be used exclusively for its proper solution, and be so
      marked for identification that there is no possibility of con-
        fttsion. If there is no running water have a large pitcher of
      cgol (not very cold water, and a tub or pail for waste.
      The water should be not over 70 degrees.
         Having lighted the lamp and locked the door, the
      worker is now re:rdy to proceed. Remember that although
        plates are safe from harmful effects in dim ruby light, too
       bright a light will produce fog. It is therefore advisable
      to cover the developing tray with a box or covef which
      can be removed when you wish to examine the negative.
          Orthochrcmatic or Isochromatic Plates should be
      loaded in almost total darkness, and developed by a very
        feeble light.
         Take the plate from the holder, and place it in the
       tray film side up; now pour out sufficient developer to
       cover every part of the plate at once.
        Rock the tray gently, meanwhile watching the plate       closely. If the exposrlre has been correctly timed, the
      image should appear in from one-half to three minutes.
             If the image appears immediately after applying the
        developer, this shows over exposur,e, and the action of the

                                                                                                                                                                                                                ll


!  *,-sirrs*ii$*i.,*;:.*iig"-trlr4*                                                                                                                                                                                                      '    '.'.':,.     .4
View original page 18Page 19 · Read text
THE AMATEUR PHOTOGRAPIIER'S MANUAL
developer should be restrained by adding a few drops of a
ten per cent. bromide of poiassium soluiion.
           image _appears very slowly, with great contrast.     If thebetween the high lights and shadows,-the platd has not been
sufficiently gxposed; in such a case ihe developing solution
should be diluted, or more alkali added if a-tw"o-solution
develop.er is             -being used. The alkali solution is usually thej'No. 2," and generally contains sodium or potassiuni car-
bonate.
    Continue the development until tke hi,gh li.ghts kazte
become aery dork. Corrcct developmerrt cainot 6e judged
b_y merely rratching for the image tb appear on the back-of
the plate, as the time for this vlries with the thickness of
the plate coating, the temperature of the solution and the
kind of developer used. The surest and safest wav is to
hold the plate between the eye and the light, and when the
image has almost or entirely disappeared, and the negative
has become so dark that the ol;siiver cannot see thiough
the high lights, the development must be stopped.
    Instantaneous exposrrres usually require longer devel-
opment than time exposllres.
   Now rinse the plate thoroughly with running water for
about thirty seconds, and proceed to the next operation.
                FIXING
  - We may repeat here the caution as to the danger ofmixing trays. Whenever the fixing solr-rtion has been pre-
pared, the photographer must thoroughly wash his hands
and be careful to allow no other chemical to touch the hypo.
A drop of hypo would ruin the developing solution.
    Place the developed and washed plate, or negative, in
the hypo solution, face up. Examine  it from time to time
and you will see that the white or grey color on the glass
side or back of the plate will gradually disappear. It  is
advisable to leave the negative in the hypo a few minutes
after the last trace of milkiness has disappeared. It is then
safe to admit white lisht.
    The sarne h1'po solution may be used for a whole batch
of plates, and, if  it does not become mnddy, for more. It
 is well, however, to run no risks, especially as the solution
ls lnexpenslve.
      WASHING THE NEGATIVE
   The negatives mnst now be thorouqhly washed to re-move all traces of the hypo. It may be done by soaking
                                    7t
View original page 19Page 20 · Read text
I
                         www.butkus.us
   THE AMATEUR PIIOTOGRAPIIER'S MA1VUAL
 them in dishes for one or two hotrrs, ckanging the uater abowt every.ten,minutes. A rnuch tetter way would be to
 use. a washing b_o>r, such as is described on'pnc"'-ZS. l" such a box a' hour's washi'g will suffice. 'D; not usewarm water.
    After washing, the negative_should be placed in a neg_           { _,, atrve      rack                               quick.           ,g                         verl-                                      drl.ing                       If                                                              is- desired,                                           may                                                                       it            9ry. De lmmersed                             rnurrrtes                                                  (Drrre                tew              lor             a                                                 grain                                       alcoJrol                                ln                                                    or                                                   I                                                     'hour,                                                     "o,wood),       when                   dry                          about                                     one-half                   it will                        in                                                                eu.n.
 less.                                                                               t
   Do not flace the nega-tizte-neer a,window or in a dusty
(oom to.-drg, nor _force the drying by artificial heut. Th:e Iatter will cause tke gelatine fiim 1o inelt.
              PRINTING
    General Dlrections. place the printin g frame face
down on the table and remove the back.' ptace-tt e-"e.nt;u"
to be printed from, film .side trp in the frame, arrd on it-place                                                                                           'a sheet of sensitized printing-but paper face down.
                                                     prece of . . ..Fefore replacing-the back, it is well to put in ablotting                         sheets             or a few                               newspapir                              of                                                         ctrt                                                       the                                                 to fit       ISpe{lrame.  'l           his improves                       the                            contact                               between                                                negative                                          the                                             andthe paper.
    Replace the back and set the frame out to print.
     If  tlte..n.egative is dense the print should be made in ..Clrect sultllgllt.
 .  A,weah ar thin negatizte gives better results if the printis made in the shade.
    Sometirnes it is desirable to make a quiclr orint from
a negative-which  reallyrequires shade prinfi'g; i'this case€over the front of the fraine with orre-or mo-r" thicknessesof white tisstre                -paper, depending upon the density of thenegative. Printing can thEn be done in the sun.
    Prints shoutrd in all cases be examined occasionallv dur-
r1S the prgcggs of .printing, but always in a subdired"tgfrt,
Open one-half of the frarne only, and-take care not to m'u.rethe paper.
 .   P_rinting on "Aristo" and silver papers shotrld be con-tinued until the shaelows have a bronZed appearance and
the picture is two or three shades darker thhn is desiredin the finished photograplr.
    \Vhcn finished, rernove the print and store it in a box(a dry-plate box is good), until a number have accumu-
lated.
View original page 20Page 21 · Read text
rT

   THE AMATEUR PHOTOGRAPHER'S MANUAL
    Printing in Clouds. It very often happens that agood landscape negative is lacking in cloud effects. If the-ky    of your negative does not print yhite, but gives a gray
tint, it should be masked.
             MASKING
    Hold your negative up to the light, place a sheet of any
transparent paper over the film side, and trace on it the out-
line of the sky. Lay this paper on a sheet of black paper
the same size as the-negative, and follow the outline with a
sharp knife. Place this black mask over the sky part ofthe negative, and place it in the printing frame, printing
as usual. Now select a suitable cloud negative, which may
have been made for the purpose, and place it in the printing
frame, using the other part of the black paper to mask the
landscape pbrtion which has been already printed. Then
put in the partly printed picture and print the sky. Print
considerably darker than you wish the finished picture to
aDDear.- -    In making cloud negatives use a small stop and give a
short exposure, from a fiftieth to a fifth second. IJse adeveloper weak in alkali. The Bay Tilter gives the best
cloud negatives, however.
    Cut-Outs. Vcry pretty effects may be secured by tak-
ing a piece of black paper, the size of the negative, and cut-
ting in it an opening of any desired shape and size. Circles,
ovals, rectangles and other figures can be used to cut out
all but the distinctive features of a negative. Place the cut-
out between the negative and the paper in printing, and the
results will amply repay you.
 FAULTY NEGATIVES; INTENSIFICATION
   The print may sometimes be found to be flat, i. e.,
devoid of contrasts. This is because the negative is too thin
on account of over-exposure or under-development.
    Such negatives can usually be improved by the follow-
ing---- treatment:    Ft"d;-ih.r"  solutions ,      p a''/Kq5 'ttj
                                      L oz       Bromide of no,"rlll;t     Water                             ... t6 "
                      No. 2.
        Bichloride of rnercury                     I oz.
       Water                    16"
                      No. 3.
                                        17
View original page 21Page 22 · Read text
www.butkus.us
  THE AMATEUR PHOTOGRAPHER'S MANUAL
        Sulphite of soda               1 oz.
       Water
   Soak the plate well in water and then immerse for
about five minutes in No. 1. Then pour this off, and flow
plate with No. 2, until the film is entirely whitened. Washthe plate well and immerse in No. 3 until it resumes its
natural color, then wash thoroughly, and place in rack to
ory.
    Intensifying may be done immediately after fixing and
washing, or at any'later time. The deg?ee of intenlifica-
tion depends upon the length of time the negative is left
in the No. 2 solution. Unless negatives have been thor-
oughly fixed, they will turn yellow from this treatment.
   OVER-DEVELOPMENT; REDUCTION
    Sometimes when development is carried too far, the
resulting negative is so opaque, that even several hours are
required to print from it.  In this case reduction must be
resorted to, using this formula:
                     No. 1.
       Red prussiate of potash
      Water                                  ... 16 "
                     No. 2.
        Hyposulphite of soda                .   I oz.
       Water
    Immerse the negatirre it  the hypo solution, to every
ounce of which have been added five or six drops of No. 1.
When sufficiently reduced, remove and wash the negative
 thoroughly. No. 1 is the reducing agent, and the action on
 the negative depends upon the quantity used.
    Very ofterr only part of the negative needs reduction,
the other parts being of the right density. In this case
 soak the plate well in the hypo solution, then remove  it,
and apply the red prussiate to the parts where needed, with
 a small brush.
   The above formulas will be found very valuable, but
 donit depend, uport them to correct errors in exposure. If
 the exposure is found to be at fault, make another negative
 rather than resort to these artifices to remedy the first.
  TRIMMING AND TONING THE PRINTS
    Always trim before the prints are toned. Although the
 paper is not so sensitive as the dry plate, trimming should
 always be done in a weak light.
                'ls
View original page 22Page 24 · Read text
www.butkus.us
        THE AMATEUR PHOTOGRAPHER'S MANUAL
        Baper to remove any excess of water, and apply a coat of
        mounting paste to the back. A bristle brush should be used
        Ior thls prlrpose.
           Adjust the print in the center of the card mount, and,
         placing a piece of manila paper over the face of the print,
        rgb quickly from the center towards the edges, to expel all
          air bubbles.
             Nezter mount prints while dry. If you do not wish to
       mount them immediately after washing, allow them to Cry,
       and when ready to mount place them in water until they
           lie flat; then mount as usual-.
              GLACE FINISH
               It you do not want to mount Aristotype prints, they
        1ray be given a high polish by means of a ferrotype  plate.      Rub them in contact with the latter under watei to avoid
         air-bubbles, and then sclueegee as much as possible of the        water from between plate and print. Then dry, and do not
        att9mpt to peel off the print before it is bone dry. Should
         prints show a tendency to stick to the plates, rub the latter
        with powdered French chalk, and then dust off. The ferro-
        type must always be clean.
                  INTERIORS
            After the amateur has become in a degree successful in
        taking ogt-door pictures, he naturally tuins to something
       more difficult, and in interior photographv he will finrl a          field for exercising his ingenuity. prolt-enis and difficulties
        which had not confronted him in landscape work will atford
       ample scope for experiment and originality
            In almost all interior work a Wide Angle lens of relia-
         ble manufacture will be found indispensabl6.
                It is often necessary, on account of lack of room, to set
        the camera in a hall or passage, pointing through the open
        door, or perhaps on a porch, pointing the camera through .      an open wlndow.
                 possible, do not include any windows. If, however,                . If           it is necessary to include a window, draw the shade and
        proceed with exposure until nearly complete, then cap the
         lens or close the shutter and raise the curtain, after wtrich
        expose a half second more. By the use of non-halation or
        "backed" plates, however, the necessity for th;s method is
        obviated. An excellent method of baiking plates is given
       under our "Formulas."
                       m

-   *        3-  -.-..L\  .;4..,A,- -"-.--..--.-,,    .,;;.
View original page 24Page 25 · Read text
TIIE AIIATEUR PHOTOGRAPIIER'S MANUAL
         The exoosure varies greatly; some rooms are very wellI         !!S!rt"q, while others are very climlr           iiEil;;               J'                                                                  i ;  ; ;;i,                                ;' ; iil                                    ;;;,i                                                        n"'.'                                                           #;..,                                   ;' J;ilt                                                                                                it;                                                l"T'i*                                                          ff              small                   stop.                                tt                                            ii r"it.i                                    on                                              the                                        t"-.rr                                                          over                                                     side of         Ii!!exposure."
             If the interior is very dimly lighted, an exposure of       half         an hour                           *u'y tr.--ti..".rury. This would be                 or -ot.         alt extreme                   case,                        however.
           Sclect a dull.,clou.dy, rather than a aerg bright day f.or        interiors, as the iigtrt ii"mor.-r"ii"i*.
                PORTRAITS
          This is bv far the most difficult branch of photography;         it should be-attempted  ;;lt   ;ii.r             ha1 quar-        ified himse_lf bv experi""ce  iir il'.-"tti.i't..amatenrr;;;;;     oiir;ru                    l ake portrarts out_-of-doors when possibre, a" ttre ligirt"rt.      is-much better than.indootr.--b"'o por.n or in the shade of     a housc give good.ligthing,           r"orriing-#i"i.?t"r-
      noon are the best hours for "ttaportraiti."ott-y The eipos"i"itoura
      be about one-half to one se&nd, .iring a m_ediirrn-iLi.' ny
       y:'_rc a targe window shade a#"ylr'tii.-r..r'.troii'o,   ,      Japanese screen for backgrorrnd,-spreading a rug 6n the                  perhaps     g'ou'd           and                                placiirg..a                                       pit-'"i   oiii.r-piutit ii  on"       side,         an                interior                 may                       be        i"pr.r"rrr"o.
        .  Pose the sitterTarcfuily,'.o"iiitv   ir t" illn  harmonv with      the surroundi'gs, a'd to g.t th.;.ii  ugrj'p#i'di.'.',  '
                                                       UT            INDOOR PORTRAITS 94K,:                . A room having a north light is best for indoor oor_        traits, as it can be-used,u,t u'y-ii-;d;;;4"'iJrl'ii        u      north room is     avairabre, use a west rodm in ih6'morrr-      ing, and an_east'otroom in the iiLirrob".
          . Nea9ry Have suilight enter the- wl'dow which vou are     using. Place the sittei   .o,pie oi i;;-f;;-    Iir"^rii,rto*,     and an equal dlstance to."orre iide, the camera b;ir.g'orr" tlr"       Stlposite side. Never point the camera toward'the window.             shade le                       enti"ty-;;J';;     Let the                                   -- -" as to actmit as much       Iight          as possible                        frorn                          th6 tbo.
      -A white screen (a. sh_eei will do) placed about three     or four                from the'window iiiJ i".i"dl;, :h";,fi ile used                  -feet     as a- reflector to equalize trre righting,ltderwi."-trr. iia"     of the sitter neareit the *ira.i"--*ourd be weil lighted,     while the other sid_e woulJ b; i; A".p-.h;o*"  ii-o'"o,            too much light on thershad-ow ,ii"-oiiire'f"i"to*-       ;;ff:t
View original page 25Page 26 · Read text
www.butkus.us
        THE AMATEUR PHOTOGRAPHER'S MANUAL
          Back Ground. For this the wall will very often
        answer, but if too far away' or not desirable for any other
         ;;;;;;.'usi the window sh-ade spoken of before, supporting
             it on a rough wooden frame made for that purpose'
            Excellent shacled and clouded backgrounds for home
          ,rr.    now offtrecl at a merely nominal pricg. By their              -.           and with tl-re exercise of discretion in lighting the sub-          iid,
           jeci, satisfactory results can be secured.
          Exposure. On a bright day, when using a large -stop        (8) or the full opening of the !e1s, a1 exposure of trom         thiee to four seconds will probably suffice; but-.ap no two         portraits are taken under exactly the same condltlon-s, lt ls
        imoossible to give absolute directions I the amateur's own
         experience will- be the best guide.
                FLASHLIGHTS
            This branch of photograpby is be.coming more and more
        popular among amateurs, a-nd especially.among  those who
        lei  tittle oppdrtunity .for f-ollowing their favorite pursuit        iuring the^day. It-also allows one to make-.pictures of
         friends and family among the home surroundings, which
        cannot well be obtained in any other way.
          Magnesium Powder to furnish light for the expos-
        ure. put up in small cartridges ready for instant light-
          ing, are sold by all dealers in photographic supplies.
               If you have a flash lamp, use only,p,ure rnagnes.ium in           it. Th6 cartridge flash compounds would explode with dis-
         astrous results.
           Focusing must be done by the aid of a lamp or a can-
        dle. Move the light to the top, bottom, and both sides of
         the group or object that you wish to photograph, so that you
         can               -see whether all of the desired view is included on the
         ground-glass.
             Place the magnesium cartridge on a tin pan or a small
         shovel above the level of the camera and a littlc to one side.
        Set this on some object, and do not hold it, otherwise you
         are apt to be severely burned.
           Always leave some light burning in the room back of
         the camera during the exposure.
         Do not open the shutter until just before the flash is set
          off; there is a risk of fogging the negative.


i.     ;da*...  ,., r,iib--  " :\.   rb&*g
View original page 26Page 27 · Read text
F

   THE AMATEUR PHOTOGRAPHER'S MANUAL
POINTS FOR THE AMATEUR
             EXPOSURE
    XPOSE to suit the da_rk portions of the picture,        ignoring the balance. Nev^er attempt to take'a tim6
        ptcture while holding the camera in your hand or
      on yo.ur lap; the camera must be on a trrpod or       something that will not jar while makirig the
        exposure.
 .   Never point the camera toward the sun when expos- tn-g, as the source of light should be behind or to one side
of the camera. If, however,  it is necessary to havi th.-."--
 e.ra point towards the. sun, the difficulty may be obviated by
shading the lens with your hat or plate tiolder slide, bul
care must be taken that the angle of-the lens does not take
in the object.with which you lre  shading ih. 1.";.     _ If, in taking an interior, there is not"sufficient lisht to
m?.kg the objects fairly distinct on the ground-glass,-apply
a lrght coat of glycerine to the ground side; this will mak-ett more transparent.
    In photographing machinery or objects that give bril-
Irant and undeslrable reflections, better results can be had_
and halation avoided-if the brightly reflecting parts are
touched with a bit of- soft putty bifoie the expo-sure. This
dulls their lustre to the Droper-poirrt.
_  When using smallef plites ihan the camera is intendedfor, mark on the ground glass the size and position which
t-he small plate will assume. If this is not done it will be
found difficult to tell whether the part of the view which is
particularly wanted will appear properly on the small plate.
     DEVELOPING AND PRINTING
   Always label your various solutions.
,. . .K."p your printing paper in a drawer away from theilgnt.
 .   ]Vh.en developer.-it  has hecome too weak for ordinarydeveloping., place    in a bottle labelled "Old Developert'an(l save tor over-exDosures.
  A matt surface may be obtained on any glossy surface
                           print                               face                           down on-the                                                              sidePfler                      -wet                                          ground"untilof a sh_eet^-bV Olacingof ground-glais,the                               rubbing                      and                                                lightly                                                                        lies                                                                               itperfectly flat. Let it dry on the glass, when it-can be easily
removed.
View original page 27Page 28 · Read text
w
                       www.butkus.us
  THE AMATEUR PHOTOGRAPHER'S MANUAL
    All brands of gelatine paper should be placed in a bath
or hardening soluiion for paPer, immediately af.tgr toning
and fixing, and before the final washes; tltis-wtll prevent
the paper-'from getting soft and sticky (see hardener. for                    -ti ttre n-egativ.es are immersed in a bath ofpaper, page 27 ).h"i'Aenins solution (see folnrula for hardening plates, qage
27), bef.o"re the finai washing,. and-immediately  after. their
removal from the hypo bath, it wiU clear them and insure
them against frilling.
   Do not develop plates in winter with cold d.eveloper, as                                       An                                 and brilliancy.                                       detail                         lacking                       risult,                   will^thin negatives                                -your                                     developer                                                     will greatly                                to                    added              water         o"f warmourr..
     i" the development, and- wili give much more satisfac-ioiv"ia  i.i"ttJ.  In^.r--"r  always-mix the deve-loper with.oit *ot"t. Often ice must be irsed to prevent frilling and
melting of the film.
      SOME GENER.AL HINTS
    Examine your camera and outfit- thoroughly, so as to
become perfecily acquainted with all the working parts'
   Do not allow the camera or the lens to remain in the
sun when not in use.
     If the carnera has a pneumatic shutter, try working  it
at all the different speeds.
    Before attempting any photographs set u-p th.e appara-
tus,.and go carefully and thoroughly through all the suc-
cessrve operatlons.
    Dust out the inside of the camera and plate holders
 occasionally, to prevent dust from settlit-lg on the plates'
     When'" ieplatin,g the slid,e in the h,olde.r, do not insert
 ort'io'rni, fiist, bu"t push the entire ed'ge. iy, a-t once. .Dis' itiora of th,is'esserriiol point zuilt certainly lead' to lisht'
         plates. struck-           use silk or cotton in cleaning the lens; linen is     W.'".i
 better,---     gliot.moistenedstartingwithonalcohol.a trip with the camera' see that
 e""ty1tti"g is in g6od workirig order and that nothing is
 forgotten.- -Bv        using "backed" plates, halation will be avoided.,. and           "improved a geni:rally                       clearnbss in -your negatives.--will be           ilt""v amateurs believe the results on "backed"                 them for. the troul-rle of preparing their "uia.trr--pi;;; ;.*ptv l-"p"y plates thus. 5ee our f ormulas.
                   u
View original page 28From the M. Butkus archive. Original publisher and archive notices are retained.
Check the model and edition against your equipment.
PDF verified 2026-10-10.