Film cameras
Ambassasor User manual
User manual for Ambassasor. 12 pages in English. Read the original PDF, download or print a copy without registration.
12 pagesEnglish1.4 MB PDF
Loading your manual…Open PDF directly
Document details
- Brand
- Ambassasor
- Model / document
- Ambassasor
- Document type
- User manual
- Language
- English
- Pages
- 12
- File size
- 1.4 MB
- Category
- Film cameras
- Document date
- Not specified in catalog
Search available document text
Find a term, then jump to its page in the original PDF. Image-only pages may not be searchable; check the PDF for exact wording and diagrams.
Page 1 · Read text
www.butkus.us
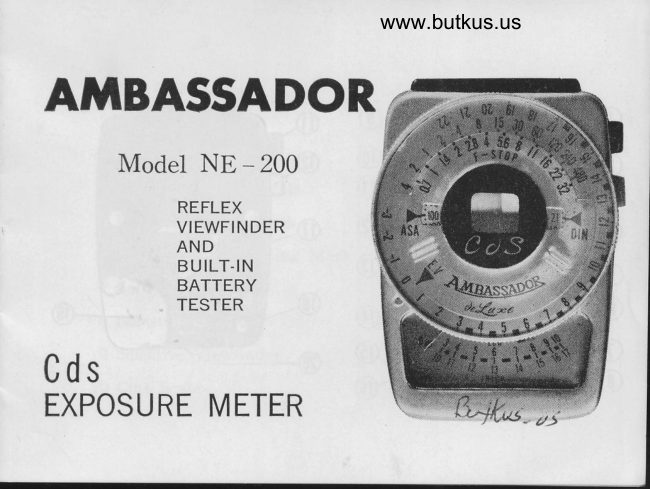
AMBASSADOR
     Model NE - 200
             REFLEX
             VIEWFINDER
           AND
               B U ILT.IN
            ?tJ+F["

Cds
EXPOSURE METER
View original page 1Page 4 · Read text
www.butkus.us

 1 Cds Cell window            11 Low Exposure Button
 2 F-Stop Scale                12 High Exposure Button
 3 Shutter Speed Scale          13 DIN Film Speecl Scale
 4 ASA Film Speed Scale       14 Battery Checker Marl<
 5 E. V. Reference Mark        15 Low Guide Number Scale
 6 Guide Number Setting Mark  16 High Guide Number Scale
 7 Zero Position               17 Zero Adjustment Screrv
 B Measuring Needle           18 Battery Checker Button
 9 Selective Viewfinder         19 Battery Compartment
10 Cine Scale                  20 Neck Strap HclCer
View original page 4
Page 5 · Read text
canWith this AMBASSADOR Cds exposure meter, you
master every critical light measuring situation and can
get the exposure value accurately and easily.
Ideal for still and movie cameras. Get better color shots
and black-and-white.
 HOW TO USE

1. ZERO ADJUSTMENT
  Before measuring exposure value, check whether or not
  the measuring needle (B) points to the zero indication  (?).
  If the needle (8) does not point to the zero indication, turn
  the zero adjustment screvr' (17) on the back of the meter
  to left or right until the needle returns to zero position
  with a small screwdriver.
View original page 5
Page 6 · Read text
www.butkus.us

 2. MERCURY B4TTERY
  FODOR CdS  III exposure meter is powered by a I.3
   volt mercury battery, of which normal life is approximately
  two years. During this entire operating life, the battery's
   output level is constant, but drops off sharply only shortly
   before final expiration.

3. BATTERY CHECKER
  To check the battery's life prior to operation, depress the
  battery checker button (18), and if the battery is fresh, the
  measuring needle (B) will be seen within the range of red
  B. c. mark (14).  should the measuring needle does not
  reach this position, the battery must be replaced.
View original page 6
Page 7 · Read text
To replace battery (Mallory RM-625R, PX-13 or GE-625),
   flip the battery cornpartrnent cover and insert the battery
  into the compartrnent (positive mark of the battery out-
  wards).

4. SETTING FILN/I SPEED NUMBER
  Rotate the inner plastic dial on tire face of the meter so
  that the ASA or DIN fiim speed number (as indicated by
  th: film manufacturers) is seen opposite the black and
   recl arrorv in the ASA and DIN window (4) & (13).
5. TA KING A READING
 The area to be measured is sighted in the view finder (9)
  on the center part of the plastic dial.
View original page 7
Page 8 · Read text
www.butkus.us

              a. UNDER LOW LIGHT CONDITION:
              Depress the black "Lo'w" exposure button (11) so that
               the needle (B) will react and stop within the range of low
              guide No. 3 to 10.  Then read off the guide number
             which the needle (B) indicates on the low guide number
il               scale (15) and rotate the outer diar until the guide num-
              ber appears opposite the guide number setting mark (6). I
           You now have a direct reading for various combination
 I              of shutter speeds and F stops.       &,y'&.o't s
              b. UNDER NORMAL-BRIGHT LIGHT CONDITION:
                    If the needle exceeds the range of the guide No. 10 on
             the low guide number scale, by depressing the ,,Low"
              button (11), depress red "HIGH" exposure button (12) f.or
View original page 8Page 9 · Read text
correct measuring. Then the needle will react and stop
    within the range of high guide No. 10 to 17.   Rotate
    the outer dial until the guide number appears opposite
    the guide number setting mark  (6).
   Now the combination of shutter speed and F stop is
     available for your camera.

6. CALIBRATION OF E. V.
    In case you want to find E. V. (L. V.) number read off
    the figure appearing opposite the red E. V. indicator 5.
View original page 9Page 10 · Read text
www.butkus.us

7. FILTER COMPENSATION
 When using a filter over the camera lens, it is necessary
  to compensate for a correct exposure reading. Check the
  filter index (IYzx, 2x, 4x etc.) and multiply any given
  shutter speed on the "TIME" scale of the outer dial and
  shift the shutter speed - F - stop combination to the figure
  thus arrived at.   For example, if by measuring the light
  value, the outer dial registers a setting of F: B at 1/500
  second, and you are using a filter with an index of 2x,
  multiply 1/500 by 2.  The answer is I/250. Align I/250
  on the "TIME" scale B with F: B on the F-stop scale 2.
  The proper setting now is F : 8 at I/250 second or F - 5. 6
  at 1/500 second.
View original page 10
Page 11 · Read text
CAUTION
  As the expoiure meter is mechanically precise and sensitive
  avoid exposure to bright light, strong shock, moisture and
  magnetism'
View original page 11
From the M. Butkus archive. Original publisher and archive notices are retained.
Check the model and edition against your equipment.
PDF verified 2026-10-10.