Camera accessories
ANOTHER Zeiss Ikon Icarette AND ADAPTER FOR OTHER FORMAT SIZES User manual
User manual for ANOTHER Zeiss Ikon Icarette AND ADAPTER FOR OTHER FORMAT SIZES. 15 pages in English. Read the original PDF, download or print a copy without registration.
15 pagesEnglish2.5 MB PDF
Loading your manual…Open PDF directly
Document details
- Brand
- Zeiss Ikon
- Model / document
- ANOTHER Zeiss Ikon Icarette AND ADAPTER FOR OTHER FORMAT SIZES
- Document type
- User manual
- Language
- English
- Pages
- 15
- File size
- 2.5 MB
- Category
- Camera accessories
- Document date
- Not specified in catalog
Search available document text
Find a term, then jump to its page in the original PDF. Image-only pages may not be searchable; check the PDF for exact wording and diagrams.
Page 1 · Read text
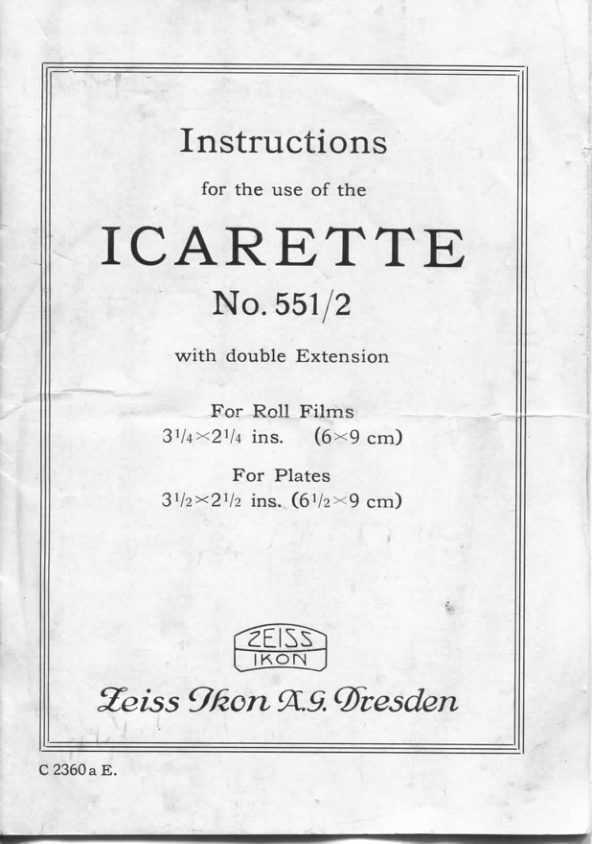
Instructions
                     for the use of the
 ICARETTE
          No. 551/2

             with double Extensión

                For Roll Films
           3V4X2V4 ins.   (6><9 cm)
                  For Plates
                            ins. (6'/2xg Cm)


    ZEeiss Ofeon R.9. Qfresden


C 2360 a E.
View original page 1Page 3 · Read text
Digitally signed by
                                                             mike butkus
                                                             DN: cn=mike butkus,            mike      o=orphancameras,ou=29,
                                                                email=mike@butkus.
                                                            c=US             butkus org,Date:                                                                          2019.01.03
                                                                       18:27:10 -05'00'


         III. 1


 A = Spring  for locking the    L = Recess   in  the  focusing
      baseboard                         scale  (ill. 2)
 B ~ Brilliant View Finder   M — Focusing Screen
 C — Spindle for operating      N = Pinion knob for the double
       rising front                      extensión
 D ~ Síght for the wire frame
       finder  (ill. 3)           O = Lock  catch  for rack and
 E = Focusing Scale                  pinion
 F = Button  for  closing Ca-    P = Spring  for holding  lens
     mera back                      and shutter
iG2 = Knobs for drawing out    R = Knob  for regulating the
       front                              focusing register for  roll-
 H = Spríng for holding  the          films or piales
      focusing   frame   píate    S = Strutsfor holdingthe base-
      holder,  or  back  cover          board
       píate  (ill. 3)                     r = Film Winding Key
  J — Wire Frame  Finder
 K = Foot for resting Camera    U -  Catch for light hood (ill. 3)
     on a Table or other firm    V — Screw thread for the  tri-
      support                        pod (horizontal exposures)


           donated to www.butkus.us
View original page 3Page 4 · Read text
Before  making  the  first  exposures be sure
and read these instructions through carefully
in order to understand the use of the camera

       Instructions
General remarks
The  Icarette  No. 551/2  is  a  double  extensión  camera,
which  offers  the  advantage  that,  according  to  circum-
stances,  roll films, piales or film packs can be used.
   By  fitting  to the  objective supplementary lenses, the
focal distance can be lengthened or shortened.
   Thus,  distant objects can be photographed on a larger
scale  than with  the normal  lens  alone, and   it  is also
possible to make wide-angle exposures.  The shutter with
lens may be removed in order to adapt another objective.
   As  the camera can  also  be  supplied  fitted  with  a
delayed  action  reléase Compur  shutter,  it  is  in  every
way a Universal Camera.
Opening and focusing the camera
Press the button A  to reléase the baseboard, which  falls
slightly forward.  Pulí  it down  till the two side struts S
lock  it by springing into  position.
When working with  roll films the  focusing
Scale E must be placed at "F", with plates or
film packs at "Pl" to allow for the  difference
inthe focal planes of each material. This must
be done before pulling out the standard front,
by pressing the scale E by means of the knob Jí
towards the lens and then backwards or for-
wards until the signs "F" or "Pl"  are visible
in the hole L of the focusing scale.
View original page 4Page 5 · Read text
Now  pulí  the  standard  forward  by  gripping  the two
knobs Gj and G2,  till  it is locked by means of knob G!.
In  this  position  the camera  is focused  for infinity and
the  pointer over  the  focusing  scale E points to the in-
finity mark OO.


                     I®   J
        t t                                                          111.2
Near exposures
For exposures  of  objects cióse  to  the camera, the  lens
must be focused  for the distance of the object.
   This is done either according to the focusing scale E,
 ÍTÍ which case the  distance should be gauged  or closely
 estimated, or by focusing on the ground glass screen M.
This  latter  is possible  only when  plates  or film packs
are used.
    After having ascertained the distance of the object to
be photographed, swing  the  catch O outwards  in order
 to reléase the milled knob N.  Exert downward pressure
on the scale E and  at the same time move the  camera
 extensión by turning  the knob N  till the pointer of the
 scale  is on the number corresponding with the distance
 from lens to object. Then secure the extensión by replacing
 the catch O in  its original  position.
The rising front
To  include high  objects, such  as the  top  of a tree, a
 steeple, mountains, clouds etc. in the field of view without
 tilting the camera upwards, which would cause a distorted
 picture,  it is possible to  raise the lens by using spindle
 screw C.


           donated to www.butkus.us
View original page 5Page 6 · Read text
Likewise the  lens may be lowered  beneath  its  central
position  for  including  objects on  the  ground, such  as
playing  babies,  kiltens,  puppies  etc., or   if more  fore
ground  is wanted.
  Not forget to return the lens to its central
position marked by white dots, before closing
or the camera will be clamaged.
Closing the camera
If  the  slide  rails have  been  extended  for  taking  near
pictures, they must be replaced in  their original position
and the pointer must stand exactly  at infinity oo. This
is very important. When the rising front has been
used  the lens must be  returned to  its central position.
Grip knobs GI and  Ga, press  the Scale E  inwards and
push the lens carrier back into the camera,  till  it catches
by means of knob Gj,  then  press down both  struts S
with your thumbs and  cióse the camera by raising the
baseboard and pressing  it against the camera body.

       Space       The                                 Space        used                     brilliant      used                                      /op        JOP         vertical       view          horijontal
         vievws         finder         views

The view finders
The camera  is  fitted with a reversible  brilliant finder B
and a wire frame  finder J  with sight D.
   The  brilliant finder  is for use when taking pic-
tures  at waist  level.   It shows on  a reduced  scale  the
same picture as produced by the objective, consequently
objects,  to appear  in  the  field  of image, must be seen
in the finder.
View original page 6Page 7 · Read text
On opening the  camera,  the  finder  is  usually  set  for
taking vertical pictures. For horizontal pictures roíate the
finder  till  it is arrested by  its stop.
   The  choice  of  picture  will  be  much  simplified  by
using a Finder Magnifier, which enlarges the small
image about 5 times.
  The wire frame  finder  (ikonometer)  is very
useful when photographing  at eye level.  For use unfold
the frame J outwards and  raise the sight D.  All objects
seen within  the frame  will appear  in  the  picture.  For
viewing, the eye should be brought as cióse as possible
to the sight D.
   The  wire frame  finder  has  the  extra  advantage of
suitability when using the camera extensión or the rising
front movement, while the brilliant finder only gives the
correct picture for  infinity.

THE USE OF ROLL F I L M S
Push the knob F, situated  under the  leather handle, in
the direction of the arrow. This detaches the hinged back.
    All new cameras  are supplied with an empty spool
to take the  exposed  film, which  will  be  found  in  the
upper  spool chamber and  is turned by means  of the
winding key.
   The core of the spool  is hollow at both ends so that
it can be  fitted on  to the spool studs.
    At one  end  of  the  spool core there  is a  slit for the
winding key, with which  the  exposed film  is wound on
to the empty spool.

              Plácing the empty  spool
By turning the winding key T forwards and drawing it
at  the same time outwards, the  spool  holder becomes
disengaged and can  be swung  out from  its position in
the spool chamber.


            donated to www.butkus.us
View original page 7Page 8 · Read text
The left cheek of the holder  is elastic and can be drawn
sidewards. The round end at the core of the empty spool
is placed upon the stud in the middle of this cheek while
the other end with the slit =O= will be near the key T.
   Push the holder back into the chamber and turn the
key T, pressing  it inwards  at the same time  till  it enters
the  slit and the spool begins to turn with the key.

              Placing the loaded  spool
Place the unexposed  film  spool into the lower chamber
by lifting the spool holder and pushing the spring cheek
sidewards.  The  end  of the  protective. paper  must  be
poinling  towards  the  empty  spool,  fj   .
    After breaking the seal pulí the red paper over both
guide-rollers and  lead  it into the long  slit of the empty
spool until  it comes out at the opposite smaller slit. Fold
it to prevent unloosening.  Give the winding key T a few
turns to draw the paper taut.  Take care to see that the
paper winds off straight and evenly between the ends of
the spool.   If the paper tends to run unevenly  it must be
corrected, or there may be trouble later on when changing
the film between two exposures, which could then only be
remedied by returning with the camera  in the dark room.
To prepare the camera for taking pictures, cióse the back
and turn the key T till,  first a hand iM^* and then the
figure 1 appears  in the red window  at the camera back.
The apparatus  is now ready for the  first exposure.  Im-
mediately after each exposure turn the key Tundí the next
number is seen, to avoid exposing twice on the same film.
    After the last exposure has been taken, turn the key T
till the film  is completely rolled off. The  progress of the
paper can be watched through  the  red window.  Open
the camera as already described, and, holding, the end of
the paper firmly, continué winding  till the paper  is com-
pletely rolled  off. Now  seal the film with the gummed
strip  of paper which  will be found  at  the end  of  the
paper band. Take out  the exposed  film  roll by  gently
pulling out the key and  lifting the spool holder. Reléase
the spool by pulling back the spring cheek.
View original page 8Page 9 · Read text
THE USE OF
P L A T E S A N D F I L M P A C K S
The hack of the camera is constructed to take metal píate
holders  for  the  size  3'/2x2'/2"  or  filmpack  adaptéis
3V4X2V4".


                                                                 111.3

    First  of  all remove  the  protective  sheath  with  the
film  pressure  píate  which  is  fixed  to   it by  exerting
pressure on  the small  catch H with the one hand and
by pulling off the cover píate with the other. This cover
píate  is now put  aside.   Insert  the  píate  holder  in  the
focusing  screen M  in the grooves and secure by means
of catch H.
Do not forget to set the pointer knob  li in
front of the lens base to the letter "Pl", before
       pulling out the standard front.

8

           donated to www.butkus.us
View original page 9Page 10 · Read text
The double extensión
   To obtain pictures of small objects, such  as flowers,
insects  etc. in  their natural size or nearly,  it is necessary
to approach  the lens quite near to the object to be photo-
graphed.
   This  is only possible with a double extensión camera
and a lens of normal  focal  length. To obtain very large
pictures of very distant objects, the lens must have a very
long focal  distance.
   To augment the focal distance of the objective, supple-
mentary  lenses are  used. The  Distar and  Delta lenses
increase  the  focal  length, proportionally to  their power,
up to nearly twice, while they diminish  the image  field
and enlarge the details contained in this  field.
   The Proxar lenses shorten the focal length. Combined
with the  single extensión, they render,  in  proportion  to
their power, a larger image  field while they reduce the
details in size (Wide-angle exposure).
   Used with the double extensión  they permit  a very
near approach  to  the  object, thus rendering  exposures
to nearly double the natural  size possible.
   The  focusing  scale cannot  be used, when working
with  the double  extensión.  Focusing  in  this  case can
only be done on  the  screen  and when  working with
piales or film packs.
  When using supplementary lenses, focusing may be
done with the full opening of the diaphiagm, but  it should
be reduced more  or  less for the  exposure  to obtain  a
good covering  all over the  píate.
   For  portrait  exposures  the   full  aperture may  be
maintained.
To use the double extensión, disengage the
pinion  JV by removing the  locking device O
and pulí the lens carrier forward by pressing
inwards the Scale E and turning knob X  till
the picture, observed on the screen, is quite
sharp. Then lock the extensión by pushing
catch O back to its former position.
View original page 10
Page 11 · Read text
Interchanging the lens and shutter
The shutter with lens can be removed in order to  fit a
different lens  to the camera.
   Take off the shutter by pressing the spring Pon the lens
panel and turning the shutter slightly towards the left. (+~¿).
   To  mount  the  shutter with  lens  press  it  into  the
opening of the lens  panel  and  give  it a slight  turn  to
the right. Take  care  that  the metal projections  register
with the slits of the three knobs on the lens panel.  The
shutter  is now held firmly in position by the spring P.

The exposure
To focus the picture on  the  screen, the shutter must be
set on Time and the iris diaphragm must have its largest
aperture.
    After having finished focusing, cióse the shutter. Now
regúlate shutter and diaphragm according to the prevailing
conditions of light at the moment of the exposure. remove
the slide from the píate holder (or film pack adapter) and
expose by a pressure on the shutter reléase.
    After  the exposure  push  the slide back  in  the  píate
holder, being careful  that  it  is properly engaged  in  the
grooves  at both sides, and remove the píate holder.
   Mark the number of the píate holder  to prevent ex-
posing twice on the same píate.
      A. MACMILLAN
        OPTICIAN
             38 CHALMERS STREET
             >UNFERMLINE

10
            donated to www.butkus.us
View original page 11Page 12 · Read text
Compur Shutter Model «S»
(WITH DELAYED ACTION RELÉASE)

                          A = Index showing the ex-
                                         posure times
                           D — Finger  reléase  for  the
                                            shutter
                             E = Diaphragm indicator
                        F= Setting  button  for the
                                          delayed  action reléase
                                                                         I — Setting  lever for auto-
                                         matic speeds, and for
                                           exposures with the de-
                                             layed action reléase
                          O = Bush in which to screw
                                             the flexible reléase
                              R = Rotating ring for regu-
                                                 lating the speeds which
                                             read ofFagainst Índex A

When delayed action reléase
is n o t in use proceed as  f ollows:
T Long Time exposures
Turn  ring (R)   till  letter T  is on  the Índex mark (A).
Pressure on lever (D)  or on the flexible reléase inserted
at (O)  opens  the  shutter, which will remain open  till
a second pressure closes  it.
B Short Time exposures
Turn  ring (R)   till  letter B  is on the índex mark (A).
 Pressure  on  the  reléase  opens  the  shutter, which will
cióse as soon as this pressure ceases.
Instantaneous exposures
Turn ring (R)  till the speed chosen  is on Índex mark (A).
Set the shutter by moving lever (/)  to  the  right  to the
limit of motion. — Reléase the shutter by a pressure on

                                                         11
View original page 12Page 13 · Read text
the lever (D) or on the flexible reléase. - Lever (I) is used
only for instantaneous exposures.  When  the  shutler is
set for T or B, this lever  is locked.
Besides the engraved speeds of 1,  '/2, Vs, Vio, l/25, lho and
Vioo  of a  second,  intermedíate speeds  can  be  obtained
by placing  the índex (A) between two of the engraved
speeds.  This remark does  not apply  to speeds  higher
than  Vico*11 of a second.
The Iris diaphragm
Set the diaphragm scale indicator (E) to the number re-
presenting the  aperture of the  iris  it  is  desired  to use.

When using the delayed
action reléase proceed as follows:
Instantaneous Work with the delayed action re-
léase for speeds from 1 up to Vioo111 of a second.
Set shutter as previously described by means r-"" ver (1).
Then push bullón (FJ aside  in Ihe direction of ihe arrow
and move  lever  (/)  a  litlle farther on,  till  it is arrested
a second  lime.
A pressure on lever (D) will set the clock work of the de-
layed action reléase in motion and afler aboul 12 seconds
the  reléase  will  discharge  Ihe  shulter  al Ihe  sel speed
indicaled on  dial (R).
NOTE.  The delayed action reléase is not
available  for  use with  time exposures ñor
for  speeds  higher  than  Viooth  of  a second.
When setting the shutter particularly when
using the delayed  action reléase and higher
speeds,  it  is  advisable  to exert a counter-
pressure on the shutter bearer in order to
avoid excessive wear of the mechanism and of
the metal parts of the camera  front.


116955.10.532             Printed  in Germany                   DinA6
           donated to www.butkus.us
View original page 13Page 14 · Read text
Supplementary Instructions for the
Icarette Camera fitted with Albada
Vie w Finder and Two-Form at Device

The direct visión finder oí the Icarette has been  replaced
by an Albada finder which shows the field oí view in a
sharp white surround that appears located  in the subject
itself. The aperture of the finder must be brought  quite
cióse to the eye, but care must be taken not to press the
viewing  píate forwards as  this  will  distort  the  field of
view. The view enclosed  within the white border is the
correct  picture. The  border  is subdivided  to show  the
amount  of view  with  the two  formáis,  and  the  inner
portion defines the field of view when using the mask
(for divided picture size).
   The finder shows  the  subject  in  natural  size.   It is
therefore  advisable  to become accustomed  to using  the
finder with both eyes, one looking through the finder and
the other at the subject.
   In taking pictures of 3t/4x21/i" (6x9 cm)  size the
numbers of the BII film must be adjusted only in  the
lower observation window  in  the camera  back.  In the
case of the 2l/4Xl3k" (4.5x6 cm) pictures  each number
must be adjusted first in the lower sight window and then
in the upper one. You
thus  obtain  8  pictures
of 3l/4x2'/4" (6x9 cm)
size  or  16 pictures  of
2'/4Xl3/4" (4.5x6 cm)
size.  Upright  (vertical)
2V4XP/4" (4.5x6 cm)
pictures   are   obtained
with the camera  in the
horizontal  (landscape )
position and vice-versa.
A revolving mechanism
allows  of masking  the
C2360b E
View original page 14
Page 15 · Read text
windows in such a way that  it can be seen  at any time
whether both windows are masked  (for 4'/2x6)  or only
one (for 6x9), or  if both are masked which  is necessary
when using panchrom. film. When the panchromatic film
is wound on  to the  next exposure,  the windows must
naturally be unmasked, so that the numbers  of the film
may be read.
   For 3V4X2V4" (6x9 cm)  pictures the camera  back
must be opened and the metal mask  in  the  rear  frame
must be taken out. It  its best taken hold off by its inner
edge and pulled upwards with a slight bend. To  replace
it for the 2'/4Xl3/4" (4.5x6 cm)  size  it  is slightly bent
and allowed to slip spring-like into the  little slot  at the
upper and lower ends of the rear frame.
   The picture-size can be changed  only when  a new
roll of film is being placed in the camera.

Red dot marking system:
In  order  to have  the  Icarette  always  ready  for quick
action,  it should be focussed as follows: diaphragm about
/712.5, approximate distance 10 m., (marked by red dots),
speed  '/25 th.
  When thus focussed all objects between oo and 4.6 m.
will be sharply defined and the time of exposure  suffices
also  to  take  instantaneous  exposures  on  bright winter
days from 9 a. m. to 3 p. m.


ZEISS IKON A.-G. D R E S D E N

9270b 6 935            Printed in Germany            DIN A 6

              donated to www.butkus.us
View original page 15Related documents and language editions

From the M. Butkus archive. Original publisher and archive notices are retained.
Check the model and edition against your equipment.
PDF verified 2026-10-10.