Film cameras
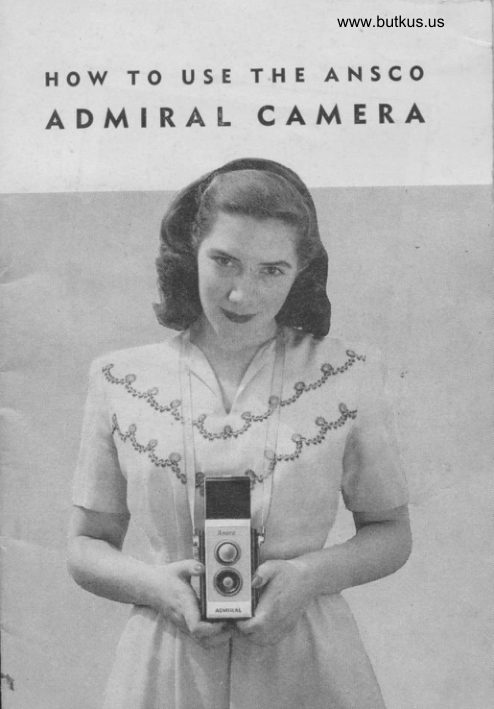
Ansco Admiral User manual
User manual for Ansco Admiral. 25 pages in English. Read the original PDF, download or print a copy without registration.
25 pagesEnglish3.8 MB PDF
Loading your manual…Open PDF directly
Document details
- Brand
- Ansco
- Model / document
- Ansco Admiral
- Document type
- User manual
- Language
- English
- Pages
- 25
- File size
- 3.8 MB
- Category
- Film cameras
- Document date
- Not specified in catalog
Search available document text
Find a term, then jump to its page in the original PDF. Image-only pages may not be searchable; check the PDF for exact wording and diagrams.
Page 3 · Read text
Youo, wAS A *ISE cHoICE!
Your Ansco Admiral Camera is a modern, com-
pact, reflex-type camera designed to take good
pictures under any lighting conditions. The in-
ixpensive Anscoflish Type l-sold  separately-
quickly converts the camera into a synchronized
fiash camera, making indoor photography as easy
as outdoor picture-taking.
This sturdily-constructed camera, made from dur-
able polystyrene, a stout plastic material, is engi-
tr""rei tb dive ybu the beit possible pictures wilh
the least elTort. Its pleasing design and smart lines
will blend well with any costume, any scene.
Carry your Ansco Admiral Camera whereve_r you
goJthe beach, the mountains, to school, to dances
and parties, around the home. It takes pictures
evervwhere!
A VARIETY OF ANSCO FILM is available for
your Ansco Admiral Camera.
 . PLENACHROME is recommended for all-around
   daytime use under average conditions.
 . SUPREME is the all-purpose film for pictures
   indoors and out. Excellent where enlargement
   is required.
                                                                           1
View original page 3Page 4 · Read text
. SUPERPAN PRESS has exceptional speed and is
    particularlv recornmended when the light is un-
   favorable or where fast shutter speeds are
    rreeded.
 Your Admiral takes 12 pictures 2r/+ x 2t/+ inches
 on all of these Ansco 620 films.
 YOUR ADMIRAL lS EASY TO USE- you don't
 need to be an expert photographer to get good
 pictures with your Admiral. You should, however,
 read the following instructions carefully. Then,
 if you'd like more complete details on picture-
 taking, read "Better Photography Made Easy", a
 very helpful 60-page booklet published by Ansco
and available at most photographic dealers. Ansco
 also maintains a special department to answer your
inquiries and furnish expert advice on your photo-
graphic problems. Just address-Ansco,  Sales
Service Department, Binghamton, N. y.
LET'S IOAD THE ADMIRAL-Use Ansco 620 Size
Film in your Admiral. But before you load, look
at Figure I and with your Admiral before you
identify each part to familiarize yourself with
your camera and its controls.
Now, go to a shady spot  ( if out-of-doors ) or a         of tJle room (if indoors) to load your
*;[lJ"
2
View original page 4Page 5 · Read text
www.butkus.us


Donate:  www.PayPal.me/butkus     venmo:  @mike-butkus-camera  Ph. 2083
View original page 5
Page 6 · Read text
VIEWING HOOD


SOCKETS FOR ATTACHING
    FTASH UNITS

VIEWING I.ENS

SHUTTER REI,EASE

 TAKING IENS

 IilAE TEVER
  "9" lot lulb Exporures
  "1" lor lnllontoneous Erposurel

        Mike Butkus  Digitally                                                                      DN:email=mike@butkus.org,Date:cn=Mike2025.01.16signedButkus,by01:08:04Mikeo, ou=Butkus.org,Butkusc=US-05'00'

                          HOOD RELEASC CATCH
                                          RETEASE TO OPEN
                                  B^CK OF CAMERA

                                                  FIT'{ WINDING KNOE


                                       EXPOSURE WINOOW


                                FIGURE  I
View original page 6Page 7 · Read text
www.butkus.us


                                          FIGURE 2

 FOTLOW THESE STEPS FOR EASY LOADING:
 l.  OPEN THE BACK OF THE CAMERAbypush-
ing the back release (Figure I ) to the right-in
the direction of the point-and by pulling the
back outward.
2. SWING THE SPOOL CARRIER up and out
from the lower chamber. Holding the two ends
of the earrier slightly apart  ( being careful not to
bend them), place a fresh roll of Ansco 620 film
in position, making certain that the two carrier
pins are engaged in the spool ends  ( Figure 2).
Now, swing the carrier and fflm down into place
in the chamber.

4
View original page 7Page 9 · Read text
www.butkus.us


so that it  rvill rvind rvithout binding. Give the
rvinding knob tu'o trrrns to bind tlte paper on the
take-trp spool ( Figure 3 ).
4.  CLOSI THE BACK OF THS CAMERA and
turn the knob until the nunrber "1" appears in the
red wi-ndorv in the back of thc' crunera ( Figure 4 ).
r\ pointing hand and four d<lts in succession will
lr  scerr jrrst bcf<lre the "1" uppt'irrs in the r.vind<lw.

6
View original page 9
Page 10 · Read text
FOCUSING
       Your Admiral requires no focusing. All objects
       from 6 feet to infinity (as far away as you can
         see) will be sharp and clear. If you wish to take
         pictures closer to the camera than 6 foet an Ansco
                                                    allow         Fortrait Lens *1  should be used. It willa       you to make head-and-shoulder  portraits as close
       as 2Vz to 3 feet frorn your subject. Ask your
       Ansco dealer about this attachment.
      NO\M LET'S TAKE A PICTURE
        In general, you will get better outdoor snapshots
      when the sun is at your back. This is called front
         lighting since the light strikes your subject from
        the front. You can also produce some very fine
         pictrues by placing your subiect so that the sun is
       on yorrt right or left. This is called side-lighting.
      You should be cautious, however, in using side-
         lighting since it has a tendency to produce deep
        shudo*, on the side of the subject away from the
        sun. Many photographers use a reflector to reflect
          light into these dark shadows  ( a white sheet or a
        piece of white cardboard will serve)
      For most picture-taking situations use your'
        Admilal with the time lever  ( Figure 1) set in "I"
         (Instantaneous) position. This is the position used
                                                             7
View original page 10Page 11 · Read text
www.butkus.us


          *d#"       \

                  i"..tt:.t'o  ._             1r,


                  ;\*
                                          FIGURE  5
irr tirkirrg  lrictrrrt's rlrrtclorlrs rrnder rl\'('rage sunnv
cr lnrlitirlrrs  u'ith all Ansco blrrck-ancl-tr.hite roll
 [iIr ns.
|[olcl the  crlnlcrit rrs shorur in F-igrue 5, phcirrg
tlrc ncck  strrtp ovt'r r'<lrr Irt:ltd and clras'ing it
I
View original page 11Page 12 · Read text
clorvn snugly <lvcr the llack rlf the rleck to help
       prevent cameril Irtoventent' Locate your subject
       in the view-fincler making sure thttt the picture
      you see is the picture you want (Figtrre 6)'
         Press dowtr slorvly ott the red shtrtter releirse' holcl-
{,r          ir-rg yo,t. bre:rth f,,,    instant irs the shrrtter clicks'                                ".                           the trumbcr "2" rrppears in the  I     Wt"d the film until
  ?       red window trtld you trre ready for the next pictttrt"
                                    "8" (Bulb) posi- .F     NOTE: Use 1'our Admirul set otr
        tion for pictures in the shade or indoors with
        flood lamps. Yrltt should rest vour camera  oll
        sorne firm support sttch irs ir ptlrch railing rvhel't
          rrsing this setting.
                                                             n
        FTGURE u
View original page 12Page 13 · Read text
www.butkus.us


UNLOADING
After the trvelfth ol last e.xposnre, cuntinue to
turn the winding knob until tlre colored paper can
no longer be seen througir the red window. Now
open the back of the cameri.r trnd pull up on the
unloading bracket ( Figure 7 ) to remove the roll
of exposed film.                                  I  Fold the pointed end of the colored paper along
the line "Fold tlnder Here" and seal the spool
with the "Exposed" sticker. Your film is tro*
ready to be develrped urd printed.
To prepare the ctmerir for the next roll of film,
move the errrpty' s1'lool up to tlre tolr of tlre camera.
l0                                        FIGURE 7
View original page 13
Page 14 · Read text
;

MAKING BULB EXPOSURES                   I
When the light is not bright enough to make in-
stantaneous or snapshot pictures, as when the sub-
ject is in the shade of a tree, or on dull, cloudy
days, and you do not wish to make a "flash shot",
you may want to make a bulb exposure.
 l.  To make bulb exposures, hold the camera on
a firm support, a chair, table or other steady ob-
ject. It is very important that neither the car.nera
nor the subject move during the exposure as this
will cause a blurred picture.
2. To take the picture, put the time lever
 ( Figure 1) in the "8" or Bulb position and press
the shutter release down gently, holding it down
for the length of the exposure. The shutter re-
mains open as long as the lever is held down
and closes when the lever is released.
3. Bulb exposures longer than one second are
seidom necessary outdoors even in extremely dull
weather. Bulb exposures made indoors by day-
light range from five seconds to two minutes in
length, depending upon the brilliance of light
outside and the number of windows in the room.

                                                       11
View original page 14Page 15 · Read text
www.butkus.us

MAKING  FLASH  SHOTS
 l.    'lir rrrakc svrrchronized flash t,xlrosrrres rvitlr
r<lur Adnriral Crrrnera, vou shotrld purchase an
Anscoflash 'l'ype I, a roll of .,\nsco 620 Supreme
or Superlriur Press I.-ilm, tu.o fresh, penlight_sizr:
batterics and as nranv Photoflash No. 5 rlr Supcr_
 flash Press 25 flash lanrps ils vou think you rvill
 ttecd. Anscoflash 'fr'pc I nrirv be prrrc,lr:rsecl  lrorrr
vorrr Ansco clealer.
IMPORTANT
\lrtkc srrre tirat the flash r,it  birtt.rit,s irrc frcslr.
lirt'slr blrttcri.s *'ill  lrrst frlr irlr.rrt,rrt,  rrrr'clr.rl
12                                                 Frcu RE I


                                        r      *,$ie..,**  "


                                      A,i
View original page 15Page 16 · Read text
exposures but lose their strength with age; three
        months being the average life of a battery when
        used for flash work.
       2. To use the Anscoflash Type I with the
        Admiral Camera, ffrst remove the screw and clamp
        from tho bottom of the unlt and insert the stud t         (enclosed in an envelope in the unit) into the
       same screw hole.$q
  lr     3.  Raiso the metal back of the flash unit by lift-
         ing up on the spring clips and place the new bat-
          teries inside the compartment  ( Figure 8). Make
         sure that the top and bottom of the batteries and
            all contact points in the battery box are clean and
        that the batteries aro inserted-ONE TIP UP
     AND ONE TIP DOWN-as indicated inside the
         compartment.
             Close the metal back and attach the flash unittit,i:      4.
ii:a'i         to your camera by inserting the prongs into thei ,,j:':r       holes on the side of t}e camera (Figure 9 ).  If
         necessary to assure snug fft, spread the notch in
*       each prong of the flash unit slightly. Now, operate
fiffx       the shutter several times before loading with fflm
     )       or inserting a flash latnp. This insures clean con-
          tact points and smoother operation of the shutter.
                                                                  r1
1l
View original page 16Page 17 · Read text
www.butkus.us


                                          FIGURE 9
5.  Next, to insert the lamp into the flash unit,
line up the two protruding pins on the base of the
lanrp with the slots in the socket of the flash unit
and push in without furning-until a "click" is
heard, indicating that the lamp is securely in place.
INSERT THE LAMP ONLY AFTER THE
FLASH UNIT  IS ATTACHED TO THE
CAMERA, because if both prongs of the unit
touch the metal portion of the camera the lamp
rntry be set off.
5. To make a flash picture, hold the camera as
shown in Figure 10. Make sure that the time lever
(Figure l)  is in the "I"  positiou. Now select
your subject in the viewfinder and press down
r4
View original page 17Page 19 · Read text
www.butkus.us

  7. After taking the picture, remove the lamp by
  squeezing the lamp ejector on the side of the bai_
  tery cornpartment. 'fhe contact spring throws the
                       unnecessury io-rn,rch the hot  l"-nlamp o1!,withmaking-your ffngers.it
   When removing the Anscoflash Type I from the
  camers, do not twist or pull on the iiash unit. The
  prongs may bend and cause poor contact or even
 snap off the battery housing. When not using the
  flash unit over a period oiri-", ."*ove the bat_
  teries to prevent corrosion of the parts.

     INDOOR FLASH EXPOSURE GUIDE
            IJSE "I'' POSITION
 With Photoflash No. 5 or Superflash press 25 Bulb
 Ansco Film         Distancelrom your Camera
                       To Subject
Superpan Press                       16 to 25 f.eet                                       I
                                                                                                                                                ISupreme                12 to 16 feet
Plenachrome              6to L2 feet
NOTE: SM or SF type flash lamps are not recom_
      mended for use with tliis cAmera.
I6
View original page 19Page 20 · Read text
7.  After taking the picture, remove the lamp by
squeezing the lamp ejector on the side of the bat-
tery compartment. The contact spring throws the
lamp out, making it unnecessary to touch the hot
lamp with your fingers.
  When removing the Anscoflash Type I from the
camers, do not twist or pull on the flash unit' The
prongs may bend and cause poor contact or even
r"up1n the battery housing. When not using the     {
 flash unit over a period of time, remove the bat-
 teries to prevent corrosion of the parts'

     INDOOR FLASH EXPOSURE GUIDE
                               ..I''            IJSE    POSITION
With Photoflash No. 5 or Superflash Press 25 Bulb
                      Distance From Your Camera
 Ansco Film              To Subject
 Superpan Press           16 to 25 feet
 Supreme                 12 to 16 feet
 Plenachrome              6 to 12 feet
 NOTE: SM or SF type flash lamps are not recom-
       mended for use with this camera'

 r6
View original page 20Page 21 · Read text
www.butkus.us


      FTASH SHOTS OUTDOORS
        Excellent outdoor flash pictures can be obtained
      by using your Ansco Admiral equipped with the
        Anscoflash Type I. All you do is take an ordinary
       snapshot with the flash unit attached to your
?     camera. The extra light from the flash lamp
         lightens' shadows in your subject's face or in the
       background.


           MAKING FLOOD EXPOSURES
       Indoor pictures at night can best be taken using
       flash lamps. If, however, you do not have any
       lamps available, you will ffnd that some very good
       indoor pictures can be made by means of flood-
      lamp illumination by using "8" (bulb) exposure.
      The operation of the shutter at this setting is ex-
       plained on page ll.  Use a watch or clock for
       making these exposures. If you do not have either
       available, say to  yourself "one-thousand-one"
      which is equal to about one second in time. The
        table that follows will serve as a guide in making
       flood lamp exposures.


                                                               17
View original page 21Page 22 · Read text
FLOOD EXPOSURE GUIDE

              Rn.           --G..--")Z Iff A
 Set up the lights in front of the subject approxi-
 mately as shown in the diagram. The main light
 source, Lamp l, should be directed downward at
 an angle. Lamp 2, the fill-in light source, should
 be close to the cartrera.
          One Second Exposures
 ( Use "8"  setting, #L floodlamps in good re-
flectors, camera at least 6 feet from subject.)
                  Lamp to Subiect Distance
Ansco Film                      in Feet
                   MainLight Fill-in-Light
Superpan Press                         28
Supreme                                t4Plenachrome                                           16l0I         t2
IMPORTANT: Be sure to support the camera on
some firm support, such as a table or back of a
chair, to prevent camera movement while the
shutter release is held down. Your subjects should
18
View original page 22Page 23 · Read text
www.butkus.us


VI OU'LL WANT TO PROTECT YOU R
ADMIRAL with a sturdy, easy-to-use JNIS6
Eveready case. Your camera is protected at all
times, yet instantly ready for use. See it at your
Ansco Dealer.
20
View original page 23
From the M. Butkus archive. Original publisher and archive notices are retained.
Check the model and edition against your equipment.
PDF verified 2026-10-10.