Film cameras
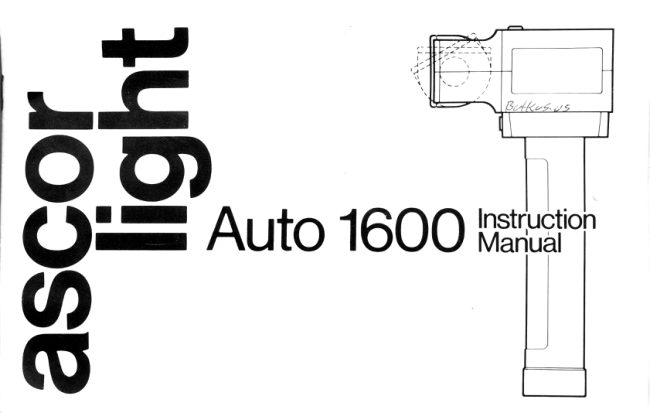
Ansco AscorLight Auto 1600 User manual
User manual for Ansco AscorLight Auto 1600. 27 pages in English. Read the original PDF, download or print a copy without registration.
27 pagesEnglish7.9 MB PDF
Loading your manual…Open PDF directly
Document details
- Brand
- Ansco
- Model / document
- Ansco AscorLight Auto 1600
- Document type
- User manual
- Language
- English
- Pages
- 27
- File size
- 7.9 MB
- Category
- Film cameras
- Document date
- Not specified in catalog
Search available document text
Find a term, then jump to its page in the original PDF. Image-only pages may not be searchable; check the PDF for exact wording and diagrams.
Page 2 · Read text
-_- sa


 CONTENTS
                                               GUARANTE E
 1. WarrantY                                                        This Ascor equipment was carefully inspected, and when 2. Introduction                                                        properly registered, is guaranteed to the original purchaser 3. Concept
 4. Unpacking                                                  against defects in material and workmanship for a period of
 5. Outline of Features                              one (1) year (except as otherwise noted), provided  it has not
 6. Basic Operating Instructions                            been subjected to abnormal or improper usage.
 7. Battery Charging and Care                                                      Under this guarantee, our obligation is limited to repairing
 8. Using the Flash Calculator                                                         or replacing the equipment at our option. Equipment must be 9. Automatic Flash Operation                                                             carefully packed and returned prepaid to the factory. This10. Manual Operation                                                            guarantee does not include flash tubes, lamps, etc., which are11. A.C. Operation
                                                                  subject to the guarantee of the original manufacturer.12. H.V. Battery Operation
13. General Picture Taking Hints                                 Seller shall not be liable for any injury, loss, or damage,
14. Bounce Flash Operation                                    direct or consequential, arising out of use of or the inability to15. Multiple Flash                                ,                                               use the product. Before using, user shall determine the
16. Bare Bulb and Umbrella Operation                                                                 suitability of the product for the intended use, and user17. Painting with Light                                                 assumes all risks and liability whatsoever in connection18. Close-Up Operation on Automatic
                                                                 therewith.19. Special Mounting Techniques
20. Use of a Flash Meter                                       This guarantee  is in lieu of all other guarantees expressed or
21. C.are of the Flash Unit                                  implied, and no representative or person is authorized or
22. Note on Light Output and Guide Numbers               allowed to assume for Ascor any obligation not in accordance
23. Accessories                                                            with the above.
24. Specifications
                                                               This guarantee does not apply to any instrument which has
                                                been tampered with in any way, or which has the serial
                                                  number removed, altered, or effaced           I
View original page 2Page 3 · Read text
.,

  Welcome  . . . to the world-wide family of ASCOR owners!        than wasted, resulting in recycle times as short as 1/3 second
Your new Ascorlight Auto 1600 Electronic Flash has been       and as many as 1000 flashes per battery charge depending on
engineered to perform reliably even under the toughest profes-          flash to subject distance and reflectance.
sional working conditions. Because this flash unit incorporates                                                     The integral bounce feature maintains a constant sensor
many unique and advanced features, please take the few min-                                                                       position during bounce lighting and in most cases eliminatesutes required to read these brief instructions ...  preferably                                                                      the need for a remote sensor.
with your flash and camera at hand. You'll be rewarded with
superbly-exposed flash photographs beginning with your first
roll offilm....                                WARNING
                                                            Like all electronic flash, this equipment employs high
                                                                      voltage inside the unit which is dangerous and may be fatal ifCONCEPT
                                                                   contacted by operating personnel. Equipment should not be  The Ascorlight Auto 1600 is a modular design flash unit                                                                   disassembled or opened except by a person qualified to workthat allows your creative flexibility to master the most                                                          on high voltage electrical or electronic equipment.difficult lighting assignments. Interchangeable light sources
plus energy saving automatic operation provide the same
degree of lighting control as today's finest professional single      UNPACK ING
lens reflex camera systems afford to picture control.
                                                                      1. Inspect packing containers for any apparent transit damage.
  The Auto 1600 operates from a variety of power sources                                                                  2. Caretully remove the different parts and assemblies from
including rechargeable nickel cadmium batteries.                                                                                 their packaging containers.
  When operated automatically, it is a multiple aperture flash        3. Do not discard the packaging until each item is accounted
unit that allows you to choose 3 different f/stops as the              for.
situation requires and provides a remarkably selective range of        4. All equipment is carefully packed at the factory.  lf
depth-of-field control. A sensitive silicon sensor measures the          damaged in transit, keep all material and file a claim with
light reflected by your subject and "quenches" the power as            the carrier without delay.
soon as sufficient light is registered. By utilizing energy saving        5. Don't forget to fill out and mail the enclosed registration-
thyristor circuitry, unused flash power is conserved, rather            guarantee card.
View original page 3Page 4 · Read text
Figure 1

 OUTLINE OF FEATURES AUTO 1600
 1.  Removable lamp head
 2. Lamp head retaining screw
 3.  Reflector pivot
 4.  Flash unit main body
 5.  Main body pivot collar
 6.  Internal  f lash sensor
 7.  Flash handle
 8.  Battery cap
 9.  Power Input receptacle
10. Power switch
1"1. Computer verif ication light
12. Ready light/"test flash" button
13. Calculator dial
14. Manual/automatic range selector
15. Remote sensor outlet
16. Flash synchronization cord receptacle
17. Ouick disconnect clamp
18. Universal "L" bracket
View original page 4
Page 6 · Read text
BASIC OPE RATION INSTRUCTIONS                         place. Press the lamp head into the lower slot until these
   The following instructions are designed to rapidly acquaint         engage. {Figure 4). When removing, push up on the bottom of
you with the basic operating procedures for use with your        the lamp head with your thumb while tilting the bottom out.
Auto 1600. They are designed as a quick reference only.      When the bottom tabs are clear of the holes, pull the head
Complete instructions follow along with suggested applica-          straight out.
tions.                                                               Secure the lamp head to the flash unit with the retaining
                                                                       screw. Note: The retaining screw has a standard 8x32 thread
 I. ATTACHING LAMP HEAD                                                in case the screw supplied is lost.
  Remove the head retaining screw (2) from the flash unit                                                                                                        II. CHARGING BATTERIES(4t.
                                                      Your Auto 1600 is supplied with a rechargeable nickel-
                                                     cadmium battery "module," good for hundreds of charging
                                                                      cycles (Fig. 5). Although the module may have a partial charge
                                                      when received, it's wise to give  it a full charge before proceeding.

                                                                     1. Move AC/battery switch (10) upwards to
                                                                                                                                  " \Q,f sff" position.
                                                               2. Unscrew battery cap (8) from flash unit
                                                                   handle (7).
                                                               3. Insert battery module with "plus" side up.
                                                               4. Replace end cap and tighten securely. Un-
         Figure 4. Attaching the Flash Head to the Auto 1600.                  screwing the cap one-half turn until  it
                                                                      clicks initially will aid in starting the
   Slide the lamp head (1) onto the front of the flash unit            threads.
making sure that the electrical pins in the lamp head line up         5. Attach small end of AC adapter/charger
with the receptacles in the flash unit. The lower skirt of the           to receptacle on flash head marked " AC"
lamp head has locking tabs which hold the bottom firmly in               (e).                                                                                                                                           Figure 5.
6
View original page 6Page 7 · Read text
6. Plug 2-blade (large) end of AC adapter/charger into 1 10-125        B) Attach the camera bracket to the mounting clamp by
  VAC electrical outlet, and charge for 4-6 hours. lf used on            placing the lower slot of the mounting bracket over the
  22O-25O VAC, slide the selector switch on the bottom of            lower clip of the clamp and raising up on the bracket until
  the charger to the 22O position. An appropriate adapter           the upper slot engages into the release mechanism of the
   plug will be necessary for the line cord.                              clamp. A "click" will be heard when the bracket is secure.
 III. MOUNTING FLASH ON CAMERA                            C) Attach the camera to the bracket by means of the retaining
                                                                              screw.
 A) Remove battery cap. With a Phillips screwdriver, loosen the
                                           To remove the bracket, push down on the red button    retaining screw in the center of your flash unit's mounting       D)
                                                                      while lifting on the end of the bracket. Lifting the bracket   clamp so that  it can slip over the handle. Position the clamp
                                                                                   will release tension on the clamp and make it easier to de-    in the desired location on the flash handle, and tighten the
                                                                         press the button. Once the button is depressed, swing the    retaining screw securely. (Fig. 6)
                                                                        bracket down and remove.
                                                                 E) lf the fit of the bracket on the clamp is too loose or tight,
                                                                     the bottom tongue of the clamp can be adjusted for proper
                                                                                               fit. Pushing it in will tighten the fit. Adjusting it outward
                                                                               will tighten the fit. lf adjustments are needed, make them
                                                                 in small steps, checking the fit  after each adjustment.

                                                                           IV. OPERATING UNIT
                                                                      1. Select manual or automatic operation using the manual./
                                                                     automatic selector (14).
                                                                  2. Using the computer (13), set the camera to theproperf/
                                                                       stop indicated.
                                                                  3. Connect the PC cord (supplied) from flash receptacle (16)
                                                            to the camera's PC outlet. lf more than one outlet is
                                                                         provided, use the one marked "X".  Figure 6. Attaching the Ouick Disconnect Clamp to the Auto 1600.
View original page 7Page 8 · Read text
-T       I

                                                   When batteries are charged for the desired time, remove the 4. Select the desired shutter speed-usually the fastest speed at                                            AC cord from the electrical outlet, and then from the flash (or   which your shutter synchronizes with electronic flash.                                                             from the battery holder  if one is used).   Move the "M/X" lever if the shutter contains one, to the
   "X" position-                                      When recycling time reaches ten seconds or more, the
 5. Move the battery/Ac switch (10) downwards to the "batt"        battery is almost fully discharged and should be recharged.
    position. Within a few seconds, the Test (ready) light will        Allowing the flash to operate beyond this point will not
   glow brightly and continuously  . . . and you're ready to       provide many more flashes. Although the Auto 1600 is
    shoot.                                                       designed to provide protection for the battery against deep
                                                                          discharge, try to avoid operating the flash on the battery after
BATTERY CHARGING AND CARE                          the 10 second recycle point is reached.
   Because the battery is of the quick charging type, it should                                        EXTERNAL CHARGINGnot be charged at ambient temperatures below 55"F (13"C)
with the standard charger. While individual variations due to           Charging may also be done with the
line voltage changes may occur, your flash should provide         optional Ascorlight battery holder,
approximately 25 flashes (at full power) after one hour of         Cat. No. 011-510 (Fig. 7). With This,
charge. After four hours, approximately one hundred full       you need only insert the battery
power flashes will be available. Charging times longer than six        module (plus end up), release the end cap,.
hours will not provide a greater number of flashes, but will        and plug the AC adapter/charger  into the
have no adverse affect on your battery module provided they          battery holder receptacle instead of the
do not exceed seventy-two hours or more.                                  flash unit. This enables you to recharge
                                                                                batteries while your flash unit is in use   While your unit is charging, press the "test" button (12)                                                                     with a spare battery module.from time to time. This verifies that your AC adapter/charger
is functioning, and also aids in "forming" the capacitors to          Figure 7. The accessory External Battery Holder
make the flash ready for operation.                                        permits changing a spare battery while the flash
                                                                                                                   is in use.


8
View original page 8Page 9 · Read text
USING THE FLASH CALCULATOR
                                                               For manual operation (range selector switch on M), simply
   The flash calculator on the back of your Auto 1600 will        read the f/stop opposite the distance mark which corresponds
 assist you in determining the proper f/stop for the film speed         to the flash to subject distance.
and distance used when in the manual mode and also the
                                                                                                                  are indicated, oneproper f/stop for the various ranges when used in the          For automatic operation, three f/stops
automatic mode. (Fig. 8).                                            opposite each different colored pointer. you may choose any
                                                          of the three ranges for selective depth of field or for a
  The outer portion of the calculation that is fixed as part of          particular operating range. Note that for smaller f/stops (larger
the back plate contains the auto range limit lines, the distance       f/numbers) the automatic range becomes smaller. This is
in feet and the film speed designation.                                because the flash is required to put out more right at the same
                                                                     distance on the smaller f/stop settings than at larger settings.
  The inner, movable dial contains a reference pointer for the        Since the total light output of the flash is utilized sooner when
film speed and the f/stop designation. To use the computer,         set for small f/stops, the automatic range is therefore shorter.
first set the index mark of the inner, movable diar to the      The green range corresponds to the largest range with thecorresponding film speed designation.                                                                           largest aperture. The red range is intermediate, and the blue
                                                               range corresponds to the shortest range with the smallestf/
                                                                       stops and the greatest depth of field.
                                                                simply select the range or f/stop desired and set the range
                                                                         selector switch to the corresponding color. Also set the camera
                                                                    f/stop to the corresponding aperture. Note that under certain
                                                                      conditions, the actual operation range may vary from that
                                                                        indicated by the colored arrows. For example, with very light
                                                                     subjects, the automatic feature will continue to operate
                                                           beyond the indicated range. conversely, for dark subjects, the
                                                                              full light output of the flash wiil be in use before the range
     Figure 8. The flash calcutator assists in determining the proper               limit is reached.        f /stop for various fitms and operating conditions.
View original page 9Page 10 · Read text
"            i:d

AUTOMATIC FLASH OPE RATION               MANUAL OPERATION
   Determine the proper camera f/stop and range for the film                lf desired, your Ascorlight Auto 1600 may be operated
being used as described in the previous section. Set your       manually at any time. Simply move the aperture selector
camera for that f/stop.                                         switch l14l upwards to "M" position, and determine the
                                                                      correct lens opening for the flash-to-subject distance as shown
  Make sure that your camera shutter speed is set properly                                                          on your calculator dial.
for synchronization with electronic flash, that your lens is set
for "X" synchronization and that your sync cord is plugged         The maximum possible aperture available from the flash                                                                     unit can be used. This results in a greater depth of field thaninto the "X" contact on the camera.                                                          on automatic when moving in for close-ups.
   After inserting the charged battery into the Auto 1600, turn
the power switch to the position marked "BATT". After a       A.C. OPERATION
few seconds, the ready light will glow indicating that the flash         The chargerlAC adapter for your auto 1600 is designed to
is ready for operation.                                              allow continuous operation off an A.C. power receptacle while
                                                                     at the same time charging the battery. lt will operate on either  Be sure that your finger or other obiects are not in front of                                                              110-125 VAC or 22O-250 VAC for world-wide use. Althoughthe sensor or the camera lens. Focus and shoot. The flash will                                                              the battery will charge at voltages lower than 110 volts, theautomatically deliver the amount of light required for a                                                                ready light may not come on at lower voltages when using theperfectly exposed photograph.                                                                charger/AC adapter.
  When the ready light comes on again, you're ready to shoot                                                                                           .                                                 To use the flash on AC, be sure that the voltage selector i
again.                                                         switch on the bottom of the charger/AC adapter is set to
  For checking the automatic operation, the computer       match the line voltage available. Turn the power switch (10)
verification light (ll)is provided on the back of the flash head.       on the flash to the offlAC position and plug the end of charger         {
Simply point the flash in the same manner as when the picture        into the charging receptacle ($). Plug the line cord into the
 is to be taken and push the test button.  lf the computer light        wall outlet and wait approximately 15 seconds for the ready
 flashes, there is sufficient light returning from the subject for a        light to come on. Recycle times on both manual and
                                                                                                                                                                                                                                                                                                               1! proper exposure on that range.                                    automatic will be longer on A.C. than on battery. lt is not

10
View original page 10Page 11 · Read text
necessary to remove the battery from the flash when operating         Make sure that the ready light is on before firing. Trying to
  on A.C. unless the A.C. operation  is to continue for more than        take a picture before the ready light is on can result in a
  72 hours.                                                                        mis-f ire or insuff icient exposure.
                                                        Make sure the reflector is pointing in the desired direction.
                                                                                                                                                                                                                                    I OPERATION WITH HIGH VOLTAGE                   This is especially important if the flash head has been moved
 BATTERY PACK                                                                            for bounce use.
          6p-tional high voltage dry battery pack is available for use            . Compose, focus, and shoot for easy, properly exposed flash
  with the Auto 1600. The pack uses a readily available 510 volt                                                                                   pictures.
  battery such as Eveready #497. When operated with this
  accessory, recycle time is greatly speeded up and up to 1000                                        BOUNCE FLASH OPERATION  full power flashes per
                                                          Bounce lighting can be a very effective technique under    Operation of the high voltage battery pack is outlined on                                                                         certain conditions to achieve soft effects. By bouncing the  the instruction sheet supplied with the pack.                                                                             light off large surfaces such as a ceiling or wall instead of
   To operate the Auto 1600 with the high voltage pack, turn        pointing the ref lector directly at the subject, the harsh
  the power switch (10) to the off/AC position. Plug the cord        shadows created by direct lighting are eliminated.
  from the battery pack into the power receptacle (9) on the
  back of the Auto 1600. The Auto 1600 will operate after the
  power switch on th"                       Ig!_y_oJbge-bat4€+y-paet<-is+u+ned  Air T"nCiioni wiff-opera-ie as in the normal battery or A.Cr/J                           *itt    * Lf "9::gq tg. ,h" r""v.lr
 GENERAL PICTURE TAKING HINTS
    The Ascorlight Auto 1600 has been designed to yield the
  best possible pictures with the least attention to tedious detail.
  However, attention to a few simple suggestions will greatly                Figure 9. The tilting reflector of the Auto 1600 allows quick,
  enhance the results obtained with the Auto 1600.                             easy vertical bounce lighting.
View original page 11Page 12 · Read text
The built-in horizontal and vertical bounce features of the       bounce surfaces are unusually light colored, the 10 foot or 20
 Auto 1600 simplify bounce lighting and allow automatic       foot ranges will not provide sufficient range for proper
 operation without the need for a rernove sensor. By swiveling        computer operation. A test  f lash while observing the computer
 the reflector or flash housing for bounce effect, the sensor can         verification light will show if suff icient light is available. Since
 remain pointed at the subject. The ability to tilt the head and       bounce lighting is generally relatively "flat" lighting, accept-
 reflector in two planes permits both overhead lighting effects        able exposures will quite often result even if the computer
 if the head is tilted toward the ceiling, and window lighting         verification light does not light. For an exact reading when the
                                                              computer verification light does not light or when operated in
                                                                   manual, the use of a flash meter is suggested.
                                                  NOTE: All automatic flash units must integrate the light over
                                                               the subject area. When using bounce flash in small, very light
                                                                          areas, the sensor may be affected by the large amount of ex-
                                                                      traneous light reflected from the light surfaces. This may result
                                                                           in an under-exposure of the film because this light floods the
                                                                 sensor and is added by the computer to the light reflected
  Figure 10. The swtvel position of the Auto  | 6OO body allows camera                                                       from the subject. Therefore, it is suggested that under such  bounce lighting even when the camera is turned to a vertical position.
                                                                      circumstances between  1 12 and 1 stop additional exposure be
 effects  if the head is tilted toward a wall. Both effects can be ac-          given.
 hieved even if the camera is moved from horizontal to vertical       When using bounce lighting, an objectional shadow  is
format positions for the same reason. Click stops are provided        sometimes cast into the eye sockets of persons being photo-
 atthe 0o, 600, and 90o positions for rapid adjustment. The use        graphed. This occurs because the light is coming from above or
 of 600 and 90o positions assures no direct light "spill" on the        to the side of the subject and does not always fill in. lf this
 subject.                                                          condition occurs when using the Auto 1600 in the bounce
   Operation of the Auto 1600 with bounce lighting is similar       mode, a small piece of white paper can be attached to the edge
to direct except that when operated automatically, best re;ults        of the reflector to direct a small amount of the light toward
are usually achieved on the 40 foot (green) range. Unless the         the subject as a "fill" to lighten the shadows.

12
View original page 12Page 13 · Read text
A general caution is necessary whenever using any type of           Using the second Auto xo00 as a background can eliminate
       bounce lighting in color photography. Be very careful in         unsightly shadows behind a subject.
           selecting bounce surfaces. colors in these surfaces will alter the                                                     By controlling the light output of the two flash units,          carefully designed color balance of the light from the Auto                                                                                   backlighting or sidelighting can easily be accomplished.t      1600 and may produce unpleasant effects. For example,
n         bouncing light off a green wall can cast unpleasant green tintsd'
         into a person's skin tones. Neutral, light colored surfaces are
         best. Colored, very irregular, or dark surfaces should be
          avoided.
      MULTIPLE FLASH OPERATIONI
               It's both practical and often beneficial to employ two or
       more electronic flash units together, both directed at the same
          subject. Often, you may have the "second" flash held by an              Figure 1 | . The Ascorlight Super Slave used on the A uto  | 600          assistant, directed at your subject from a different angle than                 for multiple unit operation.
         the master flash on your camera.
                                                       To operate multiple units, two common methods of flash
         Operating hints:                                                     synchronization are used; djrect wiring between the two flash
          For best results, use two or more Ascorlight Auto 1600,s       sync outlets and the camera and also the use of a photo slave.
                                                               The direct wiring approach eliminates interference from otherI        rather than mixing different flash makes and models together.
                                                                       entanglement of long interconnecting cords and is thereforet       Allbalance,1600'sandgiverecyclingvirtuallytimes;identicalthis makessensormurtipreresponse,flash colorwork       photographers in the area, but can cause problems with
          faster, more convenient, and more accurate.                           not very popular.
        By using a second flash, many studio techniques can be         The use of a photo slave which picks up the light from the
        used on location. For example, by using a second Auto 1600        camera mounted unit and fires or "slaves" to the second unit
         high and to the side of a subject and using the master, camera            is preferable because of the freedom that it offers. when using
       mounted flash as a fill, portrait type lighting can be achieved.        the Auto 1600, simply plug the photo slave into the sync

                                                                                                                                                  13
View original page 13Page 14 · Read text
outlet in the back of the unit (Fig. 1 1). Consult the latest Ascor       head must be used on the Auto 1600 (Fig. 12). Remove the
 price list for the appropriate slave device.                          lamp head retaining screw and remove the standard lamp head.
   Regardless of the method of synchronization used, the        Attach the bare bulb head in the same manner as the standard
functions of the Auto 1600 remain the same as when used         head. Plug the  f lashtube into the socket in the bare bulb attach-
 normally.
   For automatic operation, the selectable f/stop feature of
the Auto 160C allows different lighting ratios to be set up.
Simply select the f/stop desired on each flash unit to achieve
the desired ratio. The Auto 1600 will do the rest. When using
multiple lights, especially with backlighting techniques, be sure
that the light from the flash units does not directly fall on the
sensors of other flash units or into the camera lens. Otherwise,
improper exposures or  f lare may result.
  When used on manual, simply check the computer on the
back of the Auto 1600 for the proper f/stop to use. Note that
combinations of units on manual and automatic may be used                 Figure  | 2. The Bare Bulb attachment for the Auto 1600.
together for even greater versatility. Multiple flash techniques
are not limited to the use of two flash units. In fact, any
number can be used to achieve the desired lighting set-up. The
choice is up to you.
BARE BULB & UMBRELLA OPERATION

                                                                                                                                                                                                                                                                                                                                                                                                                                     - ior I  Two lighting techniques that have become popular in recent                                                                                                                                                                                                i',9;::....
years are the use of bare bulb and umbrellas to achieve
softness. Both techniques can be readily adopted for use with
the Auto 1600.
                                                                                   Figure 13. The Bare Bulb attachment shown in place of the  To use the bare bulb technique, the accessory bare bulb                standard reflector.
14
View original page 14Page 15 · Read text
ment noting the proper alignment of the pins with the        The Auto 1600 can be mounted on an umbrella by means
   socket (Fig. 1 3).                                                 of the % x 2O socket in the bottom of the universal L bracket.
     When using the bare bulb accessory, the Auto 1600 can be
   used on either automatic or manual. The flash head should be
   used in the 60o or 90" bounce position when on automatic to
    prevent direct light from the flashtube from interfering with
   the flash sensor. On manual, the normal, straight ahead
    position may also be used if desired. The general cautions
    outlined under using bounce flash also apply when using bare
    bulb to prevent color shifts from colored reflective surfaces.
     The soft effect produced by bare bulb results from light
   bouncing in from surrounding light areas. Use of bare bulb inl,i   dark areas can result in contrasty rather than soft lighting
                                                                                  Figure 14. The Auto  | 600 remote sensor allows off the camera,   because light is not reflected back to  lighten shadows. This                                                                                            close-up, and umbrella lighting techniques to be done automatically.
   type of lighting not only increases contrast but, also increases
    color saturation and decreases flare. By appropriate choice of       Most umbrella mounting brackets have provisions for mount-
    surrounding surfaces, a wide range of lighting techniques can         ing lights having a To x 20 thread. Consult the latest Auto 1600
    be achieved.                                                              price list for umbrellas and accessories.
                                                                                                                                             sensor      For soft lighting with more control than bounce on bare          For automatic operation, use of an optional remote
    bulb techniques, use of an umbrella  is suggested. By bouncing             is suggested. (Fig. 14)
   the light into the umbrella, a larger lighter source is created
   which wraps around and fills in shadows. Different size     PAINTING WITH LIGHT
    umbrellas can be used, with the light getting softer as the size         As compact and lightweight as your Ascorlight Auto 1600
   of the umbrella increases. Both white and silver surfaces are            is, it is capable of being used to light very large interiors-even
    available with the silver being more contrasty with higher light        for color. When called upon to photograph large areas such as
    output.                                                               hotel ballrooms, public rooms, restaurants, lounges, foyers and

                                                                                                                                            15
View original page 15Page 16 · Read text
I                                                                                                                                 -i;s
         other rooms in color for the preparation of postcards or resort        The reason for selection of the 4 x 5 camera format lies in
         brochures, the lighting at first glance would seem to pose      the fact that a Polaroid 4 x 5 black using single packet
         insurmountable problems. Thoughts of expense in setting up a        Polaroid film may be used to check lighting and exposure
          large number of heavy duty electronic flash units, lights, and        before shooting a color interior. Because the Polaroid picture
       many lengths of cable might dissuade the photographer from        is taken with the same lens and camera, the pattern of
         accepting these prof itable assignments.                                illumination and exposure is quickly determined. Use of 50
                                              ASA Polaroid P/N (positive-negative) black and white film             Actually, such interior color photography, regardless of the
                                                                             provides a double check, namely a print and a negative. The          size of the room, can be accomplished easily and inexpensively                                                                      speed of Ektacolor S (e.i. 100) requires one more stop down      by employing the technique of "painting with electronic                                                                    from where the Polaroid test shots are made.                    fl ash."
                                                                                                               It should be noted that this technique is based on the area           Because of the portability and high light output of the
                                                                          being photographed without people to avoid ghost images by       Auto 1600 Ascorlight,  it is ideal for such applications. The
                                                                                                                                                                                      is desirable to control         photographer or an assistant may move around the area and       movement during the multiple flashes. lt
                                                                              strong daylight coming through windows or openings to avoid           fire a multiple series of flashes from points of concealment out                                                                                   flare due to over exposure in these areas during the multiple        of camera range while the shutter is open. The Auto 1600                                                                             flash exposures. lf  it cannot be dimmed down by a main         flash head with its removable reflector permits use of the
        "bare-bulb" accessory to provide 180 degree coverage and        rheostat, only a few seconds exposure will be required to                                                                                  retain the natural room lighting effect and soften down the        smooth out the  f lashes.
                                                                                           overall flash illum ination.
          Of primary importance, is the use of a sturdy tripod located                                                         Use of an assistant to fire the flashes will allow the      on a floor area free of vibration that may be caused by                                                                     photographer to stand by the camera and cover the lens       movement around the room when the camera shutter is open.
                                                                       between the series of flashes.
           Experience has shown that the use of Ektacolor S color
         negative 4 x 5 cut  f ilm lends itself to this type of photography.       The automatic feature and computer verification light
           It has excellent latitude (not found in color transparency         simplify exposures with the Auto 1600. Before the exposure  is
          materials), and will .produce color prints. color transparencies,       made, test shots with the Auto 1600 set on one of the three
        and even black-and-white prints, if desired.                          automatic ranges can be made. lf the verification light flashes

          16
I
View original page 16Page 17 · Read text
'            i;d                                                                                                  ...
during exposure, the exposure will match that indicated by the         Shoutd you employ your flash for close-up or macro
computer dial. The camera can be set at that F stop and the        photography. try to position the flash two feet or more from
exposures will be correct. lf the computer verification  light        the subject. Should this be impossible, a simple expedient is to
does not light, operation on manual is suggested.                     cover the flash reflector (not the sensor), with one or more
  As a typical example in the use of this technique, a 50 x 75         thicknesses of a handkerchief or other translucent material. To
                                                                                                           absorbing one f/stop offoot room with average colored furnishings and a white ceiling        shoot at distances of 18", a material
would require from 25 to 30 bare-bulb flashes with the lens          light should be used (this can easily be determined by use of
                                                                                                                  use material with anstopped down to t116. However, when using bare-bulb, room       an exposure meter). For distances of 12" ,
size and finish greatly affect the light reaching the subject. A        absorption factor of two f/stops; for distances of 9", material
preliminary Polaroid exposure  is suggested.                         which absorbs three f/stops of light.
                                                    For these short distances, an accessory remote sensor  The camera shutter is opened on the time setting for the
                                                                      positioned close to the lens is suggested to eliminate parallaxentire series of flashes. Between each set of  f lashes, a crumpled
                                                                                 error.black focusing cloth is held in front of the lens rather than
opening and closing the shutter which might introduce
movement and double images during the multiple exposures.      SPECIAL MOUNTING TECHN IOUES
Two flashes should be fired from each point of concealment                                                    The mounting clamp (17) of your Ascorlight Auto 1600
around the area. For uniformity of exposure, all flashes should                                                                     accepts standard Honeywell quick-release brackets and attach-
be fired at about the same distance from walls and objects in                                                             ments. These are available in a wide variety of mounting
the room.                                                                          configurations, including brackets designed for specific camera
                                                        models and types. Your Ascor dealer can assist you in
CLOSE UP OPERATION                                        choosing the bracket best suited for your equipment.
   At a flash-to-subject distance as close as two (2) feet, your        Many people prefer to use the flash mounted directly above
Ascorlight Auto 1600 will deliver perfectly-exposed photo-        the lens to eliminate shadows in back of the subject. There isa
graphs automatically at any of the three lens apertures, by      wide variety of these brackets on the market which are
reducing the duration of the flash to speeds as fast as       adaptable to the Auto 1600 by means of a Honeywell
1/150001h second.                                                       quick-release plate available from your Ascor dealer. Some of

                                                                                                                                        17
View original page 17Page 18 · Read text
these have swivel provisions so that, the flash can be kept        The meter is cordless; it starts measuring automatically
above the lens when the camera is in either the horizontal or        within 1/1,000,000th sec (one microsecond) at the threshold
vertical position.                                                         of the flash.
                                                                                                Its wide measuring range is spread over a single broad scale,
USE OF A FLASH METER                                  thus eliminating the need for test measurements or circuits
  The most accurate method of determining proper exposure         switching even when unknown flash intensities are used.
when operating on manual is to use a flash meter.                        \
  The use of an electronic flash meter can greatly simplify
exposure determination, especially when using multiple lights                                     "*S,Wtq-sN
or indirect lighting. A good flash meter will give you a direct
reading in f/stop for the type of film and particular lighting
set-up used, el im inating guesswork.
  An exceptionally versatile and accurate electronic flash
meter is the Gossen-Ascor electronic flash meter. lt is all solid
state, battery operated, and requires no direct connection to
the power supply. Incandescent and other continuous light
sources do not affect the reading. This feature is especially
important with today's high intensity quartz-halogen modeling
lamps.

GOSSEN-ASCOR AUTOMATIC ELECTRON IC
FLASH METER
  The new GOSSEN solid-state electronic flash meter pro-
vides thb professional photographer with an exceptional
combination of advanced features for fast and accurate flash
exposure determ ination.                                                           Figure  | 5. The Gossen-Ascor Electronic Flash Meter.

18
View original page 18Page 19 · Read text
"         J;

  Most important to creative photographers, the Gossen-        succession by pressing the toggle switch after each measure-
Ascor E.F. meter can compute the cumulative light output of       ment, returning all circuits, and the indicator needle, to zera,
 entire series of successive flashes used for "painting with light"       and starting a new measuring cycle. However, if.uninterrupted,
and similar special application.                                        the instrument remains in measuring condition for a three-min-
                                                                                                     successive flashes are automatically   Designed and manufactured by GOSSEN, the meter  is       ute period during which
                                                                to the result of an initial flash reading. After threecompletely self-contained, weighs only 9 oz., and fits the palm       added
for convenient one-hand operation. The operation of the        minutes, the instrument switches itself off automatically to
Gossen-Ascor meter is extremely simple and positive. The         preserve battery life. With normal use, the Eveready No. 504
                                                                  battery lasts for several thousand readings. A built-in batterytwo-position toggle switch is pressed backwards to cancel any
previous measurement. Held (or tripod-mounted) at the          testing circuit is operated by pressing the switch forward.
subject position, the meter needle deflects at the instant of the              Its compactness, fast operation and adaptability to cumula-
flash and remains locked at the measured value. The adjacent         tive flash measurement make the Gossen-Ascor meter ideally
computer dial indicates the exact f/stop for correct exposure.         suited for the active studic employing electronic  f lash.
The computer ring is adjustable for ASA  f ilm speeds from 6 to                                                       The meter is supplied in a protective storage case, complete6400; the f-stop scale is calibrated for all stops from f/l  to                                                              with an adjustable neck strap. lt is available at better cameraf/90 with 1/3 stop increments.                                                                                    stores.
  The solid-state circuitry (pat. appl. for) includes a silicon
sensor which opens the measuring circuit automatically within                                        CARE OF THE FLASH UNITone microsecond by means of a transistorized triggering
                                                 Your Ascorlight Auto 1600 has been engineered andcircuit. A color-corrected photo transistor within a hemi-
                                                                                                dependable service. You canspheric diffuser integrates the light of the flash and the        constructed to provide years of
ambient light in a transistorized integrating circuit. The        extend the useful life of your equipment and insure top-notch
resultant reading can be read critically and without parallax          results even more by following these basic tips:
error as the needle image is reflected in an underlying mirror
surface.                                                      Avoid extremes of humidify and temperature.
                                                                      Battery charging should be done in temperatures between
   Individual flash measurements can be made in quick       55oF and 1 25oF. Lower temperatures may produce a smaller

                                                                                                                                        19
View original page 19Page 20 · Read text
--t*
number of flashes for a given charge time. Higher temperature         testing based on the "Guide Number" as supplied by the
during changing may shorten battery life. lf using a flash in ex-        manufacturer for general-purpose color films.
tremely hot, cold, or rainy weather, try to protect the unit be-                                                            Your Ascorlight Auto 1600 has a film-tested Guide Number
tween shots by keeping it in a carrying case, under your coat, or                                                               of 160 for ASA 100 film, when used manually (at full power).
in some other way.                                                                         Individual preference in negative density may suggest use of a
                                                         somewhat higher or lower number with specific photographers
Use your flash frequently.                                                                      uqing consistent film type and processing, printing equipment,
  The more, the better! lf for some reason your flash has not                                                                        etc. In the ultimate analysis, a "Guide Number" is expressly
been used for several weeks, re-charge your battery module                                                             what the name implies: a guide. Your flash has been carefully
and shoot off ten or fifteen 'test' flashes on AC current. This                                                                       tested to insure correct film exposure with film types designed
will 'reform' or restore your unit's capacitors to insure their       for instantaneous exposures. Should you prefer negatives
ability to receive and hold energy.                                                         which are more or less dense, simply use a higher or lower
                                                          "Guide Number'. when determining lens aperture with your
                                                                           calculator dial, you may change the "Guide Number" by usingNOTE ON LIGHT OUTPUT AND GUIDE                                                a film speed index (ASA number) higher or lower than theNUMBERS                                                            nominaf ASA rating. Always confirm your working "Guide
   Perhaps no single aspect of electronic flash design and       Number" equivalent through an actual film test, using the film
performance has created as much confusion as the numerous         type, processing, and printing equipment or source you will
different methods of expressing light output. Some manufac-       most frequently employ. Through this means, you will be
turers traditionally express this in BCPS (Beam Candle-Power         assured of perfectly-exposed photographs irrespective of dif-
Seconds) units, which however are computed differently under          ferent methods of power output rating or determination.
A.N.S.l. (American National Standards Institute) and D.l.N.
(Deutsche Industrie Norm) procedures. Others are sometimes
expressed in watt-seconds. This figure, however, does not
provide for differences  ir'r flashtube and reflector efficiency,
and configuration. Regardless of the expression, there is one
basic means which all photographers find valid: actual film

20
View original page 20Page 21 · Read text
d,-r-t

      ACCESSOR IES                                                   5) Spare AC Adapter/Charger (Cat. No. 01 1-502!,. For replace-
                                                                         ment' or if you wish to recharge several battery modules at               It's a system . . . and these valuable aids are now (or soon                                                                          onerlme'         witl be) available from your Ascor dealer to let you expand
        your flash's versatility even further:                                                                         6) optional Flash cords and Brackets. A[ow most convenient
                                                                                                                          See your         1) Nicket-Cadmium Battery Modulss (Cat. No. 0l l-401 ). With        use of your flash with virtually any camera type.                                                                                                  for available types'         two or more of these, you're ready to shoot hundreds or            -dealer
           even thousands of flashes non-stop'                                                                         7) Ascorright super slave (cat' No. 071-512). Full 180' sensor
                                                                             acceptance for unlimited freedom in placement; extra-fast         2) Battery Holder (cat. No, 011-506). For charging battery                                                                                                                         it ideal for use with your 1600 even at          module outside flash unit.                                       'turn-off'makes                                                                                              fastest recycling speeds.
        3) Remote Sensor (Cat. No. 011-507). Pluqs into vour flash's                                                                         8) Umbrellas consult the latest Auto 1600 price list for          remote sensor outret. rt is stable at cLser distances                                          "nd          umbrellas and accessories'         when using umbrellas. sensor mounts on camera's accessory
  lf        shoe, is usable in any bounce configuration.  It
                                                              standard   '      a) Bare Bulb System (Cat. No. 012-201}. Replaces
             reflector tube assembly; gives omnidirectional 180' light
         '      path. Perfect for shadowless photography, enables use of
          even Fisheve lenses.


lll
View original page 21Page 25 · Read text
ASCORLIGI{T AUTO. 1600 il SYSTEM


                                                                                       The Ascorlight Auto  7 600 II Automatic
                                                                                                    Portable Electronic Flash System


           (#
                  ry      nrt)      I


 PORTABLE POWER YOU CAN DEPEND ON                          r Swivel Head
 The Ascorlight Auto 1600 II brings the system concept found           Alf ows vertical or horizontal bounce   f ight effects on
 to be so essential for today's camera systems to electron ic            ca mera.
  flash lighting to provide the ultimate in versatility and per-
                                                                     Assures constant sensor position regardless of bounce for formance.
                                                                  proper automatic ex posu res"
  Its applications are virtuaf ly unlimited because of the                                                               o Unique interchangeable light sources. systems approach. State of the art circuitry provides a com-                                                                                 Ligh t  sou rces can be ch anged to provide d if f erent pact design with dependable service.                                                                                lighting ef fects.
                                                                     Eliminates down time due to broken or worn out flash-
 FEATU R ES                                                                          tu bes.
                                                           o Four hour quick charging premium Nickel Cadmiumo Automatic exposure control
 Three ranges for depth of field control plus manual.             Battery
                                                                                       ch arged in the  f lash or in accessory remote  Built-in sensor with constant sensor position.                Can be
 Optional remote sensor for off-camera work.                          battery holder.
o Energy saving thyristor circu itry                                   o Controlled flash duration to minimize reciprocity
  Uf tra-fast recycle time.                                                                                                                  f ailu re.
 Up to 1000 flashes per charge.                                                        o Exposure verification light
o High Light Output                                                    Indicates sufficient light for proper exposure on auto-
 Guide Number of 160 with ASA 100 film.                             matic.
c Broad, even coverage                                                  r Low Voltage Trigger Circuit To protect delicate camera
 Wif l cover 29mm lens on 35mm camera.                              con tacts.
View original page 25From the M. Butkus archive. Original publisher and archive notices are retained.
Check the model and edition against your equipment.
PDF verified 2026-10-10.