Film cameras
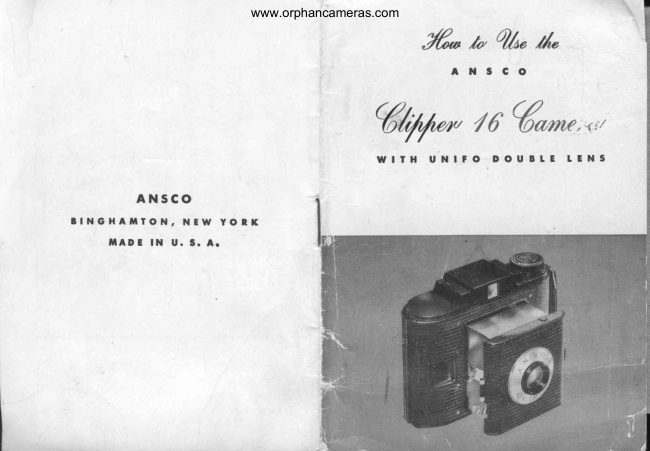
Ansco Clipper 16 User manual
User manual for Ansco Clipper 16. 9 pages in English. Read the original PDF, download or print a copy without registration.
9 pagesEnglish1.5 MB PDF
Loading your manual…Open PDF directly
Document details
- Brand
- Ansco
- Model / document
- Ansco Clipper 16
- Document type
- User manual
- Language
- English
- Pages
- 9
- File size
- 1.5 MB
- Category
- Film cameras
- Document date
- Not specified in catalog
Search available document text
Find a term, then jump to its page in the original PDF. Image-only pages may not be searchable; check the PDF for exact wording and diagrams.
Page 4 · Read text
www.orphancameras.com

  Picture   taking    is  fun  with   your  new  Ansco
Clipper  16 Camera !
   It's  easy  to  oPerate !
  There  are no complicated  adjustments   !
  No. special  photographic  knowledge   is nbeded I
  You  just aim and Push the  trigger!
  But  please read  the  instructions   !
  you  can  make  better   pictures     if  you  follow
the few  simple  instructions   in  this  book'
     If  you  want  more  detailed  information   about
pict"ie   iaking,  o,btain a copy  of  "q.tter   Photog-
;;;;ht'AttscoMadJeosy,"    a 60-page booklet  published
6y        and  available  from  your  local  photo-                                                                                          Illustration        r
graphic  dealer  at 25c a coPY.
                                        Camera.                                      Clipper                          Ansco                    your                    new                    at            look        let's  So
                                    photograph                                    the                               with                 yon                     and            before          ,tp     1t Sei                                                             1t                        - And  Superpan  p1s5s-[n    extremely   fast  pan-
 right  as a guide, Inake sure you can identify  each              chromatic   film  for use under  poor  lighi  condi[ions
 part  of your  camera.                                       and  greater  subject  range  with  any camera.
   Your  Ansco  Clipper  Camera  takes  16 pictu_res                   1.   Sliding  release  for  opening  back.
 2/2  x  2-L/ lG  inchbs  on  Ansco  616  size  Film.                    2,  Winding  knob  for  advancing   fitm.
                               speeds  of  ro11 film                            different                 three       makes Anr"o                                                                 3 &  4.  Finger  grips  to open camera  front.                           Camera.                your  CliPPer                       fit which   will
                                                                                  5.  Eye-level   optical  view  finder.
                                                    ortho-                                      speed,             Plenachrome-Higher   There   is                                                                                  6.   Shutter  release  (trigger)   .                                     and general                  better  outdoor  pictures               for chromatic
 all-around  amateur  use.                                                   7.   Vertical   footrest.
                                                                                  8.  Bulb  Bxposure bar.   And  Supreme-An    improved,  high-speed  pan-
 chromatic  hlm  for  pictures  on dull,  rainy  days and                   9.  Release  catch   to  close  front   of  camera.
 indoor  pictures.                                                                fdentical  catch on opposite  side  of camera.
View original page 4Page 5 · Read text
www.orphancameras.com
FOLTOWTHESE3 EASYSTEPSTO LOAD YOUR GTIPPER

 I.  OPEN BACK  OF CAMERA.
    Release  catch  (Figure   1,  #  t)  which  holds
    back by sliding knob  in the direction  of arrow.
    Back   will  op'en automatically.
2.  PUT  FILM   IN EMPTY   FILM  CHAMBER.
   When  back  of camera  is ,open, you'll  find two
     film  chambers.  One, at the winding  knob end
     of  camera,  should  aontain  an  empty   spool.
    This  is your  take-up  spool on which  your  film
     will  be  ro,lled when  y,ou've taken   all  the  pic-
     tures.  The  other  film chamber  will  be empty.
    Flere  is where  you  insert  your  new   roll  of                                                                                           Illustratrcn    3
   Ansco 616 Film. YOU SHOULD  LOAD  AND
   UNLOAD  YOUR  CLIPPER   CAMERA    IN               The  fresh  roll  of  film  should  be placed  in  the   THE  SHADOW,  NEVER   IN DIRECT  SUN-
   LIGHT   OR  UNDER   BRIGHT   HOUSE               supply  chamber  so that  the  pointed  end  of  the
   LIGHTS.                                                   paper  will come from  the top and not  the bottom
                                                                                      o.f the  roll.

                                                           To  insert  the  roll  of  film  so that  the spool end
                                                                   holes engage the two  pins  in the supply  chamber,
                                                              proceed  as follows.    Lift  up  the movable  pin  to
                                                                     the position shown in  Illustration   2. Place the  roll
                                                                               of  film  so  that  one  spool end  hole  engages the
                                                                         stationary  pin and then as you lower  the opposite
                                                           end of the  roll  into  the chamber,  bring  the mova-
                                                                         ble  pin  back  into   its  original   p,osition.  As  the
                                                            movable  pin and the  roll  of  film  are lowered  into
                                                                      the  chamber,  allow  the  pin  to engage  thts spool
                                                          end hole.
                                                                              After  being  certain  that  the  fresh  spool  is se-
                                                                        curely engaged on the pins  in the supply  chamber,
                                                               break  the  sticker  which  seals the  roll, and  carry
View original page 5Page 6 · Read text
www.orphancameras.com
the  end  of  the  paper  across  the  back   of  the              Now  turn  the winding  knob  and watch  the  rear
camera.  Make  sure that  the  red  or green side  of              window   until  the  figure    I  appears  (see  trllus.  4).
tJre paper   is  out,  the  black  side  facing  the  lenst            A  pointing  hand  and  a row  of  four  dots  will  be
PermiC  the  paper   to  pass  over  the  two  metal               seen  shortly   before   this   first   figure  appears   in
rollers  (never  attempt   to  thread  the  film  under                  place.  The  camera   is  now  ready   for  the   first
ttrese  rollers)  and thread  the  pointed  end  into  ttre                   picture.
slot  in the empty  spool as shown  in  Illustration   3.
                                                                       fmmediately    after  taking  the  first  picture,  wind
3.  WIND  FILM  INTO  POSITION.                              again  until   figure  "2"  appears  in  the  red window,
                                                              and  so on  until  the  roll  has been  completely   ex-
     First  be  certain  that  the  red  or green paper                posed.   After   the  16th,  and  last,  exposure,  con-
    leader  for the  film  is centered  on your  take;up                   tinue   to  turn  the  winding  knob   until   t}re  red  or
    spool  so that    it  will  wind  evenly.  Now  give                green  paper   is  completely   wound   off  onto  the
     the  winding   knob   t'hree  turns   to  bind   the               takeup   spool  and  cannot  be  seen  through   red
    paper leader  correctly.  You  can now close the               window.
    back  of the camera.  Push  it shut securely and
    do  n'ot open  the camera  back  again  until   all         NOW YOU ARE READY TO TAKE PICTURES
     the  pictures  have  been  taken  and  the  film
    wound  comp.letely  onto  the  take-up  spool.                       Just  follow  these simple  directions.
  Illustration   4
                                              OPEN THE CAMERA

                                                             To open the camera before making  an exposure,
                                                                      hold  the camera  in the palm  of the  left hand and
                                                                  grasp the  finger  grips  (3 and  4, Illus.  1)  with  the
                                                                 tJrumb and middle  finger  of the  right  hand.   Pull
                                                                        out  the camera  front   until  a  click  indicates  that
                                                                                                                                  it  is locked  firmly   in  place.

                                              MAKE THE EXPOSURE
                                                             To take a picture,  h,old the camera firmly  against
                                                                   your  cheek and nose as shown  in  fllustration   5,
                                                                          with  yoqr  right  eye close to  the  rear  opening-Composein
                                                                                                       tlr"  eye-level  view  finder  (5,  Illus.     l ) .
                                                                        the  subject   in  the  finder  and,  with  the  middte
                                                                            finger  of the  right  hand, press the shutter  release
View original page 6Page 7 · Read text
www.orphancameras.com

                                                                           dealer.  This  special  attachment    will  enable  you
                                                                                 to make head and shoulder  portraits  at a distance
                                                                                         of. 3/z  feet from  the  subject.

                                                             The  addition   of  a  yellow   filter,  which  can be
                                                                     obtained   from   your   photographic    dealer,   will
                                                                            greatly  improve  pictures made  at the seash,ore or
                                                         when  the  light   is extremely   bright.  The   filter   is
                                                                          useful  for  emphasizing  cloud  effects and  in  land-
                                                              scape and  flower  studies  to  obtain  more  correct
                                                                          color  rendition.   Color  filters should  only be used
                                                                                     in  brilliant   sunlight.
                                                                                t          IJse snapshot exposures for  all pictures made  in
                                                                         sunlight  or  bright  cloudy  weather,  but when  the
Illustration 5                                                                 weather  is extremely  cloudy  or when  pictures  are
 (6,  Illus.  1). A  single pressure of the lever  oper-            made indoors, bulb exposures are necessary. Bulb
ates the shutter, opening and closing  it. Be careful               exposures should never be mAde of moving objects.
not  to m,ove the camera while making  an exposure
or a blurred  picture  will  result.  Also, do not  point           TAKNG BULB EXPOSURES
the camera  toward  the  sun, as this causes a flare
of  light  which   is very  noticeable  on  the  finished                To make  bulb  exposures, the camera must  be
print.                                                               held on a firm  support  such as a chair,  table  or
  The  Unifo  Double  lens which   is supplied  with             some other  stable  object,  and  placed  s,o that  the
the Clipper  camera  is a universal  focus lens, which                  vertical  footrest  (7,  Illus.  1)  will  hold  tJre camera
photographs    all  subjects  from  6  feet  to   infinity                     in  a  level  position.      It   is  very  important   that
 (as  far  as you  can  see).  Therefore  objects  that                 neither  the camera  nor  the  subject  m,ove duringare  6  feet  or  further   from  the  camera   will  be                                                                 exposure, as this  will  cause a blurred  picture.sharply  in  focus.
   In  order' to make  close-ups, a  portrait   attach-             Now  pull  out the bulb exposure bar  (8, lUus. 1)
ment  can  be  obtained  from  your  photographic               and press tJre shutter  release in  the same manner
View original page 7Page 8 · Read text
www.orphancameras.com

as used when  making  snapshots.  The  length  of                release catches (1,  Illus.  6, identical  catch on op-
the exposure depends upon how  long  the  shutter                  posite  side  of camera ) .  Then  push  the  front  of
release lever  is held down,  since the  shutter  re-                      ih.   ."rrr.r.   in as far as  it  wilt go  (Illus'  7) '
mains open as long as the lever  is held down, and
closes when  the  lever  is released.                       TO UNTOAD THE CAMERA
                                                           when  the  16th exposure has been taken,  com-
  Bulb  exposures l,onger than  o{re second are  sel-                   pletely  wind  the  film  onto the take-up  spool. Then
dom  necessary  outdoors,  even  in  extremely   dull                   rp.n  and swing down the back  of the camera. The
weather.  Bulb  exposures made indoors by daylight               exposed ro11 is held  in  position  in  the same man-
range from  5 seconds to 2 minutes  in  length,  de-                 ner as the supply  spool was and may be removed
pending  upon  the  brilliance   of  light  outside  and                by  lifting  up  ,oo the movable  Pin.
the number  of windows  in  the  room.                                 Fold  under  the  pointed  end  of the  red  or green
                                                                      paper,  and  seal  the  spool  with   the  "exposed"
IO CIOSE THE CAMERA                                                                                  sticker.  The  film   is then  ready  to be developed
  To  close the camera, hold   it  in the palm  of the               and  printed.
left hand and simultaneously  press the two  closing                To prepare  the camera  for  the next  roll  of  film,
                                                              remove  tJre empty  spool  from  the  lower  chamber      Illustration     6                                   lllusttation     7                                                                                  of the camera and place  it  in  the upper  chamber.
                                                                   Rel,oad the camera  in  the manner  previously  de-
                                                                         scribed.

                                                        cAuTloNS
                                                                                    In  starting  the red or green paper  at the time  of
                                                                        loading  a fresh  roll,  always  see that    it  is wound
                                                                     onto the take-up  spool evenly, otherwise  the paper
                                                      may tend  to climb  up on one side of the spool and
                                                               be  torn,  which  can  result   in  fogged  film.
                                                                   Always  make   it  a practice   to wind  to  the  next
                                                                 exposure  immediately   after  taking  a  picture.   In
                                                                                       this way  t}re camera  is always  ready  for  the  next
                                                                            picture and there  is no chance for double exposure.
                  10                                                               1 1
View original page 8Page 9 · Read text
www.orphancameras.com
   In  making  exposures, always  hold  the  camera          F O R B E S T R E S U L T S W I T H Y O U R
level  and  perfectly    still.
                                    G L I P P E R   C A M E R A        U S E  Keep  the lens of your  Clipper  camera  clean. A
dirty  lens  or  rain  or mist  on the  lens  will  cause
fogged  or cloudy  pictures.  To  clean the  lens, usecleansing  tissue  or a soft  linen  or cotton  cl'oth.     An,seo  FiIm
  Do  not  let  the  sun  shine  directly  on  the  lens
when  taking  a picture.                                             ASK  FOR  ANSCO   676
   Select your  background   carefully.  A good sub-          PLENACHROI'IE
ject  can be spoiled  by  such backgrounds  as tele-                     F O R   O U T D O O R
phone   po'les  or  clapboard   h,ouses.  Keep  your                          P I C T U R E S
backgrounds  simp'le.  A  background   ,of foliage   is              -l                                                                                  *usually  unobtrusive  and  pleasing.
                   * * * *
  The  foregoing  instructions  explain  the mechani-                  I
cal operation  of your Clipper  camera. These should                 ASK  FOR  ANSCO   6 76
be  thor,oughly  understood   before  attempting    to         S U P R E T T , I E
take  pictures.                                                        F O R   P I C T U R E S
  Do  not  be  content,  however,  with  the  mastery               O U T D O O R S  A N D
                                                                                                                                                                                  I N D O O R S
of these simple  details.  Photography   offers mar-
velous  possibilities  to  the camera  user who  really
attempts  to  obtain  the maximum   results  possible
with  his  equipment.   Your  Clipper  camera  will
take  fine  pictures    if  you  use  it  correctly.
                                                                    ASK  FON ANSCO   676
                                          S U P E R P A N
             C5456   67  PRINTED  IN U. S. A.                        P R E S S
                                                                      F O R   P I C T U R E S
                                                                                                                                                 r N D O O R S
                       r2
View original page 9From the M. Butkus archive. Original publisher and archive notices are retained.
Check the model and edition against your equipment.
PDF verified 2026-10-10.