Film cameras
Ansco Craftsman camera User manual
User manual for Ansco Craftsman camera. 12 pages in English. Read the original PDF, download or print a copy without registration.
12 pagesEnglish3.9 MB PDF
Loading your manual…Open PDF directly
Document details
- Brand
- Ansco
- Model / document
- Ansco Craftsman camera
- Document type
- User manual
- Language
- English
- Pages
- 12
- File size
- 3.9 MB
- Category
- Film cameras
- Document date
- Not specified in catalog
Search available document text
Find a term, then jump to its page in the original PDF. Image-only pages may not be searchable; check the PDF for exact wording and diagrams.
Page 3 · Read text
www.butkus.us


  YOUR ANSCO CRAFTSMAN CAMERA
           MAKES FINE PICTURES  !


    Ansco has designed this sturdy, dependable camera
    to give you the best possible pictures with simple,
   easy operation. While no special photographic
    knowledge is required to use it successfully,  it  is
    suggested that you read the following directions
     carefully.
    'To insure the utmost ease of operation, the Crafts-
   man has been designed to take pictures only in
    daylight. ft is an ideal camera for snapshots on
    the beach, in the snow, and on the mountains, at
    the park   eveqrwhere you go. And don't forget
    those occasions-      at home when your camera can
    provide priceless remembrances  !

    YOUR ANSCO CRAFTSMAN TAKES EIGHT PICTURES{*     THIS SIZE (21/{'x3%t1 9p ANSCO 120 FllrUt.
View original page 3Page 4 · Read text
WINDING
 KNOB


                          Mike Butkus                   DigitallyDN:Date:cn=Mike2026.05.12signedButkus,by20:13:33Mikeo, ou=Butkus.org,Butkus-04'00'      email=mike@butkus.org, c=US


FIGURE   I

GEI ACQUAINTED WITH YOUR CRAFTSMAN
With your camera before you, identify the parts of
the Ansco Craftsman Camera as shown in Figure 1.
Try a few practice snapshots without film in your
camera to be sure you are familiar with the use
of the camera.
Always load your Craftsman Camera in the shadows
away from bright sunlight or bright electric lights.

4
View original page 4Page 5 · Read text
www.butkus.us
TOADING
The first step in loading your camera is to open the
back by lifting the catch on the top of the camera.
Now, holding the camera as shown in Figure 2, pull
out on the film winding knob. This releases the film
cone so that it can be removed from the camera body.
Notice that the cone is marked on both sides with
the word '(IJ'P" and an arrow, and on one side with
the words "KEY SIDE". Now, insert a fresh ro11

                                        FIGURE 2


                            www.butkus.us
View original page 5Page 6 · Read text
l
                                         I


FIGURE 3
of Ansco l2O size film being careful to place it in
the holder so that the paper will unroll with the
colored side out as in Figure 3. The slotted end of
the film spool should be toward the "Key Side" of
the film cone.
Next, draw the paper across the back of the film
cone as in Figure 4 and thread the end of the paper
into the longer slot of the empty spool as in Fig.5.

6
View original page 6Page 7 · Read text
www.butkus.us


                                                 FIGU RF  ZI
Be sure to fold the projecting end of the paper over
so that it will not slip out when you put the film in
the camera. With the winding knob pulled out so
that  it  will not interfere, replace the film cone in
the camera with the "Key Side" marking toward
the winding knob. When this is done, push the knob
in and turn  it gently to the right until you feel it
engage the end of the film spool" Snap the back of
View original page 7Page 8 · Read text
the camera closed and continue winding until the
number "1" appears in the red window. A pointing
hand and four dots will be seen just before the first
number appears.
LET'S IAKE A SNAPSHOT
It's easy to take a snapshot with your Ansco Crafts-
man Camera. Now that it's loaded with Ansco 120
film you are ready to take pictures.
                                       FIGURE 5


             www.butkus.us
View original page 8Page 9 · Read text
www.butkus.us
Flere is what you do:
 1. Hold the camera in both hands close against
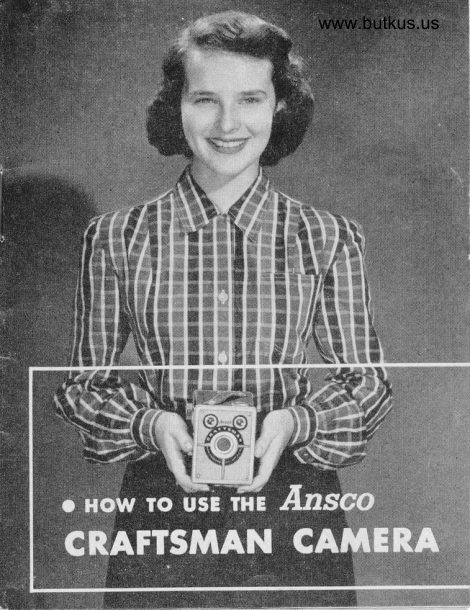
your waist (as shown on the cover of this book).
Be sure your fingers are not in front of the lens.
2. Don't let the sun shine in your lens. Have the
sunlight come over your shoulder.
3. Stand eight feet or more from the subject you
want to photograph
4. Look into the viewfinder   you can use which-                               -ever of the two viewfinders that fits the picture you
want to take. Be sure you see all of your subject
in the viewfinder.
5. Now, gently push the shutter release down. Don't
jerk the release     if you do you will get blurred                  -and fitzzy pictures.
6. Immediately after taking your first picture turn
the winding knob until the next.number appears in
the red window. Do this after every picture to
avoid taking two pictures in the same film space.
View original page 9
Page 10 · Read text
UNTOADING

After the eighth and last picture has been taken,
turn the winding knob several turns after the end
of the paper has passed the red window.

Open the back of the camera in a shady place. PuIl
out the winding lrnob and remove the film cone.
Carefully remove the exposed roll so that the paper
does not unwind. Fold the pointed end of the paper
along the line "Fold Under I{ere", then seal the
roll with the "Exposed" sticker attached to the end
of the roll. Take the film to your photofinisher for
development and printing.

Before closing the camera, transfer the empty spool
to the winding knob side of the film cone. The
slotted end of the spool should be on the 3'Key
Side" of the cone. Your camera is now ready for
a new roll of Ansco Film.
l0
View original page 10Page 11 · Read text
www.butkus.us
       A FEW HINTS FOR BETTER PICIURES
      . Always use Ansco 120 size film.
   o Never force the parts of the camera together. They
      are made to fit easily.
     r Load and unload the camera in a shady place"


    o Be sure the colored backing paper is securelyMW#attached to the empty spool when loading.
     r Close the back of the camera tightly.
    o Wind the film immediately after every picture.
     r Hold the camera level.
   o Don't jerk the shutter release, push it down gently.
    o Hold your breath while you press the shutter
       release down.
                                                                                                     ll
View original page 11Page 12 · Read text
r Select the important portion of the scene. Make
  each picture tell a story.
 . Be careful to include all of the picture in your
   viewfinder.
o Stay eight feet or more from your subject.
o f{ave film developed as soon as possible after the
   last picture is taken.
o Keep the lens and the inside of your camera clean.
 . Treat your camera with care. Prolonged exposure
  to 'abnormal temperatures or direct rays of the
 'sun (on back shelf or seat of your car in hot
  ri'eather) may result in damage to the film.
If you would like more information about picture-
taking, ask your photographic dealer for a copy of
"BEf,TER Pnorocn.lpuy MADE EAsy"-a  helpful
sixty-page booklet published by Ansco. Additional
helpo on your photographic problems may be had
through:
            Cusronnpn Ssnvrcu Dppenrttpnr
           Ansco
           BrxcnauroN, N. Y.
 ANSCO, BINGHAMTON, N. Y.
  PRINTED IN U. S, A,   C.9li44  Iz.Et   MADE IN U, S. A.
View original page 12From the M. Butkus archive. Original publisher and archive notices are retained.
Check the model and edition against your equipment.
PDF verified 2026-10-10.