Film cameras
Ansco No. 1a Readyset User manual
User manual for Ansco No. 1a Readyset. 24 pages in English. Read the original PDF, download or print a copy without registration.
24 pagesEnglish2.4 MB PDF
Loading your manual…Open PDF directly
Document details
- Brand
- Ansco
- Model / document
- Ansco No. 1a Readyset
- Document type
- User manual
- Language
- English
- Pages
- 24
- File size
- 2.4 MB
- Category
- Film cameras
- Document date
- Not specified in catalog
Search available document text
Find a term, then jump to its page in the original PDF. Image-only pages may not be searchable; check the PDF for exact wording and diagrams.
Page 1 · Read text
www.butkus.us

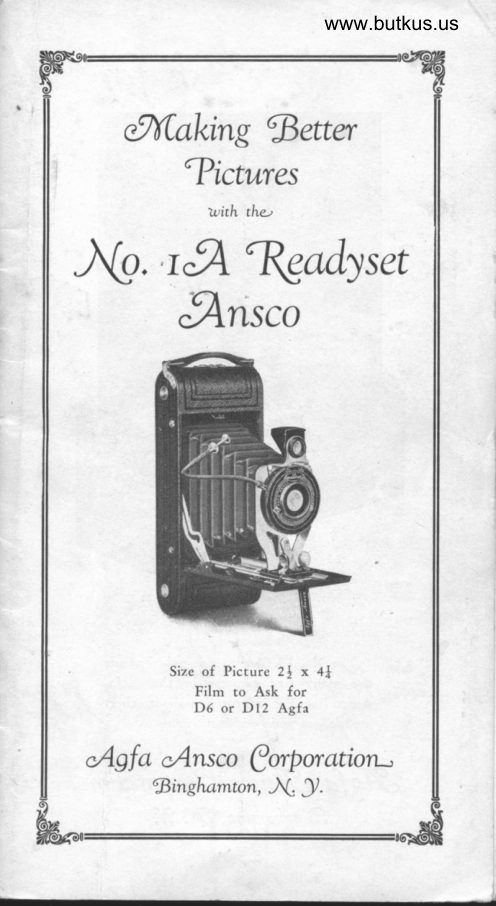
   e%Caking Setter
       ?ictwes
                 Uith the)

       J4rnsco^b.'kAkadryset


              Size of Picture 2l x a[
               Film to Ask for
           D6 or Dl2 Agfa
 ASfo u4nsco Qarporation-.
        Singhomton, -\, ).
View original page 1Page 2 · Read text
&,sk             for


       No.  I A Readysct Ansco takes
         D6 or Dl2 Agf:r film

     The No. lA Rcadysct is only onc of
    thc many fine camcr,rs in thc  A.raf:l
    Ansco line. For ir-rfornration lbout otl'rcr
     nr.,dcls. sce vour.lc,rlcr,,r  u'ritc to
gsfo     &nsco Gorporation
       Singhamton, J{. {
View original page 2Page 3 · Read text
www.butkus.us


     e%Cafung Eetter ?ictures
                  with the'
                Ansco a@. kA kadJset

   ICTURE-TAKING with the No. 1A Ready-
     set Ansco is reduced to the simple formula:
Load, aim, shoot, and wind the film.  It  is a
,simple, easily operated, readyset camera, and the
only requirement for making snapshots is that the
light be good-that is, that the sun be shining,
as is the regular thing for most outdoor pictures.
There are no complications in the shutter. The
latter has two settings only, one for Instantaneous
 (snapshots) and one for Time, and if the shutter
is left set for Instantaneous no setting whatever is
required.
  The first thing to do with a nesr camera is not
to make pictures with it but to become familiar
with its parts and see how it works. Therefore
study the illustration on page 4, with the ac-
companying explanations, and with the camera
before you read through the instructions on pages
'that follow. As you read, go through the various
motions so as to become entirely familiar with the
camera before actually loading with film and
starting to take pictures.
View original page 3Page 5 · Read text
9{o. t&  frradyset &nsco


                                                Digitally signed by Mike Butkus
                                    DN: cn=Mike Butkus, o=Butkus camera
                                       manuals, ou=butkus.org,Mike Butkus email=mike@butkus.org, c=US
                                          Date: 2021.09.13 15:27:51 -04'00'


                   t2    10

    Parts of No. 1A Readyset Ansco. Numbers correspond to
            numbers in explanation on opposite page.

         {Parts of 7tro. rcfl frnadyset &nsco
  Numbers refer to illustration. Get this before
        reading instructions and opening camera.
     I  Button u'hich releases platform catch.
View original page 5Page 6 · Read text
www.butkus.us
        9r[o. r&  &.eadyset &nsco

    Finger clamps for extending front standard
    and retiring same to close camera.
    Shutter. Operation of this is explained in
    diagrams on page 7.
 4   Shutter releases. Use either.
  t  Ansco Automatic Finder, in position for
     vertical pictures. Reverse it for horizontal
    pictures. See illustration on page 8.
 6  Catch for back.
 7  Spool-pin for lower chamber which holds
    unexposed roll.
   A similar spool-pin is on other side. Pull out
    both when inserting fresh roll, then snap
    back into place.
    Spool-pin for upper chamber. Vinding key
      is on opposite side. Pull out both to remove
    exposed roll.
     Footrest for time exposures when pictures are
    taken vertically.
10  Footrest for horizontal time exposure.
11  Tripod socket for horizontal pictures.
t2  Tripod socket for vertical pictures.
View original page 6Page 7 · Read text
9{o. r&  9"eadyset &nsco

        Go 9pen the Gamera
Cd  O open the camera depress the small button
 v  which releases thc platform. (1, pages 4
  and  I ) .  The platform may now be lou,ered, and
 when it is at right angles with the body of the
  camera the side arms will catch and hold it firmly
  in position. Now grasp the two finger levers on
  the lens front (2, 2, page 4) press together, and
  pull out front along track as far as it will come.
 The camera is now focused and no further at-
  tention need be paid to the front extension until
   it is tirne to close it.

                5 etting the Ehutter
Cd  HE illustrations on page 7 explain the setting
  \-/'/ of the shutter. Note the notch on the nickel
 rim at the top. To set the shutter for Instan-
  taneous or snapshots, revolve this nickel rim as far
  as it will go towards the INST side. To make
  sn:pshots it is now necessary only to depress the
  plunger on the wire release or to push down the
  trigger. Try this action until you are thoroughly
  farniliar with it.  Observe that a single pressure
  opens the shutter and closes it.
   To set the shutte r for time exposures revolve
  the nickel rim so that the notch moves towards
 TIME as far as it will go. If you will look into
  the shutter as this is done you will observe that
  the action not only sets the shutter for Time but
View original page 7Page 8 · Read text
www.butkus.us
      No. r&  fr,eadyset &,nsco


     Illustration at left shows shutter set for snapshots (instan-
  taneous), and illustration at right, shutter set for time ex-
  posures. To set as indicated, revolve outer rnetat rim as far
  as it will go in either direction, bringing notch (see arrow)
  ovcr INST or TIME.

  also brings the smaller opening into position auto-
  matically, thus eliminating the need of a special
  pointer to obtain the small stop regularlv used for
 time exposures.
   Vith the shutter set on Time, one pressure on
 the plunger or trigger opens the lens and the
 sccond closes it.  Thus n time exposure of any
  cJuration can be rnade.
    In taking time exposures it is of course essential
 that the camera be on a tripod or other firm sup-
  port, such as a table top, which will prevent
 rnovement of it rvhile the exposure is in progress.
          Ghe Tootrests
9 (n          t \VO footrests are provided  f or this camera
  \J  so that tirne exposures can be made by laying
  jt on I  fl:rt, firm base, such as a table top. The
View original page 8Page 9 · Read text
?{o. r&, $teadyset .fl,nsco

 position of these footrests is indicated by 9 a,nd
 I0 in the illustration on page 4.

            Ghe ffiinder
    HE No. lA Readyset Ansco is equipped
      with the famous Ansco Automaric Finder,
which prevents mistakes. The illustrarion here-
with shows how this finder changes as it   is
pivoted around so that the camera can be held in
 position for horizontal pictures. Vith other find-
ers of the reversible type the image is seen in the
form of a maltese cross, and it  is necessary to
 disregard the projecting portions either at the side
or at the top, according to which way the cam-
era is held. Many people forget to do this, with
the result that the final picture does not show


                Ansco Automatic Finder
what is was expected to include, heads and feer
being chopped off in the case of horizontal pic-
tures, and elbows, etc., being cut off in vertical
pictures. All  this is prevented by rhe Ansco
Automatic Finder, which shows exacrly what will
appear on the film and nothing else; regardless
of which position the camera is held in.
View original page 9Page 10 · Read text
www.butkus.us
        7tfo. rfl  &radyset &nsco

              Glosing the Samera
(OroSlNG the camera is merely the reverse of
U  ,h. operation of opening it, but there     e                                           ^refew points which should be kept carefully in
mind.
   First, hold camera in the left hand and with
the right hand grasp the finger clamps so as to
release their hold on the track and return the


 To close up platform, first release side-arms by pressing
            inward towards back of cemera.

front along the track into the camera as far as
it will go.
 Now hold the camera as shown in illustration
on precedinS page, with the lens towards you, and
press backward (i. .., toward back of camera)
View original page 10Page 11 · Read text
7lfo. r&. &radyset &nsco

  with the thumb of each hand. This releases the
  side-arms, so that by pressing the platform gently
  against your chest you can readily close and
  fasten it.
             Soading the Gamera
Cd  o load the camera, ir is first necessary to
 V   renrove rhe back, which is held by a catch at
  the top under the handle.
    Flaving thrbwn the catch, pull our rhe back
  at the top, whereupon it will come loose at the
  bottom also and can be laid aside while the cam-
  era is loaded. See illustrarion at bottom of op-
  posite page.
   Note that in replacing the back it should al-
 ways be caught firmly at rhe lower end first, then


    In removing back, pull
  out at top first, as here
 shown.    I n  replacing
  back, always catch first
  at bottom, then  close
 and button fastener et
  toP'


                                    www.butkus.us
View original page 11Page 12 · Read text
www.butkus.us
        0{o. r& &radyset &nsco

 pushed together at the end where the handle  is,
  after which the catch is buttoned over. If  the
 back is not caught at the bottom first it will not
 close properly.
                   flnserting the $ilm
C|O) ITH the back off you are now ready to
  lx./  load the camera with film. Note that the
  fresh roll goes into the lower chamber, which is
  at the opposite end of the camera from the wind-
  itg key. In the chamber at the key end you
  will find an empty spool. It is onto this spool
  that the film is wound as used, so that when all
  exposures are taken it is this spool which is re-
 moved from the camera for finishing.
   To load, first spring out the spool-pins for the
 lower or empty chamber. One of the spool-pins
  is indicated by 7 in the illustration on page 4,
 and there is another on the other side of the cam-
  era. Now drop the fresh spool into place as
 shown in the illustration below, taking care that
 you get it the right end around. In other words,
  insert it so that the paper will roll over, not
  under, and only orange side of paper will show,
  black side being towards the interior of the cam-
  era. After inserting the roll, snap the spool-pins
  back into place to hold it.
   Vith the new roll inserted and the sticker
 which seals it  broken, caffy the end of the
View original page 12Page 13 · Read text
No. rrfl, fr,,eadyset &nsco

pap€r across the back of the camera and thread
it into the slot in the empty spool as shown at the
top of next page. Be careful to center it on spool
so that it will wind evenly. Now give the wind-
irg k.y a few turns to bind the paper as shown,
and then replace the back of the camera. In
doing this, be sure to catch at bottom first, after
which the back will slip neatly into position
and catch can be  f astened without difficulty.
See illustration on page 10.


           Insert fresh roll at cnd opposite h,rndle.


                    www.butkus.us

             Start paper eYen on empty spool.
                           \2
View original page 13Page 14 · Read text
www.butkus.us
     No. r&,fr,eadyset &nsco


           Wind iust enough to bind paper.
  rVith the back replaced and fastened, conrinue
winding until figure 1 appears in the peephole
on the back of the camera, ts shown in the final
illustration. The camera is now readvJ  for the
first picture.


     Vhcn figure 1 appears in peephole, camera is
              ready for the firsr picture.
                           I3
View original page 14Page 15 · Read text
7rfo. r&  &,eadyset &nsco

    Immediately  af.ter taking the first picture wind
  again until figure 2 appears in the peephole, and
 so on after each picture wind until the roll has
 been completely exposed, after which continue
  to turn the key until the orange paper is com-
  pletely wound off onto the spool at. the key end
  of the crmera.


C7,flHEN  the film has been completely wound
 VU  onto the key spool, remove the back, fold
 under the tip of the orange paper, and seal the
 spool with the sticker which will be found in
  the opposite chamber. This is to prevent unroll-
 irg and fogging of the film after it has been
  removed.
  Now pull out the key and the spool-pin on
 the opposite side, whereupon the spring spoon
  will lift the exposed roll from the chamber so
  that it can be set aside for finishing. If  pre-
  ferred, the sealing of the roll can be done at
  this time instead of before the removal of the
  roll.
  Now transfer the empty spool to the upper
  chamber, being careful to put the slotted end at
 the key side. This leav€s the camera ready for
  the insertion of a fresh roll of film in the man-
 ner alrerdy described.
                            l4
View original page 15Page 16 · Read text
www.butkus.us
              9r{o. t&  &,eadyset &nsco

                       Gautions
      (fX   starting the orange paper at the time of
     C,   loading a fresh roll, always see that it  is
      even, fitting the spool neatly. Otherwise it   is
       likely to climb up one end of the spool, causing
I       the paper to tear and maybe fog the film.
       Always make it a practice to wind to the next
     number immediately after taking a picture, so
      that you can always be sure that the camera,
l    when you start to use it, is ready for the next
      picture with no possibility that you may make
      another picture on top of one already taken.It--
         ?oints ,r;;e-Gaking
                           with th:e,
                rc'4 fuadyset u4nsco
      ^b. Ttold the Samera Sevel
        qf  LV AYS hold the camera level-that  is, so that the
     v  v  pl^n" of the fih-n is at right angles with level ground.
           If the carnera is pointed up, the vertical lines of buildings in
       the view vrill converge towards the top.  If   it  is pointed
       down. thev will converee towards the bottom.

                Ttold the Gamera Eteady
          (f     f}i'f  camera moves while a picture is being taken, the     g            pictore will be spoiled. Slight movement will give a ftzzy    '
       unsharp looh, more movement a hopeless blur. To avoid this,
                                   t5
View original page 16Page 17 · Read text
7rfo. ,.fl fi,,eadyset &,nsco

 hold the camera close so that elbows can be placed against
 the body, and just before you release the shutter arrest the
 breathing, relaxing as soon as the shutter clicks.
  The above refers to taking snapshots only. Never hold
 the camera in the hands for a time exposure' but stand  it on
 a firm base with one of the footrests in position, or else use
 a tripod. The camera has two tripod sockets.

   Ghe Qiference Setveen Enapshots and
            Gime Exposures
  C]f SNAPSHOT is a picture taken "instantaneously."  ft
v  v   is commonlv called a snapshot because it is taken with
 one snap of the ,hurr.r-ro quick that the shutter just winks
 open and shut. Snapshots are taken with this camera by
 setting the shutter at INST as explained on pages 6 and 7
 and giving one complete pressure to either of the releases.
 This single pressure both opens and closes the shutter.
  A time exposure is a picture made by leaving the shutter
 open for an appreciable length of time. This is accomplished
 by setting the shutter at TIME as explained on pages 6 a'nd 7,
 then giving one pressure orr the release to open the shutter and
 another to close it.  The actual time may be of any duration
 desired-in most cases of outdoor pictures from  I  to  t
 seconds.

                                          c(Ohile     7rfever fltake a Gime Exposure
       Ttolding the Gamerd;n the J{ands
CfrWr.  exposures should alutays be taken with the camera
  -    s,rpported on a rigid object-tripod,  table, box, post,
 rock, etc. The reason for this is that any movement of the
 camera between the time when the shutter opens and when
 it closes will blur the picture. For the same reason it is best
                           r6
View original page 17Page 18 · Read text
www.butkus.us
            9{o. rfl   fi,.eadyset &nsco

       to use the wire release instead of the trigger for time expo-
        sure, to avoid the possibility of jarring the camera.
             It  is just as important that the camera be held steady in
        taking snapshots, but the time is so short-ju56 a vrink-lhas
           it is unnecessary to support it on a rigid object. Just hold it
        close to the body and catch the breath for the instant when
      you press the release.

                nilhen to Gake a Enapshot

                best time for snapshots is when the sun is shining,    QUn
          -   between 9 a. m. a,nd 4 p. m. in summer and 10 a. m.
      and 3 p. m. in winter. Flowever, the question of whether
       there is light enough for snapshots depends not only on
       whether the sun is shining but also on whether the scene or
        subject photographed  is light or dark. To illustrate by two
       extreme examples, a snapshot of an open beach scene or open
        landscape when the sun is behind the clouds will turn out
        better than a snapshot in deep woods when the sun is shining
       brightly. In general, take snapshots of people, houses, streets,
        etc., in bright sunshine, and take snapshots of open land-
        scapes, beach scenes, etc., either in bright sunshine or when
       the light is cloudy-bright.

             c(Dhen
t                   to Gake Gime Exposures
          *n   time exposures whenever you judge that the light   Q
          -    is too poor or the subject too dark for a snapshot. Ex-
I     amples: Dark days, woodland scenes with heavy foliage,
       early morning, late afternoon, portraits in shade, interiors.
      The average outdoor tir.ne exposure will be about one second
                     as fast as the shutter can be opened and      -approximately       closed. Interiors will average about  I 0 seconds.
                                   t7
View original page 18Page 19 · Read text
ffi
         jt{o. r&  firadyset &nsco
                 .fl good fltethod
 CTlff OSf people take nothing but snapshots, but thosec-/ f v     who want to increase their scope by taking time ex-
 posures of some subjects can get a good check on how much
 time to give by n,aking one time exposure on each roll (the
 rest snapshots), making a memorandum of the hour' light,
 and length of exposure to refer to aftcr the negatives and
 prints come through. This will soon give   very eccurate                                    ^ judgment of when to make time exposures and how long to
 give thern, while at the same time it risks very little.

             il[ovement of Eubject
G   f+. speed of the Readyset shutter when set at fnstan- V      ,.n.orr is sufficient to stop ordinary motion such as
 people walking along the street 2 J or more feet away, but
 when taking portraits, close-ups, or Sroups have the subject
 in repose-not in frozen rigidity, but with avoidance of
 sharp body movement or a jerk of the head during the in-
 stant of exposure. This will prevent Setting pictures in
 n,hich a hand or arm or the head is blurred. There is noth-
 ing hard about this. In fact, it is really Yery easy to snaP
 people without movement even when they do not know you
 are taking the picture.
               Qornaits (9utdoors
 f/N  faftNG   pictures of people it is advisable not to getU    ,oo close to the subject, so as to avoid any tendency to-
 wards a distortion of nearer parts. This applies particularly
 to seated figures, or figures spread out on the grass at a picnic.
 For example,  if someone is seated in a chair opposite the cam-
 era so that the head is about 10 feet away, the feet may
 actually be not more than 6.feet away, in which case the
 size of the feet will be greatly exaggerated in the picture-
                            t8
View original page 19Page 20 · Read text
www.butkus.us
        J{o. r& fr,eadyset &nsco

 perhaps appearing considerably larger than the head. This
  is not any fault of the camera, but is due simply to the fact
 that perspective is more violent close at hand than a little
 way of[. In the above case, the picture would be much im-
 proved  if the subject were turned sidewise so thar head and
 feet were approximately the same distance from the camera.
 Another way to avoid such distortion is to take the figure in
 a standing position, in which case ir can be brought a little
 nearer. It  is not advisable ro get closer than 8 feet, and
 10 will prove better for n-rost subjects.

               Qictures at a Qicnic

                                                      and,fl   PICNIC without a camera to record the evenr       get pictures of those present in holiday aspect is never
 quite complete. The following suggestions as ro the taking
 of pictures successfully at such times will therefore be of in-
 terest. In the first place, don't wait for other people to say
 when it  is time to take a picrure, but figure ahead a little
 for yourself and watch for the best opportuniries. Many
 people on such an occasion have very wild ideas as to what
 will make a good picture, but the photographer  is the one to
 decide and should use his own judgment. Another point  is
 in reference to taking unposed pictures of various people
 present, such pictures of ten being much more inreresting
 than any picture carefully posed or arranged. The thing to
 do is to watch the different members of the parry and when
 you see one getting off at one side and standing in an attrac-
 tive manner, walk r.rp ctrsually to a disrance of l0 or lJ feet
 away, point the clmcrl, and make a snap.
   At the same time, it is always a good plan to make one or
 two regularly poscC group pictures on such an occasion, get-
 ting the different members of the party togethcr facing the
 calnera and making the snap when they "look plcasanr." fn-
 cidentally  it may be said that the best way to make them
                           t9
View original page 20Page 21 · Read text
9r[o. r&. fr'eadyset &nsco                                     -'

  look pleasant is to look pleasant yourself, instead of assuming
  the rather worried expression that characterizes some ama-                     Ij
  teurs when they undertake this business.                                                                                             dt
                                                                                                                                           I
    Faces are always of particular interest, and it is therefore            I
  not a bad plan to make at least one picture of say four or       T
  five people in a row, at a distance of say 10 feet from the                   l
  camera, not bothering to get in much more than the upper                 i
  two-thirds of the figure. Do not, however, get much closer        I-{
  than 10 or 12 feet, as the picture may not be quite so clear if
  taken very close.
           t0atch the Sackground
 6/ N fnrING   pictures of people, always have an eye onu       tl,. background. A very successful pose of an attractive
  subject is sometimes counteracted very seriously by the set-
  ting or background against which the picture is made. One
 thing to avoid in backgrounds is a scrappy mass of  lines,
 such as would be made by fence rails, the clapboards of a
  house, veranda railings, barn doors, etc. In general an open
 background which leaves the subject in relief is more effec-
 tive. Thus a field or a stretch of lawn is excellent, and a
 mass of foliage is far superior to the side of a house. If
 there is a tree or a pole in  tl.re background, particulerly
 avoid having  it come directly behind the subject's l,read, or
 you may get the effect of the tree growing out of the sub-
  ject's head. Remember that  it  is the figure in which you
 are interested and the background should therefore be sub-
  ordinated to it.  Make it pleasing, but not too insistent or too
  "busy."
   Qo 9{ot 9et the Eun Ehine on the 9ens
CfrAn reason for this is obvious. If the sun shines on the v   lens it will set up reflections on the glass and fog the
 film. The old rule for beginners was to always have the sun
 behind or partly behind the camera. This is not necessary,

                          20
View original page 21From the M. Butkus archive. Original publisher and archive notices are retained.
Check the model and edition against your equipment.
PDF verified 2026-10-10.