Film cameras
Ansco Rediflex User manual
User manual for Ansco Rediflex. 20 pages in English. Read the original PDF, download or print a copy without registration.
20 pagesEnglish1.0 MB PDF
Loading your manual…Open PDF directly
Document details
- Brand
- Ansco
- Model / document
- Ansco Rediflex
- Document type
- User manual
- Language
- English
- Pages
- 20
- File size
- 1.0 MB
- Category
- Film cameras
- Document date
- Not specified in catalog
Search available document text
Find a term, then jump to its page in the original PDF. Image-only pages may not be searchable; check the PDF for exact wording and diagrams.
Page 2 · Read text
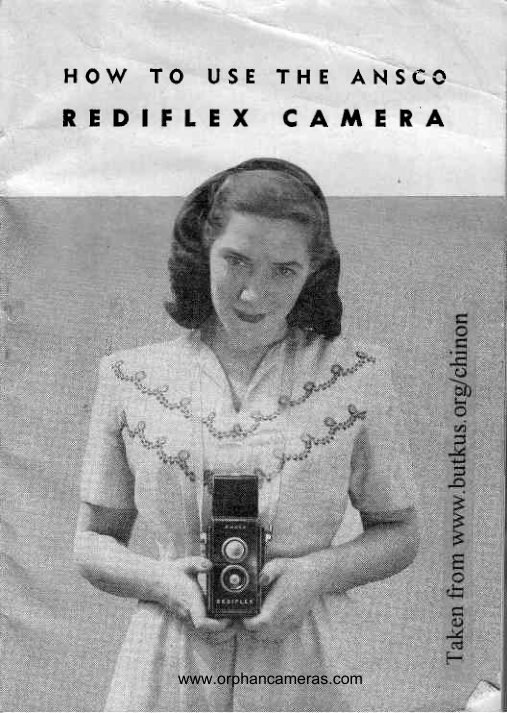
H O W T O U S E T H E A N S E C
R E D  I F T E XC A A A E R A


             www.orphancameras.com
View original page 2Page 3 · Read text
Your Ansco  Rediflex tokes  12
                   pictures this size Q/a   x  2Ve)
                on Ansco 620 Size Film.

i
View original page 3Page 4 · Read text
v       I OURS WAS  A  \rISE  CHOICEI
   Your  Aosco Rediflex Camera is a modern. com-
 pact, reflex-type camera designed  to  take qood
 pictures under any  iighting  conditions. TttJ  in-
expensive Anscoflash Type  I-sold   separatelv-
_quickly converts the camera into  a synchroniied
flash camera,.making. indoor photogt"phy  as easy
as outcloor prcture-takrng.
  . This   sturdily-constructed   cameta, made  from
durable  polystyrene, a  stout  plastic  material.  is
engineered to give you  the beit  possible pictures
with the least effort. Its p.leasinqdesien and smart
lines will  blend well  with any c-ostum-e,any scene.
Carry  your  Ansco  Rediflex Camera wherever  vou
go-the   beach, the mountains,  to school, to dances
and  parties, around  the home.   It  takes  pictures
everywhere !
  A VARIETY  OF ANSCO  F|LM  is  available  for
your Ansco Rediflex Camera,
.  PLENACHROME  is recommended for  all-around
   daytime  use under  average conditions.
o SUPREME  is  the  ideal 61m  for  pictures when
   enlargements from  the  negative  ire  required.


              www.orphancameras.com
View original page 4Page 5 · Read text
. SUPERPAN PRESS :.'s exceptional speed and is
    :;:---:-.1:,'.  :.:,::-::-ended when the iight  is ex-
    ::-::,el;  uniasorable'
  On  all  of  these films your  Rediflex takes 12
pictures 2/a x 2t/a inches on Ansco 620 Size Filrn.
 YOUR REDIFLEXtS SO EASYTO USE-You
don't need to be an expert photogtapher  to  get
good pictures with  your  Rediflex, but you should
read  the  following  instructions  catefully. Then'
if  you'd  like more  complete details on  picture-
              "Better                    Photography Made  Easy," ataking, read
very  helpful  6O-page booklet  published by Ansco
and  sold by  most photographic  dealers at S.25
per copy. Ansco also maintains a special depart-
ment  to answer your  inquiries  and furnish  expert
advice on your photographic  problems' Just  ad-
dress-Ansco,  Customer Service Department,  Bing-
hamton,  N.  Y. No  charge-it's   free!

   LET'S  LOAD  YOUR  REDIFLEX-In     loading
your  Ansco  Rediflex  use Ansco  620  Size  Film.
But  before you  begin, look  at  Figure  1  and
with  yout  Rediflex before you,  identify  each part.
  Then, go to a shady spot  (if  out-of-doors) or a
dark part of the room  (if indoors) while you put
 frlm  in your  camera.
View original page 5Page 6 · Read text
r".ffl3ro?l#]TAcHTNG

VIEWING IENS
SHUTTERREI.EASE


  "8"
       for Bstb Expossres  "t"
      for lnstontoneousExposures


                         HOOD RETEASECAICH
                                 REI.EASETO OPEN
                              BACK OF CAA4ERA


                           EXPOSUREWINOOW


             .butkus.ory'chinon

            www.orphancameras.com
View original page 6Page 7 · Read text
F I G U R E 2
NOW FOLLOW THESE STEPS:

     t.  OPEN THE BACK OF THE CAMERA by
pushing  the release button,  (Figure  1)  just below
the hood  release catch, to  the right-as   indicated
by the arrow-and    pulling  outward  on  the back.
Be sure  that  the empty  film  spool  is  in  the  top
compartment.
   2.  SWING UP THE SPOOL CARRIER from the
lower  or empty  chamber. Holding   the two  ends
of  this  carrier  slightly  apart,  (being  careful  not
to bend them permanently out  of position), drop
the fresh spool  into  place and make  certain  that
the two  pins  set in  the  carrier ends are engaged
in  the spool end holes (Figure  2). Then swing
the  carrier  and  film  down   into  place  in   the
chamber,
View original page 7Page 8 · Read text
3.  THREADING  THE  FILM:  Break  the  seal
on  the  roll   of  film  and draw  the  red  or  green
paper  over  the  metal   roller   (nevet  attempt  to
thread  the  paper  undet  the  roller)   and  across
the mouth  of  the cone. Be  verl'  certain  that  the
red  or  green side  of  the  p.rper- is out  and  rhe
black  side faces the  inside  of  the  cone. Nos'
threed the pointed end  of  the paper  into  rhe
longer slot of the take-up spool. Give the winding
knob  two  turns  to bind  the oaoer and assure its


F I G U R E   3


              www.orphancameras.com
View original page 8Page 10 · Read text
NOW YOU CAN MAKE A SNAPSHOT
  To n-rakea snapshotgxposure,first be sure that
                                               "I"the time lever (Figure 1)  is in the     (Instan-
taneous) position. Hold the camera as shoq/n in
Figure 5, select your subject in  the viewfinder


            www.orphancameras.com
View original page 10Page 11 · Read text
,.r    (Figure  6)  and press
                                    :.r    6rmly  down  on  the
                                     t,     red    shutter  release
                                     ;,     (Figure   1).  T7 h e n
                                       :.     taking   snapshots,  a
                                            . :        r i n g l e      d o w n w a r d
                                       ,;     pressure on  the  shut
                                       ::       te.r  release  operates
                                                   '''"     the  shutter.  oPening
                          and  closing   it.  Don't
                                  jerk   the  shutter   re.
lease for  this  will  move  yout  camera and  result
in a blurred  picture. Hold  your  breath  for  an in-
stant.when.pushing  down  on the shutter release.
Immediately   after  taking  the  6rst  picture,  wind
again   until   the  Figure   2  appears  in   the  red
window.

  OUTDOOR SNAPSHOTS  should  be made with
the sunlight coming from behind you  (front  light'
ing).  A  better  position  is  to  place your  subiect
so  that  the  sun's rays  fall  across the  face from
over your  left  or  right  shoulder. This  gives your
picture  side lighting-it    eliminates heavy shadgws,
especially around  the eyes, often present  in  front
lighting.
View original page 11Page 12 · Read text
FOCUSING
  The  Rediflex Camera requires no  focusing.  Its
::red  focus  lens photographs   all  objects ftom  8
:=;t  to  infinity  (as  far as you can see) sharply
:.:rd clearly. In order to take close-ups, a portrait
:rtachment  can  be  obtained  from  your  photo-
-lraphic dealer. This special attachment will  enable
1'ou to make  head and  shoulder  portraits   at  a
distance  of  lyz   feet from  the  subject.

UNLOADING
   After  the  twelfth,  or  last exposure, continue  to
turn  the  winding  knob   until  the  red  or  green
paper  is  completely wound   of  onto  the  take-up
spool,  and  you  can  no  longer  see  the  paper
through  the red window.  Now  open the back  of
the  camera,  pull  out  the  swing  loading  bracket
(Figure  2)  and remove  the  roll  of exposed 6lm.
  Fold under the pointed end of the red or green
                                      "Exposed"paper  and  seal  the  spool  with   the
sticker. The 61m is now ready to be developed and
printed,
  To prepare the camera for  the next ro11 of  film,
move  the empty spool  to the take-up position.


               www.orphancameras.com
View original page 12Page 13 · Read text
M A K I N G B U L B E X P O S U R E S

  \7hen  the  light   is not  bright  enough  to make
instantaneous  or  snapshot  pictures,  as when  the
subiect is in the shade of a tree, or on dull, cloudy
                                          "fashdays, and you dp not wish  to make a        shot,"
you may want  to make a bulb exposure.

     l.   To make  bulb  exposures, hold  the camera
on a firm  support,  a  chair, table  or  other  steady
object.  It  is very important  that neither the camera
nor  the subject move during  the exposure as this
will  cause a blurred  picture.

   2.  To  take  the  picture,  put  the  time  lever
                          "8" (Figure   1)   in  the         or  Bulb  position  and
press the  shutter  release down  gently,  holding    it
down  for  the length  of  the exposure. The shutter
remains open as long  as the  iever  is- heid down
and closes when  the  lever  is  released.

   3.   Bulb  exposures longer  than one second are
seldom necessary outdoors even in  extremely  dull
weather. Bulb exposures made indoors by daylight
range from  6ve se.conds to two  minutes  in  length,
depending upon the brilliance  of  light  outside and
the number  of windows  in the room.
View original page 13Page 14 · Read text
M A K  I N G  F L A S H S H O T S

     l.   To make synchronized  flash exposutes with
your  Rediflex  Camera,  you  must   first  putchase
an Anscoflash Type  1 (JN  174), a  roll  of Ansco
620 Size SUPREME  or SUPERPAN PRESS FILM,
two   fresh,  penlight-size  batteries  and  as many
bayonet  base flash lamps  as you  need.  Consult
the exposure  table  for  the  size  of  lamps  recom-
mended  for  Ansco  Films. The  flash unit may be
outchased from  vour  local  dealer.

 IMPORTANT
   Make  sure that the batteries are fresh. Fresh
  batteries will  last for about one hundred expos-
  ures but  lose their  strength with  age; three
 months  is  the average  life  of  a battery when
  used for  flash work.

   2.  The Anscoflash Type   I  (JN  174) as sold,
is ready  for  use with  the Ansco Pioneer Cameta.
To  use  it  with  the Rediflex Camera, first remove
the screw and clamp from  the botton-r of the unit
and  insert  the stud, (which   is enciosed in an en-
velope  inside  the  battery  compartment)   into  the
sarne screw  hole.
   3.  Raise the metal  back  of  the  flash  unit  by
lifting  up on  the side clamps and place the new


             www.orphancameras.com
View original page 14Page 15 · Read text
batteries inside the compartment (Figure 7). Make
sure that the top and bottom  of the batteries and
all contact points in the battery box are clean and
that  the  batteries are  in  series-ONE   TIP  UP
AND  ONE  TIP  DOIfN-as     indicated  in  the bat-

 f F n /            . ^ m h r             r f m P n t

   4.  Close  the metal  back and  attach  the  flash
unit  to your  camera by  inserting  the prongs  into
the holes on the side of  the camera. (Figure  8).
If  necessary to  assure snug   fit,  slightly  spread
View original page 15
Page 16 · Read text
i€


       F I G U R E A

      the notch  in each prong  of  the  flash unit. Now,
     operate  the  shutter  several times  before  loading
      the camera with  film  and inserting  a flash bulb.
     This  assures clean  contact  points  and  smoother
     operation  of  the shutter.

         5.   Next,  insert a bayonet-type fiash lamp  into
      the flash unit and line up the two  protruding  pins
     on  the base of  the larnp with  the socket slots  of
      the flash unit. Then push the bulb  into  the socket
     without  turning-until    a click  is heard, indicating

  Taken from www.butkus.www.orphancameras.comors/chinon
View original page 16Page 17 · Read text
that  the bulb  is securely in  place. Do  not  insert
a flash lamp  into  the socket except when  the flash
unit  is attached to the came.ra.
   6.  To make a  flash picture,  hold  the camera
as shown  in  Figure   !. Make  sure  that  the  time
                                        "I"lever  (Figure  1)  is  in  the      or  Instantaneous
position. Now  select your subiect in the viewfinder
(Figure  6) and press firmly down on the red shut-
ter  release (Figure   1).  This  opens the  shutter
and flashes the lamp.

   7.   After  an  exposure,  the  lamp   is  easiJy re-
n-roved by squeezing the lamp release lever on the
side of  the flash unit. The  contact spring  actually
throx.s  the lamp  out,  making    it  unnecessary to
touch  the  hot  lamp  with  your  fingers.
  \fhen   removing  the  Anscoflash Type    I  from
the camera, do not  twist  or pu1l out the flash unit
by forcing  either  of the prongs, as they may bend
and cause a poor contact condition  or snap of  the
battery  housing.  Also, when  not  using  the  flash
unit  over a period  of  titne, remove  the  batteries
to Drevent corrosion.

FLASH SHOTS OUTDOORS
  Exceilent  pictures  can be  obtained  by  making
flash shots out-of-doors  with  your Ansco Rediflex
View original page 17Page 19 · Read text
equipped with the AnscoflashType I. All you do
is take an ordinary snapshot with  the flash unit
attachedto youf camera.The extra light from the
flash bulb lightens up the shadows in your sub-
ject's face or the background.


          EXPOSUREGUIDE
Use ?hotoflash  No.  5 Bulb  or  Superflash  press  2b Bulb

  Type  of  Film     Distance From  Your  Camera
                           To  Subject
  Superpan  Press          16 to 25 feet
  Supreme                 12 to  !6  feet
  Plenachrome                8 to 12 feet

Note:  SM-bulb  is not recommended  for  use with
         this  camera,
View original page 19Page 20 · Read text
v                       I OU'LL   VANT    TO  PROTECT  YOUR
       REDIFLEX   with  a  sturdy,  easy-to-use, eveready
         carrying  case. Superbly  tailored,  the Ansco  Redi-
           flex Eveready Case protects your camera from  dirt
        and damage.  It  is furnished  in both  synthetic and
        genuine leather.

         You  get  better  pictures  with  Ansco  Films-ask
           for  the film  in the blue and red carton.


       PLENACHROME-The    orthocromatic  film  for  out-d
                     door  pictures  in  sunshine or  shower.

      SUPREME-FoI   outdoor pictures and indoor  pic-
                        tures. An  ideal  panchomatic  film  for
 t                  making.photographs which  are to be
                    enlarged.

      SUPERPAN  PRESS-Ansco's   fastest panchromatic
                             roll  6lm  for   all  those  dilficult-to-get
                    outdoor and indoor shots.


                   www.orphancameras.com
View original page 20From the M. Butkus archive. Original publisher and archive notices are retained.
Check the model and edition against your equipment.
PDF verified 2026-10-10.