Film cameras
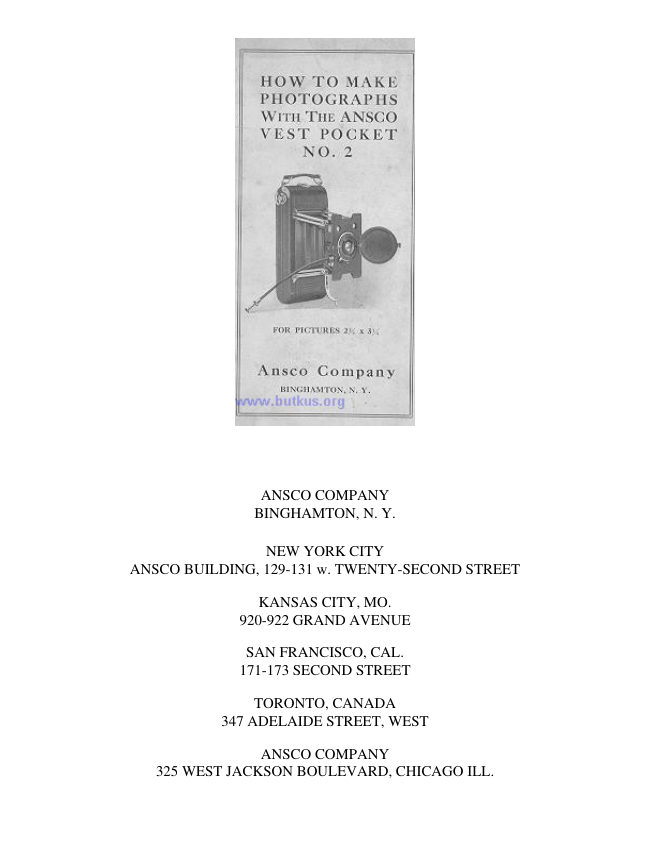
Ansco Vest Pocket No. 2 User manual
User manual for Ansco Vest Pocket No. 2. 16 pages in English. Read the original PDF, download or print a copy without registration.
16 pagesEnglish0.3 MB PDF
Loading your manual…Open PDF directly
Document details
- Brand
- Ansco
- Model / document
- Ansco Vest Pocket No. 2
- Document type
- User manual
- Language
- English
- Pages
- 16
- File size
- 0.3 MB
- Category
- Film cameras
- Document date
- Not specified in catalog
Contents
Search available document text
Find a term, then jump to its page in the original PDF. Image-only pages may not be searchable; check the PDF for exact wording and diagrams.
Page 2 · Read text
ANSCO COMPANY
             BINGHAMTON, N. Y.

            NEW YORK CITY
ANSCO BUILDING, 129-131 w. TWENTY-SECOND STREET

             KANSAS CITY, MO.
               920-922 GRAND AVENUE

            SAN FRANCISCO, CAL.
               171-173 SECOND STREET

             TORONTO, CANADA
            347 ADELAIDE STREET, WEST

             ANSCO COMPANY
   325 WEST JACKSON BOULEVARD, CHICAGO ILL.
View original page 2Page 3 · Read text
ANSCO LIMITED
                      · 143-149 OBEAT PORTLAND STREET, LONDON, W., ENGLAND

                      How to Make Photographs
                             with the Ansco Vest Pocket No. 2

Do-not open or close or in any way tamper with the mechanism of the ANSCO V-P No. 2 until
you read these instructions, unless its workings have been explained to you by the dealer. It is a
finely adjusted instrument and works easily, smoothly, and with precision. If any part sticks or
refuses to work, it will be a sign that it is not being handled properly. Do not try to force any part.

The ANSCO V-P No. 2 takes a film cartridge for six exposures. The film is designated as 4A
ANSCO SPEDEX, which is a standard size in all makes of film and may be obtained all over the
world.

Loading with Film

                                              Open the back of the camera by
                                                              releasing the hinged catch at one
                                                    end and removing the metal back,
                                                        so as to have access to the spool
                                                       chambers.

                                                         Next, insert film spool in the spool
                                                           holder at the end of the camera
                                                           opposite the winding reel, swing
                                                          spool holder into position, cut
                                                                label on spool and unwind enough
                                                          black paper to insert into slot of
                                                  empty spool in the winding
                                                      chamber; give the winding key a
                                                  few turns to secure the paper and
                                                                to keep it as taut as possible. The
                                                          black paper must be threaded
                                                                   straight and should be started
                                                             absolutely even, for if the paper
                                                       does not wind true the film will
                                                        overrun the flanges.www.4.butkus.org
View original page 3Page 4 · Read text
To replace the back of camera, hold its
                                              body with the left hand, and with the
                                                             right hand hook the back on the dowels
                                                                at one end, then close down and fasten
                                                        the hinged catch. Next, turn winding
                                                key to the right until the figure 1
                                                     appears in front of the little ruby
                                              window.


                      The Shutter and Lens

The ANSCO V-P No. 2 is furnished with two different kinds of lens equipment, and Extra speed
Bionic Shutter. It is necessary to become thoroughly familiar with the working of the shutter
before attempting to make exposures if success is to be expected.

The shutter controls the rapidity with which the picture is taken, and the rapidity must vary
according to the strength of the light and the size of the opening.

The graduated plate at the top of the shutter indicates the various exposures of which the shutter is
capable, expressed in fractions of seconds. The speed is regulated by moving the pointer to the
desired position on this scale. The letters B and T. standing respectively for bulb and time, also
appear upon this plate, and are explained under the proper headings for bulb and time exposures.

The graduated plate at the bottom of the shutter is for the purpose of regulating the size of the
opening of the lens by moving the pointer to the desired position. Moving the pointer from F 11
to F 16, indicates that the lens opening has been reduced one-half, thereby necessitating double
the length of exposure, as only one-half as much light can then reach the film. The next larger
number indicates an increased diminution of one-half, or to one-fourth the size of F 11 opening,
requiring a corresponding increase of exposure time, and so on.

The relation between the larger openings is expressed in the following table:

F6.3 is 1.6 times as large as F8
F7.5 " 2.3 "    "    "  "  F11
F 8 "  2     ``     ``     F 11

Exposure time should be calculated accordingly. Each of the remaining stops, 11, 16, 22, 32 is
just one-half the size of the one immediately preceding it.
View original page 4Page 5 · Read text
The lens equipments are:
F 7.5 Modico Anastigmat
The Modico Anastigmat lens is a lens of general application, which is somewhat faster than a
rapid symmetrical lens and the equal in definition, flatness of field and freedom from astigmatism
of the most expensive anastigmat lens. It has a working speed F 7.5.

F 6.3 Ansco Anastigmat
The ANSCO Anastigmat lens is an anastigmat of the highest quality. There is no one lens that
will do every kind of work equally well, but the ANSCO Anastigmat will do the greatest number
of things best. It is of as nearly universal application as possible. Its working speed is F 6.3.


                                                           Extraspeed Bionic
                                                              Shutter


                                                                This shutter is self-setting,
                                                                    of efficient construction,
                                                                with concealed and well-
                                                                     protected mechanism.
                                                                    In addition to time and
                                                                bulb it has the following
                                                                range of exposure 1-10, 1-
                                                                    25, 1-50, 1-100 and 1-200
                                                                  second.

                                                                This maximum speed is
                                                                           sufficient for
                                                               photographing
                                                                      successfully rapidly-
                                                        moving objects.


                       Extra speed Bionic Shutter

The diaphragm openings with Modico Anastigmat lens are F 7.5, 11, 16, 22 and 32 With
ANSCO Anastigmat lens they are F 6.3 8, 11, 16, 22 and 32. The shutter is operated by a finger
View original page 5Page 6 · Read text
release which may be worked in any position, and in additional has a flexible wire plunger
release. For the benefit of those persons who are unfamiliar with the F (focal) system of lens
markings, the following table of Universal System equivalents is given:

F 6.3 equivalent to U. S. 2.6
F 7.5 "          " U. S. 3.5
F 8 "            " U. S. 4
*F 11.3 "        " U. S. 8
F 16 '`          " U. S. 16
*F 22.6 "        " U. S. 32
F 32 "           " U. S. 64
(The decimals are omitted from the scale on the shutter, on account of lack of space.)

                                Bubbles in Lenses

It is practically impossible to eliminate small air bells or bubbles in the manufacture of optical
glass for anastigmat lenses, because of the fact that in the process of manufacture various
chemicals must be fused together a given length of time at a certain temperature. At the critical
moment the process must be stopped whether all the air has been driven out or not. This is
necessary in order that the optical qualities of the glass may be retained.
The small bubbles are caused by the air left in the glass, and should be taken as a guarantee of
quality rather than a detriment to a lens, for the actual loss of light is inappreciable, and the
bubbles even when near the surface, have little or no effect on the optical quality of the image or
the speed of the  lens.www.4.butkus.org

                  MAKING THE EXPOSURES

Before making an exposure with an ANSCO V-P No. 2, either time or instantaneous, be sure of
four things:

First - That the shutter is set for the proper exposure.
Second -That the diaphragm stop is set at the proper opening.
Third--That the camera is focused.
Fourth--That an unexposed section of film is turned into position.

1. Instantaneous Exposures
All exposures the length of which is less than 1-25 second, which is the slowest possible speed
for satisfactory results when the camera is held in the hand, are known as instantaneous
exposures.
In making instantaneous exposures, or "snapshots," the following rules apply:

FIRST--Set the top pointer at 1-25, 1-50, 1-100, or 1-200, according to the time of the
instantaneous exposure desired.
View original page 6Page 7 · Read text
Note..--If very bright light, set the pointer at 1-200 or l-100, according to the Subject. If less
bright light, set it at 1-50 or 1-25, but do not attempt to make any instantaneous exposures below
1-25 second.

SECOND--Set lower pointer at F 11. This lever controls the iris diaphragm, and F 11 is the
proper opening for ordinary instantaneous exposures. For instructions concerning the use of stops
or diaphragm openings, see page 13.

NOTE. - For instantaneous exposures - when the sunlight is unusually strong and there are no
heavy shadows, such as in views at the seashore or on the water, use diaphragm F 16. With light
clouds or slightly smoky atmosphere use F 8 at 1-100, or F 11 at 1-25 or 1-SO. With heavy clouds
do not attempt instantaneous exposures.

THIRD - Press the release. This makes the exposure.

2. Time Exposures

All exposures made in slower time than 1-25 second are known as time exposures, and it is
necessary in all cases to have the camera supported upon something solid, to prevent any
movement of the camera, which would result in a blurred picture.
To make time exposures the following rules should be observed:

FIRST - Set top pointer at T (time). This adjusts the shutter for time exposures.

Exposures of 1-10 second can be made automatically by setting the pointer at the point indicated
on upper scale of the shutter.

SECOND - Set the lower pointer at F 16, 22 or 32 as desired. For instructions concerning the use
of stops or diaphragm openings, see page 13.

THIRD--Press the release. This opens the shutter. When time is up, again press release. This
closes the shutter.

3. Bulb Exposures
The term "bulb exposure" is given to time exposures which the operator desires to control by
holding the shutter open at will, a single pressure of the release opening the blades of the shutter,
which remain open until the pressure is removed.

The following rules govern the making of bulb exposures:

FIRST - Set the upper pointer at B (bulb). This adjusts the shutter for bulb exposures.
SECOND - Set the lower pointer at F 16, 22 or 32, as desired. For instructions concerning the use
of stops or diaphragm openings, see page 13.
View original page 7
Page 8 · Read text
THIRD - Press the release to open the shutter, and remove pressure to close it. This makes the
exposure. The shutter will remain open as long as the pressure is maintained.

NOTE -- Do not oil any part of the shutter. In case of accident return the shutter to your dealer
for repairs, or to Ansco Company Binghamton, N. Y.

As a general rule make exposures by pressing the wire plunger and not with the finger release, as
the wire release is less likely to jar the camera.

                    OPERATING THE CAMERA

Instantaneous Exposures-- - "Snapshots"
To take instantaneous pictures the object must be in bright sunlight, but the camera should not.
The sun should be behind the back or over the shoulder of the operator.

Opening the Front


                                                             Holding the camera in the
                                                                                     left hand, draw out the
                                                                bellows with the thumb
                                                           and middle finger of the
                                                                           right hand. When full
                                                                   extension is reached, the
                                                                      side arms will snap into
                                                                        place, automatically
                                                                  locking the front at that
                                                                          point. Open the watch-
                                                                cover lid that protects the
                                                                      lens by releasing the
                                                                    spring snap at the top of
                                                                      the camera. Attach the
                                                                wire release by threading
                                                                                                      it into the socket provided
                                                                         for it, which will be found
                                                                   beside the finger release.
                                                       The ANSCO is then ready
                                                                         for focusing on the subject.


Focusing
View original page 8Page 9 · Read text
The ANSCO V-P No. 2 is
                                                              equipped with a
                                                              micrometer focusing
                                                                 device consisting of a
                                                                   milled disk and flange
                                                          which permits accurate
                                                                  focusing for distances of
                                                                            6, 8, 10, 15, 25, 50 and
                                                         100 feet. A small window
                                                                               at the top of the camera
                                                                    contains the focusing scale
                                                           and pointer. The figures
                                                         on the scale indicate the
                                                                     distance in feet. If it is
                                                                     desired to use an ANSCO
                                                     V-P No. 2 as a fixed focus
                                                               camera, the scale should
                                                            be set at 25 feet and the
                                                            diaphragm at F 11, or F 16.


In photographing objects which are at a distance of 25 or 50 feet, it is not necessary to estimate
the distance any more than with approximate accuracy. For instance, if the focus is set at 25 feet -
the usual distance for ordinary street work - the sharpest part of the picture will be the objects at
that distance from the camera, but everything from 15 to 65 feet will be in good focus. For
general street work the focus may be kept at 25 feet, but when great sharpness or definition is
required on any specific object the exact distance should be ascertained and the pointer moved to
the required point on the scale. The best rule to follow in this case is to pace off the required
distance. The average person's step is about 3 feet. Do not try to photograph any object nearer the
camera than 6 feet, nor moving objects at a shorter distance than 25 feet from the camera.www.4.butkus.org

To photograph a high building at close range, it is necessary to secure a position in an opposite
building which will permit the camera to be pointed at the center of the perpendicular lines of the
building. If attempt is made to photograph a high building while standing near by pointing the
camera upward, the side lines of the building will converge toward the top in the photograph, thus
spoiling the picture.

If the object be low down, like a small child or a dog, the camera should be held down level with
the center of the object.
View original page 9Page 10 · Read text
Locating the Image

The ANSCO V-P No. 2 is equipped with two brilliant view finders, one for horizontal and the
other for vertical pictures. Locate the image in the finder and aim the camera at the object to be
photographed. For vertical pictures the camera should be held upright after the focus is set, and
the image located in the vertical view finder. Always look into the finder from directly over it,
never at an angle.

To make an instantaneous exposure it is simply necessary to press the finger or wire plunger
release which opens and closes the shutter with one movement.

After making the exposure be sure to turn a new section of film into position. Turn the key in top
of camera slowly to the right until the next number appears before the red window. Three or four
turns will be sufficient to accomplish this. The warning hand appears only before No. 1. Repeat
the foregoing operation for each picture.

                          Time Exposures - Interior


                                                    To make interior time
                                                                exposures with the Ansco
                                                     V-P No. 2, set the camera
                                                                          in such a position that the
                                                                        finder will embrace the
                                                           view desired. The camera
                                                                should not be pointed
                                                                           directly at a window, as
                                                                      the glare of light will blur
                                                                      the picture. If all the
                                                        windows cannot be
                                                                   avoided, pull down the
                                                                shades of such as come
                                                                   within the range of the
                                                                camera.
View original page 10Page 11 · Read text
The camera should be placed on a table or other firm support. Center the object in the finder and
set the shutter at T. One pressure of the release will open the shutter, and another will close it.
The length of exposure is largely a matter of practice and judgment, and is governed by the
amount of light on the object to be photographed. The length of exposure is also controlled by the
size of the lens opening, or diaphragm, used.

                                                 NOTED--When the
                                                         Ansco V-P NO. 2 is to
                                                                              set on a table in upright
                                                                           position, bring down the
                                                                    extension footrest,
                                                           which is located behind
                                                                       the shutter at the right
                                                                        side of the camera, as
                                                       shown in illustration on
                                                             page 10. When the
                                                            camera is to stand on its
                                                                        side to make a
                                                                       horizontal picture, bring
                                                    down the lever or
                                                                            footrest located beneath
                                                                       the shutter at the bottom
                                                                     of the camera as shown
                                                                  above.


Time Needed for Interior Exposures
The following table is figured for exposures made between the hours of 10 A. M. and 3 P. M.,
using diaphragm F 16. If stop F 11 is used, give only one-half the time. If the stop or diaphragm F
32 is used, give four times longer exposure. The smaller the stop, the sharper the picture. F 16
gives the best results for interiors.

White Walls and More than One Window

Bright sunlight outside 4 seconds
Hazy sun          10 "
Cloudy bright       20 "
Cloudy dull         40 "

White Walls and Only One Window

Bright sunlight outside 6 seconds
View original page 11Page 12 · Read text
Hazy sun         15 "
Cloudy bright      30 "
Cloudy dull ,       60 "

Medium Colored Walls and Hangings and More than One Window

Bright sunlight outside 8 seconds
Hazy sun          20 ''
Cloudy bright      40 "
Cloudy dull        80 "

Medium Colored Walls and Hangings and Only One Window

Bright sunlight outside .....2 seconds
Hazy sun            30 "
Cloudy bright         60 "
Cloudy dull           120 "

Dark Colored Walls and Hangings and More than One Window

Bright sunlight outside 20 seconds
Hazy sun          40 "
Cloudy bright      80
Cloudy dull 2 minutes 40 "

Dark Colored Walls and Hangings and Only One Window

Bright sunlight outside 40 seconds
Hazy sun          80 "
Cloudy bright 2 minutes 40
Cloudy dull  5 "      20 "

                           To Make a Portrait

Place the sitter in a chair partly facing the light and turn the face slightly toward the camera,
which should be at the height of an ordinary table. Center the image in the finder. For a three-
quarter figure the camera should be from 6 to 8 feet from the figure, and for a full figure 8 to 10
feet. The background should form a contrast with the sitter.

                        To Obtain a Larger Portrait

Use an ANSCO Portrait Attachment, which consists simply of an extra lens that slips over the
regular lens and in no way affects its operation except to change the focus, thus enabling the
View original page 12Page 13 · Read text
operator to work closer to the subject. This makes it possible to obtain a larger and sharply
defined image on the film.

For all cameras which are fitted with a focusing arrangement the following table applies:

With Focusing Indicator set at

6 ft. place subject at 2 ft. 2 in.
10            `` '` " " 2 ft. 6 in.
25 '` "   "    "   3 ft.
100     "    "   " 3 ft. 6 in.

Time Exposures in the Open Air
Time exposures in the open air may be made provided diaphragm No. 32 is used. Exposures must
be a little shorter than for interiors, as follows:www.4.butkus.org

Diaphragm No. 32.
With sunshine         1-5 second
  " light clouds from    1/4 to 1
"   heavy "     " 2 " 5 seconds

Use of Diaphragms
F 6.3 or F 7.5 for exposures at 1-25 second on cloudy or dull days and for speed pictures at 1-200
second.

F 8 for instantaneous exposures on cloudy bright days.

F 11 for all ordinary instantaneous exposures at 1-50 or 1-100 second when the sun shines.

F 16 for instantaneous exposures when the sunlight is unusually strong and there are no heavy
shadows, such as in views at the seashore or on the water; also for interior time exposures, the
time for which is given in the preceding table.

F 22 for interiors; never for instantaneous exposures.

F 32 for time exposures outdoors. The time required on cloudy days with this diaphragm will
range from 1-5 second to 5 seconds, according to the light.

Closing the Camera
View original page 13
Page 15 · Read text
No darkroom is required for changing the spools in the ANSCO V-P No. 2. The operation should,
for absolute safety, be performed in a subdued light.

I. When last section of film has been exposed, turn the key five half turns.

II. Provide an extra spool of film to fit the camera, and take a position by a table as far as possible
from any window.www.4.butkus.org

III. Remove the back from the camera as directed on page 1.

IV. Holding the black paper taut, so as to wind tightly, turn the key until the paper is all on the
reel.

V. Fold over half inch at end of black paper (so as to make subsequent breaking of the seal easy)
and then seal with the gummed sticker that will be found on the empty spool.

VI. Swing winding key with spool holder outward and remove the exposed roll by springing out
the ends of the spool holder.

VII. Wrap up the exposed film immediately to prevent the possibility of admitting light.

VIII. Take the empty spool from the spool holder and place it in the other holder to form the
winding reel. The slotted end of the spool should first be placed upon the end of the winding key
and then the other end inserted on the spool pin.

IX. Reload as directed on page 1. The roll of exposures can now be mailed or taken to the dealer
View original page 15
Page 16 · Read text
for finishing or you can do the developing and printing yourself.

Developing and Printing
The ANSCO FILM BOOK is a complete treatise on the art of making perfect negatives.

The CYKO MANUAL is a 64-page handbook on print making.

These books are both free on application at any ANSCO store, or to

                ANSCO COMPANY BINGHAMTON, N. Y.


ANSCO SPEEDEX FILM--The Film which combines speed and quality. Obtain an Ansco
Speedex Film Booklet for complete directions in making perfect negatives.

CYKO PAPER--After the negative comes the finished print. The Cyko Manual is a complete text
book on the art of producing perfect prints.

YOURS FOR THE ASKING  - If you have neither of the above mentioned books and your dealer
is out of them, write to us for one or both.

ANSCO CHEMICALS--For best results on Ansco Speedex Film and CyRo paper use Ansco
chemicals. They are carefully standardized and compounded under the supervision of expert
chemists.
View original page 16From the M. Butkus Camera Manual Library. Original publisher and archive notices are retained.
Check the model and edition against your equipment.
PDF verified 2026-10-10.