Film cameras
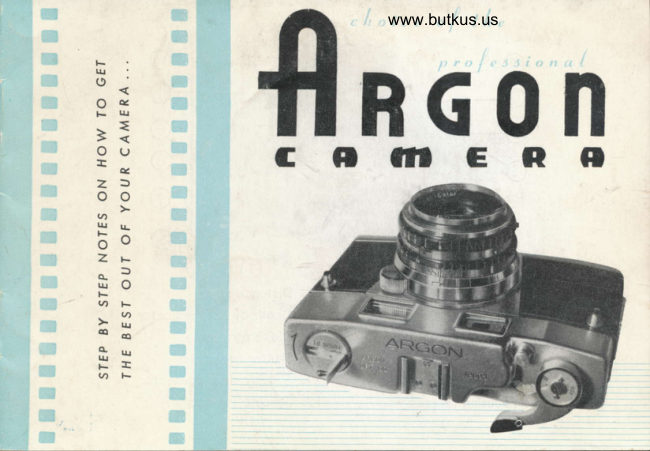
Argon camera User manual
User manual for Argon camera. 12 pages in English. Read the original PDF, download or print a copy without registration.
12 pagesEnglish2.1 MB PDF
Loading your manual…Open PDF directly
Document details
- Brand
- Argon
- Model / document
- Argon camera
- Document type
- User manual
- Language
- English
- Pages
- 12
- File size
- 2.1 MB
- Category
- Film cameras
- Document date
- Not specified in catalog
Search available document text
Find a term, then jump to its page in the original PDF. Image-only pages may not be searchable; check the PDF for exact wording and diagrams.
Page 1 · Read text
www.butkus.us


F
l!o
oc
Fl!-=
o(J
    q                  C R    flCO BGONctttzDoo
14ArioZ*
to
 q)F
>u6o
 A.l
 F{
 q)ts
View original page 1Page 3 · Read text
Digitally signed by mike butkus
                             DN: cn=mike butkus,
                              o=orphancameras, ou=29,mike butkus  email=mike@butkus.org, c=US
                                  Date: 2020.05.02 10:45:44 -04'00'


              l. Film Winding LEver          7. Distonce scole
         2. Exposure counter            8. Depth of field indicotor
         3. Shutter releose button        9. Diophrogm scole
         4. Accessory clip             10. Shutter speed diol
         5. Film speed indicotor                I l. Synchronizer connector
         5. Focusing lever              12. Synchro selector
View original page 3Page 4 · Read text
www.butkus.us


  www.butkus.us


13. Synchro set lever              19. Film sprocket
14. Film rewinding cronk           20. Film pressure plote
15. Eyelet                           21 . Tripod socket
I 6. View finder                 22. Counter set
17. Bock cover lock
18. Film winding spool
View original page 4
Page 5 · Read text
ARGON CAfrTERA INSTRUCTIONS
I{OW TO IOAD THE CAMERA
l.   Roise the bock cover by turning the lock (lZ)
     in the direction indicoted by the orrow to
    open, ond the comero bock will open outomo-
      ticolly.                                                                            www.butkus.us
2.  Pull out the rewinding cronk (t+) ond insert
   the film cortridge in the chomber, then            Flg 3
     press down on the rewinding cronk ond turn the cronk until it engoges the key in
    the cortridge ond drops bock to its former position. When in proper operoting
     position, the top of the rewinding knob with the cronk closed, should be level
    with the top of the comero body.
3.  Insert the film leoder in the slit of the winding spool (ta)   .
                                   moke sure thot the film is properly4. Advonce the winding lever % woy to
     tronsported, ond thot the perforotion of the film is engoged by the sprocket teeth
View original page 5Page 6 · Read text
www.butkus.us

                                          (te)   .
                               5'  Close the bock cover ond turn the locking
                                    k"y (l 7) on the comero bose plote, in the
                                        direction indicoted by the orrow to Close.
                                Advonce the winding lever until it stops.
                                        Push the counter set (ZZ)Autton on the comercl
          Flg 4                  bose plote, which will outomoticolly return
 counter (2) on the top of the comero to the letter "S".  Releose the shutter
                                      ond odvonce the winding lever ( t  )by pressing the shutter releose button (a ),
 until it stops. Repeot this operotion until the red line indicotor is oligned with
the number l, on the exposure counter. The comero will now operote outomo-
 ticolly.
Advoncing the winding lever will ot the some time odvonce the film, cock the
,shutter, ond odvonce the exposure counter, oll in one operotion.
View original page 6Page 7 · Read text
l.  The lens diophrogm ond shutter speed should be odiusted occording .to the
     prevoiling light conditions.
2,   Both the diophrogm ond shutter speed rings ore of the click stop type, which
    should prevent either ring from being occidently moved.
3.    It is possible to chonge the shutter speed ofter the shufter is cocked. But this
      is not recommended, ond should be ovoided. Double exposure is not possible,
    os the shutter will not be cocked until the winding lever is odvonced.
                                    4.  Focusing is with coupled ronge fin-
                                              der, which oulomoticolly sets the                                                                                '                                                       lens by use of the ronge  f inder.
                                        Keep your eye close to the com-
                                                bined view ond ronge  f inder (16),
                                      ond move lhe focusing lever (6  )
             Fig 5                             until the double imoges observed
                                                 in the center of the view finder
    coincide. This will sef the proper distonce for the lens focus.
5.  Releose the shutter by pressing the shutter releose button (3 ) slowly, while
     froming the picfure within the bright line in the view finder. Coble releose con
    be used by first removing lenseol cop which is screwed into top of shutter releose
     button.
View original page 7Page 8 · Read text
www.butkus.us

 UNTOADING THE CAMERA
l.   After the lost exposure hos been mode, the exposure counter will indicote the
     figure "36" or "20" depending on the number of exposures contoined in the
     film cortridge.
2.  Coution, do not odvonce beyond lhe number of exposures contoined in the film
     cortridge, os there is o donger thot the film rnoy teor off the spool in the film
     cortridge, moking it impossible to return the film to the cortridge.
                                  3.  Rewind the film completely in the film
                                                  cortridge, by lifitng the crcnk on lhe
                                              rewinding knob (l 4) ond turning in the
                                               direction of ihe orrow, ond ot the
                                      some time depressing the  f ilm rewind-
                        www.butkus.us             in1 \22) ond counter set button on
                                             the comero bose plote.
View original page 8Page 9 · Read text
4.   Af ter the   f ilm hos been completely  rewound, open the bock cover  lif t
    lhe rewinding knob ond remove the  Iilm cortridge, which will contoin the
    exposed film.

 FTASH PICTURES
 The shutter is MX type. ftirn Uutbs of the wire filled type should be used.
 With the synchronizotion button set ot, the M.position, the shutter will synchr-
  onize, with the floshbulbs ot oll shutter speeds. The synchronizotion deloy lever
                                               M  must be cocked (13) before                            .eoch'i"vl  exposure then using flosh bulbs of the                                                                                                       ,
                                                                                 Strobe  type, ond the synch button  (l 2).'" set ot the " M position. When using
  flosh, the synchronizotion button should ben'set ot the X position. In the X
  position, the synchronizotion is set for "0" deloy, ond lhe shutter will be com-
  pletely opened when the strobe lomp floshes.
View original page 9Page 10 · Read text
www.butkus.us

DEPTH OF FIELD INDICATOR
A subiect is mosi shorply defined, when it  lies ot the distonce to which the
lens is focused, ond its definition groduolly deteriorotes when the subiect  is
moved neorer to the comero or moved owoy from the comero. However, even
                                                                                differencethough the subiect moy not lie iust ot the focused distonce, if the
is within limit, its definition will still be sotisfoctory. This limit..'...the distonce
between lhe neorest plone ond the forthest plone:ot which fhe subiect will be
shorp.'.... is known os the "DEPTH OF FIELD"  t;n,
For exomple, if you ore focused on o subiect 6 feet from the comero. When
the lens opening is "F8", how much the depth of field?
The left hond figure of the distonce 9 feet ond the right, 4.5 feet. According
to the odove, the subiect will shorp between the distqnce of 4.5 feet to 9 feet'
View original page 10Page 12 · Read text
www.butkus.us

                             tt          I
          and bq the way
          A FEW INCIDENTAL BUT HEtPFUt HINTS
                   * Keep the comero owoy from dust ond moisfure.
                   * Do not subiect lhe comero to severe shocks.
               x Do not wipe lhe lens wiih cloth. Remcve dust wirh brush.
                   * When releosing shutter, do noi move the comero.
               x Do not turn the shutter speed diol ofter you set fhe windiug lever.
             + The key to success for proper exposures is lo know how fo odiust the shutier
                 speed ond ils diophrogm, occording to the condition of light ond shgde of the
                         obiect'
                   * Ute Series V  filter ond lens hood when necessory.
                   * When film is not looded, the film winding lever (l) sornetimes dose not mcve
                    smoothly. This is no worry, becouse ihe winding lever will work perfectly
                 when film is looded.
{l              00tt.
                            paatirulo,,, waite to:            toa tuathea
View original page 12From the M. Butkus archive. Original publisher and archive notices are retained.
Check the model and edition against your equipment.
PDF verified 2026-10-10.