Film cameras
Argus 260 Automatic Instamatic User manual
User manual for Argus 260 Automatic Instamatic. 13 pages in English. Read the original PDF, download or print a copy without registration.
13 pagesEnglish4.0 MB PDF
Loading your manual…Open PDF directly
Document details
- Brand
- Argus
- Model / document
- Argus 260 Automatic Instamatic
- Document type
- User manual
- Language
- English
- Pages
- 13
- File size
- 4.0 MB
- Category
- Film cameras
- Document date
- Not specified in catalog
Search available document text
Find a term, then jump to its page in the original PDF. Image-only pages may not be searchable; check the PDF for exact wording and diagrams.
Page 1 · Read text
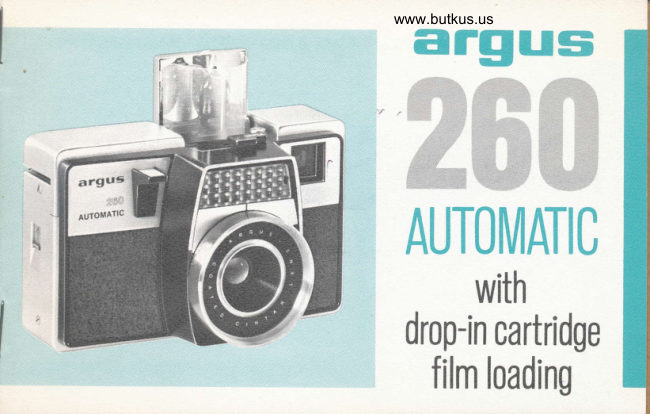
www.butkus.us argus

                        1


 AUIOMATIC
       with
 drop-in cartridge
   film loading
View original page 1Page 3 · Read text
www.butkus.us
    These are terms used throughout this book. lt's best to familiarize yourself with
   them before you read the following pages. May we suggest you read this book
    over carefully?  lt contains simplified steps to perfect pictures as wellas detailed
     information. Before you take pictures of a special event or go on a trip, try tak-
    ing pictures both outdoors and with flash for practice.

 LENS FOCUSING RINC


FOCUS INDEX MARK


VIEWFINDER WINDOW


FTASH REFI.
(Closed)
View original page 3Page 5 · Read text
for perfect outdoor pictures automnticallg

                              Open the hinged door and drop in the film cartridge, then
                                     close the door. The cartridge automatically sets the elec-
                                           tric eye for the typ€ of film you have selected.
                            Move wind lever to right and allow it to return' Repeat
                                       until it locks (about six full strokes). Film is now at first
                                       picture, and 1 will appear in exposure indicator window.

                              Set lens focusing ring to estimated subject distance in
                                         feet, or to symbol appropriate for your subject (Aclose-,*;@$,.'1,                           up, a universal setting, or $ distant scene).
                            Compose subject in viewfinder, check the safety signal'
                                                 press shutter release. Move wind lever throughta,Ire picture           and slowly
                             one full stroke and you're ready for the next picture.
detatled                Morebe foundcompleteon the informationfollowing pages.on eachFor informationof these stepson tak-willirrstrrrctlorrs             ing FLASH PICTURES, see instructions on pages 8 and 9'
 3
View original page 5Page 7 · Read text
loa,dirrg:  ttre  ca,rrrera,
                                                 Slide the door latch up and turn the cam-
                                                era over to open the door. Drop in the film
                                                   cartridge (with the largest end toward the
                                         door leifcM. Be sure it seats properly and
                                                          lies flat within the camera. Close the door
                                   by pressing it against the body until  it
                                           .snaps closed.
www.butkus.us                             With the camera loaded, move the wind
                                                      lever to the right and allow it to return and
                                              repeat until it locks (about 6 full strokes).
                                              This positions the film for the first picture.
                                                 After each picture is taken, move the wind
                                                  lever through a full stroke. The exposure
                                            indicator window on the camera back
                                         shows the number of the exposure you are
                                   on (one or two of the same number may
                                               appear) and also shows you the type of film
                                    you have in the camera. NEVER FORCE
                                   THE WIND LEVER.
View original page 7Page 8 · Read text
www.butkus.us
I     settirrg: lerrs for dista,rrce
t,    The 40mm f/5.6 focusing lens on the 260 Auto-
       matic assures sharp pictures at any distance, yet
      can be set to universal or zone focus  if vou like.
      You can ,  .
                     I  Set the camera-to-subject  distance
                        (in feet) on the lens focusing.ring
                   to the index mark,
      OR . .. 2 Set the focusing ring symbol indi-
                    cating the type of picture to the
                   index mark-                    FOR OUTDOOR PICTURES
          A for CLOSE-UPS (5 feet)                         . . . in bright sunlight, you usually
             a for GROUPS OR INTERMEDI-       can use the symbols or universal
                                                            focus setting.                ATE SCENES (l2L/z teet)
          A for DISTANT SCENES  (infinity),      FOR FLASH PICTURES
                                                                                            . . .you must set the actual cam-
      oR . . . 3Set the UNIVERSAL FoCUS sym-         era-ta.subject distance (in feet) on
                   bol (  ) on the focus ring to the       the focusing ring (see page 9).
                   index mark.
View original page 8Page 9 · Read text
corrrpose  arrd  stroot!
Look through the viewfinder squarely and compose your
subject just the way you want it to look in the picture.
Check the safety signal (small circle in the right-hand side
of the viewfinder) to be sure there is enough light for a.
good picture. lf the circle shows CLEAR (or partly clear
and partly red), there is enough light. lf it is completely
RED, there is not enough light fqr a good exposure (use
flash). Press the shutter release down slowly to take the    urrloa,dirrg'
picture. lf it won't go down, then the film hasn't been
wound to the next picture. Make it a practice to wind the     Before door is opened, and
                                                                       after you have taken the lastfilm after each exposure.
                                                                     picture, move the wind lever
Helpful hints-your pictures will always turn out best if     until it locks. The film's pa-
the sun is behind you or slightly to the side of your back.    per backing will disappear
Don't attempt to take pictures when the sun is shining    from the window. Push the
into the camera lens. When the subject is 5 feet or closer,    door latch UP and tip the
place  it (in the viewfinder) slightly to the right of and below    camera so the door opens
the viewfinder center. This corrects for "parallax," the dif-    and the cartridge falls into
ference between what the lens sees and what the view-     your hand. Have the exposed
finder sees at very close distances.                            film processed immediately.
7
View original page 9Page 10 · Read text
www.butkus.us
ta,kirrg'  fla,str pictures
Two "N" size batteries are needed to take flash
pictures. Ask your dealer for Mallory Mn9100,
Eveready E90, Bright Star 7528, Burgess AL-N,
or equivalent. To install the batteries, slide
open the battery compartment door (on camera
bottom) and put the batteries in, one with i
tip up and the other with + tip down. Clo6e
the compartment door. Have the batteries                                         Ji'':
checked occasionally to be sure they are still              ri,,rin good condition.
Unfold the flash reflector by moving the flash
lever to the left (looking at the camera from the
back). Leave it in this position. Slip a flashbulb
between the flat metal contacts and push it all
the way down, To eject a used flashbulb, slide      ilnH.-#:ffff J:-*T;
the eject button on the camera-back to the left.       and move ths flash lever all ttre
Use caution when ejecting flashbulbs as they       way to ttre right. IIEVER TAKE
are extremely hot just after they have flashed.
Never use flash in an explosive atmosphere.       Pfl1'IE,|J8+JJ1?,H':
View original page 10
Page 11 · Read text
sirntr>lel  sielp'o:<  i..+:"* fi u*a" $ Sni::Fb g*fc-e$ur.cls . . .
I   lnsert a flashbulb in the holder.
2  Estimate the number of feet to the main
   subject and set this distance on lens fo-
   cusing ring to index mark (this automa-
    tically adjusts lens for exposure).
3  Press the shutter release down slowly to  .
   take the picture.
Estimate distance to subject accurately. lf
more than one subject will be in the picture,
have them placed so that each one is nearly
the same distance from camera.                 irrepor"ta,rlt
The maximum subject distances for flash                                               Because flashbulbs may shatter,pictures are 10 feet for Kodachrome-X or                                           use the flash guard that comesEktachrome-X films and 14 feet for Koda-                                                 with your camera. With tabs up,color-X and Verichrome Pan films. Pictures                                           cup sides of guard together andof subjects farther away may be too dark.                                                   place in front of reflector so plas-
N0TE: This flash system is designed to use ASA 64            tic tabs slip behind metal reflec-
films only (all those listed on page 4).                     tor tabs.
 I
View original page 11Page 12 · Read text
www.butkus.us
rea,re a,rrd clea,rring
Your Argus 260 Automatic is a preci-
 sion camera and deserves the best of
care. Protect it from dust, heat, and
 moisture. Do not store your camera in
the glove compartment of your car or
any other place where the tempera-
ture tends to rise, humidity is high, or
where jarring or vibration occurs.
 lf the camera's lens needs cleaning,
blow the dusl off first, then use a soft
brush or lens cleaning tissue. Refer
to back page for service information.


Cut this page along dotted line and keep \
the identification card in your wallet or D
other safe place for future reference. /
 10
View original page 12
Page 13 · Read text
ser\i ice
For information about your     Your Argus 260 Automatic Camera is unconditionally guaranteed by the manufacturer to                                    operate properly for a period of one year frorn tlre date of original purchase. lf, duringcamera, or for service or                                          this period, your camera fails to operate for any reason, Argus, Incorporated, will restore
replacement parts, see your         it to operating condition at no charge to,you. (This includes all parts and labor.)
Argus dealer, authorized serv-                                     This unconditional guarantee applies to the product itself. We regret that we are unable
ice location, or write to the       to assume liability for loss of film or for other expense or inconvenience.
main office of the Argus                                  This unconditional guaranfee is valid only for the original retail purchaser and only if
Customer Service Department     the product is returned prepaid, directly or through an Argus dealer, to the Customer
(address listed at righ0.           Service Department, Argus, Incorporated, 2080 LuntAve., Elk Grove Village, lllinois 60007'
                                or one of their authorized service locations. The date and place of original purchase
When writing, be sure to men'     must be included, along with a description of the difficulties encountered.
tion you have the Argus 260     Many apparent product difficulties are actually a matter of incorrect usage. lt is always
 Automatic Camera.                wise to see your Argus dealer before returning the product for servicing.

                                          CUSTOMER SERVICE DEPARIMENT, ARGUS, INCORPORATED
                                    MAIN OFFtCE 2080 Lunt Avenue, Elk Grove Village, lllinois 60007
                                                                             lll CANADA Davis Drive East, Newmarket,  Ontario          ARGUS INCORPORATED,
           5950 TOUHY AVENUE,         For the address of the service location nearest you which is authorized
           cHtcAco lLLlNols 60648    to repair Argus products under guarantee, contact your Argus dealer
                                              or write to the main office of the Customer Service Department.
 ARGUS CAMERAS OF CANADA, LTD.
       Newmarket, 0ntario                                          PART NO. 2I5OI -653     LITHO  IN U.S.A'
View original page 13From the M. Butkus archive. Original publisher and archive notices are retained.
Check the model and edition against your equipment.
PDF verified 2026-10-10.