Film cameras
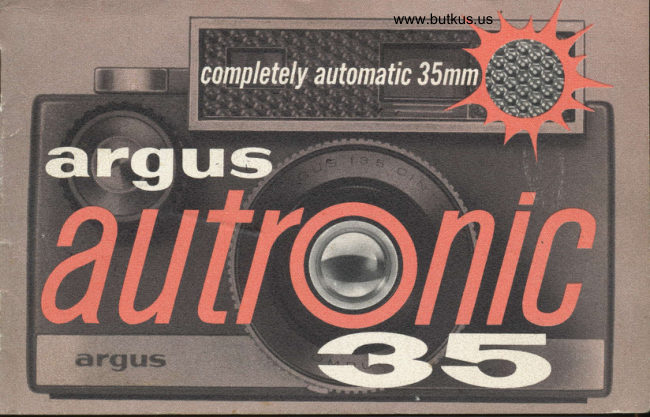
Argus Autronic 35 User manual
User manual for Argus Autronic 35. 14 pages in English. Read the original PDF, download or print a copy without registration.
14 pagesEnglish4.9 MB PDF
Loading your manual…Open PDF directly
Document details
- Brand
- Argus
- Model / document
- Argus Autronic 35
- Document type
- User manual
- Language
- English
- Pages
- 14
- File size
- 4.9 MB
- Category
- Film cameras
- Document date
- Not specified in catalog
Search available document text
Find a term, then jump to its page in the original PDF. Image-only pages may not be searchable; check the PDF for exact wording and diagrams.
Page 3 · Read text
www.butkus.us

   Finc pictures dre yours, enery
   tirne, with your neu) Argus
   Autroni.c 35. No rtore exposure
   guesswork. The buih-in auto-            CONTENTS    tnatic exposure control sets the
                                                    Condensed Inskuctions... ....,....3, 4   lens to the righ;t opening:lor a
                                                        and Unloadlng.. .. .. .. ..  . .5, 6   perlect ex,posure. Alter adjust-        Loading
                                                              Setiing the Film Speed. ..  . . ... .. .. ...7d ing the Autronic lor the fitm
   arul kind ol subject, you just        Setting Exposure Controls. ....,,.....7
  wincl-locus-shoot.                        Viewing and Focusing.  . . . .. .. .. .. ... .8
   fuIay we suggest you read, this        Using the Flash Unii.        ....9, l0
  book carefully? You uill want                                      Specifications. ............11
  to become lamiliar with alt        Care and Cleaning.    ........14   ol the Autronicts fine features.
  Belore you go on a trip or take
   pictures ol a special eoent, try
  a practice roll first.
View original page 3Page 4 · Read text
just a
       few simple
           sett'ings,,  .

here's all you do    load camera      set film speed

                                                                                   on     tor completelg    Openzine. Pullbackrewindand insertlever maga-down.  Makebottomthisof lensadjustmentby pressing
           aulam,at'ic     turn drum until hook is on    small tab and turning knurled                               top, push lever up. Hook    ring until index mark is op-
                                  on drum and move wind   posite the speed (ASA Ex-            pictures      fiIm                             lever through FULI stroke.   posure Index) of your film.
           outdnors      Close back. set counter. wind   Kodachrome Daylight is 10,                                fiIm twice (see pages 5-6).    others on page 7.
View original page 4Page 5 · Read text
www.butkus.us


  lens & shutter    focus #f,,f;fk,    take the picture
  Looking from the top, turn   Look through the viewfnder   Hold the camera either hori-
 I ring next to cagrera body to   at the subject and turn the   zontally or vertically to suit I place red A (for Automatic)   focus knob until the two   the subject. Compose your
' in window. Then turn the  images come together and   picture in the viewfinder and
  large knurled ring to place   appear as one. Be sure the   gently squeeze t}ne shutter I thetype ofsubject (scenesor   safety signal pointer is in    release. Then move the wind
, action) opposite red index   the clear area, not the red.   lever through a FUL! stroke
 I mark. See page 7.             For more on this see page 8.    for your next shot.
View original page 5
Page 6 · Read text
ffi

1. To open for loading, push up back lock and pull back
open from top. Push rewind knob out by pushing shaft
inside camera. Place       it camera (protruding end of                      "flgspool down). Push dowri on knob, turning if necessary,
until it snaps into place'                                                                               ffi
  it-
2. p"U down rewind lever (on camera bottom) and turn
fiIm take-up drum until metal hook is on top. Push
rewind lever'back up. Place film leader over drum so
one of the perforations on end engages hook. Keeping
tension on film, move wind lever through a FULL stroke,
then press shutter release.

 3. fim should now lie flat and end should be securely
fastened. Close camera back and set counter dial by
turning to the left (see illustration 3) until "set 20",
under the number 22 (ot "*t  36", depending on size of
 your film), appears in window on top of camera.
View original page 6
Page 7 · Read text
www.butkus.us

4. Morru film wind lever through another FU[L stroke,
press shutter release, wind fiIm once more, and again
press release. Counter will now read 20 (or 36). Wind
the film again wheri,-ready to take your first picture.
The counter tells how many pictures remain to be
taken and also shows that film is advancing properly.
Accidentally moving wind lever more than once will
do no harm, as film will only advance one frame between
exposures. To intentionally double expose, pull rewind
Iever down while you move wind lever a fuII stroke.
Then push rewind lever up.


UnlOading  , . . Before camera is opened,, fiIm must be
rewound. Pull rewind lever down, release rewind crank
by sliding gtrey button away from arrow, and rewind
film until counter stops turning. Open back and pull
rewind crank up to remove film.
                                                     6
View original page 7Page 9 · Read text
www.butkus.us
                         FOCUS THE CAMERA IENS by rurning the focus
ll                           Thelorobcamerauntil thecantwoberangefinderheld either imageshorizontallyappearorasverti_one.
                                                               to focus, you can set the focusf,                                        cally. If you prefer not                                knob to the symbdl (r) between B and 4 which is the
                                         setting for universal focus (15 feet).


                                                                      the needle is in the          {                 CHECK THE SAFETY SlGNAt. If                                     red, turn shutter setting ring either way until needle
                                                     is in the clear. Needle in the red indicates either insuffi-
                                        cient or too much light for your shutter setting or f,lm.  ' Be sure,your fingers arc not in lront
   of . the honeycombed electrii-ege   TAKE THE PICTURE by squeezing the shutter release.
  windaw when you take the pictuie.   Wind the film a FUL[ stroke for the next picture.
View original page 9Page 10 · Read text
To install battery, pull metal cover down    flector support in place. Open reflector by
and lift up on black inner cover. Remove   turning top blade clockwise-other blades
ribbed top   , of battery compartment and    will follow. Place tab on edge of top blade
install 22.5V battery with positive ({)   into slot in bottom blade. (Reverse pro-
end up (see specs., page 11). Push battery   cedure to fold.) Plug unit into camera.
in, replace compartment cover.
                                       Align pins on bayonet-base bulbs with           il
With inner cover (which holds reflector)    slots in socket. Push bulb in, do not twist.
straight up, close metal cover to lock re-   Socket holds bayonet-base or u-base bulbs.
I
View original page 10Page 11 · Read text
www.butkus.us

    THE IENS OPENING SCATE should
      not beleft on A (Automatic) when taking
       flash pictures-you should always set the
t     scale to lens opening number indicated
     by the Flash Finder after focusing.
    SET THE SHUTTER by turning the
      knurled ring until the FLASH betting is
      opposite the red index mark. Use this
       setting for all of your flash pictures.
                                              For flash pictures, just focus on subject    TESTING THE FTASH CIRCUIT. With
      flashbulb in place, you can test entire       by turning focus knob. The Flash-Finder
      flash unit circuit and flashbulb with Test        scale on the focus knob shows number to
     Light button. If everything is working,       aet on lens opening scale (for Koda-
     the button will flash as it is pressed.       chrome Daylight and Press 258 bulbs or
                                                        equiv.). See charton page 12 for additions
    TO EJECT A USED FIASHBULB, push        to this nuntber for other fi.lms and buLbs.
      the round metal button on the back of         If Flash Finder shows setting between
      the reflector suppott.                     two numtrers, $et lens in the same way.
View original page 11Page 12 · Read text
FILM SIZE: 35mm magazine (size 135), 20 or 36     manual lens openings from AV 3.5 to AV 9 (f/3.5 to
exposure, color or black-and-white film.                                                     t / 22l. ;  r angetinder-cou  pled focusi ng. Bui  lt-i n retai ner
                                                     unscrews to_hold Series V filter.
SHUTTER: Compur, between{he-lens, speeds:
I/30,1/60, 1/125, l/250, and 1/500 sec. Shutter
                                                                  Plugs into side of camera;folding reflectoris synchronized at FLASH setting for all flashbulbs    FIASH:
and electronic flash units.                             accepts bayonet-base or M-base flashbulbs without                                                         . adapter; battery-capacitortype with test light; accepts
[EN5: 50mm f/3.5 Argus Cintar, color-corrected,     one 22.5V battery-Ray-O-Vac 221, Eveready 505,
coated anastigmat; lens openings automatically set      Burgess Yl5, Bright Star 22P, or equivalent. Push-
by exposure control system when lens is set on A;      button flashbulb ejection.

         system comparisons table                manual settings for outdoor exposures
                                                               (uhzn you do wtwish to uEc Aulumtic)  Lens openings ind their oquivalont f/stops rre:                                                                        Set shuttor to centsr of bsr telow SCttlE {l/60};
  lensopening,.....,3.5 4 5 6   7    E    9                  find lens openirg for your lilm in lhe tighting column-
                                                                           Hauy                                                                                                 Cloudy                                                                                                               Ctoudy  f/s10p.............3.5 4 5.6 8   ll    lb   22                                  BriSit                                                                                                                                          Dull                                                                                             Eright                                                            Sun                                               Sun
  Flash-Finder numbers aod equivalsnts in te6t tre:                lbdrchromeDatligit..... 5N 1th 3k
                                7 6 5    1  FlashFinder...l 2 3 4 5 6   7    8          ffi"iiioii.iii"'li*r.,.Ektrchrome or AnscG
  feet{approx.}.. 10 28 ?0 14 l0 7   5   3Yz          l(odakPlus-XPsn,..,.... 9  8   7     6
View original page 12Page 14 · Read text
Your Argus Autronic 35 was manufactured, inspected, and tested by
skilled craftsmen. It is guaranteed to be free of deJec)s in material or workmanship
      during its lifetime. If anE seraicing is necessarE because of imperfections in
  workmanship or materials,,_Aour carnera will be factory seraiced witho,ut charge.
                           .qrgu,, equiptuent which has been d,amaged, mishandled,, or
    u)orn                                  be factory seroiced at established rates. Equipment       n":  extensiae use will
                                                         coaered bg                                                          is not                                                                           this guarantee.
                   .purchased as usedarg}|sor rebuilt
                                                                    hfl,lERA                                                                                          & EIECfRhillCg                                                                          t fEtfPilhllf                            @

                                 ARGUS CAMERAS, INC., ANN ARBOR, MICHIGAN
                                                                   Subsidiary of Syloani,a Electric Products Inc.
                                      ARGUS CAMERAS OF CANADA, LTD., REXDALE, ONTARIO

                                            PART NO. 3518/t-607                      LITHO tN U.S.A.
View original page 14From the M. Butkus archive. Original publisher and archive notices are retained.
Check the model and edition against your equipment.
PDF verified 2026-10-10.