Film cameras
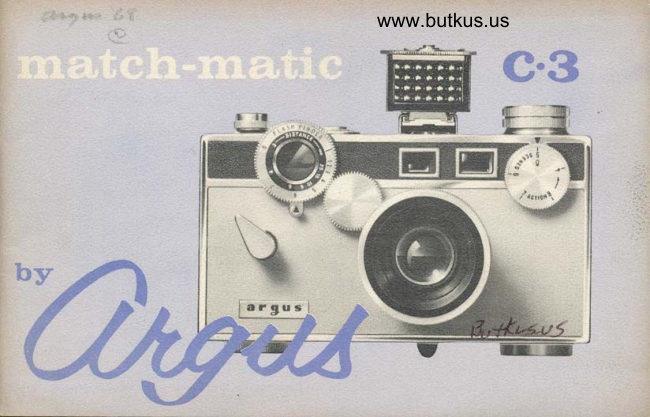
Argus C-3 Match-Matic User manual
User manual for Argus C-3 Match-Matic. 25 pages in English. Read the original PDF, download or print a copy without registration.
25 pagesEnglish3.1 MB PDF
Loading your manual…Open PDF directly
Document details
- Brand
- Argus
- Model / document
- Argus C-3 Match-Matic
- Document type
- User manual
- Language
- English
- Pages
- 25
- File size
- 3.1 MB
- Category
- Film cameras
- Document date
- Not specified in catalog
Search available document text
Find a term, then jump to its page in the original PDF. Image-only pages may not be searchable; check the PDF for exact wording and diagrams.
Page 4 · Read text
www.butkus.us


                                        lmportant Parts              .......1 Your new Match-Matic C3 brings you                                 What Makes a Picture...       ...3 an unequaled ease of operation in a                                       Match-Matic Pictures       ......4 simplified system of photography.  If
 you can match one number with           Using the Rangefinder..  ., .. .. ..5
 another, you can take fine pictures,           Shutter Settings.,....         .....6
 every time.                                Uslng.the LC3 Meter.       ......7
                                     Exposure Indexes..            ...4The opposite page shows the impor-
 tant parts of the camera and their           Loading the Camera.       .. 9, 10
 location. For best results, read this           Unloading..              ..........11
book carefully and try out the differ-          Outdoor Exposurre 6ulde ..  . , . .12
ent adjustments. Try to know your           Using the Flash Finder          . . . .19
Match -Matic C3 before you load your                  Ff ash Exposure €uide            . . . .14
first roll of film. This may prevent           HlnteonFlash         .....        ...15iyour missing an important picture                                     Care and Servlcing       .......16through lack of familiarity with its                                      Depth In Your Plctures ....17,1eoperation.                                     Lens and Shutter
The illustrations.in this book rnay not           Comparisone       .r.,..o....   19
show the latest minor changis in              Filters. r ..  .
product appearance.                           Specificatlone                 .. ..  . ..ZO
View original page 4Page 8 · Read text
www.butkus.us

The first setting to decide on when taking a picture is the shutter
number. The shutter dial controls the length of time the shutter is
open to admit lieht to the film. The low-numbered settings hold the
shutter open lonler than the high-numbered settings. Alwlys set the
dial directly on the shutter number, not in-between.


                                                                      be   Shutter Setting 6 is for            Shutter Setting 5 must
                                                                              ex-   w O RM A L picture-takln9,,^           used for  all flashbulb   such a.s scenes and people. If           posures, and can also be
                                                          used, for norntal scenes when   you .are taking pictures of   mouing ;ubiecf,, use 7 or B             lighting is too dim to use
                                                                                   6.   wheneuer possible.                           .. :,.   the narmal setttng of
                                                              . i*rlRrrs^/   't,
                                                     *  ''                                                  ipt-:
                                                     t'"'|'&" 't   Sihutter Settings 7 and. ,':         ,uuu"r Sett;ing 4 is the
    qr9     action piciures witlt              slowe,st setting, and should      dor    L\S|"S f?r the fastest action.            be used onlv"ihen the cam-    When- using a telephoto lens,           era is on a tripod or sup-
   use these ieu;ingi wheneuer            ported in a sirnilar manner
    poissible to preuent &ny ca,m:    l        to preuent mouement. Use
    e.ra tnoue.ment frorn showing                this setting when the lighting
    in the picture.                                    is too dim for higher settings.
View original page 8Page 9 · Read text
(1) Turn the inner dial on the rneter so that one of the index marks points directly
                      at the exposure index of the film you are using. The numbers alternate between
                   the two icales on either side. Exposure indexes (also called ASA film speeds)
                     for different films will be found on page B and on the film instruction sheet.
                     (2) Turn the outer dial so that the pointer lines up with the shutter nurnbertu                you have selected. Always set the shutter dial and the meter dial directly on adF     shutter'number, not in-between.LC-3      (3) Aim the camera anC attached meter toward your picture subject.
               The meter needle will point to either a black or white channel, leading up to
                    the lens opening number to use. If the -meter needle indicates a setting between@          two numbers, set the lens in the same way. There are three groups of lens opening
                  numbers on the lens mount so that one will always be seen from the top.
              NOTE:  Il your film's exposure index is not listed on the inner dial of the
                   meter, use an approximute in'between setting.
  t Set pointer to exposure                                     g Follow needle         index of your film.
     Setting of 25 is shown.                                     uplle-dfl-tel
                                                                  to lens opening.
                                                                              6 2 Turn outer dial to set                                   Lens number
pointer at shutter number.                                                         is shown.
    Setting of 5 is shown.'

  7
View original page 9Page 10 · Read text
www.butkus.us
 For aaerage scenes, aim the meter directly at
the subject and slightly downward to minimize
the "reading" from skylight. If your subject is
in surroundings that are lighter or darker than
the subject itself, aim your meter at close range
so that the surroundings do not influence the
reading. Try to "read" average tones such as a
person's face, or if this is not possible, take a
reading from the back of your hand held about
4 inches from the meter. Be careful not to read
your own or the meter's shadow.
The  f /stop numbers on the meter dial (directly
aboae the lens numbers) are for use utith the
C3 accessory lenses.
Ser the meter's shutter number pointer (on       BLACK AND WHITE
outer dial) on EVS if you wish to read directly
in EVS numbers instead ol lens opening nurl.
bers. (See page 12.)
Check the "zero ad,justment" of your tneter
occasionally by com,pletely couering the light
ceII u:indou:. Il the needle does not read zero,
adjust the screw on the back of the meter
until it d,oes,
View original page 10
Page 11 · Read text
Nous that you haae tried the camera adjustments without fiI*,                          you are ready to load the camera and start taking pictures.
      /@de\--J-                                                                                                                                                                                                                                                                    ,
                                                Your Match-Matic C3 uses 35mm
                                                                 film cartridges,20 or 36 exposures)
                                                                      either color or blaclt-and-ushite frI*.

       1 Open the back by depressing the catch at     the wind knob about one-half a turn to make
          the end of the camera. Pull out the rewind     sure the film folds under itself and is secure
         knob on the bottom of the camera (the knob    on the shaft.
          with the arrow) and'insert a 35mm cartridge                                            STake up the slack in the film Ieader with         with the small end facing up. Push in the                                                      the wind knob and turn a little more to en-         rewind knob, turning if necessary, to engage                                                     gage the perforations on both sides of the
          the cartridge spool.                                 fl* on ttie sprocket teeth. If the sprockets
       2 Uold the cartridge in the camera and thread     stop turrring before the teeth are engaged in
          the end of the film (the leader) completely    the film holes, release the fi\* catch and
          through the slot in the take-up sp"indle. Turn     continue turning. Close the camera back.
,9
View original page 11Page 12 · Read text
www.butkus.us


4 Witt, the back closed. turn the wind    Press shutter cocking leuer down and
knob as far as it will go without forcing.     squeeze shutter release smoothly lor each
Hold down the film catch and turn the      picture. Care should be taken so that the finger
wind knob about a quarter of a turn, re-     does not interfere with the up - stroke of the
lease the catch and turn knob until  it     cocking lever when the shutter is released.
stops. Repeat this operation. The film is
now in the correct position for the first     Alutays utind fiIm immediately after taking
picture, Set exposure counter dial by turn-    a picture by holding down the film catch for
ifig counterclockwise to "0".  Dial will      a quarter of a turn, then releasing catch and
indicate number of pictures taken.           winding until the knob stops.

                                                                                                                            10
                                                                                                                                                                                                                                                                                                                                                                                                                                                                                                                                                                                                                                                                                                                               i
View original page 12Page 13 · Read text
When the exposure counter dial reads 20 or
    36, and you have taken that last picture, you
    have taken all of the exposures on the film.
   THE FILM MUST BE RETTOIJND BACK
   INTO THE FILM CARTRIDGE BEFORE
   OPENING THE CAMERA BACK. To rewind
    the film, turn the rewind knob (on the bottom
    of the camera) in the direction of the arrow.
    Continue winding until the counter dial stops
    turning. Turn a few more times to make cer-
    tain all of the film is rewound, then open the
    camera back and remove the film cartridge.
   Have film processed as soon as possible after
    exposing. All types of film may be taken to
    your Argus dealer.

11
View original page 13Page 14 · Read text
www.butkus.us
Although your camera's LC3 exposure
meter gives lens openings directly without
any calculations, you may lvish to know
the basis for Match-Matic operation.

Your Match-Matic C3 uses an adaptation of
the exposure-value system (EVS). You
will find exposure-value numbers listed
under the daylight exposure table on the
data sheet packed with the film.
The outdoor exposure guide on this page
also lists exposure-value recommendations
for different films under different lighting
conditions. To use these numbers with
your camera, all you have to do is to
decide which shutter setting you want and
subtract it from the exposure value to find
the correct lens opening.
These values are for average subjects. For
dark subjects, subtract I from the expo-
oure value; for light subjects, add 1.
View original page 14
Page 16 · Read text
www.butkus.us
    EXAMPLES: Using an ASA 10 Daylight
      color film and Sylvania Press 25B flash-
      bulbs, you focus on your subject and
?     find the Flash Finder. reads 5. Set the
!i     lens opening at 5 for correct exposure.
     Using Kodachrome II Daylight film ano
      Press 258 flashbulbs, you focus on theY
      subject and find the Flash Finder reads
       4. The table on this page says to add L%
       for this film and flashbulb, therefore you
        add. L% to the Flash-Finder readin g of +
     and arrive at \rk. Set the lens between
     5 and 6.
    USE A SHUTTER SETTING OF 5 (Q)
    WITH AtL TYPES OF FLASHBULBS.
    Use shutter settings 5 through B with
      electronic flash units.
     Flashbulbs occasionally shatter, and to
     avoid any possible dama1a, e shield of
      translucent material may be used over
      the face of the reflector. Never use flash t      in an explosive atmosphere.
View original page 16Page 18 · Read text
.-.;i.J,tJ,.iJ.J::ili:,:.j,,j.:i:lJlrlj':,,   rjt:lri:.l.tii:,.J',il:ii,iJ:i
                                       www.butkus.us
                 a,nd s tuer\zicirrg of ca,rn era,
                                Your Match-Matic C3 is a f.ne camera and worth caring for.
                           To lceep your C3 and LCS Exposure Meter in perfect uorking
                                                                                                                   store                                        order, protect them fro^ dust, rnoisture) and heat. Do not
                                  the carnera in your car's gloue compartrnent or any other place
                                  where temperature tends to rise. The f.ne lens of your C3 is
                                    ground, polished, and coated with etctrerne precision. If it needs
                                       cleaning, blom off the dustfrst, then use o, soft brush with a light
                                      touch or clean it with lens tissue. Use lens cleaning fluid only if
                                                    it becornes absolutely necessary. Vorldng po,rts of your C3
                                        contain f.ne threads, tiny screws, and sensitiue adjustrnents. Neuer
                                       force any parts of the can'Ler& to work if they resist.

                              For information, seruice, or         CUSTOMER SERVICE DEPT.
                                                                      ARGUS, INCORPORATED                                   replacement parts for your
                                Match-Matic C3, see your         2O8O LUNT AVENUE
                                          local Argus dealer or author'         ELK GROVE VILLAGE
                                                                         tLLtN0ls 60007                                        ized seruice location (see back
                                       couer), or write to:                                                    16
View original page 18Page 19 · Read text
a       Did you know that if you focus your camera lens on a person at
         certain distance, the picture wiil also be sharp in front 9f 1"-d
       behind the person? ittit  "range of sharpn-esst' (depth :i  .fi"1d)       depends on ih" lens opening uied and the distance on which the
         lens is focused.
        The larger the lens number, and the greater the lens{ocusing
         distance, ihe greater is the lens' range of sharpness. The lens
          will have its stallowest range of sharpness when it is used at the
          srnallest number (3%) and the shortest focusing distance.
                                                                  one       When your pictures require that subjects at mole than
          tlistance be in focus, use tire largest ,t,r-b". possible (such u: 6,                                   .-<=-'- "3l
         7, or B) under the lighting con,litions that you have. To do this,
             it may be necesru.y'io go to a lower shutter setting, especially
       when you are using a slow filrn such as Kodachrome II'

v
View original page 19Page 25 · Read text
Ar gus uncond'itional guaranteen{
zp                         Your Argus Match-Matic C3 and LC3 Meter are unconditionally guaranteed by the                                  manufacturer to operate properly for a period of one year from date of original purchase.
                                            lf, during this period, your camera or meter fails to operate for any reason,.Argus,so(rl                                  Incorporated, will restore it to operating condition at no charge to you. (This iricludes
LJ                                     rr.:itii#,ji                 all parts and labor.)o(.t                                                  -::rtrx...
g                                This unconditional guarantee applies to the product itself. We regret that we are unable
                                   to assume liability for loss of film or for other expense or inconvenience.  o-   T,Z                       Th.is unconditional guarantee is valid only for the original retail purchaser and only if
                              the product is returned prepaid, directly or through an Argus dealer, to the Customer
                     ,u               Service Department, Argus, lncorporated, 2080 Lunt Ave., Elk Grove Village, lllinois 60007,  9o                                                                                                    i:i                                 or their authorized service location listed below. The date and place of original purchase     6, o                             must be included, along with a description of the difficulties encountered.  9t                           Many apparent product difficulties are actually a matter of incorrect usage. tt is always
                               wise to see your Argus dealer before returning the product for servicing.

                                    GUSTOMER SERVICE OEPARTMENT, ARGUS, INCORPORATED    t!2o  9n  op                 METR0P0LITANt{I                             MAIN OFFICE 2080 Lunt Avenue, Elk Grove Village, lllinois 60007                                                      106r^^ Westrr'^^+ 32ndr^-i  Street,tr                             NEW    O-f                                                                                 o{    New York, New York 100012                        'ORK 4959 Colorado Blvd., Denver, 0olorado 80216
                                                  3410 South LaCienega Blvd., Los Angeles, California 90016                           WESTERNF   8ni                                                                                                         e4080                                 srArEs                         AREA!t>                                                               ii;,rt:lTb.,i,.r.t1?!!t;r"'L,ll.liil.:[1[;i'#,  8al!'i''.  $s                                   IN CANADA    Davis Drive East, Newmarket, Ontario
View original page 25From the M. Butkus archive. Original publisher and archive notices are retained.
Check the model and edition against your equipment.
PDF verified 2026-10-10.