Film cameras
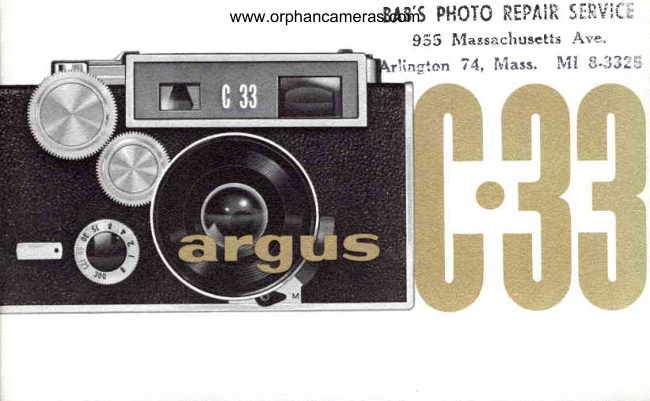
Argus C-33 User manual
User manual for Argus C-33. 25 pages. Read the original PDF, download or print a copy without registration.
25 pagesOriginal document3.1 MB PDF
Loading your manual…Open PDF directly
Document details
- Brand
- Argus
- Model / document
- Argus C-33
- Document type
- User manual
- Language
- Check the original document
- Pages
- 25
- File size
- 3.1 MB
- Category
- Film cameras
- Document date
- Not specified in catalog
Search available document text
Find a term, then jump to its page in the original PDF. Image-only pages may not be searchable; check the PDF for exact wording and diagrams.
Page 2 · Read text
pH0T0REPAIR5t:flt'ii,-www.orphancameras.comBAB'5
                    955  Ir{agsachusett',iAv*'
                        r'lington 74, Ivlass. &11 3'li3i;
View original page 2Page 3 · Read text
conteratswww.orphancameras.com
FunctionalParts. .     .3,4
WhatMakesaPicture... . 5
Color-MaticSettings.... . 6
SettingtheShutter     7
SettingtheLens       8
OutdoorExposures       I
Usingthe Rangefinder.. . l0
LoadingYourCamera. . lI,12
U n f o a d i n g . . . .      . . 1 2
Usingthe FlashUnit.. 13,14
FlashExposureGuide.. . .15
ChangingLenses  ...16
Rangeof Sharpness. . . . .17
Specifications ....18
Servicefnformation. . . . . 19
CareandCleaning... ...20
View original page 3
Page 6 · Read text
These are the importantfunctionalwww.orphancameras.comparts of )rour C33. Familiq,rize
     yoursdf  u:ith them, es th"y e,re referred to throughout  this book.


ShutterSpeedDial

MeterMountingFoot                                   FilmTake-upDrum

RangefinderDial                                      Exposure Counter I nterlock

ExposureCounterWindow                             ExposureCounter

ShutterRelease                                    SprocketWheel

CableReleaseSocket                               BackLockRelease

FilmWindLever                                   Range-Viewfinder Eyepiec

                                                                                               4
View original page 6Page 7 · Read text
www.orphancameras.com
                                                                         If  this is your first adjustable cam-
                                                era,  it may help you to first under-
                                          stand the camera's three sim.ple ad-
                                           justments which assuregoodpictures.

First there is the lens focusing  which            Last is the shutter  speed
gives a clear, sharp image on the  film.            adjustment which controls
Line up the rangefinder images by turn-             the  length  of  time  that
ing the rangefinder dial, and                              light can pass through the
the  Iens  is automatically                           lens. You   will  use  fast
focused for you.                                speeds (like 300)  for  ac-
The next adjustment   is the                            tion, slow speeds (like 30)
size of the lens openireg which                 when light  is dim.
controls the amount of light
View original page 7Page 8 · Read text
www.orphancameras.com


Your C33 has a complete range of adjustments for
all types of pictures, but   if you  like,   it can be
pre-set and used as easily as a box camera. The
Color-matic settings on lens opening, shutter, and
distance scales will  give you correct outdoor ex-
posures for average subjects in  bright  sunlight.
YELTOWMARKINGS are used with Kodachrome.
RED MARKINGS are used with Anscochrome or
Ektachrome Daylight  Color Films, Kodacolor, or
Panatomic-X, Supreme, or similar black-and-
white  films (ASA  25-50).
          The Color-matic  lens setting  is at 15 ft.,  but subjects betuseen 9 ond 50 ft.   u:ill be
               in focus.  For  subjects outside this range focus  u:ith the rangefinder  (see page  I0).
View original page 8Page 9 · Read text
www.orphancameras.com
  ffi#F :fu..H":ffi,ffi                                i


   Turn  the  shutter  speed dial  until  the  desired
   number  is exactly  opposite the index mark,  not
   in-betw@n. The  illustration  shows a setting of 60
    (1/60). The numbers are fractions  of a second.
   For action  pictures)  use L/L25 or  l lgoo second.
   For aaerage picttlres)  use Ll6o or 1 lLzS second.
   For  lotts-light  scenes, use L /3o second or lower.
  B is used for exposures longer than 1 second. When
   the shutter  is on B,  it  will remain open as long as
   the release is held down. Use a cable release and
   tripod  with  shutter  speeds lower than L /go and
  when taking time exposures.
View original page 9Page 10 · Read text
www.orphancameras.com
You set the lens opening by turning  the front  of the
Iens to the right  or left  until  the desired number  is
opposite the index mark. Lens openings may be set
on or between the numbers.
The corueet lens opening  to use.may be obtained
by  (1) using the Color-matic  setting,  (2) using the
Outdoor Exposure Guide on the next page or the
flash information on pages 13-15, (3) using the data
packed with  your  film  or  flashbulbs,  or  (4),  thesimplest of  all for outdoor  pictures, use the Argus   t#€-re-*€;:}-"m
Coupled Exposure Meter shown on page 22.
Bright  lighting  calls for small lens openings, while
dim  lighting  usually needs large lens openings.
View original page 10
Page 12 · Read text
www.orphancameras.com


                                                                      www.orphancameras.com

The  combined   viewfinder-
rangefinder on the C33 makes
focusing easy. Just  sight
through  the  viewfinder  and
turn the rangefinder dial with
your  finger until  the images
are aligned as shown in the
illustrations  below.
A  picture can be taken, as
well  as  focused,  with  the
camera in either a horizontal
or vertical position. Hold the
camera so that  the framing
best suits the subject.
View original page 12Page 13 · Read text
1 To open for loading, pushwww.orphancameras.comup back   drum so one of the perforations on end
lock and pull back open from top. Re-   engages hook. Keeping tension on film,
lease rewind crank by sliding red but-   move  film  wind  lever through  a  full
ton away from  arrow.  Pull  crank up     stroke,  then press shutter  release.
until  knob   lifts  out  of recess. Place    g  Film  should now  lie  flat and endfilm  rnagazine in camera (long end of                                         should be securely fastened. Set counterspool down).  Push down  on  knob,                                                  dial  (see illustration  3) until  "set 20"turning  if necesssry, until  it snaps back                                             or  "set 36"  (depending on exposuresinto place. Push crank back in.                                    on your  roll)  appears. Close camera
 2  Pull  rewind  lever  (on  bottom)     back.  (Back   will  not  close  unless
down and turn  fitm take-up drum  until     counter has been set.)
metal hook  is on  top. Push rewind     4  Move   film  wind   lever  through.
lever back up. Place film  leader over    another  full  stroke,  pres,s shutter  re-
View original page 13
Page 14 · Read text
www.orphancameras.comlease, wind  fiIm once more,                           and again    When  exposure counter  reads 0 and
press shutter  release" Counter   will now     you have taken  that  last  picture,  do
read 20 (or 36). You  are now ready  to      not try  to wind  film any farther  or you
wind  for your  first  picture.             may  double expose the  last  picture.
Counter   tells how  many  pictures   re-     Before cclrnera is opened, film must be
main  on  roll,  and  also shows  that  film     rewound. Pull down rewind  lever on
is transpo.rting   properly.                              -Accidentally       bottom of camera, releaserewind crank,
moving  wind  lever more than once will      then  rewind  film  until  counter  stops
do no harm,  as film  will  only advance     moving. Open back, puU rewind knob
one frame  between  exposures.  To  in-      up, remove film, and take  it to dealer
tentionally   double-expose,  pull   rewind       for processing. Reset counter dial before
leuer down  while you moue wind  leuer     attcmpting  tn close back, and push re-
full  stroke. Push rewind  lever back up.     wind  lever, knob, and crank back  in.
View original page 14
Page 15 · Read text
www.orphancameras.com


To  install  battery,   pull  metal  cover   reflector by  turning  top  blade clock-
down and  lift up on black inner cover.   wise-other   blades will  follow.  Place
Remove top  of battery  compartment    tab on edge of top blade into  slot in
and  install- 22.5V battery  with   (+)   bottom  blade. (Reverse procedure to
positive end up. (seespecifications,P-age  fold). Plug unit  into camera.1S). Push battery  in  to seat, replace
compartment cover.                      Align pins on bayonet-base bulbs with
With  inner cover (which holds reflec-   slots in socket. Push bulb  in, do not
tor)  straight up, close metal cover to    twist. Socket holds bayonet-base or M-
Iock reflector support  in place. Open  base bulbs without  adjustment.
           Do  not haue flashbulb in  plo,ce when plugging unit  into camera-
View original page 15Page 16 · Read text
L
                         www.orphancameras.comi
,,
                 ,ASH C|RCUIT-
                    n place, you can test
                                       ; circuit  and  bulb
                        button.   If  everything
                               rly, the button  will
      flash briefly as it  is pressed.
    THE FTASH CALCUTATOR-Calculator
    on back of unit shows lens opening to use.
         / Turn  calculator  diat to guide nu*b",
     (see page 15) for your fiIm and dashbulb.
    2 Focus with rangefinder to find subject distance,
      .3 look opposite this distance on diai to find lens
     opening. set this on lens. There is a different
    opening for every distance. Illustration  shows
    guide nurnber setting of 100.
   EJECTINGA usED FtAsH BU[B-push  round
     metal button on back of reflector support to
     eject used flashbulb.
View original page 16Page 17 · Read text
www.orphancameras.com
 FLASH EXPOSURE GUIDE
                       ttili$'' ttlilll''                      Flashbulbs occasionally shat-                           press_23l;fr?il$FILTil   FTASHBULBS)                       M5   ter, and to avoid any possiblev                              Useltl sync.setting                UseX sync.setting                                              damage, a translucent  shield
SHUTTERSPEEDS)     to l/30 to 1/30 to 1/60 rlt25  l/300   may be used over the reflec-                                                                      tor.  Never  use flash  in an
EktachromeTypeF      r30          130   100          explosive atmosphere.Kodacolor
KodachromeTypeF      r00    65    100   75          Set the camera's M-X  syn-
EktachromeDayfight       Use blue flashbulbswith daytightcolorfilm       chronization  selector for the
AnscochromeDaylight   95     90n    95    75    55     flashbulb you are using. See
KodachrsrneDaylight          50*   52   42    30     chart. Guide numbers are in-                                                  tended as guides only,  and
SuperAnscochromeDay.  170    160*   t70   135        may be adjusted up or down.
                                           Remember to reset calculatorKodakTri-X                             250   190                                                               to new guide number when-
KodakPlus-XPan      230    145           175   130   ever  you  change  shutter
                                                   speeds, fiIm, or flashbulbs.KodakPanatomic-X   r25           125   r00   75
AnscoSuperHypan     490          490         240   Guide numbers for electronic
                                                              flash units  are furnished  byAnscoSupreme        160    100    160    t25                                                        the manufacturer  of the unit.
          *Usethisflashbulb(M2B)for outdoorfill-inflashonly. t 5
View original page 17Page 18 · Read text
www.orphancameras.com


After about % turn,  lens will  lift  out.


To install  any  lens, align red dots on camera
     and lens mount  ring by  turning  range-!o4V
finder.  Align  red dots on rear  of lens. rnsert
lens so notch  in  lens' distance scale ring  fits
over  projection  on  lens mount   ring.  When
seated, rotate  the lens clockwise  until  locked.
Never  leave camera  without   lens  installed.
Avoid  changing  lenses in  direct  sunlight.
View original page 18Page 19 · Read text
www.orphancameras.com


Even though you focus on a single subject in your picture, more than
that  subject  will be sharp due to the "range  of sharpness"  or depth  of
field of your camera lens. The sharpness range extends both  in front  of
and beyond the point focused upon.  It depends on the lens opening and
the focusing distance used.
To find the range in a picture,  first focus on the principal  subject  (with
the rangefinder). Now  look on both sides of the distance scale index
mark  for the lens opening you are using. Directly  below these numbers
are the near and far points  of sharp focus.
Exarnple:   Illustration  shows lens opening of f/8 and focusing distance
of 15 feet. Below f/8 on each side ofthe  scale are near and far points of
sharp focus-approximat'ely   8)4'  to  50'.
View original page 19
Page 20 · Read text
www.orphancameras.com


                                                      FltM SIZE: 35mmcartridge(size135),strrecificatiorr.s                                                  20 or 36 exposure,coloror black-and-
LENS: 50mm  f/3.5  Argus  Cintar,  color-cor-        whitefilm.
rected,  coated  anastigmat;   click-stop  lens       IENS ACCESSOR|ES: Standard
openings from   fi3.5  1o  tlL\;   ruttgdfinder-         lenshasbuilt-inretainerwhichunscrews
coupled focusing;  hyperfocal  distance:  4G,Z'         to holdSeriesV (l3Ae")filtersandsupple-
at f13.5; field: 27" x 40" angular at infinity.        mentarylens;SeriesVl (l%") filterscan
                                                  be placedon outsideof retainerandheldSHUTTER,:Behind-the-lens type, 9 speeds from                                                 on with a standardSeriesVl sunshade.1 second, to LISOO second, plus B;  click-stop
settings;  cocking  action  coupled  with  the       FTASH: Plugsintosideof thecamera,
film wind;  full M-X  synchronization.                no wires to connect;foldingreflector
                                                     acceptsbayonet-baseor M-baseflash-
OTHER FEATUR,ES:Rugged, molded body         bulbs;battery-capacitortype with test
with  brushed  chrome  trim;   hinged  metal           light and flashcalculator;acceptsone
back; automatic  exposure counter with back        22.5Vbattery-Ray-O-Vac 221,Eveready
interlock;   single-stroke  film  wind;  double-        505,BurgessY15,BrightStar22P,or
exposure prevention  with  intentional  release.        equiv.Push-buttonffashbulbejection.

                                                                                                   t 8
View original page 20Page 22 · Read text
www.orphancameras.com


  Your Argus C33 was designed and manufactured by fine craftsmen.
Protect your camera from dust, moisture, and heat. Do not store the
    camera in the glove compartment  of your car or any other place
        where temperature  tends to rise or where vibration  occurs.
 The lens on your C33 is ground, polished, and coated with extreme
precision.  If  it needs cleaning, blow off the dust  first, then use a soft
                Iens brush, or wipe  it gently with lens cleaning tissue.
  Working parts of your camera include fine threads, tiny screws, and
precision adjustments. Never force any parts to work   if they  resist.
View original page 22Page 23 · Read text
www.orphancameras.com
ARGUS C33 ACCESSORYLENSES
Instantly   interchangeable  Argus  Cintar
lenses provide the right  focal length  for
every picture. A quick  twist and
the lenses are removed  or  installed.
The  f14.5 100mm Telephoto  and
the 35mm Wide  Angle  Lenses are
focused automatically  by the rangefinder.


             ARGUS ZOOM VIEWFINDER
                         This zoom-type optical system shows you the view
                                   taken in by the 50mm Normal, 100mm
                              Telephoto, and 35mm Wide Angle Lenses. An
                                     efficient parallax system tilts the viewfinder so
                                        that you see precisely what the lens sees,
                                                   at any distance.  It  slips into the
                                 accessory shoe of the Argus C33 Camera.
View original page 23Page 24 · Read text
www.orphancameras.com
ARGUS COUPTEDEXPOSUREMETER
It  fastens firmly  to the camera and
couples directly  to the camera's shutter.
For  perfect  exposures, just  aim  the
camera and meter  at the subject and set
the camera lens to the opening shown.


                            ARGUS PRESIDENTPROJECTOR
                                      The ultimate  in fine color-slide
                                                 projectors.  Completely  electrical
                                          operation  lets your  slide show run
                                                                  itself.  Built-in   timer,  picture
                                              brightness control, power eleva-
                                                             tion,  remote  control, and
                                                            other fine features.
View original page 24Page 25 · Read text
www.orphancameras.com


     Your  Argus  C33 Camera  usas manufactured,   in-
     spected, and tested. by skilled craftsmen.  It  is guaran-
     teed to be free of def ects in matetial  or workmanshi,p
     during    its  lifetime.    If  any  seraicing   is  necessarg
    becauseof imperf ections inworkmansh[.p or materie,Is,
     Aour carnera will be factory  seraiced usithout charge.
    Argus  equipment ushich has been damnged, rruishan-
     dled,  or worn  from  eutensiae use  wiII  be factory
     seraiced at  established rates. Equipment  pu,rchased
     as used or rebuilt  is not coaered ba  tltis guarantee.
  ARGUSCAMERAS,A}IN ARB(lR,iIICHIGA}I
     Diaision  of Sglaania  Electric  Products  Inc.
   ARGUSGAIIERASOT GAIIADA,LTD., TORONTO,Oi{TARIO


                             PART  NO. 33231-59r   LITHO  rN U.S.A.
View original page 25From the M. Butkus archive. Original publisher and archive notices are retained.
Check the model and edition against your equipment.
PDF verified 2026-10-10.