Film cameras
Argus Model A / A2 User manual
User manual for Argus Model A / A2. 11 pages in English. Read the original PDF, download or print a copy without registration.
11 pagesEnglish1.5 MB PDF
Loading your manual…Open PDF directly
Document details
- Brand
- Argus
- Model / document
- Argus Model A / A2
- Document type
- User manual
- Language
- English
- Pages
- 11
- File size
- 1.5 MB
- Category
- Film cameras
- Document date
- Not specified in catalog
Search available document text
Find a term, then jump to its page in the original PDF. Image-only pages may not be searchable; check the PDF for exact wording and diagrams.
Page 2 · Read text
www.orphancameras.com


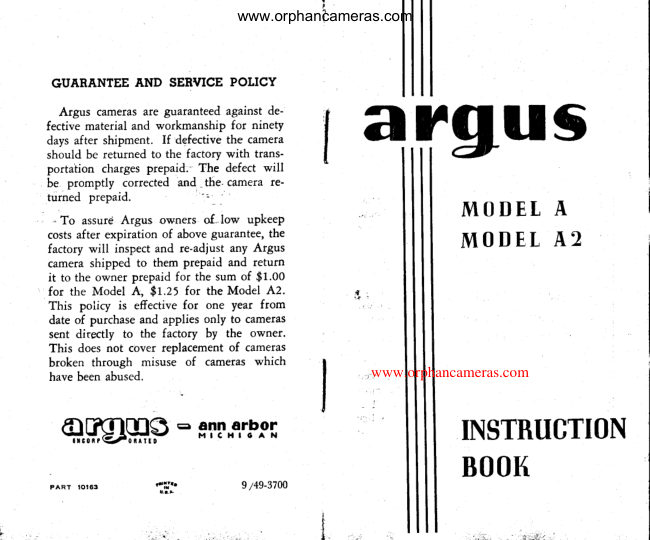
 GUABANTEE  AND  SERVICE  POTICY

  Argus cameras are guaranteed against de-
fective material and workmanship  for ninety
days after shipment.   If 'defective the camera
should be returned to the factory with  trans-       qrgusportation  charges prepaid." The  defect will                        'andbe promptly  corrected        - the- camera re'  I
        prepaid.turned
            Argus owners  of. low  upkeep          MODET A  - To  assurd
                              guarantee,                         of above      after           expirationcosts                                          the          MODET 4,2                          re-adjust                              any Argus          will             inspect andfactory
camera shipped to them prepaid and return
 it to the owner prepaid for the sum of $t.00
for the Model A, $L.25 for the Model 42.                       Ja
This  poiicy  is  effective for  one year from
date of purchase and applies only to cameras
sent directly   to  the  factory  by  the  owner.
This does not cover replacement of cameras
broken through  misuse  of  cameras which
have been abused.                              www.orphancameras.com
            -            sfli"€,'PPI      INSTRUCTIO eruH.p
                  BOOK P A R T     I O I 6 3                          .lil..            9 t49-3700


                                                                                                                                                                                                             i
                                                                                                                                                                                                                         t-r-t3 .
View original page 2Page 3 · Read text
www.orphancameras.com
                                                                                   IF YOU'NE AN EXPERT
                                                                                                                      If you are accustomed to using a candid
                                                                 type camera, the brief instructions givel be-
                                                                 low  will  suffice.  It is strongly recommended,
            YOUR ARGUS CAMERA                                                              however,  that  the  experienced amateur as                ,
                                                                         well  as the beginner read the step by step
          Your  Argus camera is a precision instrtl-                instructions which are given on the pages
        ment  of  All-American  manufacture known                 followlng.  We  know  that  better  pictures
        as a  thirty-five millimeter  camera from  the                    will  be your  reward  for  taking  the added
         width  of film  it uses. The  f :4.5 Argus lens               time to carefully read the instructions in this
         with  which  your Model A  or  Az  Argus               book.
            is equipped  is a three element anastigmat
         lens of  fifty  millimeter  focal length.  These
        Argus lenses are compounded of a number              BRIEF INSTRUCTIONS
          of  pieces of  optical  glass accurately com-             l.-Locrd    your  cqmerq  qs  ex-        puted and ground to assure you needle-sharp                                                         plcrined  in  "Locrding  Your         pictures in either black and white or color.
                                                      Cqmercr."
                     your           Although                        Argus                             camera                                                       is ruggedly
                      years           built                 to stand                                 of hard                                        service,                                                                                    it must            Z.-Turn  lens bcrrrel cllowing    it to
        be treated with  the same care as any other              snqp into taking Position.
         high  quality  precision  instrument.  Never            3.-Focus  qccurctely  crs explcrined
         attempt any repairs yourself and never  oil                   in  "Focusing  For ShcrrP Pic-
         the camera mechanism. The delicate adjust-                 tures."
        ments                   in                any                   camera                        demand                                  an                                       experienced                                                      4.-Set  shutter speed on dicl  (ll).            man                         for                          the work,                               and          rcpair                                    can                                       be most
          satisfactorily done  in  our own Service De-            S.-Set   dicrphrcrgm  opening  on
         partment. The guarantee and service policy                 dial (16).
[,       applying  to your camera will  be found  at                                                          6.-Sight  and mcke  exposure bY
         the end of  this instruction book.                       pressing shutter release  (18).
                                                  7.-Advance    lilm  a{ter  each  ex-
                                                       posure.


                                                                                                                                                                                                                                                                                                          ,."'ot:..li,,
View original page 3Page 5 · Read text
www.orphancameras.com
depressing the back  lock  clip.   Point  the              These are known  as stop values and each
lens toward a bright source of light and press                  figure indicates the amount  of  light  being
the shutter release (18)  several times while                admitted  through  tl-re lens during  the  ex-                                                                                fvarying the shutter speed dial from t/25  to                posure. At  f:4.5  the diaphragm  is widest
l/I5O   of a second. Notice the smooth ac-             open and admits the most  light.  At  f:18
tion      of        the            shutter                                                                                                                                                                         it admits                                                                                                        the                                                                       the                                                                           smallest                                                                            opening                mechanism ovet the wide           il       throughrange       of          shutter                speeds.                                                             The                                                                               smaller                                                                                openings                                                                                                        or those                                                                   least light.
  .Now  set the shutter speed dial   (f  i)  to                  with  the larger  "f"  values are used on the
                                                                  brighter  days when too much  light  would"8"  or  bulb  exposure. Notice now  that                        ioiL
when you press the release the shutter  re-               be  likely  to  cause over-exposure. By  the
mains open  until you remove your  finger.             same token  the  larger  stop  openings  or
By setting the dial at "T"  or time exposure,                   tlrcse with  the smaller  "f"  values are nec-
the shutter will open when pressed the first                essary when   light  conditions  are  not  as
time  and  close when  pressed again.  Try                 favorable such as in the late afternoon or in
these operations  several  times  and  then              deep shade.
leave the  shutter open while  you  practice               So  the  diaphragm  adjustment,  together
using the diaphragm adjustment. Bulb  or                 with the shutter speed adjustment, enables
time expcsures can be used only  for  sub-               you  to adapt ycur camera to various  light
jects in which  there  is no movement and                 conditions as well as to subjects with  vary-
only when the camera is mounted on a tripod                  ing degrees of motion. The diaphragm also
or some solid  object. An  Argus cable re-                  controls the depth  of  field  or sharpness in
lease should be used to  avoid  jarring  the                your pictures and is an aid in securing nega-
camera. This  release may be inserted  di-                   tives which  are sharp from  the near fore-
rectly into the cable release socket.                      ground  to extremely distant objects.              *
   \7ith   the  shutter  in  open position  and
the camera pointed  toward a  light  object,               IUDGING  EXPOSURE  CORNECTTY
revolve the indicator on the diaphragm dial                                 It  isn't  hard  to get on  to the knack  of
(16)  until the lens opening is diminished                judging  the correct shutter speed and dia-
to smallest point.  Turn  this back and forth               phragm opening  for any given exposure  if
several times  to become  familiar  with   its               you make use of  a few simple helps.   lf
operation.  You   will  note on  the  dial  a                yours  is a Model A  camera, the exposure
series of figures preceded by the letter  "f".                   table and depth of 6eld table at the end of
                 6

-'",.1d,,,,tl.i,  t'..       .     .                                     |                     -i*  :-,a    1.,....,,.,   L
View original page 5Page 6 · Read text
www.orphancameras.com
                                                     exposure by "reading" the light for you and
                                                             accurately judging  correct exposure. A few
                                                moments spent in  practice with  this meter
                                                                            will  enable you to produce noticeably better
                                                                 pictures. Each type of  film  on the market
                                                                               is given a \Teston  speed rating  according
                                                                                     tt                                                                    to its particular emulsion speed. This speed
                                                                rating  is given  in  the  directions included
                                                              with  the particular film  or can be obtained
                                                                       4 I        from a \Teston film rating table available at
                                                        your dealer's.
                                                                  Let's suppose we arc using Eastman Plus
                                               X   film.   \(/e know  that  this  film  has a
                                                          \Teston speed rating  of  50.  Referrittg to
                                                        Figure  2, move the tab (l+7  on the ex-
                                                     posure meter bndge  ( 6 )  until  the number


             FrcunE 2

this book will  give you suggestedshutter
speedsand stop openingsfor use with East-
man PanatomicX, Dupont Superior, Agfa
Finopan and Agfa Fine Grain Plenachrome
films.   lf , however,yours is an Az Model,
the built-in exposuremeter on your camera
will  do the judging for you  if you will
follow a simple rule or two.
  Your exposuremeter is designedto take
the guessworkout of selectingcorrect stop
opening and shutter speedfor any particular                                                             Frcunr 3
                                                               9
View original page 6Page 7 · Read text
40 is exposed as shown.  This tab is www.orphancameras.comalways                 of a second at f:4.J may be used. Your
set to  just expose the number nedrert that              meter also shows you that  if you wish you
of  the \Teston  rating  of the  film  you are             can use l/5o  of a second at f :6.3 or t/25  of.
using.  In this case, the number 40 given on              a second at f :9 and so on down the column.
the bridge is the n€arest number to 50, the              So just a few simple steps are necessary
spied of the frlm we are using.                               to use your exposure meter:
  Now  set the small arrow on the bridge               1-Set  the tab on the meter bridge to just (6)  as shown  in  Figure  2, assuming for                 uncover the number nearest to the speed    iF
our  little example that  it  is an average day                     of the film you are using.   If the speed
and setting the arrow  opposite "average."                     of your film  is below 12, push the tab
                                                                                                                                                                     ' all the way  to the bottom covering allHolding the camera as in Figure 3, point  it
toward the subject to be photographed and                 numbers.   If  the speed of  your  film  is
look through the exposure meter slot, You                 above 72,  set the  tab at 72 and take
will  notice six windows  of graduated density.                  your reading as usual, but close up your
Slide the entire meter bridge (6)  across to                 diaphragm one  full   "f"  stop from  the
your  left  until  the metal pointer  is directly                   reading given.
over  the  darkest window  through  which                2-Set  the arrow on the meter bridge oppo-
you can see any light  at  all. On  dull days                     site the lighting conditions.
the bridge will  necessarily be moved farther               3-Sight  through the meter at arm's length
to the left than on brighter days..                        and slide the  bridge  until  the  metal
                                                                 pcinter covers the last window  through   Let's assume that the second window from
the left was the last through which we were                 which you can see light.
able  to  see ^ny   light   at   all.   Slide  the             4-Read   the  selection of  exposures at the
                                                                top                                                                             of your                                                                      meter                                                                                               to                                                                                       the                                                                                 immediatepointer         directly               over this                      window                             and                                        notice                                                                                                                                         left         i*                                                                                 your                                                                      of  the                                                                 and                                                                                     set                                                                                    adjustments                                                                    bridge                            figures                                               tothat only         two columns                          of                              remain
the  left  of the bridge on top of  the meter.                   accordingly  for  correct exposure.
With  the meter  still  set for an "average"               As  is the case with   all exposure meters,                             &day, you  will   find  that  the stop opening              a  little  practice is  required.  Shoot your
f:4.J on the bridge is opposite the shutter                     first  roll  of  film  and keep notes on meter                                                                                                                 lspeed of 7/loo  of a second in the column                readings. Then after your film  is developed,                                                                                                                                                                                                                                                                                                              i
to the immediate left  of  the bridge. You             compare the results with  the meter reading                   i
know, then, that for correct exposure I/IOO             and you will  be able to tell how accurately

               10                                                    1 L
View original page 7Page 8 · Read text
www.orphancameras.com
you are reading your meter.  Since no two           PRACTICING  FOR PERFECT PICTURES
people read the meter  alike you may have                                                 You  are now ready  to  practice makingto  adjust  these  exposures  to  your  own                                                                pictures.  Do  this  first without  film  in  themethod of reading. The greatest.usefulness                                                  camera and repeat several times  until  theof a meter is in giving you an accurate in-                                                          operation becomes almost mechanical, beingterpretation  of  light  intensity.  After  oper-                                                         sure to remember after each picture  to ad-ating the meter a few times you will be able                                                    vance the film  by  turning  the filmwinding
to .do  it  easily and  accurately. You   will               knob.  Reference to loading instructions willfind its use a definite safeguard against over                                                          help you  in  this regard.or under exposed negatives.
                                                             Select the  subject which  you  wish   to
  FOCUSING  FOR SHABP PICTURES                "photograph" and compose your picture by
  Needle sharp pictures will  be yours  if'               looking  through  the view  finder  and  by
you take the extra moment's time to be sure            moving  closer or backing up as may be re-
your camera is accurately focused. Focusing              quired to secure the amount of subject mat-
is simplicity itself.  \7ith  the lens locked for                 ter  wanted, making  sure  that  the  vertical
carcying, a  short turn  allows  the  lens  to               lines are parallel to  the vertical edges of
snap into taking position for objects at dis-              your view  finder.   \ilfith  the camera held  in
tances from your camera of eighteen feet or               the conventional position   it makes a  hori-
more. Continue to turn the cameta lens and               zontal  picture.  'When you  wish  to  pho-
you will  feel  it snap out slightly farther and              tograph a subject which  will  appear better
lock.  This  "close-up" position of tbe lens                 in vertical pictures turn  the camera on end
is for focusing on objects from  six to eigh-            and.proceed as usual. After you have de-
teen feet from  the camera. Your Model A              termined the correct spot to stand in order
ot A2 camera, therf, has only these two  fo-                to secure the picture you  want,  focus the
cusing positions. \7hen  the lens barrel can            camera and select the proper  shutter speed
be rotated easily, it  is in the "infinity"  posi-            and stop opening.  Sight while  holding  the
tion for subjects at a distance of eighteen or            camera firmly  with  the elbows resting on
more feet from your camera. t07hen a fur-               the chest and  slowly  depress the  shutter
ther turn allows the lens to lock in  out or              release until  the shutter  is tripped.  Repeat
"close-up"  position,  your  camera  is ready                this  operation  often  enough   to  become
to shoot subjects betwien  six and eighteen             thoroughly familiar with  it.  After you havd
feet from your camera.                               mastered this stage of camera operation, you
                                 t 2                                             r3

    4rl:;i
View original page 8Page 9 · Read text
www.orphancameras.com

aie ready to load your camera and actually
mlke your first picture.

     TOADING YOUR CAMERA
  Your camera may be loaded with any one
of a variety of  thirty-five millimeter  films.
It  is suggestedthat you consult your dealer
for his recommendationsas to film for your
camera. Hold  the  camera with  the back
open as in Figure 4.  Pull  out thb rewind
knob  ( 19 ) and insert the film cartridge in
the camera with  the  lip and leader of the
film pointing toward you.
  \When         the film cartridge is properly set in
position the rewind knob  will  snap back                           Flcunr 4
into place easily. Do not attempt to force
it and if  it does not snap freely into posi-           soon as the full width of the film appears
tion turn   it backwards and forwards until            from the cartridge wind very slowly and
the slot in the shaft engages properly with              carefully untit the sprocket holes on each
the recessof the film cartridge.                        side of the film hrve just engagedin the
                                                   sprocket which is imrnediatelyin  front of   \7ith  the cartridge propeily placed, grasp
                                                     the lip of your film cartridge.the film leader and pull   it toward you un-
til you have withdiawn four or more inches            As sodn as the sprocket holes ate firmly
of  the film which  will  be sufficient to en-           engaged examine the camera carefully to
gage into  the winding  shaft slot. Enough          make sure the film  is  travelling straight
of the film leader may be extended through           and will not bind, and holding the 4l*  in
the slot to be folded over on the opposite             position with the forefingers,carefully clo'se
side. This will prevent its accLdentallypull-             the lid making sure that the pressufeplate
i.tg out  of  the slot a{ter the camera back             (29) on the inside of the lid holds the film
is closed.                                                   in its proper position. Snap the back of the
  Slowly take up the slack on the winding           camerashut, making sure that it  is tightly
shaft by  turning winding  knob   ( 8 ) .  As             locked. Now turn the camefawith the lens
                L4                                                  L '
View original page 9Page 10 · Read text
www.orphancameras.com
facing away from you and advance the wind-               sure not to pull  or strain the film  for addi-
ing knob in the direction of the arrow turn-                  tional  exposures.  After   the  counter  dial
ing  gently  until  resistance is  felt.  Do  not             shows  that you have taken the number  of
attempt to force  it past this point but with                pictures specified on your  roll  of  film,  the
the thumb  of  the  right  hand  depress the                 film  must be rewound.  Neuer .open  the
counter dial release (4)  and start turning              cctmerdbach xntil rewinding  is cornplete, for
the winding knob again.                                   the entire length  of  film must be rewound       L
  As soon as you have started winding  the                 into  the film  cartridge to prevent fogging.                       I
knob, allow the counter dial release to snap               Turn  rewind knob (19)  in the direction
back into place and continue winding  until                  of the arrow, continuing to turn  until count-
resistance is again met. Each time the film                er dial (2) ceasesto revolve. Your  film may
stops of  its own accord you have advanced              then be safely removed from the camera and
the  film  one  full  frame.  After  repeating             must be given  fine grain  development for
this  operation  twice  the  film   is properly              best results.  If  your  local photo  finisher
adjusted  for  making  your   first  exposure.             does not ofr.et a fine grain developing service,
Turn  the counter  dial  (2)  clockwise  until              you may  obtain   full  particulars  and  in-
the  "O"   is  opposite the  indicator on  the                structions for processing your own negatives
camera body. The camera counter dial  will              by writing  .A.rgus, Inc.
ncjw  automatically  register  the number  of
pictures you have taken.
    If  before  loading  the camera you  have
conscientiously  practiced  with   the empty
camera as described in the preceding pages
you can with  confidence expose a full   roll
of  film  with  reasonable certainty that you
will  have few  if ahy disappointing  pictures.
Remember to form  the habit  of  advancing
the film one  full  frame  immediately  after
making each exposure in  order  to prevent
double exposure.
  When  nearing the end of a  roll  of  film
carefully watch the counter dial (2) and be
                T6                                                   L 7

                                                                                                :dffi
View original page 10Related documents and language editions
From the M. Butkus archive. Original publisher and archive notices are retained.
Check the model and edition against your equipment.
PDF verified 2026-10-10.