Film cameras
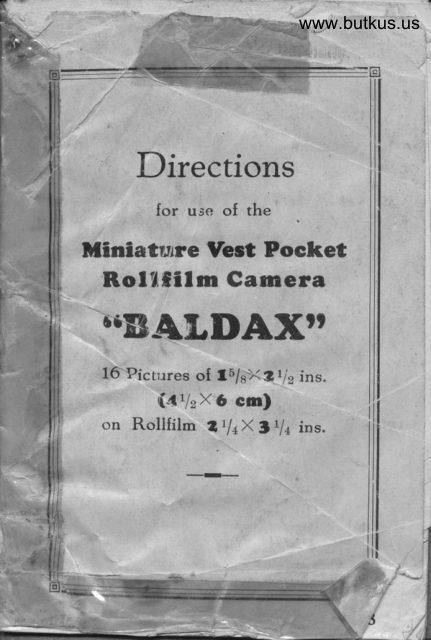
Balda Baldax User manual
User manual for Balda Baldax. 18 pages in English. Read the original PDF, download or print a copy without registration.
18 pagesEnglish4.3 MB PDF
Loading your manual…Open PDF directly
Document details
- Brand
- Balda
- Model / document
- Balda Baldax
- Document type
- User manual
- Language
- English
- Pages
- 18
- File size
- 4.3 MB
- Category
- Film cameras
- Document date
- Not specified in catalog
Search available document text
Find a term, then jump to its page in the original PDF. Image-only pages may not be searchable; check the PDF for exact wording and diagrams.
Page 3 · Read text
www.butkus.us
      --'<          -9o pplernent
            tod irectiono ior use of
  "BALDA]K" Rollfilm Camera with

  Preface.
     Whcrc the ffdax  is cquipped vzith Film.
   Ttansp,e..-t7he {ilm u,inding key is developed
   in(y,a{eial me,chanism. Here. a complete turn-ing
 -z{iltc windiqg }-goU to the ,ight arrj back agairi
   p!,til auto'r-tsil,jFelly stopped. brings the film into
  nhst-for tLc next exposure.  'S/hen takinS
   rnepohote- in                       succession the close vratchin!                  .q,uick   of tfie red vrindoy                       _on winding the film i,
   inconvenciencc and loss of time. 'Where the"",rrio!lighi
   is unfavourable, e. g. in the ther*-,4t is alto-
   '{ether          impoaar'blc.14 Jr--.rn the figures on the             rp.;.^-   {;[lrr.      -rrrm-"Iransport surmounts ali thece
              watchin! of the red or;"ioo.-ll   6':({r^lties. -   o{.rtt'y  ,o more! Th" winding of filrn i;               coot"olled by    ",,toi'rirtically              -""hroir_!
 -utfinctior,s for use.
     Wrer, rtlou..   tt. iijo,-,];;Tn the film into position, turn                                   succession                                  to  ;d"itJitti}1".".b  in quick                                                  rt.                                          "",;i  .titat d;i-":^;;.*l"i.t'n' b,{inning"p ofl watch)the waving                                                         iin
   --rl_.rrF
tu
View original page 3Page 4 · Read text
Venmo @mike-butkus-camera  Ph. 2083
PayPal Name  Lynn@butkus.org      www.PayPal.me/lynnbutkus
View original page 4
Page 6 · Read text
www.butkus.us7I
   I. Loading
   the camera
     Move the button (n in
   Fig,f ) bclow the carrying
   handle cideways and open
   thc hingcd back (seeFig.3).                         I


                                    Fig.3


                                       I. Pull out the film uzinding
                          key knob in the dircction
                           of thc arrow (eec-Fig. 4).
                     2.The spool - carricr may
                             then be moved from thc
                            take-up chamber.
                                  In the lourer film chamber
    FiE.4                      ie an empty reel: Insert
                                this reel into the upper
                             epool ea,rrier "fi".
     4
View original page 6Page 7 · Read text
www.butkus.us


3. Presc back the {ilm windind }ey knob vrhcrcby
  thc pin cngagca into the hole of thc rccl.
View original page 7Page 9 · Read text
ri

\f

       Fie.7

       5. Remove the band that Lolds thc red paper.
         pess the papcr over the two rollcrr, trofold
         thc end and thrcad it into the rcci olot ac
                              (aee Fig. Zl. Be careful that          far as it v.ill lo
         the paper dravrg straight.
      6. Give tvzo or thrcc turnc to tLe winding ley
        knob juet cnough to bind the papcr oo io thc
          reel and close the camera.
View original page 9Page 10 · Read text
a                                     www.butkus.us

         I l t,l*"11,i"";T[: :-'"-ilTil:i,f:ilH  I I               be done by alternate torward  I I         I I -.".                                                .'.                                                                        | |         | | ;n"J,n[I::t.tffi;,:*:":f,
        7. When the camera is securely shut, turn the
        winding key until the numb.r "l"  appears
          in the first (lov/er) of thc tvzo {ilm windows
          at the camera back.
       The film is now in position for the {irst
       exposure.
         A{ter the {irst exposure .ntind the {ilm until
     the number "ltt  appears in the eecond, upper
      windorv. A{ter this second exposure. uzind the                                   t     number "2"  into the {irst or low'er window,
      then into the upper vtittdow. and so on until
      at last the number "8"  has appeared in  the       ,I
      upper vzindovr.
         Nornr vrind up the remainder of the {ilm
     and the papcr-cover, open the camera-back. and
      remove the exposed film cartridge, while kcepin{
          it tightly rollcd up.
          Ingertion and removal of {ilm cartridge may
     be done in daylight.
         A{ter  each exposure turn   I n€w s€c-
      tion of {ilm  into poeition.  This preventg
     makind tvro pictures on the same section
      o{ {ilm.
View original page 10Page 11 · Read text
Fig. 8
t        II. Making the exposures
,l  Opening the front:
     A preesure on tlc button (a in Fig. f ) opens
     the front of the camera and erects the baseboard
      together q'ith the lens and shutter inetantly into
     proper working! position and at ..In{inityt' focus
      (see {ig. 8).
          To be obeerved !
       Whcn no film is in the cam€ra wc would
     rccommend to place a elip of paper across
       the openin E f.or the picture to prevcnt undue
       strain on mechaniem and springs 'whcn thc
      camera snaps into position.
View original page 11Page 12 · Read text
www.butkus.us
Finding the picture:
  A touch on tLe press eprinS (6 ;rr Fig. l)
opens the vievrfinder completely.
     If the camera is fitted with a Parallax
view{inder is has {irst to be set according to
distance o{ object.
   Hold the viewfinder close to thc cye and
yon vrill see e clear image on a reduced scale.

                                                                        . \ !';Diaphragm:
    Sct the Irisdiaphragfm to the corrett aperturc
etop number by moving the slide (g io Fig. t)
on the lovrer part of the ehutter.

Focussing:
   When thc bascboard ctruts cnap into position                                                ttlnfinityttthe camera is at once ready focused on
rxrith the front lens turned to the position marked
"@ ".  This is the correct setting for  distant
objects and landscapes.
     I{ the focus ic to be set on objects at closc
range the {ront lens is turned until thc indicatinS
mark is opposite to the figure repreeentinp the
distance in question. (See Fig. 9).

l0
View original page 12Page 14 · Read text
www.butkus.us
     Operating the shutter:
SNAPSHOTS (Instantaneous Expo"'"ts)
    Set the shutter to the Proper exposure speed,
e. €.rlzs sec. Press the trigger release (A in Fig. t).
Th.  t"igg"" release must be pushed slow'ly
to avoid iarring the camera. Each push sttape
the shutter once. if   it  is set on instantancous
 exPOSure.
TIME EX P OSURES
   Set the shutter to the mark "T" - Press the
cxposure lever (h in Fig. t). Thie opens the
chott.t. Time the exposure bv a watch' Again
press thc exposure lerrcr h. This closes the shutter'
BULB EXPO SURES                                        rrgtr.    Set thc ehutter to thc mark      Prees thc
cxposure lever h to open the shutter and releaee
it to clos" the shutter. This makes the exposure'
The ehutter w'ill remain oPen as long as the
 expoturc lcvcr is under Prcasure.
                                 ttBolbtt                     ttTi-"t'                                         exposure                       o"   Never make a
qrith the camera held in tbe hande. Prefcrablv
6crew the camera on to a tripod or placc it
 on a firm oupPort.
   Thime €xposures are cbiefly requircd for in-
 door subjecte or flashlight work. For short
 'ti-""    .*purrr"", of ten ,"cood, or less. "Bolbt'
 €xposurcs are recommended.

  ,r2
                                                                         r       --'-                                                -
                                      l
View original page 14Page 15 · Read text
I
                            I,
   the cam etai
ld the cam€ra ac illuetratid and prcss thc
    ctrutc on both gidco down with the
  The sell -erectingf mechaniem ic thus
  and the lcns eupport, togfether vrith the
d the shutter. vzithdraqrg automatically
        body. Prces down thc baseboard


              Fig.to
View original page 15Page 16 · Read text
\    www.butkus.us
     III. Taking out of Film
   After thc lact exposurc has been made wind up
the rcst of the {ilm. open the camera-bacL, arri
withdravr the film vrindinS key, thuo disengaging
the film carrier. Take out the film. and                                                    """,r""it vrith paete-paper agfainst unravelling. The cmpty
reel in thc lower film charnber is         aod                                 "emo.rcdplaced in the upp€r film chamber makingf room
Ior e neqr film.
  The exchangc of filmc 'may be d jT.  in
dav-light.                                      -.__-

                                                                                                                     Ut           k                                                                                                              G.

                                                       II--*....--
               ;F
View original page 16From the M. Butkus archive. Original publisher and archive notices are retained.
Check the model and edition against your equipment.
PDF verified 2026-10-10.