Film cameras
Balda Baldinette Rigona User manual
User manual for Balda Baldinette Rigona. 12 pages in English. Read the original PDF, download or print a copy without registration.
12 pagesEnglish0.6 MB PDF
Loading your manual…Open PDF directly
Document details
- Brand
- Balda
- Model / document
- Balda Baldinette Rigona
- Document type
- User manual
- Language
- English
- Pages
- 12
- File size
- 0.6 MB
- Category
- Film cameras
- Document date
- Not specified in catalog
Search available document text
Find a term, then jump to its page in the original PDF. Image-only pages may not be searchable; check the PDF for exact wording and diagrams.
Page 2 · Read text
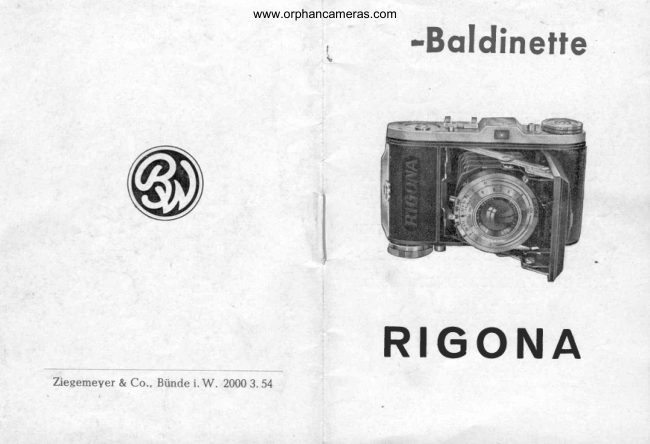
www.orphancameras.com -Bqldinette


           RIGONA
Zieeemeyer & Co., Btinde i. W. 20003.54
View original page 2Page 3 · Read text
www.orphancameras.com


BEFOREUSING THE CAMERA.
                                    Working  instrucfions for theIN ORDER TO AVOID  DIFFICUTTY
AND TROUBTE IN OPERATING THE    1                                      4  RIGONACAMERA DUE TO IMPROPERHAND.
IING PTEASECAREFUIIY READ THE               miniature camera
WORKING INSTRUCTIONS CONCER.       .:             35 mm.
NING THE VARIOUS FUNCTIONS OF                     FulI size
        THE CAMERA.
View original page 3Page 5 · Read text
www.orphancameras.com
Film  material                          PI,CTURE3
The RIGONA   takes regular 35 mm
cassette of  perforated  film  with  either
20 or 36 exposures.
Insertion  of film
Unlock the camera back by pressing the
Carnera Back Lock (1) in the direction of
the arrow. Open the camera back.
Pull out the Rewind Knob (B) and insert
a  film  cassette  so  that  the  emulsion
 (dull) side of the film faces the lens. The
hollow end of the film cassette must be
placed on  the side toward  the Rewind
Knob.  Gently  turn the Reurind Knob and
 press   it  in  until    it engages  in the  film
 lassette.  A  tapered  flap  of  the  film
 protrudes from the film cassette. Before
 inserting  the tapered flap  into  the  slot        (Should the dots not correspond pull out
 of  the Non  removable Film Spool  (17)         the Film Winding Knob (16) and the Film
 it is essential to ensure the Red Dot on the         Transport  Sprod<et (22) can be  freely
'Film      Transport Sprodret (22) corresponds         turned until the dots correspond. Push in
 with  the Red Dot  on the Camera BodY         the Film Winding Knob). The perforated
4
View original page 5
Page 6 · Read text
www.orphancameras.com
 border  of the Film Flap must toudr  the       Bringing  film  into ready  position
 disc on  the Non-removable  Film Spool        Turn  the  Film  Winding  Knob   until    it
 (Picture 3).                                                    stops. Press the Film Arresting Button (15).
                                            Take your  finger  off the Button.  Again Turn  the  Film Winding  Knob  (16) just                                                        turn the Film Winding Knob until  it stops. far enough so that the film is firmly held                                                 This brings unexposed film into position,' on the spool. TheFilmTransport Sprockets                                               ready  for the  first exposure. This proce- (22) must catch in the perforations  of the                                                dure winds  the unusable part of the film film.                                            on the spool. The Film Arresting Button
                                                    (15) is a safety devise which guarantees
 Close the camera back tightlY              P I C T U R E 4
 Attention
 The  plane  position  of  the  film  during
 picture  taking  is guaranteed by the Film
 Slide  Rails, the  double  Film  Transport
 Sprockets (22), tlne double sided Pressure
 Spring, and the Film Pressure Plate (20).
 A  loose  or  tight   {it of the cartridge in
 the lower  film chamber has no influence
 on  the  proper  position  of  the area of
  film being exposed.
 6
View original page 6Page 7 · Read text
www.orphancameras.com

that the film will  lie transported  properly
for the correct picture size. It'makes fast
picture change possible.  The RIGONA
is equipped with a picture control.
As long  as the Red Dot  (5) is  visible,
the camera is not ready.  Eadr time the
film  is wound,  the Red Dot disappears.
The Film Arresting  Button (15) also locks                                                  P I C T U R Ethe Body Release (6). The shutter cannot
be  released  until   the  Film  Artesting
Button has been pressed and the finger         Turn  the  Film  Counter  Dial  with  the
removed  from   it,   DO  NOT  FIOTD         thumb, pressing lightly,  until the number
YOUR  FINGER  ON  THIS  BUTTON.             ,,0"  is opposite  the pointer  (Picture 5).
                                          Each time  the  film  is transported one
Remember   -   eadr  time You wind  the          frame,  the  Film  Counter   will  advance
film, watch thatthe Rewind Knob (8)turns.        one number, thus automatically indicating
This  is the  signal that the  film  is trans-       how many exposures have been made.
porting  properly  from exposure to e{po-
suie.             .                                     Preparing  the camera  for picture  taking
                                    Opening  the cameraFilm counter
 After  the camera has been loaded, set        Press the Camera Opening  Button  (3).
the Fikn Counter (2) on the number  ,"0".       The Camera Base Board  will iump  out.
                                                                                   o
 I
View original page 7Page 8 · Read text
www.orphancameras.com
Watch that the Base Board  is locked in       EXAMPLE:   With  a camera-to-subject
the open position.                                   distance of  15ft, and a lens opening
                                                              of  f B, objects from  10ft  to  siightly
                                                    over  25ft will be sharp.  If lens ope-
Setting the eamera                                                    ning fi16 is used with the same (15ft)
Before a picture  is taken,  it is necessary             distance setting, objects from Bft to
to set the proper  distance on the front             co (infinity)  will be sharp.
lens (11) and to set the  Iris Stop to the
proper  opening  on  the  F - Scale  (I4).
A  rangefinder  will be helpful  in  deter-
mining the correct distance. The proper
shutter speed must also be set.                                   l
The numbers engraved on each side of
the diamond pointer of the lens collar can
be used with  the lens distance scale to                       I
indicate depth of field as follows: Focus
the lens in the usual manner so that the
camera-to-subject distance (infeet) is at the        The Shutter Speed'is set by turning the
diamond pointer. To the left and right of           ring surrounding  the shutter  (I2).
the pointer, opposite the numbers repre-
senting lens opening used, read the distan-       An Exposure Cluide or an Exposure Meter
ces of the nearest and  farthest objects            will be helpful  in obtaining exact expo-
that  will be satisfactorily  sharp.                 sure data.
10                                                               11
View original page 8Page 9 · Read text
www.orphancameras.com
Codr the shutter  codcing lever  (13). The
camera is now ready  for the exposure.
The     camera             lenses                   have                          a  two-point
Snap                                 If                       the  Iris                                         is  set on          ./-a      Shot setting.
the Red Dot and the Front Lens is set                                  \r'         )
on the Red Dot marked  ,,Close (NAH)"
or  ,,Infinity (FERN)" the depth of focus
will  be  perfect  for making  snap shots.


The exposure
Take  the  camera  in  both  hands  with
the viewer  openin g QI)  close  to  the
eye (Picture 6). Look through the optical
view-finder and select thej desired object.
Be sure that the camera is level in vour
hands.
Press the Body Release (6) gently  with                   P I C T U R E 6
the index finger of the left hand, without
shaking the camera.                             i1 2                                                               15
View original page 9
Page 10 · Read text
www.orphancameras.com
Give  special attention                 Foto flash pictures
Do  not  press the body  release unless        Any  kind  of Flash Gun can be used.
the shutter is cocked.  If you do so, the           Fix  the Flash Gun  to  the Camera and
medranism will be disturbed.                                               connect  the  Flash Gun  Cable  to  the
To avoid mishaps and blurred  pictures,        Camera Syndrronisation  Nipple   (  ).
hold  the camera firmly  and press the
body release gently and smqothly when
making an exposure.

Time exposures
When making time exposures, use a tripod
or place the camera on a table or other
solid surface.
For time exposures set the shutter on ,,B".
Press the Bodv.Release and hold  it down
for the desired length  of time. To close
the shutter, remove  the  finger from the
Body Release. The  shutter  will  remain
open as long as the Body Release is held
down. For time exposures of great length,
a cable release with  a  set screw  lock
will be  of great help.
14
View original page 10
Page 11 · Read text
www.orphancameras.com
Closing the camera                   Give special attention
Take the camera in both hands and press         Completion  to rewind  the  film.
down the Spread Open Brackets (10) with         To  rewind  the  film,  pull  out  the  Film
both  thumbs. Now   close  the  camera         winding knob.  After the film is rewound
bottom.                                                    in  the film cassette the red dot  of the
                                                              film Transport  Sprocket must be on the
Rewinding  the film                     same level with the red dot on the camera-
After  the film  with 20 or 36 exposures         body. Now pushin the film Winding Knob.
has been completely exposed (see film        Watch that you have the same red dot
counter),   it must be rewound  in the film           position when  you actuate the Double
cassette. This  is necessary because the         Exposure  Prevention  mechanism  and
upper spool in the camera is not remo-          Shutter Release without  a film inserted.
vable.  To rewind  the  film,  pull  out the
Film  Winding  Knob  (16) and turn  the          This camera  is  a precision  instrument.
Rewind Knob (B) in thd  direction  of the          Protect it from dust, moisture, and exces-
arrow  until  the  film  is entirely rewound.           sive heat. An  eveready  case will be a
You  will know when  the  film has been                                                                                                                 '         great help.
completely  rewound  by  the  difference
in the sound and the lessened resistance     EXPOSURETABTEto turning.                                           The Exposure Table  gives  the  amateur
Now open the bad< of the camera and         photographer-correctly,the opportunity  to expose
remove the cassette. Protect the cassette          bicturds           and obtain  excellent
from  direct  sunlight.                                iregatives and piints.
16                                                                                1 7
View original page 11Page 12 · Read text
www.orphancameras.com
The Exposure  Table  is  calculated  for                   If a snap  is takbn  of a group  in the
normal, everyday settings such as Woods,         open at noon in May on a cloudy day,
Under Trees, In Narrow  Streets, Lands-               tlie Exposure Table shows a spded of
capes, Mountains, or Groups in the Open,           th6sth on aperture  f5.6.   If  this  group
etc.                                                              is moving, and the 1/16th of a second
This Table  is based on an aperture of              is  not  considered  sufficient. and the
f5.6 with  a  film  speed of 28 Scheiner          1/g00this desired, one should count the
(24 Weston, 1711,0Din). All settings have         number  of  sets  of  figures from  the
two exposure times, one on the upper             l/rooth speed to the  lirnoth. In this in-
square, and one on the lower square. The           stance, it  is two, and the same number
upper exposure time  is for bright hours          should be moved correspondingly on
around noon (approx. 10 a. m. to 2 p. m.)           the  aperture  scale on  the Exposure
The lower exposure time is for the earlier           Table, in ihis instance, f 3.5, thus giving
or later hours  (before 10 a. m.  or after           1/36sthof a second at f3.5.
2 p. m.)                                                         Alternatively,     if one requires a big range
At  the end  of the Table  are exposure          of  depth  they  would  presumably  use
times from 30 seconds to 1/56othseconds         apertule  f 16. Here again, the number is
(the figures  after the  letter  "'B" mean        two  figures along from  the  set scale of
seconds) Beneath the exposure times is          f5.6, and the speed  should be moved
a scale of  all usual stops-from 12 to f22.         accordingly  to  t/roth.
Should  it be desired to use another aper-
ture, the necessary adjustment can be         5oosf';lo['   uo ,u lo 5 21 B2BbB1oBrb830
made by using the Exposure Table in the
following  manner:  (Adjustments should                        2 2,9 3,5 4 5,6 8 11 16 22                                                                                              t_il       1be made with reference to the scales at
the foot of the Exposure table).
1 8                                                          19
View original page 12
From the M. Butkus archive. Original publisher and archive notices are retained.
Check the model and edition against your equipment.
PDF verified 2026-10-10.