Film cameras
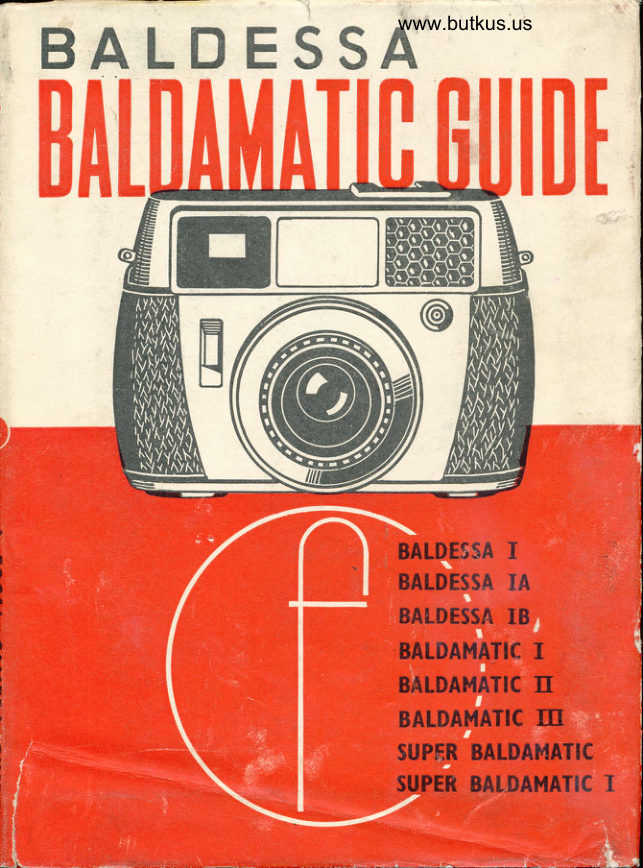
Balda Bladessa Guide Reference guide
Reference guide for Balda Bladessa Guide. 92 pages in English. Read the original PDF, download or print a copy without registration.
92 pagesEnglish8.3 MB PDF
Loading your manual…Open PDF directly
Document details
- Brand
- Balda
- Model / document
- Balda Bladessa Guide
- Document type
- Reference guide
- Language
- English
- Pages
- 92
- File size
- 8.3 MB
- Category
- Film cameras
- Document date
- Not specified in catalog
Search available document text
Find a term, then jump to its page in the original PDF. Image-only pages may not be searchable; check the PDF for exact wording and diagrams.
Page 3 · Read text
"1qs|.w:I.FF
                               www.butkus.us

            The Green Section between pages 16 and l7        Page


 THE BALDAMATIC AND BALDESSA: MODEL BY MODEL
The Buldtmatic Prontormut and I   ...
  Loading 2 - Unloading 4 - Shooting 4 - Special Controls 6
The Baklomatic II,III, and Prontormat II
                                                                                                   f 0 - Special Controls  Loading l0 - Unloading l0 - Shooting   I2
The Super Bsldamatic and Super Baldsmatic I            '  '  '                l4
  Loading 14 -  Unloading f4 -  Shooting 16 -  Special  Controls l7

The Baldessa  I, Ia, and lb...                                          l8
  Loading f8 - Unloading 18 - Shooting 22 - The Baldessa  Ib Exposure Meter 22
The Bsldamatic III Lens System                                   24
  Lens changing 24


Some iterns of equipment or certoin moterials mentioned  in this book mdy not be freely
avoilable in every country, tmport ond morketing  conditions  vary widely, and ore outside
the control of the photogrophic retoiler.


         @ Focal Press Ltd., 1961
 Printed in Great Britain by Keliher, Hudson and Kearns, Hatfields, London, S.E.l.
View original page 3Page 4 · Read text
THE BALDAMATIC-BALDESSA SERIES
  The Baldamatic and Baldessa cameras are a range of
 miniature models of the same basic body design, with
 features to make this a series of universal, dependable,
 easy-to-handle instruments of modern conception. The
 negative size is about 1 x lf  in. (24 x36 mm.), using
 standard perforated 35 mm. film. A single load in a
 standard cassette will take up to 36 exposures. The film
 can be loaded and unloaded in daylight.
  The body is a precision light-weight die-casting covered
with a special imitationleather  fabric. The interior is black
 anodised, the outside metal parts are satin chrome finished.
 Eyelets are provided for fitting a neck strap.
  The various Baldamatic and Baldessa models are dis-
tinguished by different built-in features such as exposure
meters and coupled rangefinders, by different types of
shutters and lenses, and by different degrees of automatic
operation.
  The dimensions of the Baldessa, as well as Baldamatic
Prontormat and Baldamatic f, are al {ft x2[ in.; the
weight is 201 oz. (model l, 16+ oz.). The other Baldamatic
and Super Baldamatic cameras are f-in. higher (af x 3$ x
2| in.) and weigh 22L, oz.
  Lens and shutter are rigidly fixed in a metal tube, which
is connected to the main body, except in Baldamatic  III,
which has an interchangeable lens mount. This does away
with opening or closing of the camera.
  The camera is fitted with a folding quick-wind transport
key on the left-hand corner of the base of the instrument,
which, with one half-turn, transports the film, advances the
film counter and simultaneously tensions the shutter.
 An interlock mechanism automatically prevents double
exposures or blank frames. A large, conveniently placed,
body release key facilitates smooth, shake-free releasing.
An accessory shoe is mounted on the top.
  The automatic film counter is in the base plate and geared
to the film transport key, showing the number of exposures
View original page 4Page 7 · Read text
w

               still remaining on the film. A film indicator is let into the
          base plate around the tripod bush, which is centrally below
           the lens. A depth of field indicator is fitted.                                    r*
           The camera back is removable: the film is advanced by a
          double sprocket on to a permanently fixed take-up spool.
        The film is held in position by a pressure plate in such a
        way that only the section outside the picture area touches
           either the pressure plate or the glide rails on the film
           aperture, thus avoiding any scratching of the film.
          Rewinding the film is simplified by a folding crank.
         Turning the reversing lever from the T (transport) to
      R (rewind) position automatically swings the rewind crank
          into position.
         The original Baldessa I is fitted with an optical direct
          vision viewfinder and the lens is focused by rotating the
      *                 pl     front cell.
         The viewfinder of all other Baldamatic and Baldessa      $:          cameras incorporates a bright-line frame, which is projected
            into the image area, showing a margin of the subject outside
          the picture field for easy observation.
       A special feature of this finder is its full parallax com-
          pensation, as the line frame on most models is coupled to
          the distance setting. The result is that at any distance, the
        r           correct image is seen without any parallax error.         s.             &.,          The Baldamatic and Baldessa (except Baldessa I, Balda-
       "!.                  &I:    matic Prontormat and Super Baldamatic) models have a
            built-in rangefinder combined in one eyepiece with the view-
            finder, and coupled to the lens. A photo-electric exposure
         meter is built into all Baldamatic and also into Baldessa
          Ib cameras.
       L
     F
         &'    Baldamatic and Baldessa Evolation
        f           The {irst Baldessa appeared in 1957,without rangefinder or exposure
      3     meter. An improved model in 1958 shows some rearrangement of the
             controls. In 1958 the Baldessa Ia appeared with a built-in rangefinder,
            followed in the same year by the Baldessa Ib, which had in addition a
             built-in photo-electric exposure meter.
           The Baldamatic,  first introduced in 1958, is of similar design to the
            Baldessa Ib, but with the exposure meter coupled to the aperture and
                                       6
View original page 7Page 8 · Read text
www.butkus.us

shutter controls. This model was re-nafiied Baldamatic  I in 1960 to
distinguish it from the other Baldamatic models, which were then
introduced.---iF      Baldamatic Prontormat (1960) has the exposure meter.coupled
to a scale-less shutter and aperture and has no rangefinder. This model
wal followed by the Baldamatic  II Prontormat,.a similar design jlo the
model I, but with built-in rangefinder. A second version of the Balda-
matic If has a Prontor SLK ihutter on which individual speeds and
apertures may be set. The aperture in use is visible in the viewfinder. 'The      Baldamatic  lII. also introduced in 1960, is a Baldamatic  lI with
individual speed and aperture settings and interchangeable.lenses..
  The Supei Baldamatic (1960) has no rangefinder, but a built-in photo-
electric eipot.t.e meter,'whiih  is coupled .to the shuttel speed andaperture aird can be set for fully automatic operation. Pressing the
sfiuttei release then selects the coirect aperture, which also appears in
the viewfinder.
  The Super Baldamatic  I (1960) is a Super Baldamatic with a coupled
rangefinder.
View original page 8
Page 9 · Read text
HANDTING THE BATDAMATIC AND
            BALDESSA
   In- order to simphfy the description and handling of the _
Baldamatic and Baldessa models without betng con/usbd by
dffirent .features oJ' individual models, this gLide "has been
diyiled into a general section which applies- to all models,
while the                    and consequently dffirent handling of         -requirements
eoch model are found on the green pages.
  For convenience, a symbolic reference system is also used in the
general section. Wherever the sign !  appears, further details will befgund.in the c-aqryrq pages of the green section for each camera type.
The sign !  similarly refers to lens details in the green section. Theappropriate pages are marked accordingly in the bottom left- or
right-hand corner.
Holding
   It is obvious that the camera should be held as steadv as
possible, as the slightest shake, even if not seen in'the
negative, will become visible in the enlargement. Always
stand with your legs apart.
 FOR HORIZONTAL PHOTOGRAPHS hold the
camera horizontally against your nose while looking
through the finder with one eye. Keep both elbows close to
the body. Press the right thumb against the back of the
camera, let the right index finger rest on the release, while
the right middle finger, bent downwards, presses against the
camera front. The left hand grips the camera body on its
left side.
 FOR VERTICAL PHOTOGRAPHS rest the camera
uprjsht against forehead and nose, gripping the camera top
with the right hand, right thumb against the camera back-.
The left hand holds the camera from below, left thumb on
the release, the camera resting in the palm of the left hand.
  To release the shutter, press the release with the ball of
the finger (or thumb). Use finger pressure only and keep
the hand and its grip on the camera steady. The actual
pressing down must be done slowly and smoothly. The
slower the exposure time, the smoother must be the release.
View original page 9Page 10 · Read text
www.butkus.us

                                            HOLD! NG


                                                                  Press the camera firmly
                                                                   against your  forehead,


   Right: The hold for  vertical
   pictures is very similar, with
    just a slight change in the
    grip  of the  right  hand, to
   provide better camera sup-
    port from below.
                                                             and stand with your feet
                                                                                 slightly apart.


    Eelow: To keep the camera steady during the exposure,
   support your body whenever possible against some-
   thing solid (for example, a tree) or prop up your
   elbows against your knees or other support. Use a
   cable release for time exposures from a tripod. The
    release screws into the socket below the release key;
  on sorne of the earliest Baldessa models the cable
    release socket is on top of the camera (right).
jff
View original page 10Page 11 · Read text
For series of photographs in quick succession, keep thumb
and index finger of the left hand on the quick winding key
and support the camera when releasing by holding the key
steady. This enables you to wind on without loss of time,
immediately after release. With some practice, up to 3
exposures per second can be obtained.
  For slow exposures in the hand it is advisable to rest the
elbows or at least to lean the body against some support
in order to avoid shake. In this way lll5, l/8 and even l/4
sec. can be risked without camera shake. Such a support is
also desirable for faster exposures. A slightly unsteady hold
may easily lead to blurred pictures.
  The use of a tripod is necessary when taking time exposures
and it is also recommended for speeds from l/15 to I sec.
For upright photographs from the tripod, use a ball-and-
socket head to allow changing from horizontal to vertical
position.

Carrying
  To be ready for quick action it is best to carry the camera
on a short strap around the neck so that it lies on your
chest. Lifting it up to the eye then is a matter of a split
second.
  For convenience and protection, the camera should
always be carried in its ever-ready case. The case is designed
to hold the camera ready for use. A retaining screw holds
the camera securely in the case, even when open.

Viewing and. Focusing
  The viewfinder of the Baldamatic and Baldessa (except
the earliest Baldessa I) shows the subject in almost natural
size. Looking through the finder, you can clearly see the
brilliant reflected frame which outlines the exact field of
view of the lens.
  However, the area just outside this field of view is also
visible. You can thus watch the immediate surroundings of
the subject to be taken.
                            10
View original page 11Page 12 · Read text
www.butkus.us
                          VIEWING AND FOCUSING


Most Baldamatic and Baldessa models have a
built-in  rangefinder coupled with  the  focusing
mov€ment of the lens. The central measuring field
of the rangefinder (the  bright  circle) shows a
double image as long as the lens is incorrectly
focused. To  set the  lens correctly,  turn  the
focusing mount until the two images in the range-
finder fuse into one. This at the same time adjusts
the  lens automatically  to  the  correct  subiect
d istance.


                                                                                35t "                                                                                         50t"'
                                                                              135"'
View original page 12Page 13 · Read text
The finder of most models has automatic parallax com-
    pensation. The white frame is coupled to- the distance
     setting and moves downwards (when the camera is held
    horizontally) at nearer distances.
     The Baldamatic III with interchangeable lenses shows
    also the field of view of the wide-angle and telephoto lenses
    !y _means of additional reflected image framei within the    finder field.
,     The viewfinder of the original Baldessa I is of the direct vision type:   and should be held close to -the eye.-theDo not attempt to turn the camera'    !o the right or left, away from     eye, nor muit the eye be moved
    from the centre of the eyepiece to find the limitation oi the field oi'    view. This "spying round the corner" is deceptive. as only that section
     seen in the finder with the eye close to and in-the centre oi the eyepiece
     will appear on the negative. The field of view given is exact ror pfioto-
    graphs taken. at 9 to 12 ft. distance. At infinity a trifle more appears
    on the negative than is seen through the findir, and at 3* to'6'ft. a
    shade less. To avoid parallax at w-orking disrances of 6 fi. and less,
    discount about one-tenth of the top of the image (the same amount
    appears additionally below). yith ilre camera hdld'horizontattl,.  fti
    corresponding-amount  should be discounted on the long side'of the
     picture alvpy fr94 the lens (the same amount appears aiditional on
    the lens side) with the camera held vertically.
fi    To obtain a sharp negative, set the distanoe from the
   camera to the subject as accurately as possible. On Balda-
   matic and Baldessa models without 6uilt-in ransefinder.                                                               "or    estimate or measure it with a separate rangefinder    othei
"   aid. On these mg_de,ls, the distance is sei by turning the
    focusing ring. u-ntil the_required distance figuie is opplsite
   the distance index mark.
   On the models with coupled rangefinder, the latter
   measures the distance and at the same time brings the
   camera lens automatically into correct focus. To uie the
   fngefinder, look-through the combined viewfinder/range-
   lqder eyepiece. You will see a bright circular field,'and-in
    this field the image of the subject appears double. On slowly
   turning the lens focusing mount, the two images will fusi:
    into one. Stop when the two images are superimposed;-       the    lens is then focused accurately on the subject.
                                 t2
View original page 13Page 14 · Read text
www.butkus.us

   The orthodox way of rangefinder focusing just described
 is suitable for stationary or very slow-moving subjects. For
 action subjects a different method of focusing is suggested.
 There you set the camera and the rangefinder to a distance
 at which the subject will be at a given moment, or focus on a
 spot which the subject has to pass. Watch the scene in the
 rangefinder, and press the release button when the two
 rangefinder images coincide, indicating that the subject has
 reached the pre-focused point.
                                     self-consciously (e.g.   - )Iith. subjects liable to react children), set the lens to a suitable distance an-d then
 approach your subject quickly, exposing as soon as the two
 images coincide in the rangefinder.
   Alternatively, focus on some object which is the same
 distance from the camera as your real subject, but in a
 different direction. When the range is found, swing the
 camera round and press the release button as soon as your
 subject comes into the field of view.
   See also p. 50 for quick shooting with zone focusing.

 Shooting
   Practise the following operations first with an empty
camera until you can do them practically automatically.
 1. Work the film transport. This advances the film counter
   and tensions the shutter.
2. S9t th9 exposure. Adjust the shutter for the right amount
   of light for the subject conditions (p. 4l). On cameras'  with built-in photo-electric exposure meier, the meter
   indicates the setting required oi even (on the automatic
   models) sets the controls.
3. Select the aperture-speed combination you want to use;
   smaller aperture for greater depth of field (p.49) or faster
I  automaticspeed to arrestmodels.movement (p. 63). This is nbt required on
4. Focus and determine the picture area to obtain a sharp
   picture and the view you want.
5. Release the shutter gently.
                              l3
View original page 14Page 15 · Read text
TOADING AND I.INLOADING
   The Baldamatic and Baldessa models use standard per-
  forated 35 mm. film. It is available in various packings
  (see also p. 19), the most convenient being standard day-
  light cassettes. These are light-tight containers with a ready
  cut and trimmed length of film for 36 or 20 exposures and
  are loaded into the camera in daylight.
   Avoid loading or unloading the camera in brilliant sun-
  light, though. Choose a shady spot or do it in the shadow of
  your own body if nothing better is available.

  Loading
  1. Open the camera back. Simultaneously press down the
    two locking catch buttons on the side of the camera. The
    camera back will swing open and can be lifted away.
  2. Insert the film cassette. Insert the recessed hollow end of
    the cassette with film over the spindle in the cassette
    chamber, with the protruding film end pointing towards
     the take-up spool. The cassette will drop easily into the
    chamber.
  3. Fix the film end to the take-up spool. Pull out about 4 in.
     of film until the first perforation on the lower part of the
     film protrudes from the cassette. Turn the take-up spool
    by its serrated flange until the slot is facing you and insert
   '  the film end into the slot with the perforation hooked
     over the tooth just inside the slot.
      Turn the take-up spool by its serrated flange until the
     fllm is just taut and its top perforation engages in the
     sprocket wheel.
  4. Close the camera back. Insert the lip of the camera back
    into the recess of the camera body and press the back
     against the camera body, when it will click shut.
  5. Set the film counter. Lift up the winding key in the
    camera base and turn the serrated wheel protruding on
.    the edge of the camera back in a clockwise direction until
    the letter A appears in the cut-out.
     When a fllm with only 20 exposures is inserted, set the
                              l4
View original page 15Page 16 · Read text
www.butkus.us

                                         LOADING


                                                                                                              Digitally signed by Mike Butkus

                                                                                                 manuals, ou=butkus.org,                   Mike Butkus  DN:cameraemail=mike@butkus.org,cn=Mike Butkus, o=Butkus                                                                                                 c=US
                                                                                                 Date: 2020.10.18 15:37:07 -04'00'


Top left: Open the camera back.
Top centre: Insert the film cassette into the cassette chamber
Top right: Fix the film to the take-up spool.
Centre /eft: Tighten the film on the take-up spoot.
Centre: Close the camera back.
Centre right: Set the film counter to A.
Eottom /eft: Advance the film and release the shutter twice.
Bottom right: Set the film indicator.
View original page 16Page 17 · Read text
film counter to No. 22. The film counter indicates the
     number of exposures still to be taken.
   6. Make two blind exposures. Now wind the film transport
      !9y, release the shutter, and wind the key again. The       film counter will now indicate No. 36 (or 20), showing
       the first film frame is ready to be exposed. While winding
      the key, observe that the centre of the rewind handle-,
     which is marked with a red cross line, rotates. This
$     indicates that the film advances correctly from the cassette
      to the take-up spool.
   7. Set the film indicator by turning with two finders the fine
       serrated ring around the tripod bush in the centre of the
     camera base until the type of the film inserted is visible in
      the cut-out. This has no effect on the handling or working
      of the camera, but enables you to refer to it at any later
      date, to remind you of the film type in the camera. On
     models with built-in photo-electric exposure meter, set
      the film speed for the meter as well.
   Unloading
    When the whole film has been exposed, the fiIm counter
   will indicate No. 1. If you didn't set the film counter, the
   fact that you cannot wind the winding key any further
   indicates that all the film has been used up. If the key stops
   half-way, this has no ill-effect, and the key can be returned
   to the correct position as soon as the rewind crank has been
   opened up (see below). Do not force the winder if you feel
  a resistance, otherwise you will tear the film ouf of the
   cassette.
   1. Set for rewinding. This disengages the transport sprocket
       in the camera. Push the reversing lever (which at the same
      time acts as counterpoise to permit the camera to stand
     on a horizontal base) below the front of the camera, from
     the position T (transport) to R (rewind). This dis-
   -  gngages the rewind crank, which can now be lifted up.   2. Rewind the film. Turn the rewind crank in the direction
     of the arrow engraved on it until you eventually feel a
      resistance as you come to the film end hooked on the
   Continued on page 17 after the green section.
                                t6
View original page 17Page 18 · Read text
www.butkus.us
       I      TI{E BATDAMATIC AND BALDESSA:
I         MODEL BY MODEL

          These green pages deal with the individual Baldamatic and
         Baldessa cameros in detail.
        - Sglf-contqineyl sections .for each model cover points of         loading, unloading, shooting, and specifc controls.
         For a fuller explanation of aspects common to all Balda-
        matic and Baldesso cameras, compare these sections w-ith the
       main text under the ,same heatlings.


        The Baldamatic Prontormat and r  The super Baldamatic and Super
       Loading          2     Baldtmatic I
                                                                                  14
    shootingUnloading                                                                            i2                       4;                    ,1j8lxu-lEgite             Special             Controls                       6     Special                                       eontrols         17
                                     The Baldessa I, fa and Ib        The Baldamatic II, III and        Loading                  18           Prontormat II              Unloading               t8
           Loading                t0   Shooting              22
          Unloading              tn    The Baldessa Ib Exposure
                                                                     22           Shooting                       ;:ru  The BaldamaticMeter   III Lens System             Special Controls       12    Lens Changing        24
View original page 18Page 19 · Read text
.THE BATDAMATIC PRONTORMAT
      AND BATDAMATIC T
  These models have a bright-frame viewfinder showing the image in
natural size. A release key is fitted to the camera front with a cable
release socket underneath. A depth of field indicator around the
lens mount (which is calibrated both in feet and metres) shows the
extent ofdepth offield for any aperture and distauce set on the camera.
A photo-electric exposure meter is built into the camera top and
coupled to the shutter setting, the meter control window is in the top
of the camera.
 THE BALDAMATIC PRONTORMAT  is fitted with a lf   in.
(45 mm.) Color Baldanar f 2.8 lens, a three-element triplet. The frontcell focusing mount focuses down to 3.3 ft. The shutter is a scaleless
Prontormat and is "X" synchronized for flash. The exposure meter is
coupled with this shutter. Lining up the setting marker with the meter
needle position selects an aperture-speed combination according to the
available light, but does not offer a choice of combinations. The
selection is continuous from 1/30 sec. at f 2.8 to l/300 sec. at f 22,apertures and speeds being interlaced. The aperture combination  is
not indicated and there is no shutter speed oi aperture scale (except
for flash). Time exposures can only be made at f 22. The camera hasno rangefinder. The brighrline frame finder has a parallax indication
line for close-ups.
 THE BALDAMATIC I is fitted with a li  in. (45 mm.) Xenar or
Westanar /2.8. This is a four-element triplet design with cementedrear element, in a front cell focusing mount which focuses down to
3.3 ft. The shutter is a Synchro-Compur  or Prontor SLK (on earlier
models). The Synchro-Compur has speeds from I sec. to 1/500 sec.
(Prontor SLK to 1/300 sec.) and B, an exposure value scale, XM-
synchronization  for flash bulbs and electronic flash at all speeds. and
a delayed-action release. The built-in photo-electric exposure meter is
coupled to the shutter speed and aperture setting. The bright{ine
linder has automatic parallax compensation. A rangefinder is built-in
and coupled to the lens setting.
 BOTH MODELS accept 40.5 mm. screw-in filters and lens hood.
 FOR CLOSE-UP WORK from 39 to 12 in. close-up lenses are
available, and for Baldamatic  I also the Proximeter which permits use
of the built-in rangefinder for close-up work.
Loading
 l. Open the camera back.
2. Insert the film cassette.
3. Fix the film end to the take-up spool.
4. Close the camera back.
5. Set the film counter,
I  2 BALDA]TIATIC   I
View original page 19Page 21 · Read text
6. Make two blind exposures.
 7. Set the film indicator.
 8. Set film sped on the exposure meter of Baldamatic Prontormat by
   depressing the small milled stud on the base of the shutter rim and
   turning it until the arrowhead on this rim points to the appropriate
   film speed. There are two scales, calibrated in ASA anii in DIN.
  On the Baldamatic I, turn the disc on top of the exposure meter
  window by one of the two red studs on it until the required film
   speed appears in the cut-out window for ASA or DIN speeds.
 Unloading
 l. Set for rewinding.
 2. Rewind the film.
 3. Open the camera back.
 4. Remove the cassette.
 Shooting
 l. Work the film transport key.
2'S.t th" exposure. On the Baldamqtic Prontormat, turn the large
   milled ring of the shutter rim so that the symbol of the sun between  two yellow lines is on top, opposite the black diamond (f) mark.
   Poini the camera at the subiect without obstructing the honeycomb
  window of the meter cell. Turn the milled shutter rim until the red
   setting pointer in the cut-out meter window in the camera top is in
   line *ith the white meter needle. If the white needle disappears
  behind the black mask at one of the ends of the window, the light
   available is inadequate to take the photograph.
   ON THE BALDAMATIC I pre-set a suitable shutter speed, e.g.
   1/60 sec. for all general outdoor work. Turn the two black serrated
  keys on the shutter rim until the required shutter speed is opposite the
   black line on the lens mount barrel. The black figures on the shutter
  speed ring indicate fractions of seconds 1:1 sec.; 2:l  sec.;4:
  * sec.;60:1/60 sec.: 125:1/125 sec., etc. (For green figures, see
  under Special Controls.)
   Now take the exposure reading: point the camera at the subject,
  keeping your fingers clear of the honeycomb window of the meter
   cell. Press the two black keys on the shutter rim backwards towards
  the camera body and turn them to the right or left, until the red
   setting pointer (in the cut-out window) covers the thin white needle
  of the exposure meter. Look straight down on to the pointers.
   As you superimpose the two pointers, the correct aperture figure
  automatically moves opposite the set shutter speed (against the
  triangular -e. mark). The exposure is now correctly  set.
    The black masks in the corners of the meter window indicate the
  measuring limits. If the white exposure meter needle is behind these
  marks, the light is too strong or too weak for the measuring range
  of the meter. You may, however, still be able to make an exposure
  at a longer or shorter shutter speed than originally selected.
.  4 BALDAMATIC  I
View original page 21Page 22 · Read text
www.butkus.us

                              THE BALDAMATIC  I


                                            Meter window

                                                      Film speeds

                                                Focusing mount
                                                       Release
                                                   Rangefinder

                                   DOF indicator
                                                         Flash socket

                                               Aperture and
                                              speed scales
                                                 Reversing lever

                                             Rewind crank
 www.butkus.us
                                               Transport key

                                               XM-lever
                                                     Film counter


The flm speed setting is on the top of the exposure  rneter cell, next to the window for the meter
needle. The setting marker is linked with the aperture control. The releose key incorporates a cable
release socket. The rongefinder is combined with the viewfinder and coupled to the focusing hov€-
ment. The focusing scale is calibrated  in feet and metres, and carries a focusing knob. The automatic
de1th of field indicotor is coupled to the aperture scale and shows the sharp zone at any setting. The
operture ond shutter speed scoles are cross-coupled, the linking can be disengaged  for setting different
exposure levels. The reyersing lever uncouples the film transport and at the same time releases the
rewind cronk. Half a turn of the tronsport key advances the film and tensions the shutter, and also
advances the flm  counter in the camera base.
The above details refer to the Baldamatic  I with Synchro-Compur  shutter. An alternative model,
with Prontor SLK shutter, differs only in the arrangement  of the scales on the lens.
                        ffiKiifrffi$,l*                                                                      film and tension the shutter with theShooting with the Baldamatic l. From left to right: Advance the
transport key; pre-select a suitable shutter speed; press down the black key on the aperture ring
and move the latter to superimpose the setting marker with the meter needle; view and focus the
subject through the rangefinder; release.
 B*                                        BALDAMATICI5I
View original page 22Page 23 · Read text
3. The aperture-speed combination is automatically  selected. by the
  shuttei on the baldamatic Prontormat. No alternative combination
   is possible. On the Baldamatic  I you can change the aperture or the
   shirtter speed, by turning the shutter speed ring by the two black
  keys, withour'pr6ssing thEm backwards, until the aperture or speed
  reduired is opfosite t[e black mark; the exposure will remain correct.
4. Focus and determine the picture area. On the Baldamatic Prontormat,
  turn the front lens mount to bring the required distance figure-
  corresponding to the subject distance-opposite the black diamond
  mark (O) on the lens mount rim.
   ON fHe SaLDAMATIC   I look through the viewfinder and watch
  thelmage,especiallyin  the bright centre circle- Turn the focuqng knob
  on the irdnt rim of the lens to make the double outlines in the centre
   circle fuse into one. The camera is now set to the correct distance.
   The subiect field reproduced on the film is that outlined by the
   brieht-line frame in tlie viewfinder. The two red index lines behind
  thidistaoce scale point to the beginning and end of the depth of
   field zone for the aperture  set.
5. Release the shutter genflY.

Special Controls
 FOR FLASH SHOTS with the Baldamatic Prontormat, turn the
main shutter ring until the red aperture scale on the shutter ring
imarked with a fllsh symbol) is ontop. The shutter now remains set
io it:O sec. (for shots *ith flash bulbs or electronic flash), and you can
iit i"AiuiOuil apertures as required. For this pulpose, simply turn the
main iettl"g ririg until the appropriate aperture_ figure is opposite the
             iust 5elow the finbbr *indow.-No other setting is required.
"-iio*tr"iOOn the Iialdamatic I, set the lever on the side of the shutter to X
        X- or M-sYnchronization.  M foror-          EXPOSURES with the Baldamatic Prontormat turn      TIME  FOR
thJ laree shutter setting ring until the letter B is opposite the black
Aia-on? mark (O). The aperture is f 22 and not -adjustable.. On
oiessine the shutt'ei release, the shutter opens and remains open as long
is- - vou keep the release dePressed.  On the -baldamatic I, s6t the index of the shutter speed ring t-o B'
Th;--B ietting is also obtained when the index points.to any of the                                                                              will                                                       the shutter                                                 releasing,                           On                    B setting.                           the                        of                 the left      neri"s-to-open                                                  and closes                                             pressed down                                                    is                              release                                  button                     as                         the             as longiemain".6""
                                                  is removed.                pressure                                  release                   on the        as theas--iGroott                                   and are, in fact, the times for                               seconds                      indicate                                     full               fisures       ereen
 *tti"tt iou muit keep the shutter open (by hand) at the corresponding
 apertuie--iHB -oBiAvnd-ecrtoNwith any given exposureRELEASEmeter:e-ading--for self-portraits built into
thJ Svnchro-Compur or Prontor SLK shutter of Baldamatic  I, _is
 i,iorshl itto action by moving the lever on the lower- p-art of the
 JhuttEr to "V". Tensiori the shutter (by advancing the film) first.
 I 6 BALDAMATIC
View original page 23Page 24 · Read text
www.butkus.us
       THE BATDAMATIC lfo m, and
            PRONTORMAT II
           These models have a bright-frame viewfinder with automatic
            parallax compensation for close-ups, showing the image in 2/3 natural
              size. A release key is fitted to the camera front with a cable release
            socket underneath. An automatic depth of field indicator is fitted. The
             built-in exposure meter is coupled with the aperture/shutter speed
            controls; the aperture settings are visible in the viewfinder. A coupled
           rangefinder is built-in and is combined in one eyepiece with the
            viewfinder.
        THE BALDAMATIC II PRONTORMAT is fitted with a 1* in.
fl            cell(45 mm.)focusingColormountBaldanarfocusesf 2.8lens,down toa3.3three-elementft. The scalelesstriplet.ProntormatThe front
            shutter is X synchronized. The exposure meter is coupled with this
             shutter. Lining up the setting marker with the meter needle position
              (visible in the finder) selects an aperture-speed combination according
             io the available light, but does not offer a choice of combinations. The
            selection is continuous from 1/30 sec. at f2.8 to l/300 sec. at f 22,
             apertures and speeds being interlaced. The aperture combination  is not
             iridicated and there is no shutter speed or aperture scale (except for
              flash). Time exposures can only be made at f 22.
        THE BALDAMATIC II is fitted with a 1* in. (45 mm.) Xenar
            -elementf2.8 lens. This is a four-element triplet design with cemented rear                     in front cell focusing mount and focuses down to 3.3 ft. The
           Prontor SLK shutter has ten speeds from 1 sec. to 1/500 sec. and B for
          time exposures; it is fully XM synchronized for flash bulbs and
             electronic flash at all speeds and has a built-in delayed-action release.
         The viewfinder shows the aperture in use, in addition to the setting
            control for the built-in photo-electric meter.
         THE BALDAMATIC  III is fitted with a 2 in. (50 mm.) Xenar/2.8
          or Xenon /1.9 lens; this latter is a six-element design. The lens is
            interchangeable with a quick-change bayonet mount; alternative wide-
            angle andtelephoto lenses are available for this model. The lens is in a
              hetical focusing mount and focuses down to 3 ft. The Synchro Compur
             shutter has ten speeds from I to 1/500 sec. and B for time exposures,
                 is fullv XM flash synchronized for flash bulbs and electronic flash at all
            speedi, and has a built-in delayed-action  release. The rangefinder  is
           cbupled to the standard lens as well as to the interchangeable tele- and
            wide-angle lenses. The viewfinder shows the field for the standard lens
          and also for the tele- and wide-angle lenses.
             All MODELS ACCEPT 40.5 mm. screw-in filters and lens hood.
         FOR CLOSE-UP WORK from 39 to 1'2 in. close-up lenses are avail-
            able and also the Proximeter which permits use of the built-in range-
              finder at close range.
                                          BALDAMATTC  il,  ilt  7   |
View original page 24Page 25 · Read text
THE BALDAMATIC II PRONTORMAT


                                                         Release

                                                 Focusing mount
                                    DOF indicator

                                                       Film speeds
                                               Meter cell
                                                  Apertures
                                                    Rangefinder
                                                          Flash socket
                                                  Reversing lever
                                              Rewind crank


                                                 Transport key
   www.butkus.us
                                                      Film counter


 The releose key incorporates a cable release socket underneath. The rongefinder  is combined with
 the viewfinder and coupled with the focusing movement. The focusing mount is calibrated  in feet
 and metres. The automatic depth of field indicator shows the zone of sharpness at any exposure
 setting. The main setting ring selects the exposure range (daylight or flash) and sets the appropriate
 aperture-speed combination on lining up the meter needle and setting marker in the viewfinder.
 The supplementary  operture scale serves for flash exposures. The reversing lever disengages the film
 transport and releases the rewind cronk.  Half a turn of the flm  transport key advances the film and
 tensions the shutter, and also advances the film counter in the camera base.


                                                                                                           i:iii1i"i?iti?'ii-1i-fi isii$
 Shooting with the Baldamatic Prontormat  ll.  From left to right:remTension the shutter and advance
 the film with the transport key; select the exposure range with the main setting ring; line up the
 meter needle with the setting marker in the viewfinder; view through the finder and focus the lens
 with the rangefinder; release.
 r   8  BALDAMATIC      ll,    lll
View original page 25From the M. Butkus archive. Original publisher and archive notices are retained.
Check the model and edition against your equipment.
PDF verified 2026-10-10.