Film cameras
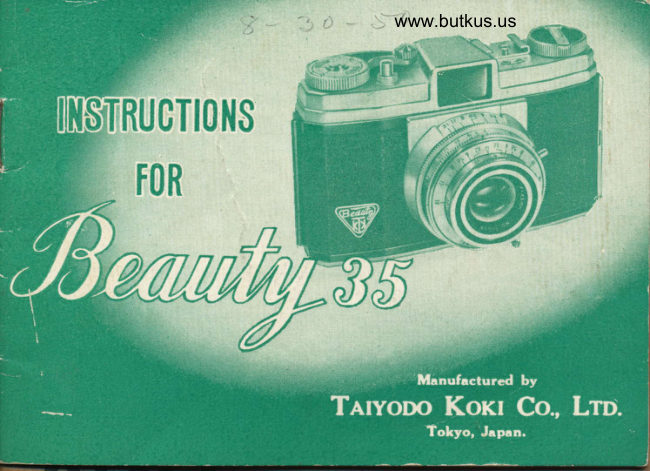
Beauty 35 User manual
User manual for Beauty 35. 23 pages in English. Read the original PDF, download or print a copy without registration.
23 pagesEnglish4.9 MB PDF
Loading your manual…Open PDF directly
Document details
- Brand
- Beauty
- Model / document
- Beauty 35
- Document type
- User manual
- Language
- English
- Pages
- 23
- File size
- 4.9 MB
- Category
- Film cameras
- Document date
- Not specified in catalog
Search available document text
Find a term, then jump to its page in the original PDF. Image-only pages may not be searchable; check the PDF for exact wording and diagrams.
Page 2 · Read text
I
                               .'BEAUTY                                                                                                                                                                                                                                                                                         I           INTRODUCING THE           35''                                                                                                                                                                                                                                                                 lt
   You are welcomed into the company of an ever growing
number o{ satisfied owners and users of the "BEAUTY 35"
camera.                                                                                                   1?
   Your "BEAUTY 35"  is a precision built camera designed
to take the Leica size 35mm film (24mmx 36mm), either in the
36 or the 20 exposure magazine (cassette).
   The camera is fitted with a  L / 3.2, 45mm 3-element
eoated lens which has a remarkable resolving power of 5O lines
in the center and 30 lines at the circumference making it a
high grade anastigmat. It takes both black-and-white as well as
color film.
   The shutter is a  newly designed "NKS-FB" S-blade
"prontor" type with automatic cocking, built-in llash synchro-
nizer and selftimer. There are nine speeds including B, from I
second to t/3OO second.
View original page 2Page 3 · Read text
www.butkus.us

   The focusing is obtained by the revolving ring which
moves the front lens smoothly in and out from 3.5 feet to
infinity in gradations of 11 scales.
   The view finder is of the trimming type and the target
frame which is clearly outlined in white will enable you to
shoot fast moving subjects with ease and accuracy.
   The film winding system is rapid one-stroke lever winding
type which automatically advances the film one frame and at
the same time cocks the shutter lor the succeeding shot. A
double exposure preventive Iock is built in.
   Rapid rewinding is possible by means of a crank oper-
ated lilm rewinding knob. There is also an indicator which
shows the type of film loaded in the camera at the time of
shooting.
   The other features provided for are an accessory clip,
body shutter, European type synchro terminal, depth-of-field
scale, back cover positive locking device and lens cap.
View original page 3
Page 4 · Read text
Venmo @mike-butkus-camera  Ph. 2083
PayPal Name  Lynn@butkus.org      www.PayPal.me/lynnbutkus
View original page 4
Page 6 · Read text
www.butkus.us


@ FiIn Counter
@ Film Rewinding Knob
  and Lever
@ Depth of Field Scale
@ Synchro-terminal
@ Taking Lens
@ Self-timer
@ Tripod Hole
@ Film Rewinding
   Button
@ Back Cover Locking
   Lever
View original page 6
Page 7 · Read text
..BEAUTY            OPENING THE            35''
                         To open the camera lor
                                   film loading or unloading:
                                  1. Push the Back Cover Lock-
                                ing Lever (R) in the direc'
                                       tion of the arrow.
                                 2. Then gently open the Back
                             Cover (S) to a fullY oPen
                                          Position.

                            ..BEAUTY 35,,            LOADING THE
 To lood the comero
1. Rotate the fixed Take-up Spool (T) by the milled flange until
   the film slot faces up.
View original page 7Page 8 · Read text
www.butkus.us

2. Pull the Film Rewinding Knob (K) as far out as it will go.
3. Insert the new film magazine (cassette)  - prelerably in subdued
   ligh| even your own shadow will help.
4. Hold the magazine (cassette) in place with your thumb.
5. Push in the Film Rewinding Knob, rotating  it slightly to make
   sure that the slot at its end grips the slot on the film spool.
6. Pull out the end oI the film and push it in the slot oI the
   Take-up Spool (T)
7. Engage the  second
   perforation of the film
   with the nipple on the
   Take-up Spool.
8. Guiding the film with
  your thumb, wind the
   film on the Take-up
  Spool by turning  it
   slowly by  its  milled
View original page 8
Page 10 · Read text
www.butkus.us


    t    I      and pushing the Back Locking Lever (R) in.
      1It      Sefflng the fllm exposure counterry

   I
   II        Before the first exposure can be made, it  is necessary to
     bring the unexposed part of the film into starting position and
;     to set the Film Counter (I) to No. I index.
      1. Work the Film Winding Lever (E) as far as it  will go and
        then release.
      2. Press down on the Shutter
        Release Button (F).
     3. Work the Film Winding Lever
        (E) once again.
     4. Press down on the Shutter
        Release Button (F) once again.
     5. Work the Film Winding Lever
         (E             I for the third time. This
       brings the film into position
View original page 10Page 11 · Read text
for your first exposure.
6. Now set the FiIm Counter (l) to No. I index by pressing down
   the FiIm Counter Setting Button ( I ) and turning 1t cloekwise   with your fingers until No. 1 index appears opposite the    I
   triangle mark.                                                                            I
               TAKING THE PICTURE
1. Take off the Lens C.p.
 Settlng the Dlstonce Scole
1. Measure the distance between the camera and the  picture-
   subject.
2. Set the Distance Scale (A) on the Front Ring by aligning
   the footage marks with the triangr,r,lar mark (V). The distance
   scale is marked in feet.
 Setring the Aperture or Lens Opening
   AIter setting the distance scale, it  will be necessary to
determine the right lens opening.
View original page 11Page 12 · Read text
www.butkus.us

                                               1. This is done by turn-
                                           ing the milled ring
                                                   nearest to the camerat'                                     body and setting the
                                         dark triangular markfi                                                to the proper position
                                                 opposite the Aperture
                                              Scale (C)
                                             2. T}ne lens openings pro-
                                              vided are 3. 2, 4, 5.6,
                                              8, 11, and 16.
 il                                        Note: The amount            of light coming from the picture-subject on to the unexposed
           film is determined, in part, by the size of the lens opening.
 ..[       The ligures on the Aperture Scale (C) are so arranged that
           at 3.2 setting, most effective light is let through. Each suc-
          ceeding-higher number cuts this amount down by one-half.
View original page 12Page 13 · Read text
Saltlng rhe Shutter Speed
1. The shutter speed is set by rotating the middle milled ring
  and aligning the black notch on it with the proper shutter
  speed on scale (B).
2. Shutter speed provided on the "BEAUTY 35"  measured
   in seconds are:
     B, f , L/2, L/5, L/IO, L/25, L/5O, L/LOO, L/3OO
  No?e: Since the amount of light required to reproduce the
  image on the film is fixed, the shutter speed and the lens
  opening are inter-dependent. Stating this another wdy, a high
  aperture number (for example f./LL) will require a slow
   shutter speed (i.e. long exposure time, Ior example I/s
   second). Conversdly, a fast shutter speed, (for example, 1/1OO
  second) will call for a low aperture number (for example I/3.2).
Gomposlng the Plcture
      Finally, decide on the composition of the picture.
View original page 13Page 14 · Read text
www.butkus.us

 1. This is done by looking through the viewlinder lens and
   composing the picture within the white targret frame.
2. Any scene falling outside of this target frame will not be
   exposed on the film.
3. For HoRIzoNTAL pictures, hold the camera with both hands
   and press down steadily and firmly on the Release Button
   with the index finger of the right hand. Be sure that the
  cdmera is not held at an angle. Avoid camera shake by
   assuming a firm posture.
4. For VERTICAL pictures hold the camera in an upright position
  and press down on the Release Button with the thumb of your
   right hand. A slight lateral adjustment should be made in
   the direction of the viewfinder for vertical exposures because
   of the varying position of the viewfinder and the taking lens.
5. Likewise, Ior CLOSE-UP pictures a small error is introduced.
   because of the higher position of the viewlinder in relation
   to the taking lens. No practical effect is noticeable at a distance
View original page 14
Page 15 · Read text
over 6 feet.
    HOW TO READ THE ..DEPTH.OF-FIELD'' SCALE
 Whar ls "Depth-of-Fleld"'
   When you focus your camera on a picture-subject, you will
find that there is a zone both in front of and back of the picture-
subject within which everything is still in acceptable focus. On
the other hand, images of objects outside of this zorte become
progressively blurred. This zone of acceptable sharp focus is
called the  "depth-of-Iield" and is particularly important to
beginners when focusing at very close distances.
Relotion between Aperture or Lens Openlng ond "Dep?h-of- Field"
   Broadlyspeaking,the,,depth.of-field,,isinfluencedby
(1) the distance oI the picture-subject from the lens and (2) the            I
aperture or lens opening. For fairly distant objects, the "depth-
of-field" is generally adequate but when focusing at very close
View original page 15Page 16 · Read text
www.butkus.us

distance, there is surprisingly little "depth-of-Iield" and the
photographer must be very carefull about focusing his main
subject correctly
   The aperture or lens opening is another factor which
determines the amount o{ "depth-of-field" available. Small
apertures (higher number) give greater "depth-of-field" whereas
a larger aperture (lower number) will result in decreasing this
zone oI sharpness.
 The "Depth-of-Fleld" Scole on the "BEAUTY 35"
     It will first be necessary to know that the "depth-of-field"
scale (L) on the lens mount are approximate values.
   The following is the procedure for "reading" the "depth-
of-field" scale. There is indicated on the lens mount two sets
of equal numbers set olf to the left and right of the distance
indicating triangle (v). (See illustration on next page  ).
1. Read the aperture or lens opening number (for instance I/Il).
View original page 16Page 17 · Read text
2. Read the distance number. (In the illustration this is 10 feet).
3. Now read on the Distance Scale (A) the two sets oI the
   figures opposite the figures "J-L"  (In the illustration they
   are "6" and "3O" respectively).
4. This means that the "depth-of-field" for this  particular
   "shot" is between approximately 6 feet and 3O feet; which
    is to say that any image
   falling inside this zone
   will  be  acceptably
   sharp in focus.
UNTOADING T}IE FILM
  When  your   Film
Exposu,re Counter indi'
cates that you have made
36 exposures (or 20 as              www.butkus.us
the case may be),  it  is
View original page 17Page 18 · Read text
www.butkus.usI
      time to unload the film.
        since the exposed film has been wound on the fixed
      spocl in the c.*er",   it will be necessay to rewind it back to
      the spool of the film magazine or cassette.
          This is performed by the following procedure:
         1. Raise the Crank Handle (K) on the Film Rewind Knob'
        2. Press the Film Rewind Button (.Q) on the bottom of the camera
             i      and hold in this position.


                     1


             i


         I

I
View original page 18Page 19 · Read text
3. Turn the Film Rewind Crank in the direction oI the hands
   of the clock.
4. When the exposed Iilm has been completely rewound on the
                            magazine or cassette sPool,
                        open the back cover and
                             remove the film magazine.
                          TAKING FLASH PICTURES
                             The "BEAUTY 35" will take
                                either the  llash unit  with
                             bracket attachment or  the
                                                                  ' accessory shoe type provided
                                 both have European-type flash
                                connecting cord.
                          The shoe-type flash unit is
                                   attached directly to the camera
                                             , body by means of the Acce-
View original page 19Page 20 · Read text
www.butkus.us           s
                                                    $
                                                                                    \  rssory Clip (H)                                   \$ The flash connecting cord is attached to the Synchro Flash                                                                                               [  ]
Terminal (M) usin9, ds said above, European type connector.     { $
             DOUBLE EXPOSURE IOCK               \$N   Your "BEAUTY 35" has a built-in "double exposure" and    J\
"blank exposure" locking device. This mechanism "locks"   . the   yJ
Shutter Release Button alter every exposure so that the shutter Y  I
cannot be released until the exposed film is wound and a new     . D\
frame of unexposed film is advanced into place. In this rqay, \1  J
the same frame cannot be exposed. twice (double exposure6".)CJ                                                                                                I
can the fitm be wound by mistake before it has been exposed)|                                                                                                \(blank exposure). Therefore, if the Shutter Release Button cannot-                                                     Jbe pressed all the way down it means that either (I)  the film            ..
has not been wound to the next frame or (2) the Rapid Winding   J
Lever has not been moved to itsILD  fullrurr  stop.DLlvTP. Intlr  eithersrtlltit       (;dsg,case, a  $
complete turn of the Winding Lever to its full stop will activate,a            \
                                                                                                 il{
View original page 20Page 21 · Read text
the Release Button.
              GENERAL INFORMATION
  A modern camera is a precision instrument manufactured to
exacting dimensions. It should therefore be handled with great
care.
   The carefully ground lens is the heart ol your camera. Keep
it clean and covered with a protective cap when not in use.
To clean the lens use a lens tissue or soft linen or cotton cloth
or fine camels hair brush.
    Before taking the picture, run over the following "I-2-3"
check list in your mind to make sure that you have not
forgotten anything:
 One : Have you set the aperture to the proper F-stop ?             t Two : Have you set the shutter speed to the one you want ?
  Three: Is the distance footage correct for this picture !
                                                       Printed in fapan.
View original page 21From the M. Butkus archive. Original publisher and archive notices are retained.
Check the model and edition against your equipment.
PDF verified 2026-10-10.