Film cameras
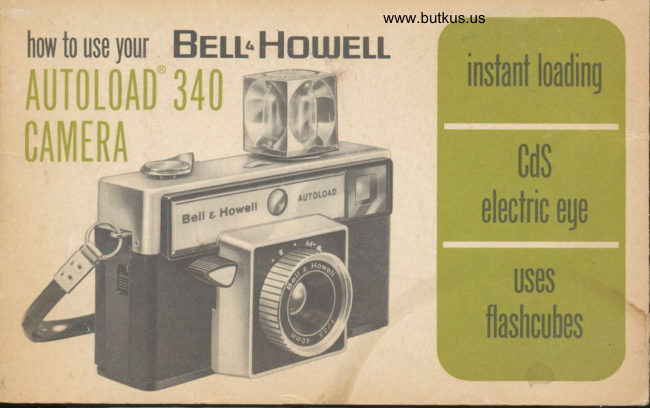
Bell and Howell Autoload 340 User manual
User manual for Bell and Howell Autoload 340. 15 pages in English. Read the original PDF, download or print a copy without registration.
15 pagesEnglish4.2 MB PDF
Loading your manual…Open PDF directly
Document details
- Brand
- Bell & Howell
- Model / document
- Bell and Howell Autoload 340
- Document type
- User manual
- Language
- English
- Pages
- 15
- File size
- 4.2 MB
- Category
- Film cameras
- Document date
- Not specified in catalog
Search available document text
Find a term, then jump to its page in the original PDF. Image-only pages may not be searchable; check the PDF for exact wording and diagrams.
Page 3 · Read text
www.butkus.us
                                Film Indicator Window                                      Back Cover Latch

                                               Viewfinder Eyepiece


Electric-Eye Banery Compartment


             Flash Battery Compartment


                                Tripod Socket
View original page 3Page 4 · Read text
Venmo @mike-butkus-camera  Ph. 2083
PayPal Name  Lynn@butkus.org      www.PayPal.me/lynnbutkus
View original page 4
Page 5 · Read text
taking piclures uith     A[JI0L0AD                                 Uour
           340 CAil|TRA is as easq as...


                   Drop in the instant-loading film and wind  it to
                      the first picture

                     Set the lens focus for the picture-close-up,
                     group, or distant scene

                 Compose through the viewfinder and slowly press
                      the shutter release

                 There are preliminary things to do before using your
                  camera for the first time. however. You'll want to install
                the batteries, learn how to take flash pictures,'etc.
www.butkus.us        Reading this book over thoroughly will assure perfect'
                       results your very first try.
View original page 5Page 6 · Read text
www.butkus.us
the electric-ege batterg


The automatic operation of your camera is controlled by
a long-life mercury battery. One is included with your
camera (in the packaging) when you purchase it.
  To install the battery, first open the BACK COVER
by sliding the covER LATCH up. The ELECTRTC-EyE
BATTERY COMPARTMENT slides out as shown. Place
the battery in the recess with the * side down, then
slide the compartment back into place. NOTE: Wiping
both sides of the battery with a cloth before inserting  it
will insure good contact and dependable operation.
  Although you won't have to worry about this battery
for a long time, here's how to check it for proper
strength. With your finger, rapidly cover and uncover
the CdS ELECTRIC-EYE WINDOW (have the camera
pointed towards a bright scene). When the battery is
good, the needle in the METER WINDOW will respond
rapidly" lf the action is sluggish. then a new battery is
needed and can be purchased from a Bell & Howell
dealer. See the back flap for the correct type.
                                                     3
View original page 6Page 7 · Read text
Many different types of Size  / 26 film are available
                                  for your camera (see film information on back flap).


                     film loading
                        Just open the BACK COVER and drop the film in-
                               that's all there's to it! NOTE that the largest end of the
                             cartridge goes to the right.  . . actually. you can't put it in
                           the wrong way. Close the back cover, advance the film
                          with the FILM ADVANCE LEVER until it locks (about 6r%                 or 7 full strokes), and you're ready for the first picture.
                     The number "1" will appear in the FILM INDICATOR
                     WIN DOW to show you the first picture is ready to take.
                        This number will change each time you advance the
                                 film. The film indicator window will also show the type
                              of film in the camera and the number of exposures in the
                              cartridge. NOTE: Do not open the camera back until all
                        the pictures have been taken and you have read thie
                        unloading instructions.
View original page 7Page 8 · Read text
www.butkus.us
                       unloading     L   After taking the last picture in the cartridge and B EFO R E                            \                               \   opening the camera back, advance the film until all the
                             yellow paper has disappeared from the film indicator
                        window (the lever will lock). Then you just open the
                                back, tip the camera over, and let the cartridge fall into
                              your hand. Have the film processed as soon as possible.


      CLEAR AREA                      outdoor pictures
                       No worry here! The 340's electric eye will set the lens
                             and the shutter for a perfect picture, every time. No film
                                     settings, either. as the electric eye adjusts for the type of
                                     film as the cartridge is inserted.
                         Be sure to check the light for each picture with the
                           camera aimed directly at the subject. The needle in the
                              meter window will warn you if the light is too dim
 USE                              or too bright for a good shot. lf the needle is anywhdreFLASH                                 in the center "clear" area, go ahead and shoot!
View original page 8Page 9 · Read text
Flash should be used whenever the needle is in the
                           warning zone at the left. See pages 8 and 9.
                             ln some extremely bright outdoor situations. the
                           needle may indicate in the right-hand warning zone.                                                                                                                              I                                Pictures taken under these conditions may be slightly
                             overexposed, but probably will be acceptable to you.

                       setting the distance
                               You'll want your pictures to be sharp and clear, of
                               course, and here's all you have to do . .  .
                                  Just turn the LENS FOCUSING RING so the FOCUS
                       INDEX (red dot) is opposite the FOCUS SYMBOL for
                             your piciure. That's ali there's to^it! I   is for close-ups,
                                                                             u                       ht  is for group shots, and A     is for those distant
                               landscapes.  lf you like, you can set the lens between the
                           symbols. Be sure to change the setting  if the type of
                                 picture changes.
                                                      lf you want to set the lens focus more exactly. the
                           drawing on page 10 shows the distances that corre-
www.butkus.us                 spond to the symbols.
View original page 9Page 10 · Read text
www.butkus.us

I                             taking the picture
I
                             When yoq've set the lens focus and checked the light,
                                           press the SHUTTER RELEASE down  . . . and you've got
                                         the picture! Press the release down slowly and smootlily,
                                    though, so the ca'mera doesn't move the instant the
                                          picture is taken. Note that the shutter is released at the
                                          very bottom of the stroke.
                                   Here are a couple of hints that will assure great
                                             pictures! Sight through the VIEWFIN DER squarely and
                                compose the picture just as you want it to appear. you
                                     won't want to be too far away when taking pictures of
                                        people, for instance. When the subject is less than b'
                                   awayl place the center of the subject to the right and
                                            slightly below the center of the viewfinder. This will
                                     prevent any possible "head chopping" when taking
                                         close-ups. Remember to recheck the meter window and
                                           lens focus.setting whenever the light or subject changes
                                                           be sure.                                                -it takes just a second to
View original page 10Page 11 · Read text
flash is easg, foo  !


Two "N" size batteries are used to power the flash on
your camera. Your dealer can supply you with the
proper type (see back flap for battery numbers). To
install them, first remove the BATTERY COMPART-
MENT COVER by sliding it in the direction of the arrow.
lnsert the batteries into the compartment so that one *
tip is up, the other *  tip is down. Replace the com-
partment cover.
  Have the batteries checked occasionally by your
dealer to be sure they have sufficient power to fire the
f lashcube.
   Since batteries of this type sometimes give off a sub-
stance that coats the contacts, wipe the battery ends
and the compartment cover contacts off with a coarse
cloth every once in a while. This will assure you of d'e-
pendable flash results.
View original page 11
Page 12 · Read text
www.butkus.us
 To install a flashcube, just snap  it into the FLASH CU BE
 SOCKET. Inserting the flashcube automatically adjusts
 the shutter to 1 l3O second for proper synchronization.
  To remove the flashcube. just press the EJ ECT BUT-
TON on the front of the camera. lf you insert a partially
 used flashcube, rotate it until an unfired side is facing
forward. The flashcube can be rotated manually in
 either direction at any time.
  The flashcube will rotate automatically to the next
side each time you take a flash picture. Be sure and re-
move the flashcube when taking outdoor pictures.

selling the flash distarrce
After the batteries and the flashcube have been in-
stalled, just set the lens to the subject distance.
   Estimate the distance from the camera to the subject
and set the LENS FOCUSING RING. The chart on the
next page gives the distances that correspond tq the
focus symbols. This simple setting automatically ad-
justs the lens for the proper exposure for your flash shot.
                                                         I
View original page 12Page 13 · Read text
Of course, there is a limit as to how far away or how
                         setting the     close you can be and still get excellent results.
                                The flash range is shown in the meter window (see
                      flash distance       illustration). With a flashcube in place, the needle in the
                                       (mntinued)                            window will move back and forth as the distance is set
                              on lens. As long as the needle remains within the flash
                                       range. you'll get perfect exposures.
        FLASH RANGE               The approximate distance range for flash pictures
                                   with ASA 64 or B0 films is 3'to 25'. When using ASA
                                125 or 160 films, the range is 6' to 45'.
                                   Here are some helpful hints for flash. With the film
                                advanced and flashcube in place, set the subject dis-
                                    tance on the lens. Then check the needle to be sure it is
                                   within the flash range in the meter window.  lf it isn't
                                          you'll have to get closer or farther away from your sub-
                                           ject. lf the needle in the window doesn't move when
                               you change the lens distance setting, this indicates that
                                      the flashcube side has already been used-or the flash-          hl          ?                  cube has a broken circuit and won't fire. This provides   2Y2'??3'     5'     Ilo'   15,?fr50, @                          a handy check so you won't miss a good shot. The
                                  mercury battery that powers the electric-eye system also
                               powers the automatic flash-exposure system. Always
                               have battery in place when taking flash pictures.
  10r
View original page 13Page 14 · Read text
www.butkus.us
                                    lf the shutter release won't go down, this means you haven't ad-
                  vanced the film for the next picture. No chance for a double-
                      exposure!
                                    lf the film advance lever won't move. you haven't taken that pic-
helpful              ture yet. This is a good way to tell if the film has been advanced.
               When you're outdoors in dim light and the meter needle is at the
  hints           edge of the warning zone. Take the picture anyway. Chances are
                         you'll get a perfectly acceptable exposure.
                  Going to take a lot of shots outdoors in bright light? No need to
                     adjust the lens distance setting for each picture-just set it to
                      approximately  1 2' (see page 10) and every subject between 6' and
                            infinity will be sharp and clear.
                                  lf you're putting the camera away for a while, remove the flash
                        batteries and the mercury battery. Store them in a cool dry place as
                         this will prolong their useful life.
                  Never keep your camera and film where it is hot or humid. The
                    camera's case provides good protection against dust and hard
                     knocks. Keep the camera covered when not in use.
View original page 14Page 15 · Read text
ill
                                 (PtctFtcATt01.|s                                        ulLUlllunllul'
         FILM SIZE AND TYPE-The Autoload 340 Camera uses size 126 instant-loading  film cartridges;
           black-and-white. color print, and color slide films with ratings of ASA 64, 80. 125 and 160 can
          be used for outdoor or flash pictures.
        LENS-4Omm f/3.5 optical glass 3-element design; focus fully adjustable from 2/z' to infinity
           with zone-focus symbols.
        ELECTRIC EYE-Adjusts lens openings for f/3.5 to  f /22: CdS exposure control system
          powered by long-life mercury battery.
        SHUTTER-Programmed  type; works with electric eye to provide best combination of lens
           opening and shutter speed; range 1/30 to 1/25A second; automatically adjusts to 1/30 second
              for flashcube pictures.
       FTASH SYSTEM-Adjusts  automatically to proper lens opening as lens focus is set; flash
           range shows in meter window with needle indicator; automatic flashcube rotation as picture is
            taken; flashcube circuit check; flash power supplied by two N-size alkaline batteries.
       BATTERV TYPES USED-6/ectric Eye uses single mercury battery; Mallory PX-13,
           Eveready EPX-13, Burgess HPX-13. or equivalent. Flash system uses two alkaline batteries;
           Mallory Mn-9100, Eveready E-90, Burgess AL-N, Bright Star 7528. or equivalent.
                         41 Y1a" x23/q" xT\a"  .          SIZE -
       WEIGHT-10 ounces without batteries or film.
   \b                                     #
   Unfold this flap when reading your instruction book.
View original page 15From the M. Butkus archive. Original publisher and archive notices are retained.
Check the model and edition against your equipment.
PDF verified 2026-10-10.