Light meters
Bewi Electro Electro Bewi User manual
User manual for Bewi Electro Electro Bewi. 24 pages in German. Read the original PDF, download or print a copy without registration.
24 pagesGerman2.0 MB PDF
Loading your manual…Open PDF directly
Document details
- Brand
- Bewi
- Model / document
- Bewi Electro Electro Bewi
- Document type
- User manual
- Language
- German
- Pages
- 24
- File size
- 2.0 MB
- Category
- Light meters
- Document date
- Not specified in catalog
Search available document text
Find a term, then jump to its page in the original PDF. Image-only pages may not be searchable; check the PDF for exact wording and diagrams.
Page 1 · Read text
www.butkus.us


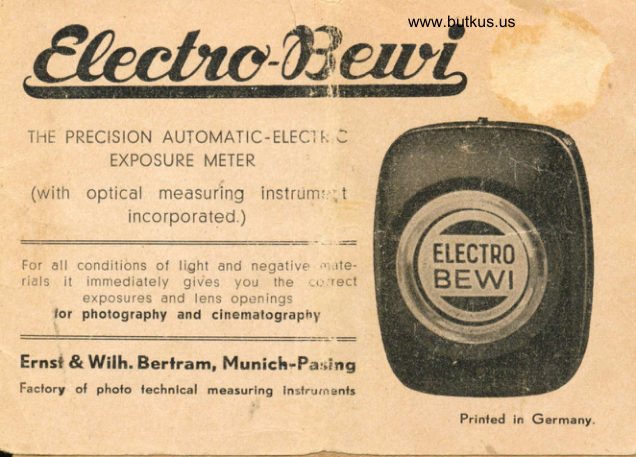
 ThF PRECISION AUTOMATIC.ELFC:  !
         EXPOSURE METER
 (with optical measuring instrum'
            incorporated  )

For dll condilrons of light dnd negati!'€ ,rte-
r;els  it  immedidlely gives you the  .,.rect
        e,posures dnd lens opurings
     tor pholography and cinemalographl'

Ernsl & Walh. Berlram, Munich-Pa,;!ng
Faclory of phofo fechnlcal measurlng Inslrvrnenls
                                                                  Prinled in Germany.
View original page 1Page 2 · Read text
practicalThe Electro-Bewi is the indispensable adviser for
photography and is s'o easily manipulated, its indications are so
reliable and exact, that errorS or dcubts are absolutely impossible'
Measuring requires only two manipulations:    '
1. Pressing the button    the instrument is ready for measuring.                      -                                 with the indicated light value2. Adjusting of the measuring!-tape
   to the emulsion speed of film used    reading the exposure                                      -  and lens opening (takes about 5 secs.)
Ihe Electro-Bewi is only supplied in two models:
                                                        and1. The Standard Modelwith table of exposure times
   lens openings as shown on ,,between lens" shutters.
2. The Leico Modelwith exposures aS shown on the Leica
  camera f,ocal-plane Shutter ond the openings of the Leica lens.
Both models are supplied with the particulars required for
cinematography.
2
View original page 2Page 3 · Read text
www.butkus.us
Read carefully this pamphlet. Beside detailed directions you
 will Iind many things worth knowing for practical photogrdphy.
                  Cont€nts.
  1. Detailed directions                    page 4-9
 2. Manipulation of the optical lightmeter .      page 10
                                                                8 3. Color photography              Pdge
 4. Explanations about the scale of openings' ol
                                                           12   Elektro-Bewi                  Page
 5. Explanations about the scale of exposures of    Elektro-Bewi                      page  '13
 6. Directions for evaluation of intermediate values page 14
 7. Some hints for the use of further advantages   of the scales                     page 15
 8. General rules for electric and optical measuring page 16
 9. Example, how to use the depth-of-focus table page 17
10. Use of Electro-Bewi for cinemdtography     pdge 19
11. Final remarks for special notice          page 20
View original page 3Page 6 · Read text
www.butkus.us
                 Detailed instructions for use
Hold the instrument flat on the palm bf your left hand, with ihe
cover showing the trade-mark upvrards. Press the knob, and the
cover will spring open; take care to cei"tch the backward spring
with your right hand. (see Fig. 1 and 2).
First adjust the meter to the emrrlsi,orl speed of the"film.used.
This is done by turning the knob (k;) until the degree of sensrrive-
ness appears in the space (f). T rere is no need to repeat this
procedure so long as the same negative material is used..
The red points on both sides cf the scale of emursion speed
present an enlargement of this scale down lo 7/to DIN and up
lo 25/to DlN. on instruments with scheiner0 scales read 14 and
32 degress.
View original page 6Page 7 · Read text
On using a film with the above emulsion speed move the slot
of . the covering slide by means of the knob (b) to the first
speed number beside the red point being in question and adjust
the number of light value measured to this red point.
                Adjustment of speed ot film.
The speed of  fi lm is always given by the average value of a group of
speeds giving practically the same result of exposure.
             Example  of adjustment:
On using films or plates of a speeo ot 15 /10 DIN or 17 /1O DIN adjust in
both cases to 16l10 DlN.
When using the intermediate values you will observe the indications on
page 14. On instruments showing the Scheiner degrees the adjustment  is
the same.
View original page 7Page 8 · Read text
www.butkus.us

 After having adjusted the
speed of   f ilm hold the
 light-electric photo-cell (k)
 inc'orporated in the cover
like the camera lens in
the direction of the object
to be photographed. When
taking open air pictures,
be careful not to include
too much sky. The hood
allows no llght to enterthe photo-cell than is
corresponding to   that
which enters the camera
lens, so that the light
falling on the object to
be photographed is accu-rately measured. The      Fig. 2: The correct way of holding                                          the meter in use.
View original page 8
Page 9 · Read text
needle of the value scale (g) indicates automatically the accu-
rate light value according to brightness. Read the number
nedrest to the pointer. lf it stops midway between two figures,
either of both light values is correc,t for evaluation for black and
white films. ln these cases the lens aperture or exposure may
decide which is best for taking.    For taking color pictures,                                  -                                                                consi-.however, the intermediate values are to be taken into
deration because of the narrow margin of exposure of these
films. (For details see page 13.) lnstructions about exposures
of color pictures are found in ,,Directions for measuring the
exposure times of color photographs on ,,Agfacolor"-film and
,,Kodochrom"-film by medns of Electr,o-Bewi"; enclosed sepa-
rately.
I
View original page 9
Page 10 · Read text
www.butkus.us
                   Evaluatlon ol the llght value.
                   By turning the small wheel (a) at the
                         side edge of the instrument adjust the
 o                                                                          f igure read onto the scale of light o
 E                       values (9, e) [yellow figures for photo, o                     black ones for cine] exactly to the .c                                                                             2                            right speed of film (f). [Fig. 1 and  o,o                                                 16lro                               light value     lo      DIN]. When the o                                           ',9".E                             light value                                         is fixed this way the rows
 o                   of stop  f igures (c) and of exposure
 o                     times (d) are automatically adapted
.oJ                     to each other in such a manner that
  tCo                         for any exposure time the correspon-                        ding lens opening can be read.   Now                                                                                                                                 f inished: The-  data        Back View.      lhe measuring isFig. 3                    given should be used f'or adjusting the
                             shutter and the diaphragm of the camera.
View original page 10Page 11 · Read text
Manlpulation ol the Optlcal Ughtmeter.
                             . when the light is very poor
                                     (i. e. indoor-, nlghl-, moonlighl-photo-
                    gruphy, in churches, ravlnes efc,)
                    and when the elec-
                tric photo element is not
             sensitive enough to  in-
                                        f luence the needle, the
               optical lightmeter is used.
                Tilt the open instrument
             forward, place the lens           (1) fixed in the base,
             close to your eye (Fig.4)
                spectacles should not
           be removed   and direct           the instrument-  accurately
              to the object to be photo-

               when working with the opt. mcter.
View original page 11Page 12 · Read text
www.butkus.us
graphed. (ln order to prevent light from entering at the side,
hold your right hand round the ground glass ,of the optical
lightmeter.) After 5 seconds the highest number, readable
without eye-strain, is the correct light value for this taking. In
dubious cases use the intermediate number (e. g. when 2 is
read with 3 fainily appedring, take. 2,5).
You adjust the measuring tape of the light values (e) in exactly
the sdme .manner as af ter electric measuring, placing the
af'oresaid figure to the emulsion speed, then read exposures
and stops as already explained.
In general the optical lightmeter is not often used. But if by
means of it you have succeeded in taking some beautiful pictures
you will never want to do wilhout  it.

                                                                      11
View original page 12Page 13 · Read text
Thereby you will realise that it is the combination with the
optical lightmeter that makes the electric lightmeter a perfect
adviser for any taking.
Explanations about the scale of openings of the Electro-Bewi.
For practical reasons the two rows of diaphragms most fre-
quently used have been put on the Standard Model of the
Electro-Bewi.    The difference between the apertures of the             -unified diaphragms                       is about 30 %.   The scole of the instrument                                 -                                average value between bothhas been calibrated exactly to the
openings; s'o the difference is halved. Therefore you may use
both stops read opposite to the exposure.
With regard to the intermediate exposures adjustable on the
Leica focal-plane-shutter the various diaphrdgms on the special
Leica Model are given separately.
12
View original page 13
Page 14 · Read text
www.butkus.us
    Explanations about the scale of exposures of the Electro-Bewi.
     ln connection with the re-gauging of Electro-Bewi for color films
      it has been necessdry to insert some unusual fractional expo-
    sure times on the measuring tape.
   As long as we have to deal with black-and-white-photography,
    the distance from L/s Io % sec. has been insignificant. The new
    color films, however, having d very narrow exposure margin,
    render it necessary to find the- exact exposure times at any
     rate. Therefore that distance is to be subdivided.
                                     1/r                                      sec. is followed by % sec.I     lf then, on the measuring tape
    you may/ when taking a black-and-white photograph, use tA,sec.
    or     in case of % sec. take 1 sec. as before.       -                                           -    For color photographs, however, the use of more accurate expo-
    sures is imperative.  lt is advisable to adapt the lens opening by
                                                                 13
View original page 14Page 15 · Read text
intermediate positions to shutter speeds of % or 1 sec.    ,
on evaluation of intermediate light values eventually measured,
there will result no fractionary stop values in any case.
    . Directlons for evaluation of intermediate light vatues
Example: Supposing the light value 12% given by the needle is
to be evaluated for film speed 16lro DlN. Adjust the separating
line between 12 and 13 to 16lro DlN. After this adjustment the
exposure ti.mes are to be read between the full figures of aper-
tures. ln the example shown the openings between 9 and 12,5
or 8 and 11 are decisive for an exposure time of 1/ro sec. On
the execution of this evaluation on the Leica Model the data
of exposure times and lens openings given by alternate colors
belong together. For light value 12% and exposure time 1/ao s€c.
you have to adjust the lens opening 11.
14
View original page 15Page 16 · Read text
www.butkus.us
    Lens apertures resulting by evaluation of intermediate vdtues
   may easily be adjusted on the objective by setting the mark
    between the fixed figures (Not to be used for punched dia-
     phragms).
     Some hints for the use of further advantagesr of the scales
                        of the Electro-Bewi
 t    ln the above way it is possible to evaluate exactly the interme-
     diate data of film speeds.
   Move the adjusting slide by means of the knob (b) in a po-
      siti'on that the separating line between the two speed figures
     in question is bisecting the slot of the slide.    E. g. 15lro DIN                                                  -      is adjusted, if the separating line between 13/ro                                            and 16lro DIN is
     bisecting the slot of the slide.   Then the evaluation is carried                                  -      . out ds usual; the whole light values                                   are put exactly opposite to
    the slot, whereas the intermediate values are corresponding  to
                                                                                                '15


A.                   :
View original page 16Page 17 · Read text
the separating line between the limiting figures and the line
between the two speed figures in question. In every case the
exposure times and the lens apertures standing opposite to
each other are to be used together. On practising some
evaluations you will see that the Electro-Bewi is able to answer
every question concerning exposures and apertures.
       General rules for electrical and optical measuring
1. When taking photographs with artif icial light only panchro-
  matic ma.terial is to be used. Add one light value to the
        f igure read. When using orthochromatic negative material,
   take one light value less than measured.   The numbers 1,5;   2,5; and 3,5 ore also whole numbers.     -
2. when using double extension ,of the bellows in connection
   with back or fr'ont lens, use two light values less than the
   figure read.
16
View original page 17Page 18 · Read text
www.butkus.us
3. When using yellow filters adjust as follows:
           2-5 times, 1 light value less,
           4-5 times, 2 light values less,
           6-8 times, 5 light values less.
ln order to extend the effectiveness of the instrument for
additional help a depth-of-focus table (i) for the focal lengths
most frequently used is attached below the measuring scales.
According to the depth-of-focu:; desired the correct dperture
can be read at once.
        Example: The use ol the depth-of-focus table
A group to be photographed, the first row being 12 leet from the camera
 (1 0 feet deep) and the back row 22 leet. To get a clear picture extending
over the entire group, a certain distance focussing as well as adjustment
of the lens opening is essential.
The reading off of the focal distance, as well of the correct aperture, is
lound as follows:
                                                             17
View original page 18Page 19 · Read text
Looking down the column,,sharp" in the region of 12-30 for the above-
 mentioned photograph, we read in the column,,focussing"  the focal distance
 of the camera (15 feet). Now turn lrom the aperture observed in the first
 upright column, horizontelly as far as the point of intersection of both columns
 The reading is: for 5 cm (-  2")   . 114.5; tor 7,5 cm (:  5")     f/6.j etc.
 The exposure figure corresponding to this aperture is read on the instru-
 ment in the usual way.Smaller apertures may always be used, if  the
 depth of clearness is favorable; wider openings, however, lessen the
extension oi the depth.
 ,,Circle of diffusion" means the unsharpness of a dot admissible for enlar.
 genrents of this size,    looked at from normal distance    in order to get                       -                                                             -pictures sufficiently sharp.                          For, the smaller the original                                                       negative is, the
more you must observe its sharpness, because, in general, bigger enlar.
gements are made from such than from negatives of a larger size.
For better understanding of all important items of theory and practice of
photography we advise every beginner to buy a manual of amateur-photo.
graphy. Such books are to be had at low costs with all photographic stores.
18
View original page 19
Page 20 · Read text
www.butkus.us
          Use of Electro-Bewi for Cinematography
rhe manipulation of Electro-Bewi for cinematography is the same
as for ordinary photography, the only diff erence being that,
after the black light value figure has been adjusted, it is not
the exposure times which are opposite t,o the scales of aper-
tures, but the  ,,f rames" (numbers indicating the change of
pictures per second). Theref ore the correct lens opening
corresponding to every single frame can be read immediately.
   Notice that the two inner scales of frames and apertures
apply to each other, and the two outer scales likewise
correspond.
on the Leica Model red applies to red and black to btdck.
                                                         19
View original page 20Page 21 · Read text
Final remarks for special notise
Now that you are acquainted with the practical use of Electro-Bewi we feel
that we would like 1o explain you more about the high technical value
of the instrument and about the.care to be given it. The interior of the
instrument is composed o{ a large number of single parts, together with
a combination of smaller movements which constitute the Electro-Bewi that
 is impossible to describe here in detail. But we would like to point out the
most important data o{ interest.
As the current intensity produced by the photo-cell is only 0.000002 Amp.
at a position   . of the needle at light value ,,4", and as it increases only
to 0.000 750 Amp. at lullest possible intensity of light, everybody will realize
that lhis tiny current intensity can only be measured by a  scientifically
made instrument.
Realizing furthermore that the winding of the coil bears more than
1000 single windings of copper-wire only 0.03 mm thin;     that the most                                                              -precisely elaborated steel axes.of this spool rotale in                                                      bearings of half-
precious stones;    and that inside the instiument spiral springs made of                  -
20
View original page 21Page 22 · Read text
www.butkus.us
0.01 mm wire must do their work: then you will admit that it is self-evident
that such an instrument requires careful handling.
Protect, above all, your Electro-Bewi especially against falling; for in this
respect lightmeters are to be harrdled like watches.
Normal shaking as it occurs in cars, in trains, on a bicycle or from similar
causes/ will not affect the instrument. In case of slight disturbance, or
in case of a damage caused by a fi:ll or by shock, you can take it to
your photo dealer's who will forward it to us for repair. lf unable, send
it direct to the manufactures to be repaired by experts.
Under no circumstances, whatsoever, try to open the instrument, as in
almost every case damage would be done to this highly sensitive measuring
instrument and expensive repair will result instead of easy removal of the
distu rbances at low costs.
Only a highly specialized staff are competent to deal withr the repair or
adjusting of an electric lightmeter.
PS. New instruments are to be had exclusively through approved dealers.
                                                                      21
View original page 22From the M. Butkus archive. Original publisher and archive notices are retained.
Check the model and edition against your equipment.
PDF verified 2026-10-10.