Film cameras
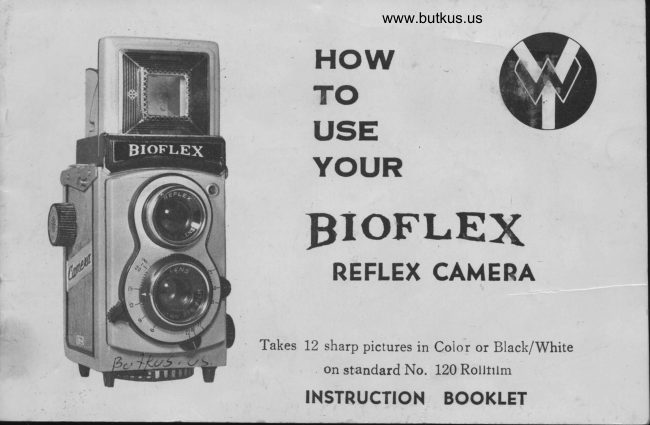
BIOFLEX User manual
User manual for BIOFLEX. 10 pages in English. Read the original PDF, download or print a copy without registration.
10 pagesEnglish4.5 MB PDF
Loading your manual…Open PDF directly
Document details
- Brand
- Bioflex
- Model / document
- BIOFLEX
- Document type
- User manual
- Language
- English
- Pages
- 10
- File size
- 4.5 MB
- Category
- Film cameras
- Document date
- Not specified in catalog
Search available document text
Find a term, then jump to its page in the original PDF. Image-only pages may not be searchable; check the PDF for exact wording and diagrams.
Page 4 · Read text
www.butkus.us
LOADING FILM:          120 Size Film           Caution: Always Load or
                               12 pictures per roll in the          Unload Film in                               popular 6x6 size Color           Shade
                              or Black/White
                                   1. Open.the Back Cover by turning the Tripod Socket in
                                    the direction marked 'OPEN' (clockwise). Then open
                                    the Back Cover by swinging it out.
                                 2. Remove the Take-Up Spool in the Lower Film Chamber
                                   by'pulling the Lower Film Spool Iocking Spring to
                                    the end.
                                 3. Place the Take-Up Spool in the Upper Film Chamber
                             by pulling the Upper Fiim Spool Locking Spring to
                                    the end.
                                 4. Place a new roll of size 120 fibn in the Lower Film
                                Chamber.
View original page 4Page 5 · Read text
5. Draw out the backing paper of the film and insert
  the tapered end into the slot of the empty faktpn   Spool in the Upper Film Chamber,- then turn the Film                       -   Windirig Knob.  Make sure that the backing paper of
   the film is properly placed.
6. Turn the Film Winding Knob three or four times so
   that the film leader is held securely on the Take-up
   Spool.
7. To close the Back Cover, turn the Tripod Socket in
  the 'Close' direction until it stops.
8. Carefully and gently turn the Film Winding K-nob Ultil   the Film Indication Window shows number '1'. You
   are now ready to take the first picture.


                                                                    1F
View original page 5Page 6 · Read text
www.butkus.us
                      SIGHTING THE SUBJECT
                 Your   Bioflex Camera has       t rvo                        viewfinders. One is  the Refiex Glass                and the  other  is a  Sportsfinder for
                          viewing picture at eye-leve,l. Th-e Upper Lens in
                             front of the camera is used for view-g ;h" ,;tj";;
                       on the Reflex Giass and the Lower L.;, ;;il,  th"                               picture.
When obstructions are
 in your way you can
 hold your camera over                                                Rest your camera onhead viewing the                                          the ground for  lo.;vpicture from below.                                                                     subjects.


                             Hold the camera at
Place the camera on               stomach level & view             For high subiect useyour knee when taking                                        straight down to the            the Sportsfinder fora picture from a lower                Reflex Glass for clear                viewing the picture atlevel.                                             subjects.                                      eye-level.
View original page 6Page 7 · Read text
checkFor best results with your Bioflex CAMERA you ,have tothe Lens Opening, Shutter Speed and Distance Scale before each exposure. The
following suggestions are helpful.
                THE LENS OPENING                                                                            ,11
The Lens Aperture controls the amount of light that will pass through ttre lens onto
the light tettiitine film. Your tsioflex cAMERA offel* openilgs at f: L_f,11, f:16 and f:22.                  \
To seT the Lens Openings, move the Lens Aper[ure Control Lever to the desired number                  /
                                         is suggested that Setting f:16 should be used for normalon th; Lens Apertlre-W[."Sfaie. It                                                                       obscured, f:11;;il.""diti;;               ih. *"uthei'ir cloudy and the-sun is partially
shouid be selected. The Lens Openin g of. f.:22 is advised for exceptionally bright scenes.
  .        T     SHUTTER SPEED
The Shutter Speed controls the duration of the exposure. Shutter Speeds on your
                                                                               spgedBiotlex CAMERA are 1125, 1/50 of a second and 'B'. The                                                                               pictures of fast;L 1=ta-tt   second is recommended for general photography. 'faking
                                                  an exposure longersubject is not" advised. The 'B' setting is Ior taking ,pictures with
than 1/50 second. This setting should only be used'when the camera is firmly supported
on a iripod or on a table u.td rhould not be used to take pictures of moving subfects.
When you press the Shutter Release Button by 'B' position the shutter stays open until
you release pressure on the button.                                    1
                     TI{E DISTANCE SCALE                                                                             ;J                                                                                       correctBy accurately rotating the White Mark  '.1' o.t the Lower Lens Ring to the
dirtun." ,rrrrnt"r on th"e Distance Scale results in exposing sharp pictures. Do not take
pictures at a distance less than g feet from the subject to the camera. For excellent
 iortraits use distance scale of6.t2feet, and15 feet for groups and scenes. Infinity 'm'
 indicates distance of over 30 feet.
View original page 7Page 8 · Read text
www.butkus.us
                 PICTURE TAKI NG PROCEDURE
              Read the following instructigns carefully before exposing 1
t,           1. Opett the Cover Hood by lifting it with your right hand thumL"
               Press the Sports Viewfinder Hood inward to cloie.I           2. Remove the lens cap. Look into the Reflex Glass and you rvill see
                the picture whjch'you can take with your camera by following
                   the se instructions:
             a, As the Picture Taking Lens of your BIOFLEX REFLEX
           CAMERA is not a fixed focus lens. You must adjust the lens
                  to the distance of your subject bv turnin! the lens ring to the
                   appropriare distance on the Distance Scale.
             b, Set the required Lens Aperture.nl .,
               c, Set the required Shutter Speed.
                3. Hold the caniera steady, then gently press the Shutter Release
              Button downwards and the picture is then taken.J#
                 4. Then turn the Film Winding Knob until the next number appears
                  in the Red Film Indication Window and you are ready for your next
                    picture. Repeat this procedure until 12 pictures have been taken.
                                                                                        6
View original page 8Page 9 · Read text
UNLOADING FILM                    TAKING FLASH PICTURES


                                                                                    For taking pictures at night or iri dark place,     After all 12 pictures have been taken, ,roll                                                                  your Bioflex CAMERA has built-in    the Film Winding Knob to take up the                        Flash Synchronization. Insert tlash gun     remaining film entirely onto the Take-up
    spool. Open the camera as instructed                          into Aceessory Shoe, then, connect the co(d                                                                        with the Flash Synchronization Contact     aheady, and pull out the Upper Film Spool                                                              Any kind of Flash Gun equipPed with     Locking Spring Knob to the end to loosen                                                          a pvc cord can be used with The     the Take-Up Spool and remove the exposed                                                                           Bioflex CAMERA. Full Aperture f:ll      filn.                                                                            and both shutter speeds of. l/25 and l,/50
7                                                                                             of a second may be used.
View original page 9From the M. Butkus archive. Original publisher and archive notices are retained.
Check the model and edition against your equipment.
PDF verified 2026-10-10.