Film cameras
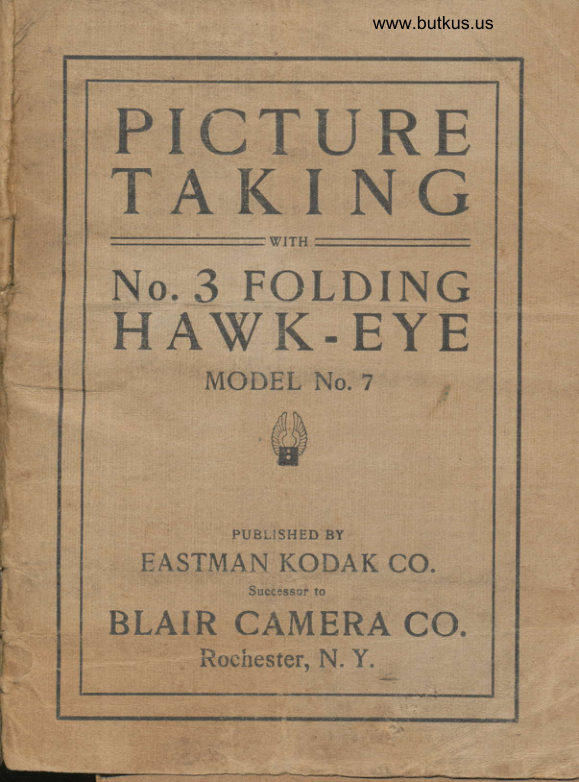
Blair Folding Hawk-Eye no. 3 Model 7 User manual
User manual for Blair Folding Hawk-Eye no. 3 Model 7. 23 pages in English. Read the original PDF, download or print a copy without registration.
23 pagesEnglish3.3 MB PDF
Loading your manual…Open PDF directly
Document details
- Brand
- Blair
- Model / document
- Blair Folding Hawk-Eye no. 3 Model 7
- Document type
- User manual
- Language
- English
- Pages
- 23
- File size
- 3.3 MB
- Category
- Film cameras
- Document date
- Not specified in catalog
Search available document text
Find a term, then jump to its page in the original PDF. Image-only pages may not be searchable; check the PDF for exact wording and diagrams.
Page 5 · Read text
www.butkus.us

        The manual was in pretty rough shape        One of these is in the National Air and Space Museum        \\N
      No. 3 Folding Hawk-Ey.
                  Model No. 7
                     Fsr Picturg".3% x 4%
                                              .'11. ..                                                                   . ^,.                                    ' ., t.   i  ,ri.
        '     Before loading or.attempting to tal<e anv plitures rvith
        the         Hawk-Eye                                                             carefully   1r                       read -the f2n11i1lar1vith_following direclions       aud            become. thorqlghh'                                        the instrumenr,
         tai<ing spccial care to fei,rn the corrstructiorr u,  .;^,         shutter; worl6 it for..both iime and instantaneorls ex_
         posures, before threading up th&fiIm.
      A most importarrt thing'to be remembered is that no
'-    --_f"hite.light  (inclrrdirrg gas or lamp light) should reach
        the film for a fractioual part-Thereforeof a secorrd urrtil it has         beetr developed and fixed.           extreme care musr
       be used to keep the black paper wourrd tightly on thi
        spool so_as to protect the film while loading-anci unload-
        ing the Hawk-Eye. It is best to select sonie place where
        the light is rrot too bright to insure safety.  :
                To Load
         I3ef'<rre lou,ding, try  ttre shutter a,nd. see      that  it 'works proqrerl.y.
       The film for the No. 3 Folding Hawk-E1,e, Model       \g. 7, it known as N9.-: F. P-. K. cartiidge, size        3/4 x 4tA, and is put up in light-proof cartridges so the
      camera can be loaded and unloaded in daylight. It  is        best that the operation be perfonned in subcllued light,      not in bright sunlight. After thc seai is brokerf  ii
         filust lre !-roriie irr mind tliat care must be takerr to keeo
          tiie biack paper tight so rro light carr reuch the film.
                                     3

                   ..-&.                       .4                   --                 .,:"-*.--t                                                            -';a,"
View original page 5Page 6 · Read text
Venmo @mike-butkus-camera  Ph. 2083
PayPal Name  Lynn@butkus.org      www.PayPal.me/lynnbutkus
View original page 6
Page 7 · Read text
',      '.i                   -t
                                                                                                                       I
  To iusure against all'tiangcis,  it is advisable to seleci a
place where the light  i.' rrot strong. as ihis work should
never be perfor"mer! in the gl'are of bright sunlight.
  Hold the camera in both hands as illustrated in Fig.
r ; first press with the forefinger of the left hand on thelittle linob D and at the same time with the forefinger
of the right hand push the little knob E toward the
winding key which releases the back cover.


                 www.butkus.us
                        Frc.  r

  Pull out the spool centers at each end of the empty
chamber about 13u= inch until the inside ends are flush
with inside of soool chamber: then olace the film cart-                                 rrloorr'onridge into positibn (the ',r'orcl'        a Kodak spool
should be at the bottom of tht came'ra), using care that
the centers when pushed back engage in the holes in
the ends of the spool.
  The film cartridge should be placed in the camera so
that the paper unwinds from the outside or off the top,
as it were. Break ihe seal ;rnd pass the black paper
over the rolls at back of canrera and thread into the
slot in the rvincling reel. Turrt the key to secure.
View original page 7Page 9 · Read text
indicates different methods of making exposrlres as
 desired.
  Opposite "T"  tilne exposure of any duration is ob-
tained by pressing the bulb to open the shutter, and
pressing it again to close  it.


                                  www.butkus.us


 ' Bulb exl)osures are ol;tained' by placing the pointer
opposite "B," pressing the birlb, when the shutter re-
mains open as long as pressure is applied to the bulb.
   Irrstantaneous exposures.are made by placing the
pointer trpon ,!,  .tto or rlo as desired.  This shutter lvorks automaticallv and is alwavs set
and read-v for nral<!rrg arr                                          "*1rrrt..tr..
            Stops or Diaphragms
  The stop or diaphragm is the opening which regulates
the amount of iight passing through the lens.
  The opening for the lens apertrlre can lte reduccd or
enlarged in accordance with the :trength of light rvhen
maKlllg alr expostlre.
  Under orciinary conditions ttre 8 opening should be
used. If the light be very strong, 16. 3z and 64 arefor use in making time exposures.
  NOTE.-If camera is fitted rvith single lens r6 should
be used under ordinarv conditions; if  the light bestroug, j:.
                                                          (t
View original page 9Page 10 · Read text
www.butkus.us

         To Focus wirh Film
  , When preparirrg for arr exposrlre the lens must first De placcc ln tocus.
 __To open the bed press the hidden button on toD of
 Hawk-Eye, as illustrated in trig. :.  Pull the bed cltwn until the side ltrace springs lock it so it is frrm. Draw
 out the standard, grasping it b1' the finger clamps.


                                trrc. 3
 - -Yg44 N9.- _7_-FlJrED wIrH STNGLE ACHRO-MATIC LENS. The stanclara snouta-U. Ai"*r^"""tuntil the pointe-r reaches the rire o'-the scale.--o6;".iJ
wlll then be rn tocrrs at a distarrce of eight feet or mo.e.
                                                    (s_inch   f,lodel No. 7-FITTIiD WITH R. R.-loc?iT.li'LENSf_"Sll and AUrorrtr'rc roc0S                   ijE'jVICE. To set the focus, press clown on the leu"r-a]_lached to the bed and set fhe catch i'ifi.-ifor.;;kafor the dista'ce desired, 6, 8, ro,-i5 o, ,o" i."il*iii.npull out the standar<i to limit of ,iotioo             il;;    bewill       in focus for the distan.. nl *iri.t,-.i-;;tvil'h;;;set the         catch.

                                                                                                                                                   ,l
                                                  )
View original page 10Page 11 · Read text
To Focus with Glass Plates, Using Scale
               It  is of ten  f ound cour,enient rvhen using plates to
       make pictures without being obliged to focus same ou
         glass. To use the plate attachtnent rvith No. S trolding
        Hawk-Eye, Model 7, fitted rvith Single Achrou,atic or
        with R. R. Lens, place the standard ]1 inch farther        back than when used with film at the roo foot mark,
         placing the plate attachment scale on the rnahogany
           strip opposite the focusing scale, usittg the front of the
         standard plate as a guide. Thetr use the front of the
        ,   standard plate as a guide on this scale for the different
         distances. This rnay be proven by focttsittg ou the
         ground glass in the plate attachment.     ,
           Insrantaneorrs Expcsl?{bq cr Srrp Shots
 '-'{nF+''   -Il--               tar: use <lier,plrraglrn srna,ller than  lG.
        Usua,lly No. 8 is prefela,ble,  especia,Ily for
        short ra,nge pictures.
    .       Instantaneous exposures, better ktrown as "snap
          shots." are usually m:ide rvith the camera held in the
       hand. The light therefore should be bright sunshine
        and exposures made frorn abottt tl-lree hours after sun-
           rise to three hours before sunset. Earlier or later than
          ihese hottrs time expostlres shorrld be tnade. See "Time
         Exposures in Open Air," pagc 9.
          Always photograph   f rom the sul-I, ltever toward it;
          that is, the surt should come from behind the operator
         or over the shoulder, shining clirectly on the object to
        be photographed. If  it shines iirto the lens the picture
            will be blurrerl.
        Do not try to photograph movirtg objects at less dis-
          tance than twenty-five feet, and lndeavor to catch them
         at an angle or coming toward lhe camera. In photo-
        graphinga  tall building at close ralrge and.poirrtin-g thg
        camera upward, the lines in- the photo will be found
        very irregular on account of the top being a greater
         disfance from the camera. When possible, you should
          obtain a position as ltear as yoll can to the horizontal           '           line of the center.
                                     8

\\                            ,  ra!!..{#Lr*l                     ,l-b;o*
View original page 11Page 12 · Read text
www.butkus.us
         The same rule applies to small objects, such as a
         dog, when the camera should be loweied to center of
          object to be taken.
        When ready for making the exposure hold the camera
           firmly and as nearly level as possible so the pictrrre                                                  -by     will       be true. Locate the object in the finder     looking
          squarely down into it, arrd release the shutier, usini
          care not to jerk the camera. This will uncover the leni
      a fractional part of a second, thereby making the im-
          pression upon the sensitivc surface of the film.
                 - After making the exposure, turn the rvindirrg key to          the right unt_il the next number appears to vieu'lhrough
         the rcd rvirrdow in the back of the camera.
                It  is a,clvisa,ble to get  into  the  harbit of
        *inding   tbe  fl.kn qs soorl as an exposure is                 -whiclr          rrtatle,          wri-t l:-v'sid tire  pcssiL-ilit.l  o{'
       making two expcrsures on the sArne surfaee.

                  Time Exposures
              L.r making  time exposllres some judgment must be
          us:d as to the length of time the lens should remain un-
         covered. This                              -is governed by the arnourlt of light upon         the object to be photographed and varies at diffefent
-          tlmes.The following   . rule should be observed :  Place the
        camera upon a tripod, table or some firur support where
          there will be no danger of moving it during the time the
         exposure is made; ceriter the object iu the finder, set
         the shuttcr on time as described on page 6, theu one
         pressure to open and rvhen sufficient time has elapsed
          olle to close,-using care, of course, not to jar  the
        camera either in openir:g or closino the shutter
                                                                                                                                                                                                                                                                                                                                                                    .;
             Time Exposures in Open Air
          In making time exposures out of doors the shutter
        can hardly be worked too quicl<ly.
View original page 12Page 13 · Read text
VVITH SUNSHlNE-smallest diaphragm, open and
      close as quickly as possible
     WITH LIGHT CLOUDS-smallest diaphragm, one-
      half second to one second.
     WITH HEAVY CLOUDS*Smallest diaphragm, two     to five seconds.          '.fhe               .foregoilrg-  is- c:Llculated for .open air exposures;^accurate      for objects in shadorvs or under iorches uo
       directiorrs carr be gir,en, only expeiience can teach the
      proper e.\posure.
     Never try to nra,ke a tirne exposure while
     holding  the ca,rnera, in the  ha,nd, a,s it  is     lrnpossible.
       Time l\leeCed foi" in*,'ior- E;iposures
-*;.i*;:*  -The following table is for  I  openirrg or diaphragm.
    When using 16 opening, twice as-much-time should'he
      Slv.en; with 3z opening Jour times, and with 64 operrirrg
     eight times the time bf the table.
       White walls and more than one window:
           Rright sun outside, two seconds.         Hazy sun, five seconds.          Cloudy bright, ten seconds.          Cloudy dull, twenty seconds
        \Vhite walls and cinly one rvirrdorv  :
           Bright sun outside. tlrr.ee seconds.         Hazy sun, eight secorrrls.          Cloudy bright.  fifteen seeonds.          Cloudy dull. thir.ty seconds.
        Nleclium colored lvalls arrri hangings and more than
     one rvindorv   :
           Bright srrn outside, four seconds.         Hazy sun, ten seconds.                                                                        I          Cloudy bright, twenty  sec\)rids.                                                        a          Cloudy dull, forty  seconds.
        I\{edirrm colored walls and hangings and only one
     window:Bright sun outside. six seconds.         Hazy sun, fifteen seconds.         Cloudy bright.  thirty  seconds.          Cloudy dull, sixty seconds.
                                    IO                     --:\--
                                                                                                                                                                                                    I
                                                                        ,.\!th:                                                 ,,.!
View original page 13Page 15 · Read text
One sheet is sulficient for. exposure rvith subject tett
feet away, in an ordinary room with light walls;- two
sheets when the subject is fifteen feet away; three sheets
when subject is fifteen feet away, with dark rvalls attd
hangings.
 When one or mbre sheets are used they should be
pirrned to the cardboard, one over-lapping the other
slightly at the corlrer.

                                                                                                                                                                                                                    '           Removing the Film      )
  The danger of light reaching the sensitive surface of
the film when unloading is the same as at the loading,
and to insure against any possibility of fogging the
qrlges, it had besf be done in a subdrred light.                                                         r.,  When t\c. rz has beeri c,\l;r).  ,.    txtiliri.  to tuftl the
   in.r iig key until the blacl< p?p,r;r leaves the-supply spool
and is all wound onto the winding spool' This you carr
rell as the key will turn 1'sv'y rnuch easier after the
paper has left the supply spool.
  Next, open the camera, the same as when-loading. and
take hold of the end of ihe black paper with thumb and
finger of the left hand, tttrniug the-winding key to the
right so as to drarv the paper e'renly dorvtr around the
so-ool. IJse the sticker fuinished rvith each spool for
fastening the end of this pal€r. A{ter this is done,
the spool may be removed by 'rithdrawirrg the spool
centei and diau,ing out the ivir cling key, turning the
cameia at the same time, so thc: spool will drop out.
  The ernpty spool shottld then tre adjusted in position
for rvirrdirig the rrext lihn by placilg the slot end of the
spool towaicl the winding kev. atter the winding fey isproperly engaged, push the spool cellter into original
posltroll.^  After all the exl)osures have be,en made arrd the film
removed, the negatives must trext be made and the
pictures-         finished. We recommeud that the amatettr do the rvork com-
plete as it will be found very intertlstirrg arrd the process
ls very slmple.
                              t2
View original page 15Page 17 · Read text
the negatives apart. If, however, olre or more of the
negatives flash up more quickly than others, they should
be cut out of the strip with a pair of shears and trans-
f;rred back to the trdy of ciear cold water where they
may remain until the balance of the strip has been
developed, and then they can be developed one at a time.
It takes usually from 5 to to minutes for development,according to the amount of exposure.
  Wherr sufhcieut density has been obtained, wash the
negatives thoroughly and place them in the Acid trix-
ing Bath made from I(odak Acid trixing Powder, until
the rvhite appearauce has disappeared. This usually
requires from 5 to to minutes. Then remove arrd washthem thoroughly in clear cold running water f.rom 2o
to 3o minutes.  lt  is very importatrt that all traces ofhypo be removed or stairts l'!l!'ar--pear a;t.'" dryitrg and
 r uir-r the negatives.
   Ii the fihn is regular it will be nccessary to place same
for about 5 miuutes iu a soaking solutiott conrposcd of
% or. glycerine and zo oz. water'; thett remove ancl piuto a flat surface by the four cortters, with emttlsiorr or
dull side out, with no further rvashing to clry.
   If the film is Non-Curling, which you rvill note by the
cartor.rs or by the coating. ttamellr, coatecl ort both sides.
     shoulcl bc piuned up to dry after having beett thor--itoughly u,ashed. r,vithout beirrg put into the soaking solu-
tioir, and should be suspended b;r the two corrlers.  It
must not be placed against a flat srtrface as it will sticl<.
  Use all cold solutions aud employ ice in extremely
hot weather. The temperature of: the developer shoulil
be from 65' to 68".
          Developing in Daylight
 We recommend the I(odak Filn, Tank, as the entire
process can be accomplished  ir-r daylight and the work
of developing is much more simplified.
  The gerieral results obtained by the Film Tank are
far better than the work done in dark-room.
  All films are put up with ittstructiorrs horv to prepare
thern for development in the Tank Developer.
                                    t4
View original page 17Page 19 · Read text
Mix Nos. r atrd 2, and allow the negative to remain
in the above solution until sumciently reduced. lVash
                                                                                                                                                              :'and place to dry.         - FOGGED NEGATIVES are' cattsed by leakage of
the dark-room, or by holding the negative too long in
the ruby light. This causes the film to darken soon
after placing in the developer.
 AIR BUBBLES beneath the film while developing
or fixing cause spots, and streaks are produced by
allowing a part of the material to remain ttncovered
in .otn." of ihe solutions.
 When sending film to us for finishing pack securely
and mark as follows:
BLAIR GAMERA DIV]SIO\,  B.rsrvar.r''Kooar< Co.,           *
              Rochester    r  .
   ;-.ro llot treglect to put  .\'(,Llr ()\'/11 llame and address
upon the rvripper: alio rvrite us utrder. separate cover    {:siating what you are sending, acivisiirg  if you rvish the
film developed, or developed and printed. For price list
of this work, see last page.
  Should you decide to do the finishing,. Ee providean outfit containing all the articles needed and thechemicals already cbmpoturded, ready for use.
  The outfit consists of
r Candle Lamp                           ..  . .. .             . .. $ .zS
I4x5  Printing Frame.                                    .25
I4x5  Glass, for Frame
 | 4-oz. Graduate.                                        .ror Stirriqg Rod. .                                             .o5
                                                                    .4o4 4rt/z x 5l  Dcvcloping TraYsi frb"r'Special D6vei-oper.il, rc. Kodik Acid Fixirig Powder                        .25.I5tl oz.Bromide Potassium                            .Io
                                                                     .5oz-doz. 4xg Velox Paper    ....,....,._.,.......2 ozs. Nep6ta Solution^ for developing Velox....   .I5
Directions                                                      .IO
                                              $i:i       Price complete, neatly p:tcked, $r.5o.
                              r6
View original page 19Page 20 · Read text
www.butkus.us

                   Printing on Solio Paper
              Solio paper giv_es prints having beautiful lvarm, brown
             tones,  . and rvhich. are usually mounted on cardboard         and highly burnished.
                   Merhod of Printing
         Open the printing frame of the outfit ancl lav the
           negative.b.ack 4orvn upon the glass (the back is thi             shirry side). Place upbn this a-piece'of Solio o"o.i.
           face down. Replace the back of ihe frame ancl ie.ti"
           the springs. The bacl< is hinged to permit of uniouer_
             i.ng part of the print at a time to inspect^      it with;;t           destroying its re,gister \rylth the negative.  The operation         OI ptjttln_g  ;- : ih;   :.:j,r -    ,, irapcr mirst be perfO;-mer'           in a subduecl light, thit  r, r,.-say, in an,irdiliary  r,.,in         as far               as possible                        from                                      ar:y                                  rvjndow.                                          Ihe paper                                                                                                              '   ^      _^;         used             must                  be k-ept                               covered-                                      in                                                its envelope.
          _ .Th" printing frame, w.hen filled as direited, is to be            laid glass-side-up, irr the strorrgest light possible (sun-             light                                               pa*itrg^                               until                                                           throrrgtL the                 .pref.erred)                                  .the light,                                                     -impressEcl           negative                                sensitive                      the                                     plper,                                           has                                                                       the                    -into          image srrfficiently- u-pon it.- Tlie progress of ihe printing
         can be examined frorn time to tin-re by removins thE
          frame from the strong light and opening:one-haif oi the
           hinged back, keeping ihe other haff fasiened to holci the
            pap.qr from shifting. The printing should be continued
            until the print is a lrttle darker Tint than the finished I           print should be. Plar:e prints without previous washins
,l          in the follorvirrg corr,bined toning and^ fixing bath  :              .    2 ozs. Solio Txing  Solution.
T           4 ozs. COLD Water.
           Pour the toning sclution into one of the travs and im-
            gl€rse the prints. ou,: a,fter the other. irr the toning bath.
,          int'tvemotionor sixandprintsnotcanallowedbe tonedto lie-intogethercontact.if they-Turnare keptthe
           prints all face dorvn and then face uD, and reoeat thisIi            all the time they are tonirrg. The priirts will'besin to
          ch41gc color almost immediately from reddish brdwn to
           reddish 1'ellow, therr lrrorvn to prrrple. The change rvill
                                               t7
                                                                                                                                                                       ./ /
                                                                                                                                                                                   :,:.    a*i      ,    --d:l
View original page 20Page 21 · Read text
. _'   t6t     '.
 I;e gmdual fronr one s*rade to auother, and the tonine
 sfotrld be''stopped whcrr the' print reaches the shadE desired.
  Six ounces of the--dilutecl toning solution wili tonetwo."dozeu prints; after that a new- solution should bimade the sanle as lrefofe.
  When the proper shacle has been. attairred in toninebath, the prints shorrld be transferred for five minuteito the follorving.salt solution to stop the toning   :
       Salt, I oz.; watcr,, J2 ozs.
  Then transfer the pritrts to the;.washing tray and wash
one hour irr funning waterr or in iixtEen ihanges ofwater.                                        i;
   The.prirrts a-re.then readv f,r1 ffiri,r1i rq. or they can le laid our anl drieci betwit   ,,!,r.ting paLqrs.
      Printing on Develogri.ng-Out Paper         '*
                    .Velox and Azo    .
        papers.may b-e safely handled for the purpose .Theseof placirrg in ptinting frame and deveioping, eighl to ten
teet_auay fro-m an-ordinary full flame of artificial light,or three or four feet away if the light is turned low.
With Welsbach lighr or ciayiigirr  ii  ii  riecessary to re-
duce the light-somiwhat by strldirrg the light or-*indo*
r.r'ith one thickness of orange post--office paper.
  Place the paper in an ordinary printing f5ame, in the
sarlle manner as when using printing-out paper, having
the emulsion side of the pap6r to'vard the <iull'side oT
the negative. After the pap-er is placed ir-r tlre frame in
perfect ,contact with nelative, exoose by holding thef_rame-close to gas, lamp or ir.tcanclescent-light, oisub-
dued daylight. Artificial light is rr:cornmended in pref-
erence to daylight because of its tiniformity and 6eing        $
in consequence easier to judge the proper length of time
to expose.
 .The amount of exposure varies  according to the
strength of the light.  It takes about the same time with
                             r8
View original page 21Page 22 · Read text
i-\
                                www.butkus.us
  a-n ordinary gas burner a  in incandescent light. The
 Welsbach requires about only one-half as much time as
  the ordinary gas burner and kerosene li!h.t of ord.iriary
  size about three times as much as an ordinarv-be-gas burn, er.  If daylight is used the rvindow should    coveied
  with post-office paper in which a sub-window about one
 foot square for making the exposure may be made.
 Cover this sub-windorv or opening with two or three
  sheets of tissue paper so as to diffuse the light, then
 have a piece of black cloth oi post-office paper to put
 over the opening when the u'hite light is uot wanled
  for making exposure. The printing frame should be
 kept from one to trvo feet away from the opening cov.
 ered with tissue paper vrheu making an exposure.
   The time tlecessary for exposing is regulated by the
  density .of negativb arxl strength of light. The further  the negative is from iri   r.,.irri€ of light  ; t the time of
  exposrlre the weaker ll.    !ii;:rt, hencc,  t ) secrlre utri
  formity in exposure lt  i:, d.'sirable always to make :        ,
  exposure. at a given ciiqtaitce  f rom the light used. Wrrn
 a negative of mediurrr density exposed one foot from an
 ordirrary gas buruer about t.ivo minutes exposrtre  is
  required.
   The temperature of the developer should be from 6.;'
 to 7o" Fahrenheit, and the proper developer to use is
 the one put up by the company who mauufactures the
 paper, as the best results will always be obtained when
 using their developers, as substitutes very often are not
 proportioned correctly and naturally the prints do not
 turn out as they should. Always follow closely the
 directions as given with the developer.
            -             To Develop
   Immerse the papcr irr the developer, usiug care that
  it florvs evenly over the surface and leaves no air bells.
 The image should appear in about eight or ten seconds' and when the prir,t is developed sufficiently remove
 quickly from the developer and rinse in clear water be-
 fore placing in the acid fixing bath.
                               r9


                          *r.lti&&rlilg. *;.
View original page 22Page 23 · Read text
,,€!t

    T',re tixirrg bath sirouic be irr Sbr.I,,,,..  u,ith formula ;,i'eu ivrth. tlre papet- and sl,orrld be kepf  f resh, and
 pri;its- should be kept irr n:otion  ,i not allorved to iie on          a top of one another u'hile in this bath. After becomins
 thoroughly fixed, ll'lrich takr:s abotrt rCn'minltes. thei should be removed and washeri for  ',oqt.onE hour  iir running water, or ten or twelve ^l,"anges 6f 'clear water.
  The prints should then br: r,;iro.i'ed. from the water
and placed ol.l a glass, face ,iown, and the water
 squ_eezed out of them by placirig a blotter on the back
 and running a roller over ri-he blolter, and then thev mav
 b.e placed_ betrveen blottirrg paper to d.ry, after whicir
 they can be trimmed arrd idourr  ri.
   Nlore explicit clirectiorr, zir,i;g't"n _1iith each kind of r)aDe:.
                 Pric;    -L
                                     JIi rlel )io. Z,  clouble
                                        S:rrrtt,:r, not  loacled $16.oo
                                Nlor,el }Io. 7,  single
                                                               r4.50
                       6 exp., l/+ x q.r/q.  .      .35
                         12 exp., S%xq%..      .7o                                    Cilse, lvith strap..     r.25
                                                                     .9o
                                                               r.6o
                                  .ompl.ie.:.....     r.50
                                                                     .06
                                                                     .08
                                                                      r2r/2
 To insure best r.esults  irr rist ul)oyr ha,ving
Blair Non-Curling Cartrirlge Fikns.

                                           J         Blair Camera Division
            Eastrn*n Koelak Co.
                  Rochester, N. Y.


   'i.\.ri{.-{E*,.                     ,J,::i*rath,..irriii*D      *-,:--        rl,-                   ^n4
View original page 23From the M. Butkus archive. Original publisher and archive notices are retained.
Check the model and edition against your equipment.
PDF verified 2026-10-10.