Light meters
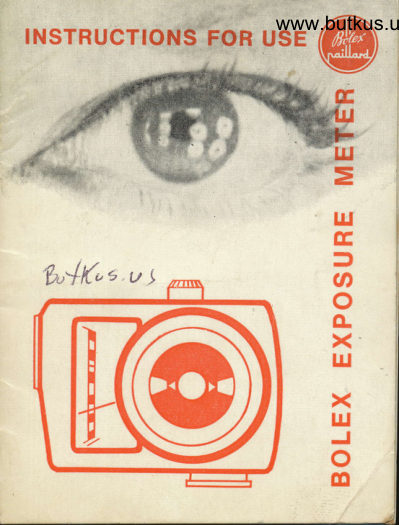
Bolex Exposure Meter User manual
User manual for Bolex Exposure Meter. 20 pages in English. Read the original PDF, download or print a copy without registration.
20 pagesEnglish2.2 MB PDF
Loading your manual…Open PDF directly
Document details
- Brand
- Bolex
- Model / document
- Bolex Exposure Meter
- Document type
- User manual
- Language
- English
- Pages
- 20
- File size
- 2.2 MB
- Category
- Light meters
- Document date
- Not specified in catalog
Search available document text
Find a term, then jump to its page in the original PDF. Image-only pages may not be searchable; check the PDF for exact wording and diagrams.
Page 4 · Read text
www.butkus.u


The BOLEX exposure meter
has been designed
and manufactured
by GOSSEN to PAILLARD'S
specification.
Intended primarily as a filming accessory
it is especially calibrated for use with
BOLEX H16 Reflex and H8 Reflex camerds
and takes into account the light deflected
into the reflex viewfinder.
lf adjustment is made to the sensitivity
rating, the Bolex exposure meter can be
used with other cameras -  in particularBolex H16 and H8 non-reflex models. (See
page 14).
View original page 4
Page 6 · Read text
www.butkus.us     Preliminary settings
    The dials of the Bolex exposure meter
     are controlled by a single ring (a) which
     is equipped with a safety lock to elimi-      ' nate all risk of settings being accidentally
     moved.
     Film sensitivities
     Pull ring (a) towards you and turn it right
     or left until the filming speed scale is away
n   from the zone of guide marks (c).
     Slacken the tension on the ring and you
      will find it moves freely within a distance
    of approximately one quarter of the dial
     circumference. Only within this area will
     the ring, when pulled out, engage the sen-
      sitivity dial. Outside this area, the ring auto-
     matically locks.
     fn the area where the ring turns freely,
     pull it towards you and turn it until the
    number corresponding to the sensitivity of
    your film appears opposite the guide mark'
     (h) in either the DIN or the ASA window.
    Slacken tension on the ring (a) and, mak-
    ing sure it does not move the sensitivity
View original page 6Page 7 · Read text
diaf, turn it until the filming speed scale is
again near the zone of guide marks (c)
when the ring will slip into place in the
locking device.
Filming speeds
Pull the ring (a) towards you and turn  it
until the mark corresponding to the desi-
red filming speed is opposite one of the
guide marks indicating the different posi-
tions of the variable shutter (see illustra-
tion opposite). lf your camera has no va-
riable shutter, simply use the mark ( open
shutter " (black triangle).
View original page 7
Page 8 · Read text
www.butkus.us
N. B. Once you have made these prelimi-
nary adjustments, you can forget about
them while filming : the locking device en-
sures that the dials will not move out of
position.


               1/4 closed


                              1/2 closed
                    I      Yi
     IrBiz
View original page 8Page 10 · Read text
www.butkus.us
Light reading
To take a light reading, press button (d).
Button depressed Normal reading posi-
                      tion ; the needle is free
               as long as the button
                       is down.
Button released The needle is locked
                    at the reading.
Button depressed (diagram at foot of
and turned 90o  page 6)
           The needle remains
                    free ; continuous read-
                 ings can be taken.             dI
                                                                                                                                                    {iEWhen the button is released, read off the
figure indicated by the needle. Then refer
                                                                                                                "ito the same figure on the outer scale of
the dial. Opposite this, on the red scale,
you will find the appropriate aperture sett-
ing.
Example: Film sensitivity: 25 ASA. Filming speed  :
18  f .p.s. Shutter open. lf the exposure meter
needle is set on the figure 8, the lens diaphragm
should be set at f/5.6 (See diagram page 2).
View original page 10Page 12 · Read text
www.butkus.us
    The very narrow acceptance angle of the
     Bolex exposure meter makes it especially
      suitable for this method of measurement.
      In fact, this method should be used in the
      majority of cases.
     Correct positioning of the exposure meter   I'f   {    with respect to the camera lens -  vital for     accurate readings -  is ensured by fitting        it into the accessory shoe on the camera.
    Look through the camera viewfinder and
     frame the subject. Depress the exposure
     meter button for a few seconds ; then re-     lease it, thus locking the needle. Now
     simply read off the f/number and set the
     lens accordingly.

      N. B.
    The Bolex exposure meter can be used
     separately from the camera. lt functions  in
    any position.


 tr
t*
View original page 12Page 13 · Read text
lncident light readings
R.e.adings are taken from the subject po_sition      by. pointing the exposure meter            .
towards the camela, thus measuring th;light falling on the subject.
View original page 13
Page 15 · Read text
Checking the battery
The Bolex exposure meter is powered by a long-
life battery which should be checked occasionally
however.
Depress button (d) and then depress the small
button (e). lf the needle does not reach the red
line between the figures B and 9 on the scale (see
diagram below), the battery must be replaced. To
replace the battery, remove the battery compart-
ment cap (f) with a coin. Fit the new battery
(Mallory Type PX-13) with the base (marked wittr
the sign *) towards the cap.
Finally, check the new  battery as described
above.


12
                                              ra r  i*                           .r..-',,,.: --.   . -.,. ;'
View original page 15Page 16 · Read text
www.butkus.us
     Zeroing the needle
     The check enables you to ascertain whether the
      meter is functioning accurately.
                                                12)      - Remove the battery (see page
      - Press the button (d).
     The needle should come to rest on the calibration
     mark below the figure 1 on the scale (see dia-.t    grary below). lf  it does not, adjust the zeto      setting screw (g) on the back of the exposure
      meter.
    The button (d) must be depressed during this
      operation to ensure that the needle is not locked.
View original page 16Page 17 · Read text
Using the Bolex exposure metel
with an H16 or H8 non-reflex camera
a) Correction of ASA sensltlvlty
Multiply the film sensitivity (expressed in ASA)
given by the film manufacturer by 1.3 and set the
flgure obtained in the appropriate window of the    {exposure meter. dial.
Example  : 25 ASA film. Exposure meter should be
                                                         halfset for: 25 x 1.3 -- 32 ASA (approximatelyway between 25 and 40 ASA).
b) Corrections of DIN sensitivlty
Add 1 to the film sensitivity (expressed in DIN)
oiven bv the film manufacturer and set the figure
6UtaineO in the appropriate window of the expo-
sure meter dial.
Example : 15 DIN filrn. Exposure meter should be
setfor:15*1-16DlN.

Using the Bolex exposure meter
with other cine cameras or still cameras
lf vour cine camera is not a Bolex 'H' model, oris'even a still camera, you only need to know theexposure times corresp!nding to the different                                    position                                                  the                                            of                             to_the       speedsfilming                - according                                          me-                                 exposure                          Bolex         shutter                 to set thevariable                 -ter correctly (see table opposite).
14                                                                                                                                 a

                                                                                                                                                                                                                                                                                                             .i
                                                                                                   -i **{
View original page 17Page 19 · Read text
Specif ication
   Photo-electric cell : cadmium sulphide photo-   resistance powered by a Mallory PX-13 battery
-  Circular acceptance field (12o Angle, see dia-  gram below)
  Measuremerit scale graduated lor 12 readings-   sensitivity scare ,     ,u33-                3 13     6i,0
                                tl22                      tl1 to            scale :- Aoerture                  schle                               : 12,  fitming speed-                            18, 24, 32, 48 and 64       f .p.s.
a - Wide angle lens fieldb - Standard lens fieldc - Telephoto lens field


  F
View original page 19Page 20 · Read text
www.butkus.us


;\r


       PAILLARD S.A.
             Sainte-Croix (Switze^r.tand)


    ME 660/864 Anglais    Printed in Switzerland
View original page 20From the M. Butkus archive. Original publisher and archive notices are retained.
Check the model and edition against your equipment.
PDF verified 2026-10-10.