Film cameras
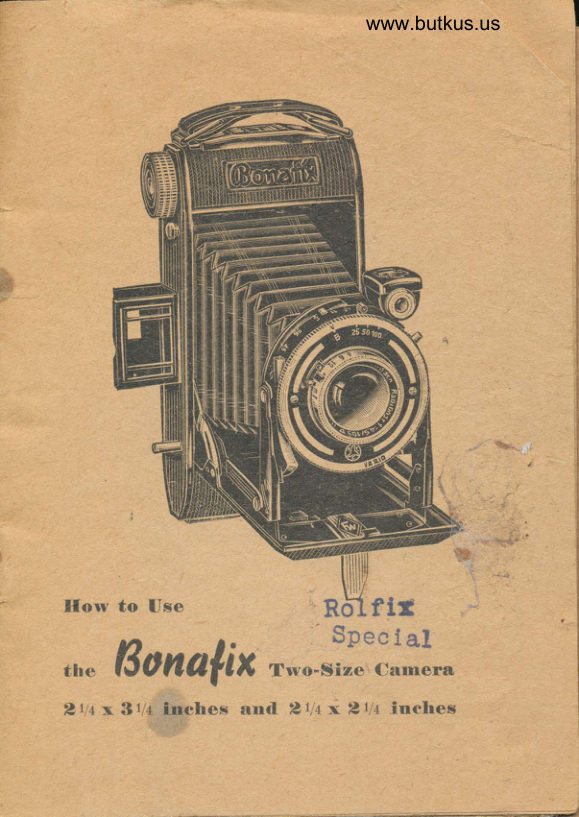
Bonafix Rolfix Special User manual
User manual for Bonafix Rolfix Special. 12 pages in English. Read the original PDF, download or print a copy without registration.
12 pagesEnglish3.9 MB PDF
Loading your manual…Open PDF directly
Document details
- Brand
- Bonafix
- Model / document
- Bonafix Rolfix Special
- Document type
- User manual
- Language
- English
- Pages
- 12
- File size
- 3.9 MB
- Category
- Film cameras
- Document date
- Not specified in catalog
Search available document text
Find a term, then jump to its page in the original PDF. Image-only pages may not be searchable; check the PDF for exact wording and diagrams.
Page 2 · Read text
Loading  the Carnera
     The "Bonafix" is constructed for roll films B II or No. 120.
     Never use any other films.
     Opening of Bach of Camera
     Open the back 30 by pushing the button 2l in the direction
      of the arrow and fold the bacJr 30 downwards in its hinge.

      Inserting Film
$l   Pull out the film windingw     knob 23 and swing upward
     the film spool carrier 35.
     'Place an empty spool in
     the spool carrier 35. The
      slotted side of spool must
    face the  film  winding
    knob 23.
    Swing out the half cylin-
    der of the lower film
    dramber 33 and place a
    new film in it. The'blacl<
     side of the protective pa-
    per must face the lens.
    Break the adhesive strip
     of the film, pull out some-
    what of paper and swing
     badr the spool carrier into
     the dramber. Bring up the
     point of paper.34 into the
              @t'
View original page 2Page 3 · Read text
www.butkus.us

 wider slot 36 of the upper empty spool, so that it pro_trudes
 from the narrower slot.
 Fold the upper spool carrier 35 with the empty spool back
 into the spool dramber; for this pull out the film winding
 knob 23. Turn the film winding knob 23 in the direction
 of the arrow until its catdr clutdres the slot of the empty
 spool, hereby enabling knob 23 to spring bacl< into its             lI
 former position.                                                                                                                                                                                                                                                                                          :
                                                                                                                                                                                                                                                                                                       ,i Wind 2-3 layers of protective'paper onto the spool and
 mind that the film paper is running absolutely straight              It without crumbling at the edges of spool.
Now fold up the bad< 30 with the locJ< 22 catctring.
Wind the film farther until dots become visible in the
 lower film window 32; now wind cautiously until number 1
 is appearing. Then the film is ready for the first exposure.
 After taking a picture, it is advisable to move the film at
once to the next number.

Removing the Exposeil Film
After the last (8th. or 12th.) exposure turn filmwinding
knob 23 until no more of paper is visible through the film
window. Then open the bacJr 30, wind the film tight upon
the spool and close it with adhesive strip. pull out film
winding knob 23 swing out the film carrier and take the
film out.
Changing the Empty Spool      a
Take the empty spool out of the lower fllm dramber ancl
insert it into the'upper film dramber as described above.

4
View original page 3Page 4 · Read text
Venmo @mike-butkus-camera  Ph. 2083
PayPal Name  Lynn@butkus.org      www.PayPal.me/lynnbutkus
View original page 4
Page 5 · Read text
Proteetive Lid for Panehromatie Fihns
     The sensitiveness of pandrrom-
        atic films is so great that the in-
       trusion of light for hours or days
      through the red film wjndow
      makes the fllm hazy. Therefore
,Y    the camera is equipped with a *
       device to cover the fiIm window, *

r.,G i      This cover keep shut all the time *FEI      and open merely in order to con-
l':       trol the numbers while moving          www.butkus.us
       the film by pushing upward the
      small button 39.
     Two-Size Dquipment
     The "Bonafix" is equipped to take two different sizes of
       pictures. If using 2rlq X 3rlr" only the lower fllm window
      32 must be considered.
         If 2r/qX2r/E" is used, the picture mask 37 put in place
       before inserting the film. The angular ends on the narrow
       side of the adapter are pushed between camera body and
       film guide roller.
         If  operating with size 2tlq X 2tll' use the upper fihn
                      31.ri    window
  :.     With size 2r/q X 2rlc" you need not worry about upright
 ,I     or square. Besides, the focal lenght of l0,b cm reproduces
       particularly well the size 2tlsX 21la" whidr is of great ad-
      vantage for the ensuing colour photography.
View original page 5Page 6 · Read text
www.butkus.us
Opening of Camera,
 After pressing button 24 the base board 2g will fly open.
 Pull down the base-board 28 until both struts catch audibly,
                    or else the base-board will not be
                         fast and the lens is not in the cor-
                     rect distance from the fitm. This
                may cause unsharp pictures.
                     Focussing the lens:
                               If the stop hand 2 points, to .,In-
                         finity" the camera is focussed for
                       distances beyond 50 feet. For ob-
                        jects of a lesser distance the adjust-
               ment is  effected by setting the
                  mount of the front-lens on the de-
                       sired number of feet.
                   Judge or measure the distance be-
                  tween the object and the camera
                   and make the actual number of feet
                        tally with the stop hand 2 on the
                           lens.
                               If the ascertained distance, for in-
                       stance 7 feet, is not indicated on the
mount, then set the front-lens in suctr a way that the hand
2 rests between 6 and 8 feet; or if possible, change the dis-tance of the object to some suctr distance as indicated on  i
the front-lens (6 resp. 8 feet).
After the exposure and before closing the camera always
put the front-lens badr to ,,Infinity,, otherwise the pro_
View original page 6Page 7 · Read text
[,


                                              www.butkus.us
                                           Picture 5
      truding lens cannot be housed in the case and damages
     would be the result.
    Shutters
      Generally, the following shutters are being used in the
      "Bonafix" cameras:
      vario   speeds: B    Llzs    L1TD   U200 second with flash-                             -       -       -              syndrronization
     Pronto Speeds B    t/ZS    1/b0    f/100 _  1i200 second                             -        -        -             with built-in selftimer and flash-synctrronization.
h    Setting of shutter speeds
      setting of shutter speeds is effected by turning the rim-
    med adjustment ring g until the indicator 6 shows the
      desired speed.
                *
View original page 7Page 8 · Read text
www.butkus.us
      For ..B" 1:  indicating time exposure) the shutter                                                                  "tay"       open as long as the release is being pressed. "B" is used for
       any exposures greater than those marked on the shutter. e
       Cocking the shutter
        All shutters have a blodring device against double ex-
        posure; the release will work only if the shutter is cod<ed.
                                                                              {
      Setting of Dia,phr&Ern                                               J
       Usual diaphragm apertures 4 are f:32                                       -22-16-11--        x       8-5,S-4,5.                                                                                            .i".4           f  : 32 is the smallest, f  : 4,5 the largest opening.
                                                 short exposure time       Large opening :  muctr lighf -
              4,5 -  5,6                            U200 -  1/100 sec.      Medium oPening : medium light :'medium exposure time
        8-11                                       1/100    1/50 sec.                                                            -       Small oPening :  less light :         ionger exposure time
         t6-22-32                                    1/50    1/25 sec.                                                            -       Great openings :  less depth of focus
       Small openings :  great depth of focus.
       Adjusting of diaphragm is effected by moving the dia-
       phragm indicator 3 onto the desired diaphragm values 4.
      Selftimer (Delayed-Aetlon Device)
      The built-in selftimer 10 permits you to take your own        'portrait               without outside help, even when taking group  t
         pictures the photographer may join the group.
      Mode of Use
        After setting the speed 3 and cocking the shutter 7 the lever
              ll on the lower side of the shutter is turned to the left


         8


ll                                                                  ,r
View original page 8Page 10 · Read text
J                                 www.butkus.us

       Flash-S.ynehronizing                                                                                                                                                                                                                                  :


                                                                                                                                                                                                                                                                                                                                                                                                                                                                                                                                                                                                                                                                                                                     I       The flash synchronizer resp. the connecting nipple 8 is on
        the right upper part of the shutter. In order to use it the                      i
        cable of the flash device must be plugged into the con-                         f
        necting nipple 8. When the shutter is released the syn-                      f
         ctrronized flash butb is automatically ignited.                                                                                       I
      Body-release                                                                                      I
       The release of the shutter is effected by the body-release 2?'                                                      J       Opening the base-board 28 causes the body-release 27 on     1
        the right of the camera to coine but automatically. When      {
        closing the                  tcamera, the release 27 is again pulled back
         automatically.
     .    Important
      When opening the base-board, mind, lesi by inapt holding
         in your hands, the foreward movement of the body-release
       be impeded, as this may cause trouble an<i damages.
        Yet, should any trouble arise due to unskilful handling,
        close the camera gently and re-open  it properly.
     Waist Level tr'lnder
       Looking straight down into the upper lens one sees the
       image of the subject. Picture (7) shows the limits for up-
         right resp. square exposures by hatdted lines. For square
        exposures  tilt the finder 900.
        For the use of size 2rlrby 21lr inches, picture (8) shows the
         limits within the finder.
     hye Level Finder
       For sport pictures use the metal frame fioA"r. Place the
  *      tiny aperture in the rear of the finder close to your eye.


           10

                                             .a                              -l
View original page 10Page 11 · Read text
Picture 7                Picture B

      The view through the front part shows the range of the
         picture.
       The two rods may be used to show the limits of the smail
         size 2rl+ X 2rln".


,t-
  II

1
"i


         ;
View original page 11Page 12 · Read text
./l,,1
                                   www.butkus.us

     Taking pictnres
         Picture 9 shows the correct way to hold your camera while
        taking pictures.
       Hold the camera fast with both hands, bring finder close
         to eye and fc'cus your object into the center of the picture
        area. Then press the body-release 2? slowly and genily
         right through.
                               For pictures of longer expo-
                                  sure than 1/25 second always
                                  use your tripod or something
                                      else for a steady support.


                                                                                                                                                                                     ?                                    ('losing  of CamerR
                                Before closing your camera,
                                always turn the front-lens  10
                           back to  "Infinity".  Avoid
                                     shutter 7 and selftimer 11 be-
                                 ing cod<ed.
                                   Pressure of both thumbs on
                                   the two struts 26 folds up the
                                  base-board 28 and the lens
                                   front retreets automaticallv
                                    into the carhera.
View original page 12From the M. Butkus archive. Original publisher and archive notices are retained.
Check the model and edition against your equipment.
PDF verified 2026-10-10.