Film cameras
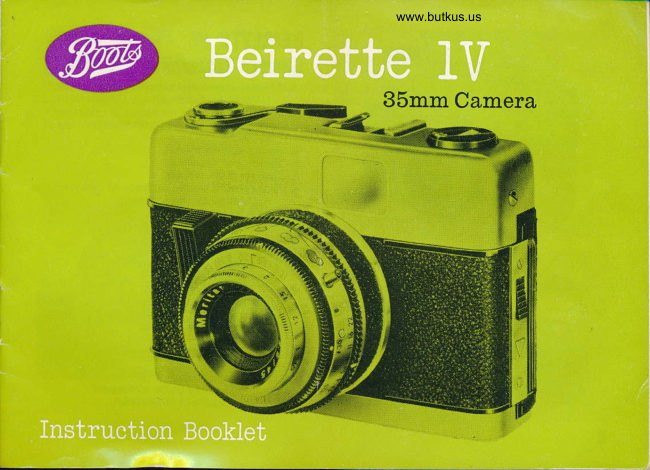
Boots Beirette IV User manual
User manual for Boots Beirette IV. 13 pages in English. Read the original PDF, download or print a copy without registration.
13 pagesEnglish4.9 MB PDF
Loading your manual…Open PDF directly
Document details
- Brand
- Boots
- Model / document
- Boots Beirette IV
- Document type
- User manual
- Language
- English
- Pages
- 13
- File size
- 4.9 MB
- Category
- Film cameras
- Document date
- Not specified in catalog
Search available document text
Find a term, then jump to its page in the original PDF. Image-only pages may not be searchable; check the PDF for exact wording and diagrams.
Page 3 · Read text
www.butkus.us
$hutter speeds
The speeds are shown in fractions of seconds 1 lgo, 1160, 1112s andB. At'B'the shutter will open fully until releaseil.
To select the correct shutter speed, line the white mark on the
control ring (1) against the ASA/DIN rating of the film in use.
This rating is stated on all film cartons.  lf the speed of the film
is not indicated, then select the one nearest to it.


                            Aperture Gontrol
                                        There are four symbols.which represent the
                                                following:

                                                           Bright sun           #                                                  Hazy sun                               €*
                                                           Cloudy/Bright               C]
                                                          Cloudy/Dull         N
                                          Set the aperture control ring (3) against the symbol
                                      on the lens mount which is neareit the preva[ling
                                         weather conditions.
View original page 3Page 4 · Read text
Focusing
Measure or estimate the distance in feet between
the camera and subject and rotate the lens
until the appropriate distance is set against the
small arrow on the lens mount (4)'


                                              www.butkus.us
                                     Depth of field

                       The depth-of-field scale
                                    The depth-of-field scale will be found on the lens
                                                       barrel. When the camera is focused on the
                                                 subject, look for the aperture in use on either side
                                                  of the scale to determine the depth-of-field. Simply'
                                                   this is the area in which all objects are sharp.
View original page 4Page 5 · Read text
www.butkus.us
 loading the Gamera
 Push the catch downwards (6), fully open the
back and pull out the re-wind handle (ig). lnsert
the cassette of unexposed film into the film
chamber (8). Push in the re-wind arrn until it
snaps into place holding the cassette in
position, then pull out about 4 inches of film
(the darkest side of the film should be upwards)
and make a crease about { in. from the end of
the leader. This is the tapered portion of the
film. Slot the { in. of film into the take-up spool
(9) and wind on with the lever wind (10)itheRlm
perforations should engage snugly into the
sprocket wheel (11). Then close the back and
advance the lever twice to clearfilm that might
have been exposed during loading.


            www.butkus.us
View original page 5Page 6 · Read text
Venmo @mike-butkus-camera  Ph. 2083
PayPal Name  Lynn@butkus.org      www.PayPal.me/lynnbutkus
View original page 6
Page 7 · Read text
The canera is now ready for use
The exposure counter (12) will count upwards as the
film is advanced and automatically revert to zero when
the re-wind handle is pulled out.
'Getting to grips'
The illustrations show two methods of holding the
camera. Bring the camera up to eye level; it is
important to hold it absolutely still at the time of taking
the picture. Your eye should be as close to the
viewfinder eyepiece (5) as possible.


                                                     www.butkus.us

For vertical pictures hold the camera like this, and horizontal pictures like this

6
View original page 7Page 8 · Read text
www.butkus.us
    Winding on
       After the first picture advance the film by pushing the lever
      wind (10); this movement will also cock the shutter.  lt will
       not harm the shutter  if the camera is put away with  it set.
      The BEIRETTE camera is designed not to take two pictures
      on one (double exposure) or to miss an exposure by
       winding on too far.
       After the final exposure the film is re-wound into the film\      cassette. The camera back must not be opened at this
       stage. The windi,ng back is done by depressing the
       release button (at the bottom of the camera) and winding
       the re-wind handle (13) in a clockwise direction, following
       the arrow, until all the film has been wound from the
       take-up chamber into the cassette. Remove the cassette
        of film and it is now ready for processing.  lt is advisable,
        especially with colour emulsions, to have the film
      processed immediately.
View original page 8Page 9 · Read text
Flash pictures
The BETRETTE witl accommodate both electronic and bulb guns. There are two flash contacts, one
within the accessory shoe, the 'hot-shoe' contact (16), the other on the lens mount (15).
Flash photography is reatly great fun and lncidentally can be used successfully out of doors.
The flish instruction leaflet will answer any technlcal problems. Boots are the experts with a
comprehensive range of inexpensive guns.
The'BEIRETTE has-an X synchronised shutter, so always setthe shutterto 1/30th sec. when using
flashbulbs. The lens aperture (3) is determined by a Guide Number specified for the film in use,
which will be found prlnted on the flashbulb packet or film instruction  leaflet. Always go by the
following rule:
                                                                                   (3).     Guide Number -i Distance (in feet) : Lens Aperture
     EXAMPLE
      Using Kodachrome ll (speed 25 ASA) with PFlB flashbulbs, Guide Number is 65.
     At a distance of 12 ft. the aperture will be:
               Guide Number 65  :  aperture f5'6
                          12ft.
View original page 9Page 11 · Read text
The bright frame viewfinder
When the subject is closer than 8 feet from the camera, anything above the lower white guide line
 at the top of the viewfinder will be omitted from the photograph. The above illustration explains
 this point clearly.
 Our range of gadgets is almost endless, so why not come in and browse around, perhaps the
 most important accessory is the Ever Ready case to give added camera protection. Our
 photographic staff will always be willing to help and to try and offer any advice you may require.


10
View original page 11
Page 12 · Read text
www.butkus.usJ'   Exposure table
               EXPOSURE TABLE for Black-and-Whitc and Colour Films
                             Film soeed (ASA)                 zt-32    50-6{     100 - lzt   160-2m
          Weather                     Subiect                      Sec.  7no   Sec.          Sec.   ilno   Sec.   llno
                        Distant views; sea, mountains, snow       a160   t6   alt?5,   t6  U 25  22  U 25  22
                      People outdoors; general vlews                     t 160   il    tlt?5,    il    tl 25    6  U 25  22
                        Subjects in shade; shots against the light  tl&   8  tl,E    8.   tl E          I  U 75   t6
                        Distant views; sea, mountains, snow       t160    il   tltzs   il    tl 25   6    tl 25   l6
                      People outdoors; general views            t160   8   tlt?s    I    tl E          tl 25    il
         Hazy Sun    Subjects in shade; shots agalnst the light   r/60  5.6    ltzs  5.6   tl 25    I    tl 25    il
                        Distant views; sea, mountains, snow             | 160   8    It2s   8   tl 25    il    tl 25   l6
                      People outdoors; general views            t160  5.6    Itzs  5.6   tl 25   8    tl 25    il
         Cldy. Brlght  Subjects in shade; shots against the light     t 160   1    ltzs   4   tl 25   5.6   )l 25    I
                        Distant views; sea, mountains, snow       t160   4    Itzs  5.6   .l 25    I    .l 25    il
                      People outdoors; general views            .160   4    ltzs   4   tl 25  5.6   .l E    I
        Cloudy Dull  SubJects ln shade; shots against the light     t 160  2.9   tltzs  2.9   tl'|E   4  tl.E  5.6
                              This table is only intended as a guide. For greater accuracl
                                  the use of an exposure meter ls recommended.
                                                                                                     fl
View original page 12Page 13 · Read text
Film seruice@
For-a fast, efficient and handy processing service, tqke your exposed printfilms along to Boots
and add that professional touch-Boots care about your pictures so don't risk being disappointed.
But that's not all. Boots offer many grore facilities including reprints, enlargements and prints from
transparencies as well as having a ilalth of expert photographic knowledge behind the counter-if you need advice, donlt be afraid t$ask.
                                          v
View original page 13From the M. Butkus archive. Original publisher and archive notices are retained.
Check the model and edition against your equipment.
PDF verified 2026-10-10.