Film cameras
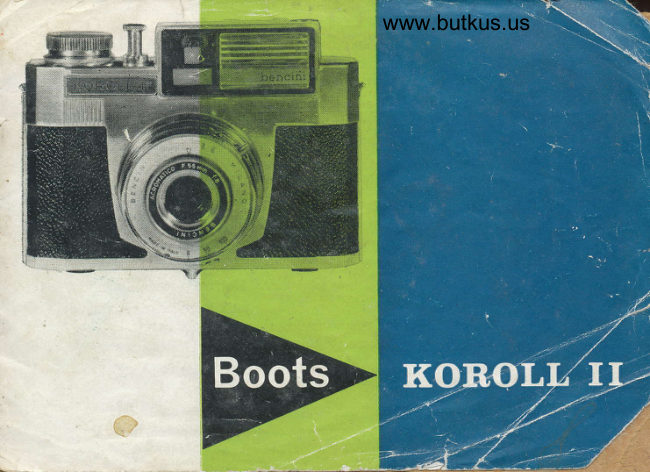
BOOTS Koroll II User manual
User manual for BOOTS Koroll II. 25 pages in English. Read the original PDF, download or print a copy without registration.
25 pagesEnglish5.8 MB PDF
Loading your manual…Open PDF directly
Document details
- Brand
- Boots
- Model / document
- BOOTS Koroll II
- Document type
- User manual
- Language
- English
- Pages
- 25
- File size
- 5.8 MB
- Category
- Film cameras
- Document date
- Not specified in catalog
Search available document text
Find a term, then jump to its page in the original PDF. Image-only pages may not be searchable; check the PDF for exact wording and diagrams.
Page 3 · Read text
rso/AsA 64    KODAK'Ektachrome' 64 Film    Roll and              \l
    19 DIN               Process E-6              ER1 35

FOR COLOUR SLIDES
Film price does not include processing
Daytight exposure: For cameras without automatic exposure control, determine exposure setting
with an exposure meter set for ISO/ASA 64 (19 DIN) or by using the following table.

     Bright or Hazy         Bright or Hazy
    Sun on Light        Sun (Distinct      Weak Hazy Sun      Cloudv Bright      Open Shade or
    Sand or Snow         Shadows)           (Soft Shadows)      (No Shadows)       Cloudy Dull
        f /16 1/125 s                  f /1'l    1 /125 s*       f/8  1/125s                f /5.6 1/'125 s               f /4  1/125 s
  *f  / 5.6 at 1 /1 25 second   f or backlig hted close- up subiecls.
Flash exposure: Use blue flashbulbs. flashcubes, or electronic flash.
Processing: Your dealer can have this film processed by Kodak or another laboratory. You can
develop this film yourself with Kooax'Ektachrome' Film Processing Chemicals, Process E-6,
Like other dyes, the dyes used in 'Kodak'colour  materials may change in time.
                                                          K"di-!:!3,{T;d'tii"r*i-"                                  .                  ^ -,r-.-**.                                                         -                          two apertiirtsSl                        ^
                     *   Synchronised for flash.
                     *   Fully removable back simplifies.loading.
                                                                                                                                                                                                                                                                       'l
View original page 3Page 7 · Read text
www.butkus.us

Loading the film  srde down the catches at each side of the camera and
                 remove the back.
View original page 7Page 8 · Read text
www.butkus.us


Pull out the small knob at the top left hand of the camera
and give it a half turn to secure it: then pull out the knob
at the bottom left hand and insert the film in the
left-hand chamber. Release both knobs so that their
spindles engage in the film spool.
  Break the seal on the film and unwind a few inches.
With your thumb keep a gentle pressure on the film to
prevent it unwinding  ft-rrther as you . .  .
View original page 8
Page 9 · Read text
www.butkus.us


. . . thread it through the wider of the two slots in the
take-up spool in the right-hand chamber.
  Turn the winding knob to take up any slack, and then
one more whole turn to secure the fihn, making
sure that it is feeding evenly on the spool, and is
not running up against one of the flanges.
  Replace the back of the camera and refasten
the catches.
View original page 9
Page 10 · Read text
www.butkus.us


Turn the winding knob and watch the left-hand window
in the back of the camera. After a few turns
some printing, usually dots or letters, will appear:
at this stage wind slowly to ensure the figure  l,
which follows immediately afterwards, comes into the
centre of the left-hand window. There are now only two
more operations to be performed before you take
your first picture.
View original page 10
Page 12 · Read text
www.butkus.us


t
i'ir

 lt:

t:
 !i


                              Taking the picture
                            For upright pictures grip the camera with one hand at
                                    either end, fingers at the front, thumbs at the back,
                                with the right index finger resting lightly on the
                                  shutter release.
                            11
View original page 12Page 13 · Read text
tr:T   ;r

                              For horizontal pictures hold the camera like this.
                                Bring the camera up to eye level, and, as it is important
                                   to hold it absolutely still at the time of taking the
                                      picture, hold it against cheek and nose for support
                            and keep your elbows against your body. your eye
                                should be as close to the viewfinder as possible.
                             Compose the subject in the viewfinder as you wanr
                                                     it to appear in the finished picture, hold your breath
                                    for an instant, and depress the shutter release gently
                            and s-m-o-o-t-hJ-y.
                              Your picture is now safely recorded, and you should
                                immediately wind on in readiness for the next exposure,
                               whether you are going to take it immediately or not.
                          Make a habit of doing this and you will avoid the
                               annoyance of taking two pictures on the same piece
                                   of film (double exposure).
View original page 13Page 14 · Read text
www.butkus.us
                 winding on   For the first picture the figure I was in the left-hand
                            window: for the second, turn the winding knob until the                  I                             same figure I appears in the centre of the right-hand
                              window. For the third exposure, the figure 2 should be in
                                 the centre of the left-hand window again, and for the
                                  fourth  it should be in the centre of the right-hand window
                            and so on until you have taken the twenty-fourth  picture
                          when the figure 12 will be in the right-hand window.

           Unloading the film     After taking the last picture on the film, wind on until
                           you see the end of the protective paper pass both windows:
                            a further turn or two will ensure that the film is
Fr                               completely wound on to the take-up spool. Remove the
                             back of the camera, and pull out the winding knob,
                                   giving it a half-turn to secure it: next pull out the knob
}                                 at the bottom right hand of the camera and take out the
                                                       filn-r. Take care that the film does not unwind, or light may
                                   get in at the edges and spoil it. Seal the film tightly by
                           means of the gummed paper provided.
                               Never unload the film in direct sunshine:  if it is
                      ,{   necessarybody to shieldto unloadthe filmoutfromof doors,the sun.use the shadow of your

                                                                      ..*iLrar.,:.e*l{!-r:
View original page 14Page 15 · Read text
Bfief time eXpOSUfe By setting the shutter speed control to B you can
                         yourself control the length of time the shutter is open.
                  You will not want to use this unless you are taking
                  ;i|;:H1TJ:,'i,l:,r,",::l?1'"n1ifl                                                             i:,';x,,ffi :FLA'H
                        the shutter opens when you press the shutter release and
                         stays open until you let it go. It is essential for the camera
                         to be kept absolutely still the whole time, and it will
                       .  help to rest it on a firm, flat surface or better still
                   mount it on a tripod: a cable release will ensure smooth,

                                                   b6 obtained rrom Boots          tr  f:i,'in::T:tHl'ff*'lll;

                                                                                                                                                                                                                                                                   '    :.,ii:r.i.,.-
View original page 15Page 16 · Read text
www.butkus.usFlash pictures
  The ronorr  rr is a fine FLAsH camera with a
built-in shoe into which the flashgun  fits, and a special
contact in the shutter to fire the bulb as you take the
picture. Simply fit the gun into the camera and connect the
lead on the flashgun to the flash contact, put a bulb into
the gun and take your picture in the normal way.
You will be delighted with the pictures you get,
both indoors and outside, when the light would otherwise
be too poor for picture taking.
  Flash is simple to use, and gives consistently good
results because you can take snapshots in poor light both
outdoors and inside. Inexpensive flash guns and
flash bulbs available from Boots ensure that you have the
right amount of light just where and when you want it                                                  -the sort of 'happy memory' picture illustrated on page l7
is obtainable really only with the help of flash.
Boots are specialists in rr-lsn and will be pleased to tell
you all about it. The table overleaf shows the distance
the flashgun should be from the subject.
View original page 16
Page 17 · Read text
r
Simple flash guide    i Ur" aperture f/8 and
                        I shutter speed 1/50.
                                                    Bulb No.     Bulb No. 5
                     'Black and White               6to8ft.     12 to 14 ft.
                     eg Verichrome Pan,
                        Selochrome,  etc.
                     Colour Prints                  4to6ft.     7to9ft.
                       eg Kodacolor, Ilfocolor,
                       Agfacolor CNI7, Gevacolor N5
                     Colour Transparencies           i ro e t.
                       eg Ektachrome, Agfacolor CTl8,
                       Cevacolor R5.
              l{B    For black and white, under all conditions. use
                        clear bulbs.
                      , For colour prints. use blue bulbs in daylight,                        clear bulbs in artificial light.                            [.
                                   transparencies, in all conditions,                      I for colour        16   use blue bulbs.                      [
                       rt
View original page 17Page 19 · Read text
rCare of the camera   A case will help to keep your KoRolr  rr free from dust,
                     and protect  it at the same time. Owing to the special
                       nature of the coating, the lens should be dusted only with
                                softest material                        the
                         preferably,                             a special-lensanbrush,often-washedavailablehandkerchieffrom Boots. or,
                     The camera requires no other maintenance and you
                      should not attempt to make adjustments yourself: Boots
                            will be very pleased to undertake any which may become
                          necessary.
      Accessories     Boots stock the following range ofaccessories for the
                 KoRoLL  tt and will be pleased to show them to you and
                        explain their use.
  Ever-Ready Case     Invaluable for protecting your camera, and the most
                       convenient method of carrying  it. No need to remove
                        the camera when taking pictures.
        Lens llood    Cuts out unwanted light and improves most pictures.
              18    Screws into lens mount.
View original page 19Page 21 · Read text
II              *         Filters    Lirh, yellow, medium yellow or yellow green to bring out
                      the clouds in landscapes with black and white; colour filter
                  5" (ultra-violet), to reduce the excessive blue tinge so often
                    I  experienced with colour films in landscapes and beach
                      scenes. Fit into filter holder which screws into lens mount

                                                  ilil;"rchangeab,e wi,h  crose-up Lens 1:1 ;i::::'ff:11il: ;::;'ili
                     the filter above or can be supplied in similar screw-in
                      holder.
ACCeSSOTy CaSe To take Lens Hood, and Filters. Fits on
                    ,  to carrying case strap.
  Cablg ReleaSe Specially useful to eliminate camera movement.
                   Screws into shutter release.
      TfipOd Keeps the camera absolutely steady. Screws into special
                    bush in camera base. Tripod Case, to fit on to Carrying
                   Case strap, also available.
      Flash Gun To fit into Accessory Shoe   a wide range available.                                            -    Gadget Bag  To take all your requirements in one      camera,
                      lens hood, filters, close-up lens, flash gun,
        20    flash bulbs and spare films.
View original page 21Page 22 · Read text
www.butkus.us
Boots Developing and Printing Service has a nation-wide
                       good                                     for ENPRTNTS         and is especiallyreputation                                            - andthe 17'                                on pages 3                    pictures                                 illustratedlarge-size big-value
We suggest you take your exposed film to any branch of
Boots and ask for'ENPRTNTS'.

                    precious                are      negativesYour                         reprints- andoftenenlargementsirreplaceablefrom-  and               have        want toyou will
your favourites. They should be kept where they
will be safe from dust and scratches.
A Negative Album, available from Boots, is ideal'

Photograph Albums, always fascinating to browse through,
are the best means of keeping snapshots orderly and safe'
Boots have the finest range in the country to choose from,
together with all mounting and titling accessories'
 In order to project your transparencies or to look at
them in a slide viewer, they must be mounted between
card or glass. Boots stock 2 in. x 2 in. plastic mounts
specially designed for ronot-r- rr transparencies.
View original page 22Page 23 · Read text
Here are a few easy-to-follow hints which will help you
to take good pictures from the start.
Hold the camera very still, by resting it on something
if you can. Otherwise    keep your elbows in,
breathe out a little way,- hold your breath   and squeeze
the shutter gently to avoid 'camera-shake'. -
Keep the sun over one shoulder, rather than right
behind, otherwise your subject will tend to look flat
and washed out.
Never             sun                  shine        let the                           directly                                  into the lens -  a lens hood                'againstis essential                       the            for                           light'photographs.
Avoid taking outdoor pictures in deep shade and in the
early morning and late evening unless you use flash to
light up your subject. Flash is useful even in sunlight to
relieve the deep shadows from forehead and nose which
often obscure detail in faces.
To take a         moving subject
someone        running-is                         tricky.- Aa speedboat,head-on or athree-quartercar or even
view can be successful. Or you can photograph from the
side, following the subject with your camera.
View original page 23
Page 24 · Read text
www.butkus.us


                                            5@
                                               I

                          Try to avoid fussy backgrounds, and especially
                                  try to place your subject away from trees and lamp posts,
                            which in the finished print may look as though they
                               are growing out of the person's head.
                                'Close-ups' of people, and animals, make especially
                                    effective pictures and because the ronorr- rr focuses as
                                close as four feet it is ideal for them. When taking
                                close-ups always allow a little more space over the
                        {    subject's head in the viewfinder than you think you need
                                          '        this compensates for the slightly different position of                              the-   viewfinder in relation to the lens.
                       "Ii     . . . and make sure the number of the fiIm is exactly in
             23    the centre of the rvindow when winding on.
                                rt-  -::                   - \          ;--   --fr
View original page 24Page 25 · Read text
l                         Boots branches offer a wide (and evergrowing)
The Photographer' s Chemists    range of, exclusive photographic accessories
                             suitable both for the beginner and
                             the experienced photographer -
                                      all the best of their kind at unequalled. prices.
                          Boots branches stock all the leading makes of film-
                                                                                                                                                                                                      '{                         both black-and-white and colour.
                            ih.ir nation-wide processing service handles all
                            types of work competently and carefully.              r'g
View original page 25From the M. Butkus archive. Original publisher and archive notices are retained.
Check the model and edition against your equipment.
PDF verified 2026-10-10.