Film cameras
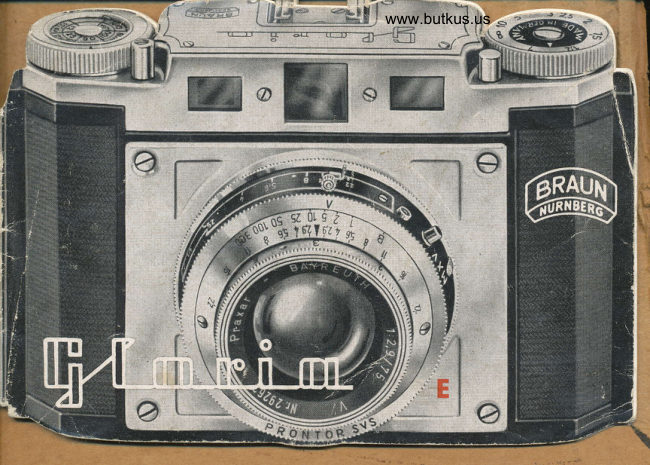
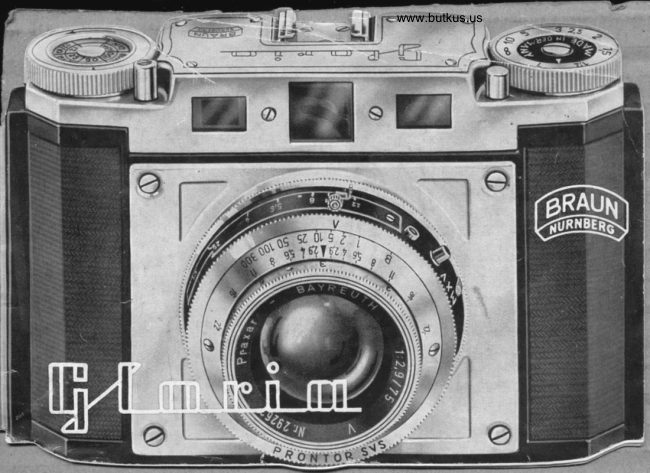
Braun Gloria User manual
User manual for Braun Gloria. 20 pages in English. Read the original PDF, download or print a copy without registration.
20 pagesEnglish7.5 MB PDF
Loading your manual…Open PDF directly
Document details
- Brand
- Braun
- Model / document
- Braun Gloria
- Document type
- User manual
- Language
- English
- Pages
- 20
- File size
- 7.5 MB
- Category
- Film cameras
- Document date
- Not specified in catalog
Search available document text
Find a term, then jump to its page in the original PDF. Image-only pages may not be searchable; check the PDF for exact wording and diagrams.
Page 6 · Read text
www.butkus.us
                              -
                 close ihe camera


Slide the back lock on the right-hand
side of fhe camera in fhe direcfion o{
the arrow, whereby the locking me-
chanism is released. You can now easily
swing fhe back panel open for inserting
or changing fhe {ilm. Close lhe camera
by pressing the back panel to the body
unfil fhe back locking mechanism audibly
clicks into place.                                         www.butkus.us
View original page 6Page 7 · Read text
-
     How lo insert the film
          First swing the iilm-carrier out as shown
         in the illustration on this page.
       Engage the {ilm in fhe knob at the lower
       end of the {ilm carrier, slipping the film
        info place. Swing the carrier back info
         position.
     When changing fhe {ilm, remove lhe
      empty spool in fhe same manner, and
         insert it info the take-up chamber below
       the {ilm fransport knob.
       Adjust fhe {ilm reminder on fhe film
        transporf knob to the sensifivity o{ the
        inserted film.
View original page 7Page 8 · Read text
www.butkus.us
                              -How to atfach the {ilm
A{fer you have inserfed the film into
the empty film chamber, as indicafed,
engage the end o{ the film info the wide
slot etc. Slide the bent film paper info
fhe wide slot of the emply take-up
spool, and furn the film lransport knot
two or fhree fimes until the {ilm paper
adheres closely to fhe empty ipool.
Make sure lhat fhe {ilm is wound evenly.
Now the camera can be closed again.
For removing lhe exposed film, swing
the.take-up spool away from the body
in lhe same manner as for inserting the
{ilm.
Avoid direct sunlight when loading or
unloading the camera; if there ii no
ofher shade available, turn your back
lo lhe sun.
View original page 8Page 9 · Read text
-                            The film control window
                                      After you have inserted the film and
                                        closed the back panel, slide the cover
                                       plate of fhe control window aside by
                                  moving lhe knob on fhe back panel.
                                 Turn lhe   f ilm lransport knob in the
                                           direction of fhe arrow unfil number 1
                                       appears in lhe control window. ll is besf
                                       to advance the {ilm lo the nexf number
                                          immediately a{ter the complefion o{ each
                                          shot. A{ter number 12 appears in the
                                             confrol window, and the last picture on
                                       the {ilm is exposed, the lransporf knob
                                               is lurned until ihe red film paper dis-
                                     appears {rom the contr:ol window. Now
                                 the camera can be opened, and fhe
www.butkus.us                        exposed {ilm removed.
View original page 9Page 10 · Read text
II       ,I               r,--1                          www.butkus.us                                          7

         Loading and unloading  drill    il
            Loadins fhe GLORIA                Unloadins the GLORIA f
         1. Open the back panel.                                 1.  Turn the {ilm transport knob until
         2. Swing oul the {ilm carrier,                  the film paper disappears {rom lhe
            and insert the {ilm.                            confrol window.
         3. Swing the {ilm carrier back into
              place, unwind the   f ilm paper and        Open the back panel.
                slide it info the take-up spool.                                                                                  3.  Swing out fhe refaining arm,         4. Turn fhe transport knob until fhe film                                                  and remove fhe {ilm.              adheres closely fo fhe take-up spool.
         5. Close fhe back panel, and advance          4.  Transpose fhe empfy spool into lhe
            the film unfil number 1 appears  in                                                       fake-up chamber.             lhe control window.
        6. Close lhe {ilm control window.         5. Close the back panel.
View original page 10Page 11 · Read text
gody retease, tube tocking device, double-exposure prevenfion device      {{i                                      -:-G                           1J

                                                           is the body release which by means of ils thread-         Adjacenl to lhe film transporl knob          permits also the use of a cable release.

           Prior to every exposure you should operafe the tube locking device which enables
          fhe lens barrel lo jump into its exposure position. The lens barrel is thereby automafically
          locked. A{ter having complefed lhe shot, depress the locking device (10), and slide
          the lens barrel back into the body.

         The built-in double-exposure prevenlion device prevents double-exposures, inasmuch
         as it permits fhe shuffer to be released only if the {ilm has been advanced.

               l{ the lens barrel is retracted, fhe body release cannot be operafed.
View original page 11Page 12 · Read text
www.butkus.us

   How to


    Bring the disfance which you have
     eslablished by means o{ the built-in
    range - finder info register wifh the
     friangular focussing mark by turning the
    {ocussing ring on fhe lens.


12
View original page 12Page 13 · Read text
-
       The lens diaphragm
        The diaphragm is sel by means of the  slide on the
         upper side. of the {roni panel. Bring the arrowhead o{
          the slide into register wifhthe line of the desired aper'
          ture number.
q      The delayed ac{ion release
           1. When fhe Prontor SVS shuffer is employed, fhe
            lever is adjusted fo lhe green mark "V". The
           delayed action release can be set whether the
              hufter is cocked or nof.
'i         NOIE; At "V" seffing fhe setfing fime B cannot
          be used.
          2. When fhe Pronto shufter is employed, lhe
           delayed acfion release is set by moving lhe
             lever in fhe direcfion of fhe arrow as far as
                   il will so.
          NOIE: Af time-setting B, the delaYed
             acfion release cannof be used and
              lherefore cannof be cocked either.                                           www.butkus.us
                                                        13
View original page 13Page 14 · Read text
a-
                                        www.butkus.us

                        Flash  synchronisalion for the Pronfor SVS Shutler
                      The new Gauthier shuffer  Pronlor SVS is   {ully
                                 synchronised {or {lash and enables you to work wifh
                         any desired setting, be{ore and a{fer cocking  fhe
                                         shufter.
                       Three  sef f ings are possible:

Seffing lA, yellow
ln this posilion M, flash lamps are ignited with shutler speeds o{ 1.150.sec. to. 1/300 sec.
Seffing' M cannot be used'for eleEtronic {lashe5. o The delayed. action release does
no{ work, l{ no {lash unit is affached the shutfer operates normally'
Seffing X, red
ln this posilion eleclronic {lash shofs can be laken at any sh.utfer_speed. r For {lash
lamps,'only shufter speeds up to 1/25 second can be used. o The delayed a.ction
release does nof work. Withoirt a {lash unit atfached the shutter operates normally.
Selfing V, green
This posifion is used if you wanf to work with the delayed acfion release.
For flash shots the same condifions apply as in posifion "X".
View original page 14Page 15 · Read text
The deplh-of-{ield              -
The depth-of-field comprises the zone which is sharply defined by the lens, from the
foreground fo the background. This area or depth varies according to the aperture
chosen. That is to say, a large aperture   (f l2.g) gives less depth-of-field, and a small
aperture ({116) gives a qreafer depfh-o{-field. The depth-o{-{ield for every aperfure
setting can easily be read o{f the obliquely positioned depfh-of-field ring o{ the
"GLORIA". This repeats on the leff and on lhe righf o{ the black diamond the range
o{ lens aperfures.
Example: lf you have set the focussing ring
exactly af 10 {1., fhe depfhs-of-field {or the
apertures listed below will be the {ollowing:
wilh aperfure 16  irom 6    ft. to 30 ft.
 with aperlure I   frorn I     ft. lo 16 t+.
 wilh aperlure 2.9 irom 9L/z lI. lo 11 tt.
Wilh any other dislance or aperfure the depth-
of-{ield can be read off in the same manner.

                                             15
View original page 15Page 16 · Read text
www.butkus.us

                     The range-{inder

through the lafter, you will notice a lighf rectangular area which is fhe range-{inder
image. The range-{inder adjusting *h..1  (9) with its distance scale is af the leff of
the range-{inder eYe-Piece.
View original page 16Page 17 · Read text
-I
                          How to use the range-{inder
                                           In the light rectangular area you will
                                          notice a double image o{ the sighfed
                                             objecf. l{ you make these two images
                                              coincide by turning fhe adjusting wheel,
                                          lhe exacf dislance to {he sighted objecf
                                               is established.


This distance is read o{{ on the scale
on fhe fop of the adjusting wheel, and
is correspondingly set on the focussing
ring (1) o{ the lens.
View original page 17Page 18 · Read text
www.butkus.us
                             -Accessories for the GLORIA
1. The Ever-ready Case
    is as elegant as the camera itsel{ and prof.ects vour GLORIA from possible injurY'
   Convenie-ntly slung across the shoulder in the ev.r-ready case, you can carrY fhe
  GLORIA wiih ease andand comfortcomfort whereverwherever yotyou go.
2. The Sunshade
   prevenfs reflections and diminished conlrasts, especially in exposures against the
    iight. In bad weafher if protecfs fhe lens from rain and snow.
3. Filters
   are indispensable, i{ you wanf pictures wilh sfriking artistic e{{ecfs. Yellow {ilfers
   io{t.n fh! blue o{ th6 sky, make clouds come out airy and clear.
4. The Supplemenfary Lens
   enables you to fake pictures o{ fhe smallesf subjects. lt is slipped over the lens
   mount eiactly like a {ilier or a sunshade.
5. A Flashgun
                                                                              exp.lore a   is a valulble addition to your GLORIA equipment.'no     Wifh it you can    Ji11!r."i-rot-'.ri.'oi  riniutu're ,photography,     malier wheihei you have loaded   your camera wrfh black-and-white or wifh colour film'
                                               successful and moderafely priced CeBe   :-ftk t;r-ptr"+"gruphic dealer for the  o Flashguns.

                                             18
View original page 18Page 19 · Read text
-I


                                                                             is reslingTh. G LO R lA should be held in both hands so fhaf it
{irmly on fhe palms of fhe hands. When the shufter is released the le{f
hand witl be keeping lhe camera sfeady
Press down the shufler release genfly and withouf jerking as far as i+
will go. Move fhe {inger only and nof lhe whole hand. Keep the {inger
on the release unfil the laifer has run of{. Remain calm while faking a
picfure, especially when faking snapshots at 1/25 second.
lf you follow fhese rules, you will be delighted wifh your sharply defined
pictures.
 . W. ,.r.rve the right lo make such alteralions in the design of lhe camera as we may consider
   to be in lhe inferest of furlher improvemenl.
View original page 19Related documents and language editions
From the M. Butkus archive. Original publisher and archive notices are retained.
Check the model and edition against your equipment.
PDF verified 2026-10-10.