Film cameras
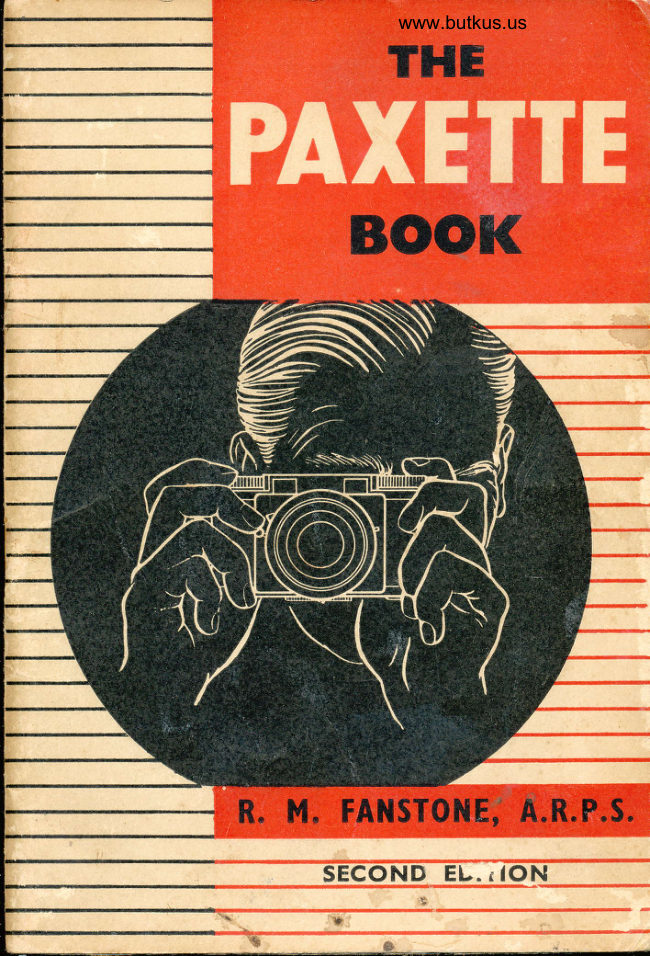
Braun PAXETTE Book User manual
User manual for Braun PAXETTE Book. 75 pages in English. Read the original PDF, download or print a copy without registration.
75 pagesEnglish10.4 MB PDF
Loading your manual…Open PDF directly
Document details
- Brand
- Braun
- Model / document
- Braun PAXETTE Book
- Document type
- User manual
- Language
- English
- Pages
- 75
- File size
- 10.4 MB
- Category
- Film cameras
- Document date
- Not specified in catalog
Search available document text
Find a term, then jump to its page in the original PDF. Image-only pages may not be searchable; check the PDF for exact wording and diagrams.
Page 4 · Read text
www.butkus.us

  THE
PAXETTE
 BOOK
    (Second Edition, Revised)

           DV7                      -/
  R. M. FANSTONE -
         A.R.P.S.

           Author oJ:
   Colour Sensitive Materials
A Guide to Colour photography
   All About print Finishi-nq
DLr rlotos in the Garden, etc. ?tc.

                                , ./'
      PRICE ?    NETT
                J 'b
View original page 4Page 5 · Read text
PAXETTE is easy, the camera cannot produce pictures
automatically. Picture quality depends upon the camera
and upon the user. There is a right and wrong way of
using the camera. This little book offers guidance and
points the way to success; by following the advice, good
photographs will result. They cost no more than poor
ones, and the latter may represent lost opportunities that
may never be repeated.

ADVANTAGES OF THE 35 mm.
CAMERA
The miniature camera comes nearer to the universal camera
than most. Many modern photographers use a 35 mm.
camera. Small size and light weight are important, and if
these were the only points in its favour they would determine
the choice for many. The PAXETTE has these advantages
      others. It offers economy in the cost of film, and-andcan be loaded with film for 36 exposures or less. It will
photograph a wide range of different subjects successfully.
Flash, compensating for poor lighting or where there is no
other illumination, is easy.
   A good miniature camera is not just a small camera.
Some cameras termed miniatures are only reduced scale
editions of larger cameras. The PAXETTE makes small
negatives, and is a true miniature camera, but the negatives
have such exquisite definition that very large prints can be
made without loss of quality. This is due to the high
quality of the lens. A good miniature camera must have
the following features.
 l.    It must be compact, easy to operate, ever ready for the
    unexpected subject, and must prevent two pictures
    being taken on one " frame".
View original page 5Page 6 · Read text
www.butkus.us
2. The lens must be of large aperture, allowing exposures
      to be made of objects in movement or when the lighting
     conditions are poor. The negatives must be .. sharp "
     so that large prints can be made without loss of detail.
3.  The shutter must have a wide range of speeds, including
     high speeds for action subjects and flash photography.
4.  The camera front must be rigid. This is best ensured
    by the " no-bellows " type of construction.
5.  It must use film of standard size, and a type of casette
     obtainable everywhere.
    The PAXETTE is a simple camera. Although this is
so the user must realise that the best results will be obtained
only after the owner fully understands it.  This applies to
those who have experience, as well as to those who have
never used a camera before. Of course you can load the
PAXETTE with film and go off taking pictures right away,
but you may be disappointed with the results. Before
loading the camera get to know the purpose of each part.
It is certain that successful pictures will follow.
View original page 6Page 7 · Read text
butkus        c=US-04'00'
     mike                   ou=29,        12:09:25  by               butkus,
       signed                              2018.10.05               cn=mike          DigitallyDN:o=orphancameras,email=mike@butkus.org,Date:
mikebutkus
View original page 7Page 10 · Read text
www.butkus.us
    PAXETTE II AND IIM
PAXETTE II and IIM are in some respects identical with
 Paxette I and IM but they may be termed universal cameras.
All PAXETTES are fitted with the rapid lever wind
which advances a new section of film and sets the shutter.
This is a most useful feature when a number of pictures in
rapid sequence are being taken.
   PAXETTE II and IIM offer the advantage that lenses
of different focal length can be used. These will increase
the photographers' scope, and will, in some cases, produce
 better results.
   The standard lenses of 45 m.m. as normally fitted,
while suited to groups, figure subjects and others, often
include more of the subject than we want. There are some
subjects that cannot be approached because of water or
some other obstacle. In these cases the problem can be
solved by replacing the standard lens with one of longer
focal length. A Telon or a Wray Plustar includes less of
the subject and a narrow angle of view, but those parts of
the subject included will be on a larger scale. If an object
with the 45 m.m. lens is 15 m.m. in height on the negative,
with a 90 m.m. lens it will be 30 m.m. in height.
   The lens of longer focal length also offers other
advantages. Figure subjects can be taken from a greater
distance without the subjects being aware of the fact that
they are being photographed. This avoids " camera
conscious " pictures. Shipping and yachting subjects are
often too far distant to make good pictures. Details of
architectural interest in inaccessible positions beyond the
reach of the standard lens can be photographed of a
reasonable size. Animals and birds and all those subjects
which cannot be approached.
  A lens of this type is also ideal for portraiture. The
proportions are better than when the standard lens is used
close to the subject.
                                9
View original page 10Page 11 · Read text
There are occasions when we find it is not possible to
 include all we want in the picture because a restricted
 position prevents our being far enough from the subject.
 In this case, a wide angle lens Choro 35 m.m., or the Wray
 Architron 35 m.m. will make the job easy. The shorter
 focal length permits of more of the subject being included
 and is the answer to the needs of the photographer who is
 interested in architectural  subjects.
    The interchangability of the lenses is of value to the
 user of colour film. It is necessary to " fill the frame "
 with the subject with sufficient material to the exclusion of
 the redundant. With colour it is not possible to enlarge
 part of the picture as with a monochrome negative. The
 extra lenses permitted by these Paxette models are especially
 useful for the colour worker.
    For those who wish to use both colour and mono-
chrome it is an advantage to have two Paxette bodies, and
the one set of lenses. All that is necessary is to screw in
the lens on the camera body containing the film to be used.
    The photographer using either of these cameras has a
very wide range of subjects open to him. By the use of
supplementary attachments and extension tubes it is possible
to extend the scope of the camera.
    Copy negatives, reproduction of documents, as well as
large scale pictures of small objects, stamps, coins, botanical
specimens, and similar subjects, are easily made.
     Finally, the lens used on the PAXETTES II and IIM
can also be used on the enlarger. This effects a saving on
the cost of the latter by ten pounds or more. The high
quality of these lenses will ensure the exquisite detail in the
PAXETTE negatives are amplified in the enlargement.
     It will be realised that the PAXETTE II and IIM
cameras are universal in their scope, and now provide
facilities that were previously only associated with cameras
costing several times the price.
                                 l0
View original page 11Page 12 · Read text
www.butkus.us
LOADING THE PAXETTE
 It is assumed that you have become familiar with the various
 parts of the PAXETTE and the working mechanism.
    The films are supplied in metal cassettes containing
 sufficient film for 36 exposures. See Page 68. These
 cassettes are light excluding and permit of the camera being
loaded and unloaded in daylight or artificial light. It is
not wise to perform these operations under very bright
lighting conditions such as strong sunshine. Always seek
a shaded spot if working out of doors, and if no shade can
be found use the shadow of the body. Keep the cassette
in its packing until it is required for use. NEVER EXPOSE
THE CASSETTE TO DIRECT SUNSHINE.


                                                       Fis. I

(1)  Hold the camera firmly and release the milled screw in
    the base (9) by turning  this in an anti-clockwise
                                                    ll
View original page 12Page 13 · Read text
direction until it is quite loose. The body and the
    back of the Paxette can then be taken apart. (Fig. l).
(2)  The cassette is held by a movable arm opposite the
    rewind knob. The arm must be swung out sufficiently
    to allow the cassette to be inserted. The recess on
    the spool must engage with the under side of the
    re-wind knob. After the cassette is in position the arm
     is swung back so that the shaped part of the arm fits


    against the spool projecting from the end of the cassette.
View original page 13Page 14 · Read text
www.butkus.us
(3) The hinged pressure plate is lifted back and the projec-
     ting end of the film drawn gently forward through the
    cassette. The end of the film is next inserted in the slot
    of the take-up spool. Wind the film winding knob
   as indicated by the arrow, holding the film by
     finger pressure to prevent it slipping out of the slot,
      until the perforations in the film engage in the sprocket
    teeth. As winding the film also sets the shutter it may
    not be possible to continue winding until the shutter
    has been released. The film must be advanced until
     the perforations have passed over the sprockets. See
     that the sprockets engage properly and that the film is
                                                   precau-     straight and flat. (Fig. 3.) Neglect of these
     tions may result in the film jamming.
     Replace the pressure Plate.


 Closing the Camera.
    The camera is closed by inserting the back between the
 camera housing and the front plate. The locking ring is
 then secured. (Fig. a).
                                      l3
View original page 14Page 15 · Read text
Setting the Filn Counter.
 The film counter of the PAXETTE reads backwards from
 36 to l.  This has the advanatge that the photographer can
 see at a glance the number of unexposed frames  still
 available. After loading and closing the camera the counter
 should be set to the RED dot near the figure 36. This is
 done by turning the projecting teeth. The film is wound
and the shutter released, twice, bringing the number of 36.
Remember to set the film speed reminder on Rewind knob.

                                Loading (in brief).
                                              l.  Open the PAX-
                                ETTE.
                                              2.   Lift Pressure Plate.
                                                 3.   Insert cassette and
                              draw out film.
                                              4.   Attach film to take-
                            up spool sprockets
                           through perfora-
                                       tions. See that film
                                             is straight and flat.
                         Close camera.
                            Operate shutter
                                      twice and advance
                                                 film.
                                      Set exposure coun-         !
                                                     ter.
TAKING PICTURES WITH THE
PAXETTE
Before taking the picture with the PAXETTE  it is necessary to
l.  Find the exposure necessary from the optical exposure
    meter, and set the shutter.
                                 t4
View original page 15Page 16 · Read text
www.butkus.us
      2.  Set the focussing ring in conjunction with the " depth
            of field " ring with PAXETTE IM and IIM.
      3.  Set the lens aperture control.
               It will be seen that having found the exposure, the
       other adjustments arecloselyrelated.

   USING THE RANGEFINDER
   PAXETTES IM & IIM
     The rangefinder will be found one of the most useful
        features on the PAXETTE IM and IIM and especially when
        the larger lens apertures are used. In the case of close-up
         subjects, where the permissible margin for error is small,
        this ensures very accurate focussing and sharp negatives.
      Many people find it very difficult to judge distances and for
      them the rangefinder is bf especial value.
         The rangefinder is quite simple to use, but the best
         results will be obtained after a little practice.
           Looking into the view finder you will see the subject
        included by the lens. In the centre of the finder there is a
         light circular area and in this area there will be seen the
                                             area you will;      range finder image. Looking into this
       probably see a double or divided image. A well defined
         vertical line, such as the angle of a wall, a door or window
        frame, is the best for this. Holding the camera with the eye
       close to the finder, turn the small knurled wheel. This
        will either further separate the divided images, or bring
       them together until they finally merge into one. When this
         latter takes place the scale over the range finder indicates.
       the distance at which the focussing scale should be set.
  I      Should the range finder indicate a distance not on the
        focussing scale of the camera, set the scale for the nearest
        point.

                                            15
View original page 16Page 17 · Read text
The use of the rangefinder ensures very accurate
 focussing. Setting the scale for the principal object after
 consulting the range finder will generally ensure sufficient
 depth of field over these parts of the subject situated before
 or behind the point for which the scale is set.
      If the subject is very close to the camera the range
 finder is especially useful as it is necessary to ensure that
 both the near and more distant parts of the subject are
 sharp. The depth of field is also smaller.
      First find the distance for the nearer part of the subject,
 and then for the more distant one. With these two in mind,
 set the camera focussing scale for the nearer part of the
 subject. Then note the point on the depth of field ring
 corresponding to the second point of distance. This will
 indicate the stop to be used to ensure both are sharply
. defined and avoids the need to use a stop smaller than may
 be actually necessary.
    For example, the rangefinder may indicate that the
 subject is included between 6 feet and 10 feet. With the
 scale set at 6 feet f/I1 will include a range from just under
 5 feet to between 8 feet and 10 feet.
 Paxette IIm. Changing Lenses
    The lens is unscrewed by taking a firm grip on the
 mount and then twisting in anti-clockwise direction.
   To screw in the lens hold it in the same way and
 screw in a clockwise direction. When screwed in the
 central dot on the red depth of field scale should be Just
 below the engraved word PAXETTE.
    Do not touch the glasses with the fingers-
 Paxette II.  View Finder
    The view finder is mounted on the shoe of the camera
 when using the telephoto or the wide angle lens. When
 using the wide angle lens the large aperture marked F 35
 m.m. faces forwards. When using the telephoto lens the
 mask marked F 85 m.m. is attached.

                                    16
View original page 17Page 18 · Read text
www.butkus.us
       The Optical Exposure Meter.
         This ensures the first essential in a good photograph: a
          correctly-exposed negative. The exposure can be ascer-
          tained in different ways from simple exposure tables to
          using a very accurate photo-electric cell meter to make a
         measurement of the lighting. The Optical Exposure Meter
        on the PAXETTE is simple and efficient, and, because it is
            built-in,  it cannot be left at home. In the eye-piece on the
           right hand side of the camera there are three rows of figures.
         These are from I to 12. They are not all of the same degree
         of brightness. The figures will be discerned according to
         the brightness against which they are seen.
          The camera is held
        close to the €yo, and
          directed towards the sub-
          ject to be photographed,
         but not towards the sky.
        After 20 seconds, or a
             little longer if the lighting
         is very bright, note the  iI      highest number clearly
         discernible. This is the
         basis of exposure. It  is
       recommended that fullt'I
         time is given for viewing
        under bright lighting as
       the eye needs a  lirtle
      more time to become
          sensitive to the different
          conditions.
                   found the number in the meter, the exposure             .Having
  f      can be immediately determined.
          The table shows a horizontal row of figures in heavy
        type. These are light values, and they correspond to the
                                             t7
View original page 18Page 20 · Read text
www.butkus.us

         Setting the Focussing and Diaphragm Ring.
       The use of the optical exposure meter provides the informa-
         tion as to the exposure. This is largely associated with the
        focussing and lens apertures. The latter determines the
         " depth of field", and the user of the PAXETTE should be
         quite clear in his mind what this implies. Briefly, depth of
                                                      field comprises the
                                              area sharply defined
                                         by the lens from the
                                        foreground to  the
                                    background. The
                                           depth of field varies
                                       according to  the
                                                  lens aperture used  ;
                                                                                  f l2.9gives much less
                                         depth of field than
              fl  E  5,6a2,8      2t456 E    rl     tlrr or flr6.
                                                                 It is not possi-
        ble in this little book to deal with all the factors which affect
        depth of field. It is reduced to simple terms by the " depth
       of field " scale printed in red on the PAXETTE. This
        repeats the lens apertures on the left and right of the centre
       line. By setting the focus at between 20 and 30 feet, detail
I        will be sharp lrom 60 feet to 15 fentatfl4.  If f/8 is used the
        range of sharp definition will be from " infinity " to 12 feet.
            It flollows, therefore, that the smaller the aperture the greater f         the depth of field. After a little practice this depth of field scale
       becomes one of the most useful features of the PAXETTE.
          In spite of the fact that the PAXETTE offers great
       depth of field it is necessary to set the focus correctly for
       the principal object. The distance can be estimated, or
        in the case of subjects near the camera it can be paced out,
       or measured. Some photographers prefer to use a range-
       finder. This can be fitted into the shoe on the top of the                                                          l
                                             l9                                                                                                                j
                                                                                                          {
View original page 20Page 21 · Read text
camera, and it provides a very accurate means of ensuring
             sharply-defined negatives. All that is necessary is to find
              the distance, and set the focussing ring accordingly. Another
         way is to set the focussing ring to the estimated distance
           and then move towards or away from the subject until the
             rangefinder images coincide.


I


                                      1;j--.+                               {     16,,za      2.8 4 5,6


        How to Set the Focus.
          Having determined the distance at which the focussing
             ring is to be set, the milled edge ring on the lens is turned
            to register with the line on the fixed ring (engraved in red
         on the camera).
          The Lens Aperture.
           This is set by means of the ring
        on the front of the lens mount.
               It is only necessary to set the red
           dot against the black line according
            to the setting required.
                                                                                          @
          As pointed out, the smaller             €
           the aperture the greater the depth
          of field. At the same time we           €
           have to realise that the smaller the
            aperture the less light passed, and
View original page 21Page 22 · Read text
www.butkus.us

the longer the exposure required. The exposure table will
show that each smaller stop requires twice the exposure
of the preceding one. It tl4 needs I second, at f15.6 it
will have to be 2 secs., or if f/8, 4 secs.
    Most uses of the lens aperture have been indicated.
At the seaside under brilliant lighting conditions, if the
camera is loaded with rapid film we may need to use a very
small aperture and high shutter. speed to avoid over-
exposure.


Making the Exposure.
It is good practice to make all the settings on the camera
in the same order. These are the focussing ring, the shutter
speed, and the aperture. If accustomed to work in the
same sequence it becomes a habit, and there is less risk,
at a moment when we are intent upon a good subject, of
omitting some important detail. It is an excellent plan to
keep the camera set for what may be termed " general
subjects". If the focussing ring is set at 25 feet, the
lens aperture at f/8, and the shutter at 1/50 sec., the camera
is ready for action. Any adjustment necessary to cope
with particular conditions can be made in an instant.
   The viewfinder of the PAXETTE gives a bright and
clear image of the subject. It may be taken as an accurate
guide. When the subject is close to the camera we must
make the necessary allowance for the fact that the finder is
not in lhe same position as the lens but very slightly above
                                 2l
View original page 22Page 23 · Read text
E


                                                                                                                                                                                                                                                                                                                                                                                                                             ,:.\
                                                                                                                                                                                                    $,
 and the delayed action lever pushed over as far as it will
 go. When the shutter is released,  it operates after approx-          {
 imately l0 seconds. If the photographer is alone, and feels        ?
 that a foreground figure can improve the subject, he can
 be his own model.                                                                                        *s
     There is another use for delayed action. The exposure
may be too long to be given in the hand. Interiors, such as            {
 small details in churches, need exposures as long as one
 second. Find a support for the camera (a chair, pile of       I
 books, or seat end); but even when a support is provided,                               lil
                                                                                                                                                                            :1 it is almost impossible to prevent movement when releasing
 the shutter. Set the shutter at the speed decided upon,           I
and operate the delayed action release. Any tremor will                                    frri*
have subsided by the time the shutter is in operation.                 .4
   The delayed action must not be operated with the
shutter set at " B", as this may damage the shutter
mechanism.

Time Exposures.                                            {
    In spite of the long range of speeds provided on the                                                                                l
PAXETTE the slowest (one second) may be too short for                                                         {some subjects. We have to use the " B " (Brief) setting
on the shutter. Pressure on the release opens the shutter,
and it will remain so until the pressure is released. For
these exposures the camera must be supported. In order
to make sure that there is no movement of the camera, all
these exposures will have to be made with a cable release
preferably of the self-locking type. This avoids direct
contact with the camera. For time exposures an exposure
meter or calculator should be consulted, as the subjects
are beyond the range of the optical meter fitted to the
PAXETTE.

                               24
View original page 23Page 24 · Read text
www.butkus.us
        Checking the Film Transport.
                If the instructions regarding the loading of the
      PAXETTE have been correctly followed the film will be
         transported through the camera with perfect smoothness.
             It is well to check this in order to be certain.
           The rewind knob is lifted as far as it will go. If the film
         transport mechanism is operating perfectly, the rewind knob
    I.        will turn in the OPPOSITE direction to the arrow on the
  tt      knob as the film is advanced.
       Film Winding and Film Transport.
      The shutter winding mech-
        anism, film transport and
          film counter are coupled so
         that they are operated when
          the lever wind is used. After
 f       the shutter has been released       and until the film has been
 r      re-wound, the safety device       which prevents double exposure is in operation.
t     To Unload the Camera.
      When the last exposure has been made the film counter
        should be at l. To wind back the film press the lockinga        stud down and keep it there. Pull up the rewind knob
       and turn it in the direction indicated bv the arrow. As t


                                                  rrrrFrr;                    C           C
View original page 24Page 25 · Read text
the film is rewound, increased resistance is felt, owing to
         the fact that the film end is being held by the take-up
         spool. A few more turns will wind the film fully into
          the casette, and the camera is ready for unloading.


    CARE OF THE PAXETTE
        The PAXETTE is a well-constructed camera and may be
            relied upon to afford satisfactory service for many years.
            Its more delicate moving parts are well protected by the
            substantial body. In spite of this the PAXETTE is an
          instrument needing care. It should be protected from
           moisture, as well as dirt, dust, and sand at the seaside.
       An " ever ready " case ensures this, and affords not only
           the necessary protection but makes transport easy.
                   If any part of the camera fails to function, take it to
         your dealer. Never " fiddle " with it yourself: it may
           involve you in costly repairs.
            Take the camera apart occasionally and dust out the
            interior with a clean brush. A small artist's brush is
             excellent, but see that the brush itself is free from dust, or
                it may deposit as much, or more, than it removes. It is a
         good plan to keep the brush for this purpose in a glass
           jar with a screw cap.
           The lens is one of the most important parts of the
                                                                       glasses       PAXETTE. It is a delicate production, and the


i
t
View original page 25Page 26 · Read text
www.butkus.us
are soft, and easily damaged. If the lens is dusty remove
the dust gently with the brush. Fine optical glass is " soft "
and should never be cleaned except with a camel-hair brush.
     Little will go wrong with the shutter, but should it
fail to function hand it to a dealer who is in touch with a
competent repair service. The " handy man " with a knife
or screwdriver can do untold harm.
                             shutter to " make it work".  . Never apply oil to the
This can have truly disastrous results.

lnsurance.
The PAXETTE is a good camera. It is attractive and very
portable. This offers a great temptation to the thief' Each
year a great number of cameras are stolen from cars, trains,
cafes, etc., during the temporary absence of the owner.
Moreover, these cameras are not often recovered.
      It is a wise precaution to take out an insurance policy
for the PAXETTE and its accessories.  It costs very little.
Any photographic dealer will supply particulars.
HOW TARGE CAN THE
PRINT BE ?
The PAXETTE makes a small size negative. They    u"ty                                                          "t"sharp, and full of detail, but are of no use for " contact "
or same size prints. Printing is by enlargement, sometimes
termed " projection printing". The size of the print can
be very much larger than the tiny negative. You may ask
" How large can the print be? "  The answer, in the
language of the House of Commons, is " in the negative".
       If you want the largest possible prints from PAXETTE
 negatives the negatives must be sharply defined. The lens
 fitted can ensure this but we have to recognise the fact that
much depends upon the photographer and the way in which

                               27
View original page 26From the M. Butkus archive. Original publisher and archive notices are retained.
Check the model and edition against your equipment.
PDF verified 2026-10-10.