Film cameras
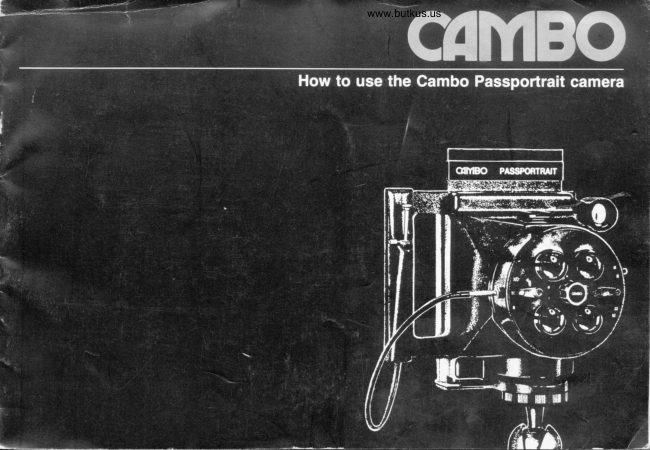
CAMBO Passportrait camera User manual
User manual for CAMBO Passportrait camera. 23 pages in English. Read the original PDF, download or print a copy without registration.
23 pagesEnglish2.1 MB PDF
Loading your manual…Open PDF directly
Document details
- Brand
- Cambo
- Model / document
- CAMBO Passportrait camera
- Document type
- User manual
- Language
- English
- Pages
- 23
- File size
- 2.1 MB
- Category
- Film cameras
- Document date
- Not specified in catalog
Search available document text
Find a term, then jump to its page in the original PDF. Image-only pages may not be searchable; check the PDF for exact wording and diagrams.
Page 3 · Read text
www.butkus.us
   Introduction

    The Cambo Passportrait multiple-image  in-   The Models20-25 have two lenses, giving two
     stant picture camera is designed specially for   pictures on each sheet. On each camera, the
    making high quality identification pictures and   lenses are accurately matched so that, if allthe
      miniature portraits that are available to the cus-    pictures on one sheet of film are taken simulta-
    tomer moments after the exoosure is made.    neously, the images will be virtually identical.
    Time consuming and costly darkroom work is   The lens aperture is set simultaneously  for all
     eliminated and, as the customer is handed his   the lenses. The between-the-lens shutters are
     prints right away, much tedious book work is   designed to give each picture the same expo-
     also made unnecessary.                        sure, either simultaneously or consecutively,
    The camera uses Polaroid Land films, both co-   as desired. The shutter speeds are 1/100 sec.
     lour and black and white.                    and 1/50 sec., and there is a "8" setting which
    There are five different models of Passportrait   enables the shutters to be kept open for any
    cameras - Model 40 - 20 - 25 - 44 and 45. Their   desired length of time. The shutters are "X"     basic operation is identical, a'nd the Model40 is   synchronized,  for use with electronic flash.
     featured throughout this book. lllustrations of  The Passportrait camera has been designed
     the other two models are also included, toge-    for the easiest possible operation.  lf you follow
     ther with their major features. Wherever there   the instructions  in this book you need no great
    are important differences in operation, these   photog raph ic ski  ll to produ ce quality identifica-
     are pointed out.                                    tion pictures or miniature portraits.
    The Models 40 and 44-45 have four lenses and   The serial number of each camera is located
    produce four pictures on each sheet of film.   next to the triood socket.


i
View original page 3Page 4 · Read text
4

rr          |    |   rtl'rtM00el lu

1.  Polaroid Land pack  f ilm holder (removable)   7. Shutter cocking lever                   Focusing method: Measure distance. Focus
2. Cable release, with locking screw           8. Aperture control lever                                 is  f ixed on subyect at distance of 1 .20 m (48 in.)
3. Cable release socket                      9. Shutter seouence selector knob           from camera front.
4.  Shutter control lever                    10. Electronic flash contact
5.  Optical viewfinder                        11. Triood socket                           Film types used: Polaroid Series 100 Land
6. Two 125 mm f/8 lenses                                                              pack films.
                                                                            Format of each image: 46 x 72 mm.
                                                             EACH PRINT PROVIDES 2 IMAGES.


                                                   10
                                                                         11
View original page 4Page 5 · Read text
www.butkus.us
Model 40

1.  Polaroid Land pack film holder (removable)     7.  Shutter cocking lever                   Focusing method: Measure distance Focus
2. Cable release, with locking screw               8. Aperture control lever                                 is fixed on subject at distance of 1 .20 m (48 in.)
3. Cable release socket                                 9.  Shrrtter senuencc selector knOb           from camera front.
4.  Shutter control lever                           10. Lens sequence numbers
5.  Optical viewfinder                              11.  Electronic flash contact                   Film types used: Polaroid Series 100 Land
6.  Four 125 mm  f /8 lenses                    12. Tripod socket                           oack films.
                                                                            Format of each image: 36 x 46 mm.
                                                             EACH PRINT PROVIDES 4 IMAGES.


                                                        www.butkus.us
View original page 5Page 7 · Read text
www.butkus.us
Model 44

1. 4 x 5" camera back with ground glass     5. Optical viewfinder                      Focusing method: Measure distance.
   focusrng screen. Will take Polaroid 4 x 5"     6. Four 125 mm   f /B lenses                 a. Focus is fixed on subject at distance o11.20
   Land film holder or wet-process 4 x 5" film     7. Shutter cocking lever              m (48 in.) from camera front.
    holders                                  8. Aperture control lever                   b. Ground glass focusrng2. Cable release, with lockinq screw           9. Shutter sequence selector knob
3. Cable release socket                     10. Electronic flash contact                  Film types used: Polarotd Series 50 4 x 5"4. Shutter control lever                                1 1. Tripod socket                            Land  f ilm packets. Wet-process 4 x 5"  f ilms may
                                                                                             also be used.
                                                                             Format of each image: 44 x 56 mm.
                                                             EACH FILM PACKET PROVIDES 4
                                                                            IMAGES.


                     2
                    3           (@@)
                                                                 7

                                                         B
View original page 7Page 8 · Read text
B

Model 45

Focusing with camera Model 45           The focusing mechanism: Loosen the focus  When you think the image has the right size,
This camera can be focused. either by   locking knob (1). Focus the camera with the   you focus with the focusing knob until the split
                                                                                                          amaloated.rangefinder or through the ground glass   focusing knob (2). When the image is sharp,    -rr-^"-^^^^+;imaoe is                                                                                                                                                                                            ru fnr-rrgruuu   WilhOUtscreen. Before you focus. position the camera   tighten the knob (1 ) agatn.                                                       I llCt  IClll9UilllUUI^,-rI. UlrouruJ^rahlps vnrryuu  tn
between 1 .20 and 4 m i4 and 12 ft.)  f rom the                                               removing the 4 x 5 filmholder from the camera.
subject.  lf. after focusing you find that the                                         This gives you a quicker operation than                                     lmage Control Model 45                                                                                                       controlling on the groundglass.image rs too smail or too large in the picture
area srmply move the camera closer to or   Rangefinder control.                                                                                imagefurther away  f rom the subject, and refocus.    The rangefinder has a built-in split
                                                                                                                                                         f ocusing.


                  \'V
View original page 8Page 9 · Read text
www.butkus.us
                                                  The oneratinq distance with
Camera focation            Seat the subject              camer'a Moddls 40.20,25, 44

The camera should be set up in an area which  A seat should be provided for the subject.   The focus position of the lenses is fixed. For
is specially set aside for its use. With very   Avoid chairs with high backs, as these willtend   optimum image sharpness, the distance from
simple lighting, the space need be no larger    to appear in the picture and thus create an ugly   the  f ront plate of the camera to the eyes of the
than about 3 x 2 m (about 10 x7 ft.). For the    effect. A low backed chair is ideal, or a stool of a    subject should be 1.20 m (48 in.). This is most
most efficient operation,  it is important that the   comfortable height will also do. The camera    easily measured with a small chain, cord or
set-up remain undisturbed and that the camera   should be set at such a height that its centre is    ribbon, one end of which is tied to the tripod
and lighting are always ready for use.          about level with, or just a little higher than, the   and the other knotted at the correct distance.
Once the camera, the subiect's chair and the   eyes of the seated subject.                      For measurement, the cord is held in a straight
lights are so positioned as to give you the                                                              line toward the subject's face, and the camera
lighting and exposure you want, they should                                                is moved until the knot is level with the
not be moved. The correct oosition of each                                                     subject's eyes. Before measuring, be sure tlle
item can be marked on the floor, with masking                                        subject is  sitting as desired. Aftbr
tape or some other simple marking device.                                             measurement, be sure there is no subject
                                                                         movement before you take the picture. See
                                                                                             also DEPTH OF FIELD, on page 17.
View original page 9Page 10 · Read text
10
Basic portrait lighting technique

There are four basic lights that make up    (A) is the main light.  lt generally casts distinct   (B) is the fill light. lts purpose is to fill the
complete portrait lighting. These are shown   shadows. lt is positioned in such a way as to   shadows cast by the main light. This lamp
and described here. The function of each   give the most pleasing and effective   should give a diffused light, and it should
specific lamp is basically the same, no matter   "modelling" to the face. Generally the best   generally be aimed at the subject  f rom near the
whether you are using electronic flash or   position is to one side of the. camera, at   camera viewpoint.  lts distance   f rom the subject
tungsten lighting. For identif ication and   approximately the angle shown, and pointing   must be adjusted carefully.  lt should lighten the
miniature portrait photography, you can often   down at the subject's head at an angle of about   shadow areas sufficiently to permit these to be
make do with less than the full equipment   45 degrees from the horizontal.                reproduced with some detail, but it should not
described here. See the next page, and also   To soften the shadows and minimize lines and  be brought so close as to eliminate the
the lighting set-up sketches on page12.         wrinkles in a face, the lamp reflector can have a   shadows altogether. Under no circumstances
                                                    diffuser placed over  it.                       must the  fill light be permitted to cast shadows
                                     An effective way of getting a diffused light with   of its own. Use of a large reflecting umbrella
                                                  electronic flash is to use a reflecting umbrella    with the main light can often render the fill light
                                               (see page 14).                                            u nnecessary.
                                       The main light should be no less than 2 m (6 to
                                         7 ft.) from the subject.                         (C) is the rim light.  lt is aimed at the subject
                                                                             from behind, and generally well above. lts
                                                                                   purpose is to give a pleasing highlight to the
                                                                                                              hair, or a rim light to a shoulder. ldeally,  it
                                                                                            should be a smallfocusing spotlight. Care must
                                                                                            be taken that it is not permitted to shine straight
                                                                                                          into the camera lens. lt must also be placed
                                                                                                           carefully, so as to provide a highlight where
                                                                         needed but not at the same time give an
                                                                                   unpleasant light patch to, for example, a
                                                                                                forehead.
View original page 10Page 11 · Read text
www.butkus.us

li
                                              (D) is the background light. lt is used to   the light from the main light, and reflect  it back
                                                           lighten the background to the desired extent.  lf    into the shadows. The rim light will generally
                                              the subject is a girl with long dark hair, for    not be necessary in identification or miniature
                                              example, you may want a well illuminated    portrait photography, unless you are aiming for
                                                  background, so as to make the subject stand   the utmost in lighting quality.
                                                      out against  it. On the other hand,  if the subject  One main light, one reflector card, and a       'tLs),        has long blond hair, you may want to use a   second light for the background are adequate
                                                    comparatively dark background.              equipment for most photography with the
                                                 Generally, identification documents require    Passportrait camera. lf space and equipment
                                          photographs with a comparatively light   are really limited, excellent results can be
                                                  background.                                    obtained with just one electronic flash unit and
                             A brightly-lit background should not extend   a reflecting umbrella.
                                   much beyond the actual area that will be    /t^w                               included in the picture. Also, the background   Reflections in eyeglasses: lf your subject
                                                should not be unduly reflective.           wears eyeglasses, watch carefully for             '1                                                                                        unwanted reflections. Moving the lamp slightly
                                          Working with fewer lights: You do not need   and/or the position of the head will generally
                                                                                                                                                                                                                                                                                                                                                                                                                                                                                         .                                                                                                           eliminate the problem.                                        to use all the lights described here. For               \.y,        example, the fill light can frequently be  The lens shades shown on page 23 are
                                                       effectively replaced by a white card or foil   recommended for use on the Models 40 and
                                                                reflector, and sometimes even by a white wall.   45 at all times.
                                           The reflector is placed so as to catch some of
View original page 11Page 13 · Read text
www.butkus.us
   The shutter sequence selector knob

    Camera Models 4O-44-45: The knob in the   1. To take four pictures simultaneously, set   3. To make two separate pairs of identical pic-
     centre of the camera front plate enables you to   the white dot on the knob opposite the white    tures, first set the white dot on the knob oppo-
     set the camera for shooting four identical   dot on the camera front plate. Depressing the    site the white dot on the camera front plate.
     pictures simultaneously or for making four    shutter release once will give you four identical   Cover the two top lenses with their lens caps.
      separate shots, one after the other, on a single    pictures on one piece of film. Develop the   By making one exposure, you can now take a
     piece of film.                                         picture,                                                 pair of identical pictures through the lower len-
                                                                                                  ses. Do not develop yet. Move the two lens
                                                 2. fo take one picture at a time, set the white   caps to the lower lenses. Recock the shutter,
                                                   dot on the knob opposite the lens marked 1.   and make another exposure, to give you ano-
                                         Make an exposure and recock the shutter. Do   ther identical pair of pictures. Develop.
                                                not develop the film yet. Rotate the knob so
                                                            that the white dot is opposite lens 2. Make an   Camera Model 2O-25: The knob and the prin-
                                              exoosure and recock the shutter. Repeat the    ciple of its operation are as described above.
                                                     procedure, using lens 3, and then lens 4. After    With this camera you can make either one pair
                                         having made four separate exposures,     of identical pictures simultaneously, or two se-
                                                     develop.                                      parate pictures, one after the other, on one
                                              The lower picture indicates clearly which image   piece of film.
                                                      is made through which one of the camera
                                                        lenses.                               CAUTION: The knob will click into the right
                                                                                                               position for each lens setting. Always followthe
                                                                                                              click positions, and never set the white dol
                                                                                                      exactly opposite the numbers on the camera
                                                                                                                 front plate.
\
I
View original page 13Page 14 · Read text
14

Electronic flash illumination

For colour pictures the use of electronic flash is   1. "Bounce" flash. This is achieved when   2. Direct flash. The flash is aimed straight at
recommended. Polacolor film is balanced for   the light from the lamp does not strike the   the subject. This method is recommended
average daylight conditions (colour tempera-    subject directly, but is first reflected from a  when using less powerful flash units with
ture approximately 5500 K). Almost all electro-    large diffusing surface. Lighting umbrellas are    colourfilm, where bouncing would severely cut
nic flash units give a light with daylight colour    ideal for this purpose. Two simple and typical   the intensity of the light reaching the subject,
characteristics. Thus, no filters need be used.   bounce flash set-ups are shown. The basic   thus causing underexposure. Follow the basic
The duration of electronic flash is short enough    lighting principles described on page 10 apply.    lighting principles described on page 10.to stop virtually any subject or camera move-  A rim light and a background light may be
menI.                                     added,  if desired. Bounce flash gives a soft
Electronic flash is also definitely recommen-    light to the subject, minimizing lines and
ded for use with Polaroid Type '105 positi-    wrinkles and avoiding deep shadows. lt also
velNegative Land pack film, which has a speed   has the advantage of not needing absolutely
of approxim alely 75 ASA equivatent  (1 9 DtN)   exact positioning in order to achieve the
and Type 55 4 x 5 Land film, which has a soeed    precise lighting effect wanted. This also means
of approximately 50 ASA equivalent (18 DtN).   that the subject can move more without
                                                     spoiling the lighting effect-a feature which can
Two lighting techniques: Two distinct   be particularly valuable when photographing
electronic flash techniques can be useo.         restless children.


                                                                                                                                                                                                                                                                                                                                                                                           I


                                      R EFL ECTOR

      UMBRELLA
View original page 14Page 15 · Read text
www.butkus.us


The shutter of the Passportrait camera is   Neutral density filters: When you change
synchronized for electronic flash. Connect the         f rom 75 speed film to 3000 speed film, you can
flash synchronizing cord to the flash contact on   compensate for the higher film speed by using
the camera. The shutter can be set to '1l50 or   appropriate neutral density filters over each of
1il00 sec                                     the camera lenses.
Set the lens f-number as indicated by the guide   The Neutral Density Filter Kit will almost exactly
number of your electronic flash unit for the   compensate for the film speed change. Thus
speed of the film you are using. The guide   you can keep your camera setting and lamp
number will be in the instruction literature   distances virtually the same.  lf there shou ld be
provided by the manufacturer of the flash unit.   a minor discrepancy, this can be easily correc-
This guide number will generally refer to a   ted by slightly adjusting the lamp distances.
direct flash. For bounce flash, open the lens   See ACCESSORIES on page 22 and 23.
aperture by 2 f-stops.
Make a test exposure. Correct the exposure,  if
necessary, as described on page 16.
Having found the right exposure, leave the
camera, the subject's chair and the lights in
their positions. So long as you continue to use
thts set-up, your exposures should remain
satisfactorv.
View original page 15
Page 16 · Read text
to

Tungsten  illumination       Exposure control

lf most of your work with the Passportrait   Exposure: For initial exposure determination,
camera is to be on 3000-speed (36 DIN) black     it is best to use an exposure meter. Take a
and white  f ilm (or on Polaroid Type 52 or Type    readrng and then set the camera to one of the
57 Land film with the Model 45 camera),    shtttter sneed and anprtrrrp cnmIipgligng
tungsten lighting will be adequate.               indicated by the meter.  lf the meter indicates a
Use lamps intended especially    f or   speed/apertu re combination for which the
photography. such as photofloods or special   camera cannot be set, then the subject is lit too
studio   f loods, mou nted in  appropriate    brightly or too dimly. Bring the lights nearer to
reflectors. Keep the lamps at least 2 m (6 or 7   the subject or move them further away, until
ft ) from the subject, to avoid discomfort   the subject brightness  is such that the camera
caused by both their heat and their light   can be correctly set for it. Having repositioned
rnlensrly.                                        the lights and taken another meter reading, set
                                              the shutter and aperture as required.
Lighting technique: See BASIC PORTRAIT   Once you have found the right exposure, leave
LIGHTING TECHNIQUE on page 10 As   the camera. the subject's chair and the lights in
indicated there, in identif ication and miniature    their positions. So long as you continue to use
portrait photography you can generally achieve    this set-up with the same film, your exposures
excellent results with less than the   f ull liohtinc   should remain satisfactorv.
r:omrrlement desr:ri bed.
                                                                       www.butkus.us
View original page 16Page 17 · Read text
www.butkus.us                                                  17
Depth of field          How to take pictures

The depth of field, or the distance zone within   1. Seat the subject at approximately the   4. Depress the shutter cocking lever.
which the subject will be recorded with   correct distance from the camera. The camera
acceptable sharpness, increases as you close   and the subject's head should be at about the   5. Set the shutter sequence selector knob, as
down the lens aperture. Thus,  it is advisable to  same height. Use a chair with a low back that   described on page 13.
always use the smallest possible lens aperture    will not intrude into the picture area, or use a
(that is, the largest possible f-number).            stool.                                     6. Now set the camera-to-subject distance
The table shows the approximate distance   Have the subject lean forward slightly with the   accurately (Models 40 and 20), or focus the
zone, measured from the front of the camera,   forearms resting comfortably on the legs, or on   image (Model 45), as page B.
within which the subject will be recorded   the arm rests of the chair, if it has any. This
sharply at the various f-number settings.       posture is most flattering to the majority of  7. Carefully frame the head and shoulders in
                                              subjects, eliminating apparent double chins   the bright-frame viewfinder.
Approximate depth of field               and heavy necks. lt is at the same time a                                             position in which a subject can remain   8. Make the exposure by depressing the cable
              Negligible on either side          motionless for a longer period of time without   release mounted in the hand grip. (Remember
   t/8         of focused distance"               discomfort.                                             to first remove the dark slide  f rom the pack film
                                                                                                           holder.)
  t/11           1 15-130 cm. (45-51 in.)        2. Arrange your lights as you want them.
                                '1                                                                       9. When you have recorded four images on  t/16        10-140 cm. (43-54 in.)        3. Set the shutter control lever and the   one piece of film (two images in the case of the
       f /22       105-145 cm. (a1-57 in.)          aperture control lever for correct exposure.     Model 20) you are ready to develop the picture.                                                                                     For development with the Model 45 camera,
  t/32             1 00- 150 cm. (39-59 in.)                                             see the instruction book supplied with your                                                                                                  Polaroid 4 x 5 Land film holder.
'The locused distance is 1.20 m (48 in.)
View original page 17Page 18 · Read text
1B

Holder

1. dark slide grip                         Mounting the holder on the camera         The two mounting lips on the holder fit into the
2. mounting lips                                Put the holder in the right position and fasten   two brackets at the camera.
3. door latch                                    the holder at the camera by pushing the knobs
4.  film tab slot                                    (A) into the mounting apertures of the holder.
5. dark slide
6. mounting aperture
View original page 18
Page 19 · Read text
19
                                                            www.butkus.us
Loading


With both thumbs, snap open the door latch on   Before loading the pack film remove the steel   Also inspect and clean the narrow slot on top of
the end of the holder, and gently open it. Note    roller assembly (A) for inspection. The unit will   the holder where the yellow film tabs emerge.
that the door does not open flat. Do not try to  snap out of the holder  if you apply a slight    After cleaning, push the roller assembly back
force  it.                                 upward pull at the loops. lt is important to    into position, until it locks firmly in place.
                                       keep these rollers clean.
View original page 19Page 20 · Read text
Loading

1. Hold the film pack so that the black paper   3. Push the pack gently into the holder. You   4. Make sure all the white tabs are free, as
safety cover faces the picture area.                 will feel it snap into place.                   shown, and are not trapped inside the holder,
                                                                                           or under the film pack.
2. Push the closed end of the pack into the
recess (A) against spring tension, until  it
comes to a firm stop.


                                                                                                            www.butkus.us
View original page 20Page 21 · Read text
www.butkus.us                                                    21
Loading

5. Close the holder and lock it. The spring   6. Grip the black tab firmly and pull it straight     lf no white tab is visible, remove the holder
latch will snap into place  if you press it in the    out. Pull  it allthe way-  it must come completely   from the camera. Carefully open the holder in
center.                                        out of the holder. When the safety cover has  subdued light and, without disturbing or
                                        been pulled out, a white tab (A) should stick out   moving the pack, push the white tab into the
                                                             of the small slot. Do not pull the white tab at this   opening. Close and latch the holder again.
                                                    time.                                    Check that the white tab is protruding from the
                                                                                                                                   slot.
                                                                 IMPORTANT: The black paper tab of the
                                                                                                     safety cover must extend out of the front slot ol
                                                                                            the holder. lf it does not, reopen the door and
                                                                                                       straighten the tab so that it does stick out.
View original page 21Page 22 · Read text
n
Guide to tab pulling                                       ACCeSS0lres

ModeltlO: The film tabs must be pulled straight   Model 25-44-45: Please see the instruction    Print Cutters will precisely trim the four and
downward from the camera. Adjust the tripod   book supplied with the Polaroid 4 x 5 Land film   two pictures made with the Models 40 and 20.
so there is ample clearance. lf the tripod is    holder.
sturdy, there will generally be no need to hold
the camera while pulling the tabs. lf you do   Model 20: Firmly hold the camera orthe tripod,
wish to hold the camera while pulling, it is   as described above, while pulling the tabs out
better to grip the upper part of the tripod, rather   sideways.
than the camera itself . Never use the
viewfinder of the camera as a grip.
View original page 22
Page 23 · Read text
23
                                                            www.butkus.us
Accessoires

Pack Film Holder, provided with your   Neutral Density Filters will permit you to   Lens Shades will enhance the quality of your
Passportrait pack film camera, is also available    alternate between 75 speed and 3000 speed    portraits by reducing the effects of flare and
as a separate accessory. With additional   film without making major changes in the   uneven illumination. They are recommended
holders of this type, you can easily interchange   exposure or the lighting.                             for use on the Models 40 and 45. Included also
films, from black and white to colour, for                                                               is an extender for the lens selector knob.
instance, without film wastage.               Supplementary Lenses reduce the image
                                                  size of your Passportraits. They enable you to
                                            include more than one person in a single
                                                frame. Or, they can be used for other special
                                        com position requ    i rements.
View original page 23From the M. Butkus archive. Original publisher and archive notices are retained.
Check the model and edition against your equipment.
PDF verified 2026-10-10.