Film cameras
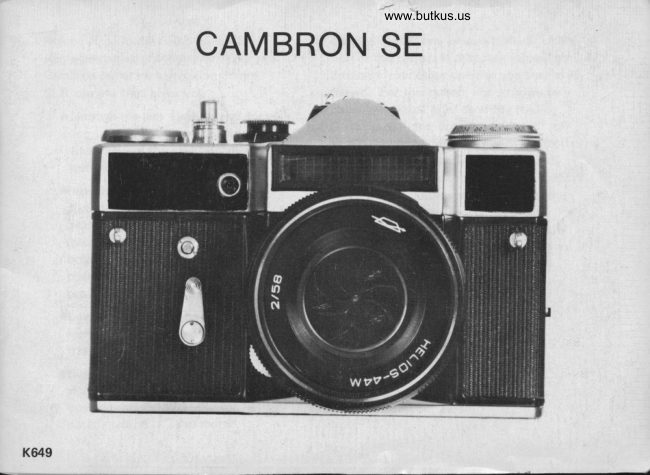
Cambron SE User manual
User manual for Cambron SE. 38 pages in English. Read the original PDF, download or print a copy without registration.
38 pagesEnglish11.4 MB PDF
Loading your manual…Open PDF directly
Document details
- Brand
- Cambron
- Model / document
- Cambron SE
- Document type
- User manual
- Language
- English
- Pages
- 38
- File size
- 11.4 MB
- Category
- Film cameras
- Document date
- Not specified in catalog
Search available document text
Find a term, then jump to its page in the original PDF. Image-only pages may not be searchable; check the PDF for exact wording and diagrams.
Page 2 · Read text
Welcome.  . . to ihe Cambron world of           Because of its many unique features, opera-
single-lens reflex photography! Your new         tion of this camera is probably somewhat
Cambron camera is a precision 35mm              different from other cameras you may have
SLR camera that gives you  .  .             "roWn€d. For this reason, it is strongly re-
   oThrough-the-lens viewing and focus-       commended that after carefully reading
                                                these instructions, you shoot a "test" roll     ing . . . your brilliant eye-level vievy-
                                                   of film, have this film processed, and ex-     finder shows the exact image trans-
                                           amine the pictures before exposing addi-    mitted by your lens.
                                                     tional rolls. This test roll will verify that
    of nterchangeable 58mm tIz.O                                          you are using your new camera correctly,
   Auto Helios Lens . . . with a fast-           and allow you to make any necessary
    working automatic diaphragm                                              changes in camera operation; additionally
   mechanism that gives you an always                                                                                     it will confirm that all camera controls are
    bright image in your viewfinder. The                                                functioning perfectly.
    coated, color-corrected 6-element optics
    provide superior sharpness, too.
  oLow-Noise Focal-Plane Shutter. .  .
    highly accurate, with speeds to an action
    freezing 1/500th second plus "8".
   oBuilt-in Exposure Meter . . . ends guese
   work by showing you the correct lens
    opening and shutter speed for well-ex-
   posed pictures . . . and more!
View original page 2Page 3 · Read text
www.butkus.us

Flash Synchronization      Full M/X Synchronization at 1/3fth second via
                                     selector switch.
Flash Contact.            PC outlet"6ccepts  all standard flash cords.
Viewing/Focusing System      Eye-level pentaprism shows upright, laterally-correct
                                   i        impge at life-size (1x) with 58mm lens; instant-return
                                        - mlrror.
Focusing Screen                   Central Microprism surrounded by fine groundglass
                              T                               collar.
Exposure Meter                       Built-in selenium-cell meter, with match-needle
                                    shutter/aperture readout. ASA Film Qpeed Range 25-500.
                                   Equivalent D lN indices (13-28). Calibrated for aper-
                                      tures from t/2.O to t/32, shutter speeds from 30
                                  seconds - 1/500th second.
Loading                    Hinged back, multislotted take-up spool.
Exposure Counter             Additive 0-36, manual resetting type.
Transport                   Two-stroke ratchet-action lever advances film, winds
                                      shutter, counts exposures, prevents double exposures.
Unloading                  Locking rewind release control; elevating rewind
                            knob rises above camera body for convenient access.


                                                                                                                                                                                                                                                                                                                                                                        !..r1-      --d -            !,-,r
View original page 3Page 5 · Read text
Self-Timer                            Built-in with approximately 10 seconds delay. May be
                                   disengaged without firing shutter  if desired.
Tripod Socket                       Standard"l /4x20, accepts all standard tripod and
                                   bracket retain ing screws.
Construction .           . .i. . : ..   MGtalalloysusedthroughout.
 Finish
Dimensions                    Body Only: 2" x3.9"x5.4"
                               With Lens: 3.7"x3.9"x5.4"
Weights                      Body Only: 24.5 oz.
                                Standard Lens: 10.3 oz.
View original page 5Page 8 · Read text
www.butkus.us


LOADING YOUR CAMERA                  2. Push up Film Cassette Spindle (29) from in-
                                                              side camera; drop in 35mm film cassette. PullFind a spot where the light is subdued (if you're                                                   out enough film to insert film end in any slotoutdoors, look for a shaded area or shield the                                                                 in Take-Up Spool (36).camera from direct sunlight with your body or
coat). Then . .  .                                   3. Alternately press Shutter Release Button (2)
                                                and move Film Transport Lever (1) until
1. Open Camera Back (38) by raising Back Lock        Film Sprocket Wheels (35) engage sprocket
   Latch (22l. and swinging back open. Make            holes in film. Make sure film cassette lies flat.
   sure Rewind Release Ring (3) is turned clock-        Close Camera Back (38) by pressing firmly.
   wise fully.
View original page 8Page 9 · Read text
4. Press Rewind Knob (24) downwards firmly    6. Move Film Transport Lever (1) through two
  and twi5t it counterclockwise slightly; the         or more short strokes (letting it return to the
   Rewind Knob is now raised slightly above the      starting position after each stroke) until no
   Grmera body. Slowly, turn Rewind Knob (24)     further movement  is possible. Press Shutter
   clockwise until resistance is felt (this takes up     Release Button (2).
   excess slack of film within the cassette).                                               7. Move Film Transport Lever (1) through a
5. Twist Rewind Knob counter-clockwise slight-     second series of short strokes until further
    ly, then press it down fully and lock in place     movement  is impossible. Now, turn Expo-
   by twisting clockwise. Press Shutter Release        sure Counter Dial (41 until the number "0"
   Button (2).                                                       is shown by the red Exposure Counter
                                                        Indicator (34).
View original page 9Page 10 · Read text
www.butkus.us


8. Once more press Shutter Release (2), and        have taken up the "slack" in the cassette
   wind Filr,n Transport Lever (1) fully  . . . and      as described in Step No. 4, open camera
   your first film frame is in position, as shown     back to check that film is securely at-
   by the Exposure Counter Indicator (34).         tached to Take-Up Spool.
                                            oAlways make sure the Transport Lever
oWhen moving the Transport Lever as de-                                                                                                                       ( 1 ) has been fully wound. This is easiestscribed above, the Film Rewind Knob                                           when you move this lever in two short(24) will rotate counter-clockwise by it-                                                          strokes. When the lever stops during theself. This provides positive assurance that                                                   second stroke, you are assured that theyour camera is correctly loaded, and that                                                      camera's film, shutter and exposure
 filrn is being wound through the camera.                                                   counter are all ready for exposure. Fail-
 lf the Rewind Knob does not rotate as               ure to fully wind the Transport Lever may
you move the Transport Lever, and you                result in a "blank" exposure.
View original page 10Page 11 · Read text
Speed Indicator Window (19).
                                                      'r Your camera's meter has marked numer-
                                                            als for films rated at ASA 25, S0, l0O,
                                             2OO,4OO, and 500: this speed range en-
                                             compasses virtually all general-purpose
                                                   black-and-white and color films. Should
USING YOUR CAMERA'S                  your film be rated at an intermediate ASA
EXPOSURE METER                         speed, such as ASA 64 or 90, simply
                                                  position the ASA Index Mark so thatYour Kalimar SR3O0 incorporates a sensitive                                                                             it is between the next larger and smallerbuilt-in Exposure Meter. lt contains a photo-
                                              numbers. (For example, for ASA 64 orelectric (selenium) cell (25) that converts                                           80 film position the index mark betweenthe light reflected by your subject into
                                           50 and 100.1 When this is done, yourelectrical energy, which activates the Meter                                              meter will operate well within the tolerancesNeedle (171. Because the "selenium" meter                                                   of all film types.cell generates its own electrical energy, no
                                                               are using film marked onlybatteries are needed! Here's how to use        NOTE:  lf you
                                                                            speed, enter thisyour exposure meter:                                 in "DlN" (European) film
                                       number in the DIN Film Speed Indicator
1. Adjust Meter for ASA Film Speed. Move       (18). Should the film be marked in an
   the Aperture Indicator Dial (201 until the      intermediate speed number, position in-
  ASA number for your film type is shown       dicator midway between the next larger
  by the black Index Mark in the ASA film     and smaller numbers as described above.
                                          10
View original page 11Page 12 · Read text
www.butkus.us


2. Aim Meter Cell (251 at your subiect. {For         cator Ring (20) and Shutter Speed Indi-
   a practice "reading", aim meter at a               cator Ring (21) will give a perfectly-ex-
    brightly-lit scene or if you are indoors, at        posed picture. For examPle, in the
   anearby lamp.) As you do so, you'll note           illustration shown, these scales show that
                                                                                                      a   the Exposure Meter Needle (17) moves to         correct exposure will be obtained with
   a certain position, then stops. Holding             shutter speed of 1l125th second and a lens
   your camera in this position, you now . .  .        opening of f/5.6, or a speed of 1/250th
                                               second and lens opening of f 14, or, any3. Match the Needle (17) by turning the                                                    other combination shown on the scales.   Shutter Speed Indicator Ring (21) until
   the Exposure Meter Circle (1 6) is cen-       5. Now, set the Shutter Speed Dial (5) to
   tered over the Needle (17l..                      the desired speed by lifting the dial and
                                                   turning it until the desired shutter speed4. Your light measurement or "reading" has                                                                          is indicated by the red dot in the center  now been taken! AnY combination of                                             of the dial. (lf the dial won't move    lens opening (f/number) and shutter speed                                                             in one direction, turn it in the other   appearing in black on the Aperture Indi-
                                                  11
View original page 12Page 13 · Read text
sensitive films. lf it's necessary to shoot at
                                                 1/60th or 1/3fth second, hold the camera
                                                                                           using a                                                      as steady as possible - ideally by
                                                        tripod, or by bracing your arms on a nearby
                                                      table or other support.
                                              a Remember that your exposure meter
    www.butkus.us                                  measures all the light that reaches the
   direction to reach the desired speed.) Then,      meter cell (25). lf your subject is much
    let the Shutter Speed Dial return to ,down'        lighter or darker than the background, it's
   position.                                       a good idea to move up to your subject
                                                         for a "close-up" reading. This simply means6. Turn the Lens Aperture Ring (26) until                                                  aiming the meter cell (25) as close as possi-   the indicated lens opening is lined up with                                                           ble to the most important part of the sub-   the red Distance/Aperture Index mark (12).                                                                            face of a person                                                         ject - for example: the
HELPFUL HINTS FOR BETTER EXPOSURES   whose picture you are taking.
oFor outdoor photography, a shutter speed of   oWhen shooting landscapes or other out-
 1/125th second (or, if possible, faster) is re-      door pictures where a large part of the sky
 commended whenever possible. This speed is       will appear, aim your camera's meter cell
  fast enough to prevent most "blur" due to      downwards slightly when taking your
 camera or subject movement, yet is slow          "reading". This prevents the exposure
 enough to per:mit picture-taking in a wide         reading from being adversely influenced
 variety of lighting conditions with today's       by the bright light of the sky.
                                         1)
View original page 13Page 14 · Read text
www.butkus.us


oln extremely dim lighting, the Exposure     VIEWING AND FOCUSING
  Meter Needle (171 may rest near the right-
 hand edge of the transparent window.         oMake sure your lens is securely attached
 Should this occur, place your hand in              to the camera. lf not, turn lens clockwise
  front of the Exposure Meter Cell (25) and          until no further movement  is possible.
 watch the needle carefully. lf the needle                                         o Frame your picture by looking through the
  moves when you block the Meter Gell, the                                                Viewfinder Eyepiece (32). You're looking  exposure meter is able to function in the                                                through the same lens that will actually
  existing light; remove your hand from the                                                    take the picture exactly as you see it.
   cell, and determine exposure in the normal
  way. However,  if no needle movement         o Focus to bring the image in clearly. To do
  occurs when you pass your hand in front            this, just turn the Focusing Ring (13) in
  of the Meter Cell, the existing light is in-           either direction until the subject is sharp
                                                                                                 (lf the image in the view'  sufficient and the exposure meter Gannot            in the vievufinder.
  be used. In this event, either a time exposure      finder appears dark, make sure the Auto/
                                                                                           [141  or use of an electronic flash are recommended.    Manual Switch for Lens Diaphragm
                                         13
View original page 14Page 15 · Read text
{

 I

                                        Groundglass
                                    @llar
                                                                              Microprism
                                                                                Spot


                                                                                                                                is a clear                is in "Auto" position - so that the green         Around the microprism spot              letter "A" is visible on the switch.)                   ring of fine ground-glass. This also tends
        o Your Cambron offers two alternative               to accentuate out-of-focus images, show-
           focusing methods. The microprism spot              ing a clear, sharply-defined image at the
                                                                 point of greatest sharpness. (Again, aim              in the center of Vour vieMinder is com-
                                                                                                            see             , posed of literally hundreds of tiny prisms          the camera at this instruction book to
          which accentuate out-of-focus images,          how it works.) You'll find this ground-
          then seemingly disappear into a single,                glass area helpful when focusing on sub-
            clear image when you're at the point of              jects which lack contrast or color; it's
            sharpest focus. (lf you aim your camera at          quite handy when using wide-angle and
             this instruction book, from about two              long telephoto lenses, too.
            feet away, you'll see how it works.l This       oThe Distance Scale (28) of your lens is
            focusing method is best for a majority of           calibrated both in feet (white numbersl
            subjects and conditions, especially when         and meters (yellow numbers). Generally,
            using your standard f/2.0 lens.                      there's no need to check distance except
                                                   14
View original page 15Page 16 · Read text
www.butkus.us


                                                                  Distance Scale
                                                                     (feet/meters)
                                                                                                        '   lnfrared


 when taking flash pictures (see page 17)     TAKING THE PICTURE
  or when depth-of-field  is important (see                                           Hold your camera steadily, using both hands.
  page 26).                                       You'll probably find it most convenient to
oThe Red "R" next to the Distance/Aper-         grip the camera firmly with your right hand,
  ture Indicator (12) shows the correction       and trip the shutter release button with your
  required for Infra-red films. When using          forefinger; here, your left hand can easily
  infra-red films,first focus in the               turn the focusing ring and lend extra support
 normal manner, and note the indicated           at the same time. For vertical shots, you may
  distance. Then, move the Focusing Ring        experiment to see in which position the camera
  (131 so that that distance is now aligned          feels most secure and the controls (focusing
                                                              is            ring, shutter release) most accessible. with the Red "R". Remember - this
 needed only when using infra-red films,
 which are sensitive to light rays which        And now . . . press the Shutter Release Button
  focus at a slightly different plane than            (2) in a smooth, firm stroke. You've just taken
  ordinary light rays.                           your first picture!

                                         15
View original page 16Page 17 · Read text
FOR SUCCEEDING EXPOSURES  . .  .      UNLOADING
You are ;eady for your next picture in an in-   When you've finished your roll of film, the film
stant - just move the Film Transport Lever     must be re-wound back into the cassette so it
(1) until fully wound, and you're set: just      may be removed and processed. Here's how:
frame, focus, and shoot. As lighting may                                                  1. When you have taken the last exposurechange,  it's a good idea to check the Exposure                                               (number 2O or 36, depending on the lengthMeter Needle (17) from time to time, to make                                                     of cassette used), turn the Rewind Releasesure it's still lined up with the Exposure Meter
Circle (1 6).  lf it is not, just take a new ex-         Ring (3) all the way to the left                                                  so that the Red Dot points at the "R" en-posure "reading" of your subject, move the
                                                    graved on the camera's top. Be sure theLens Aperture Ring (26) to the new aperture
                                          Rewind Release Ring has been movedshown on the Exposure Meter Aperture Indi-                                                   fully towards the left until no furthercator (201   and continue shooting!          -                                 movement  is possible. (ln some instances
                                                  the film transport lever [1] will stop be

                                        16
View original page 17Page 18 · Read text
www.butkus.us


   fore it has been fully wound to position           arrow). While resistance is felt, you are re-
   the last frame. This indicates that you            winding the film back into the cassette.
   have reached the end of the film. Should        When film has been fully rewound, the knob
   this happen, put on the lens cap, supplied           will turn freely without resistance.
   with your camera, and then turn the Re-
                                            3. Lift up the Camera Back Latch (22) and   wind Release Ring [3] to the left fully.                                             open the Camera Back (38). Pullthe Film   This will insure that no portion of the
                                                                                                                                                              , and let    last frame is exposed to light as the shutter      Rewind Knob (24) upwards fully
                                                   the film cassette drop out of the Film     is released by the Rewind Release Ring.)
                                                      Cassette Chamber (301. Your film is now
                                                  ready for developing.
2. Raise the Film Rewind Knob Qal bv gently
   pressing against the top of the Knob with a    4. Push down Rewind Knob and lock in place.
   counter-clockwise movement. When the          Close Back. Move Rewind Release Ring (3)
   knob springs up, grip it firmly and turn it         clockwise fully so your camera's ready for
   clockwise (in the direction indicated by the       your next roll of film.

                                            17
View original page 18Page 19 · Read text
www.butkus.us

       TAKING FLASH PICTURES              1. Make sure the Flash Synch Selector Dial
                                                                      (6) has its White Indicator Line pointing
           Your Qambron single-lens reflex camera           to the letter "X" on the camera top. lf
             operates perfectly with any of the excellent        Dial is not at "X" position, the shutter
              electronic flash units now available. Today's        will not synchronize correstly with the
          compact electronic flash units give dozens          flash unit.
             or even hundreds of flashes on a single set                                                           2. Set Shutter Speed Dial (5) to 1/30th sec.
             of batteries; some also permit use of re-
            chargeable batteries. In addition, the most     3. Slide flash on your camera's Accessory
            advanced electronic flash models incorpor-       Shoe (15). (lf your flash is made for use
              ate a computer mechanism which measures        with a separate mounting bracket, attach
             the light of the flash, and automatically            bracket screw to camera's Tripod
              regulates brightness for perfect exposure.         Socket tl1l ).
            With any electronic flash unit, follow these     4. Plug flash cord into camera's Flash Cord
             simple steps:                                     Outlet (7). Push tip of cord in firmly.

                                                 18


i-
View original page 19Page 20 · Read text
www.butkus.us                                                               lens Aperture Ring (26) to the aper-  '                                                   Set
                                                    ture indicated by your flash dial. You
                                               can now take pictures at any distance
                                                     within the range indicated by your flash
                                                  without further adiustments.
                                                B. With Manual (Non-Automaticl Flash
                                                        Units. Set calculator dial of Flash to
                                                       correct ASA film speed. Your flash
5. Select correct lens opening for filmfflash            dial will now indicate the correct lens
   crombination. The short burst of light pro-        openings for various distances. Focus,
  duced by electronic flash (often 1/1000th        and set lens Aperture Ring (261 to the
   second or faster) is too brief for your             aperture indicated by your flash for
   camera's Exposure Meter to measure. For         the actual camera-to-subiect distance,
   this reason, all electronic flash units have           as shown by your lens'distance scale
   calculator dials or scales which indicate             (281. All photographs taken at this
   the correct lens opening.                              flash-to-subject distance will be pro-
                                                       perly exposed.
A. With Computer (Automatic) Flash
   Units. Set calculator dial of flash to             oDifferent makes of electronic flash units
   correct ASA film speed. Your flash                use different calculator dials or scales; for
   dial will now indicate the correct lens            exact information, please consult the in-
   opening for photography at a wide                struction manual for your flash or check
   range of distances.                               with your camera dealer.
                                            19
View original page 20Page 21 · Read text
oln the event the flash unit does not fire       USING FLASHCUBE OR FLASHBULB GUNS
          when you press the Shutter Release                                                                   In general, f lashcubes and bulbs are more
           Button (2), check to see that the flash                                                                 costly than electronic flash, and less conven-
            cord is securely plugged into Flash Cord                                                                     ient to use as the bulbs must be replaced
            Outlet (7), and that On/Off switch of                                                                                                   eacht              flash unit is in "ON" position. Finally,  'r  r  after each picture (with flashbulbs) or                                                             four pictures (with flashcubes). Should you                                                (6) is atI         make certain the Selector Dial                                                           wish to use these light sources, however,
          "X" position.       ..r                r           follow Steps 1-5 above, with this exception:
                                                         o For flashcubes or flashbulbs, move the
        oDo not press down on Shutter Release               Flash Synch Selector Dial (61 to "M"
            Button,(2) unless actually taking a flash              position. This adjusts the timing mechan-
              picture. Pressing this button down fully            ism of your camera to insure that the
              will fire the flash whether or not the               shutter opens when the flash of the bulb
            Film Transport Lever (1 ) has been wound.                is at its brightest. Leave the Shutter Speed
           Should this happen, however, no loss of           Dial at 1/30th second for all flash
             film will occur.                                          pictures.n
                                                         oDetermining exposure with flashcubes or
                                         SpeedI        oAlways remember to set Shutter                                                                bulbs is done the same way as with manual             Dial (5) to 1/3fth second, and Flash Synch                                                              (non-automatic) electronic flash units, as             Selector Dial (6) to 'X'position for elect-                                                                described above.
             ronic flash photography. At other speeds
                                                                                                                                                                    \             or settings, the flash will not synchronize
              fully with the shutter.

                                               20
View original page 21Page 22 · Read text
www.butkus.us


USING LONG EXPOSURE TIMES        oln the event a locking cable release is not
(TIME EXPOSURES)                           :. available, you can keep your camera's shutter
                                             open for extended periods quite simply. WithTime Exposures are exposures of one second                                                   the shutter at "B" position, press down theor longer. At these extra-long exposure tir4es,                                                      shutter release firmly. Hold it down, and ro-you can photograph city rtrr.ir at night,                                                         tate the Release Button (2) counter-clock-dimly-lit interiors, and many subjects too                                                  wise (towards the left) until it stops. Now, thefaintlv illuminated for normal picture-taking.                                                      shutter remains open as long as desired. To
To take a tinie exposure with your Kalimar,          close the shutter when the exposure  is com-
set the Shutter Speed Dial (5) to "8", press          pleted, press down on the Release Button and
the Shutter Release Button (21 . .. and simply       turn Release clockwise until it stops.
hold it down until the desired number of
seconds has elapsed. When you release the         After a time exposure using this method, always
Shutter Button, the shutter will close.          make certuin the Shutter Relase Button (2 and
For extra steadiness, use of a locking Cable      Rewind Release Ring (3) are both turned fully
Release and a sturdy Tripod are recommended     tovvards the right: this will insure correct opera-
when taking time exposures.                       tion of shutter and exposure counter in subse-
                                             quent pictures.


                                              21
View original page 22Page 23 · Read text
Long Exposure Times                                                                          Standard Exposure Times
           I second - 30 seconds                                                                                                                            | /3oth sec.                                                                                                                         sec.                                                                                            -   | /fi0th

oUnder certain conditions, your camera's         oThe Red numbers 15, 8,4,2, appearing
 exposure meter may be used when making          next to the Black numbers 30-500, repre-
 Time Exposures. First, make sure that the          sent fractions of a second: "15,' is 1/lSth
 existing light is sufficient for use of the             second, and so on. These numbers appear
 meter 1p.12l.; then, "match the needle"             for information purposes only, when using
 and read the correct exposure time in full          your camera's meter to determine expos-
 seconds from the Red numbers 30, l S, g, 4,2,       ure with cameras lacking a built-in expo-
 1, which appear furthest from the Black             sure meter.
 numbers 30-500 on the exposure meter
 shutter speed Indicator Dial (21).


                                      22
View original page 23Page 24 · Read text
www.butkus.us


                                             I                                                     This closes down the lens to the correctUSING SELF-TIMER
                                                      aperture, and is required when the self-Your Cambron camera is equipped with a
                                                   timer is used.built-in self-timer. This trips the shutter after
a 1O-second delay (approximate), thus enabling   4. Move Self-Timer Lever (10) counter-clock-
you to get in your own photographs! To use it,      wise until no further movement is possible.
here's allyou have to do:                           (As you move it, you'll notice the "M"
1. Mount camera on a tripod or other  f irm            sticker underneath the Self-Timer Lever.                                                  This is simply a reminder to move the lens   support such as a nearby table or shelf,
                                                   to "M" [Manual] position as described).   with transport lever fully wound.
                                              5. Press Self-Timer Release Button (91. You'll2. Frame, focus, and adjust camera for cor-                                                  hear a "whirring" noise, which indicates
   rect lens opening and shutter speed - ex-          that the timer is functioning. Now, walk   actly as you always do.
                                           away from the camera into the scene being
3. Move Auto/Manual Switch (141 on lens to       photographed   the shutter will fire auto-                                                             -  "M" position (so the red "M"  is visiblel.           matically in about ten seconds.

                                        23
View original page 24From the M. Butkus archive. Original publisher and archive notices are retained.
Check the model and edition against your equipment.
PDF verified 2026-10-10.