Photography reference
Camlogix SH-T2 Product booklet
Product booklet for Camlogix SH-T2. 16 pages in English. Read the original PDF, download or print a copy without registration.
16 pagesEnglish3.7 MB PDF
Loading your manual…Open PDF directly
Document details
- Brand
- Camlogix
- Model / document
- Camlogix SH-T2
- Document type
- Product booklet
- Language
- English
- Pages
- 16
- File size
- 3.7 MB
- Category
- Photography reference
- Document date
- Not specified in catalog
Search available document text
Find a term, then jump to its page in the original PDF. Image-only pages may not be searchable; check the PDF for exact wording and diagrams.
Page 1 · Read text
www.butkus.us

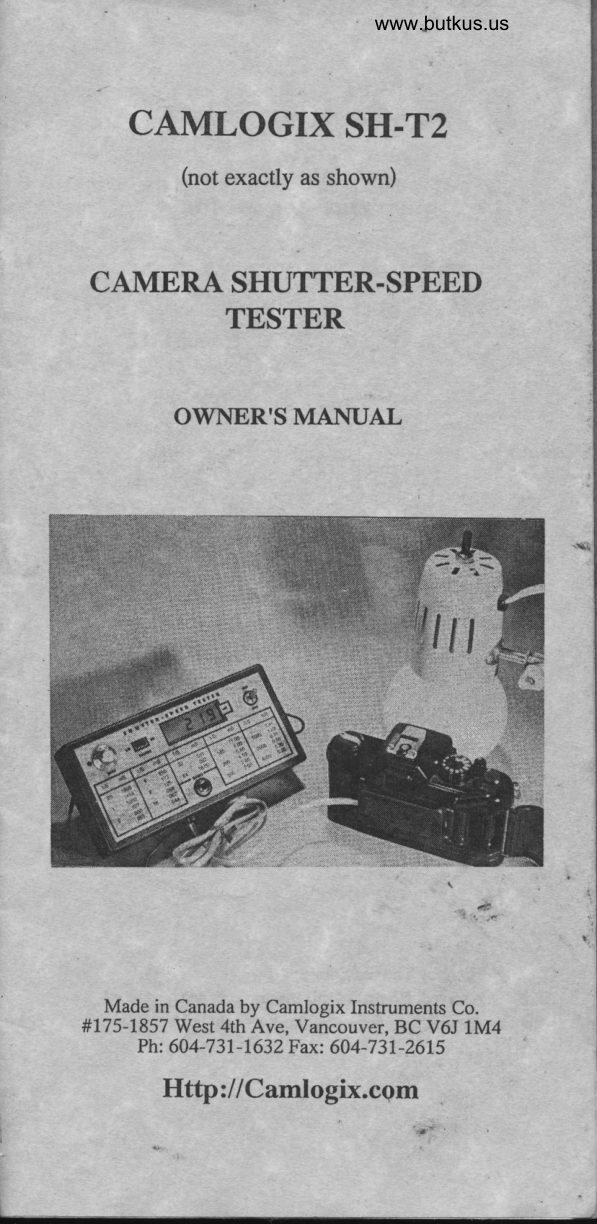
     CAMLOGIX SH-T2
                    (not exactly as shown)


    CAMERA SHUTTER-SPEBD
           TESTER


           OWNER'S MANUAL


         Made in Canada by Camlogix Instruments Co.
         #175-1857 West 4th Ave, Vancouver, BC V6J 1M4
               Ph: 604-7 3l -1632 Fax: 604- 7 3l -26L5
            Http:llCamlogix.cgm

                                                                                          "r."

rj
View original page 1Page 2 · Read text
Copyright 1996 by Thomas TomosY
All rights reserved. No part of this manual may be reproduced
without the written permission of the copyright holder'
View original page 2
Page 3 · Read text
www.butkus.us


   Table of contents


                     page
 light source            4
sensor bias              5
basic setups             6
reset                   9
range           .9
shutter-speed tables      9
"kink" in the scale       10
tolerance               10
scatter                   11
alternate scale           11
modern scale           72
old scales               13
warranty information    t4
View original page 3Page 5 · Read text
Light source

                                             a   In order to use the instrument you need
light source. The steadier the light output, the
better. The 60Hz fluctuation of any flickering
tight is detrimental to accurate readings. While
                                                best,a DC powered light were the
                                                              isincandescent 110VAC powered bulb
suitable. The light must be diffused' A large
                                             calleddiffuser bulb is available from GE
"snowball". This is a regular stock item in most
hardware or lighting stores. "Snowballs" come
in the usual wattages and in 4 or 5 inch sizes.
                                         obtain (lt  for some reason you can't
                                            diffuser"snowballs", a regular bulb inside a
globe can be used.) Remove the shade from an
adjustable desk lamp and install the "snowball"
 (see photos).
     Natural light (sunlight) is also good.
  However, dir?ct sunlight is too bright and
  acts as a point source which is unsuitable.
  Reflecteci sunlight from a mat white surface
   is perfect for our purpose- Or on overcast
  days, you may point the camera directly
  toward the sky.
    Unsuitable light sources are fluorescent
 lights, glow bulbs, sodium or mercury lights
 etc. Any light that follows the 60Hz alternating
                                              or current is unsuitable. A thyristor dimmer
 diode energy saver has the same effect, they
 enhance the 60Hz flicker of the light and are
 unsuitable for use with the shutter-speed tester.
 However, a resistive dimmer can be used if
 desired.
View original page 5Page 6 · Read text
5':      www.butkus.us
   The color of the light is of no importance
 since the bias adjustment compensates for light
 input variations. Thus a low wattage bulb
 (redder) or high wattage bulb (whirer) can be
used when called for. Use at least a 40W
 "snowball" for testing cameras with lens
 installed and a 25W "snowball" without lens.

           Sensor Bias

   The adjustable sensor bias enables the tester
to test any type of camera or shutter, with or
without lens. The bias adjustment compensates
for variations in light input. Careful adjustment
is especially important when shutter speeds
faster than t1250 second are tested.
  To calibrate the sensor bias, place the
sensor board and the light source in the testing
position, open the shutter on B or T, slowly
rotate the "BIAS" knob until the correct-bias
indicator--a green LED--lights up.
     If the light is too bright and is outside the
range of the bias pot, stop down the aperture or,
move the light further away from the camera. If
too dim, open up the aperture, remove the lens
from an SLR or move the camera closer to the
light. If you can't get the green LED to light up
by any of these methods, change the intensity
of the light source. For testing shutters without
lens a 25W "snowball" is recommended and for
testing shutters with lens attached, a 40W or
60W "snowball" should be used, depending on
the speed of the lens.
View original page 6Page 7 · Read text
6
     At shutter speeds slower than Ll30 second,
                                        always   if correctly calibrated, the green LED
   lights up during exposure allowing you to keep
  an eye on the bias calibration.

     When testing slower shutter speeds or when
  high accuracy is not essential, 1lo1l can turn the
   bias knob all the way clockwise.

              Basic Setup

     Horizontal Arrangement: Set the camera
  down on its bottom with its back toward You,
  place the "snowball" bulb in front of it, in line
  with the lens or lens opening. Open the door
  and press the sensor board onto the film rails.
  Hold the sensor board in position with your
  thumb (photo 1). If you find this difficult, use a
  narrew strip of double sided adhesive tape to
   stick the sensor board to the edge of the film
   gate.


                                                           Digitally signed by Mike Butkus
                                            DN: cn=Mike Butkus, o=Butkus camera manuals,
                                                 ou=butkus.org, email=mike@butkus.org, c=USMike Butkus  Date: 2023.01.22 16:35:58 -05'00'


                                          www.butkus.us

    photo 1


                                                               r.-l,i*      {                                                                    !t                 .
View original page 7Page 9 · Read text
8

   Some of the modern SLRs don't time with
 their door open. This problem can be remedied
by setting the frame counter to #1. To do so,
find the counter set'lever. (It is in the door
channel close to where the counter dial is
located.) Press the counter set lever in with a
                                                                                                             3
screwdriver to  emulate the door-closed                                                                          )
position. Wind and release the camera three
                                                                          )times until the counter reaches #1. The shutter
will now produce the correct shutter speeds. To
make setting the counter easier, you're urged to
make a little jig that fits into the door channel
and keeps the counter set lever pressed.
Such a iig, called the counter clip, is now
included with every SH-T2 shutter speed tester
unit at no extra cost.
           -Arrangement: -Some systems,   Vertical
such as a view camera shutter is easier to
operate in the vertical position: Set the sensor
board flat on the table, place the shutter over it
and let the light shine down into the shutter

                                                                    ^
                                                             1
                                                                       )


   When testing view calnera shutters without
                                wayleris, place the sensor  window half
between the center and the periphery of the
shutter. opening.


                                                              li'
View original page 9Page 10 · Read text
www.butkus.us

                   Reset
       The SH-TZ tester is provided with auto
       reset. The auto reset circuit is activated before
     the counting begins, thus the count is not
       effected by the reset action.
I      To reset the read-out manually to a visible
        set of zeros, turn the power switch off, wait I      two seconds, then turn the power back on
       again.
                Range
          Effective range of the SH-T2 is from 2
      seconds to 1\2000 second. If the count runs out
       of range (over L999.9) the most significant digit
       (1) turns into a reversed L "-l ". (If the count is
     allowed to continue, the half digit cycles
      through the numbers showing the b,c, and g
                                                                                                                                                                                                                                                                                                                              :
      segments only.)

            Shutter-speed Tables
         For your convenience, the modern shutter-
     speed scale is printed on the face of the
      instrument. The millisecond column  is
'fi,'I      graduate d at L/2 stop intervals.
                                                        toi     To convert any shutter sPeed
       milliseconds, divide 1000 by the shutter speed.
      For example: the shutter speed of 25 is equal to
     1000125=40mS. To obtain the half stop
      between any two full stops, take the geometric
     mean (square root of the product) of the two
       stops. For example, the half stop between 25
      and 50 is \ffi0=35. Similarly, a quarter stop
        is obtained by taking the geometric mean of the
        full stop and the half stop.
      To convert milliseconds back to shutter
      speeds, divide 1000 by the millisecond. Thus.
     when 23 mS is displayed, the shutter speed is
      1000123=43.5 (half stop between 30 and 60).
View original page 10Page 11 · Read text
10
   The "kink" in the shutter-speed
                  scale
    The factor between the stops supposed to be
' 2. This, however, is not entirely true. In order
  to gain round numbers from start to finish on
  the scale, the factor between some of the stops
  is changed from 2 to some other value. This
 change in the factor places a "kink" into the
 smooth geometric progression. The old scale
 placed one severe "kink" between 2 and 5
  (factor of 2.5)and another between L0 and 25
  (factor of 2.5).
   Today most often the "kink" occurs
 between 8 and L25 in either one or two steps.
 The progression 8, L6, 32, 64, 725 places a
  slight "kink" between 64 and LZs (factor of
  1.95), while the progression 8, 15, 30, 60, L25
 places two "kinks" in the scale that oppose each
  other: one between 8 and 1.5 (factor of 1.87)
 and another between 60 and 125 (factor of
  2.08)
    Keep in mind, however, that these are just
 numbers printed on the dial. Wen the values L5,
 30 and 60 are displayed the actual shutter
 speeds maybe 16, 32 and 64. Older, mechanical
 shutters are not accurate enough for such
 nuances to make a difference, but these nuances
 may show up in top-of-the-line electronic
 shutters.

            Tolerances
    For otalr, mechanical shutters, a plus or
 mirms half stop tolerance along the whole range
  is deemed to be acceptable by most technicians.
 A top quality mechanical shutter should be
'within plus or minus quartel of a stop. The best
 electronic metal                             are often                  lsquare shutters  !
             ,      i{.
View original page 11Page 12 · Read text
11      www.butkus.us
accurate within plus or minus l07o of a stop. To
get "1,07o on either side of any stop, multiply
and divide the stop by the tenth root of 2, which
is 1.07 .  _ Thus l07o tolerance for the shutter
speed of 250 falls between 233 and 268 or in
milliseconds between 4.29 and 3.73.
  These recommended tolerances are
applicable along the whole shutter-speed range
and they include scatter. Individual stops may
produce tighter tolerances.
               Scatter
  Due to  friction, inertia and other
mechanical or electronic factors, the time will
be slightly different for each exposure. The
scatter decreases as the quality of mechanism
and electronics in the camera increases. Scatter
 is not the same as tolerance, but it should fall
within the limits the tolerance sets.

                Alternate Scale
                  between 8 and 125

                                 t25
                 9.5   105
            11.3          88
                 13.5   74                          .               l6                   62
                19.2   52
            22.7         44
             .2737              32                    31
                38.5   26
            45.4          22
                53.7  18.6
              64                    15.6
                75.7  1,3.2
            90.1          11.1
                106             L25                ,t 8.0                          "o


                                                                    '1,                                   .                                                           ...      -  l^k
View original page 12Page 15 · Read text
,    W'arranty fnformation
  The SH-T2 is made in Canada by
Camlogix Instruments. Camlogix
Instruments is a division of Canadian Camera
Service. Camlogix is the Internet domain
name and registered trade mark owned by the
same company
  One year parts and labour waranty is
provided by the manufacturer from the date
of purchase. Please enquire by E-mail before
deciding to send the unit back. Often a
problem can be resolved by telephone or e-
mail without any delay or expense. Should
the shutter speed tester require repairs during
the warranty period, send the malfunctioning
unit directly to the manufacturer:

        Camlogix Instruments Co.
  #1,75-1857 West 4th Ave, Vancouver BC
          V6J lM4, Canada
  Phone: 604-7 31 -L632, Fax: 604-7 3L-26L5
        E-mail: ThTomosy @ aol.com
   Please, package the instrument well.
Enclose a copy of the bill of sale as well as a
check or money order for Cdn$ 5.00 to cover
shipping and handling.
   Important: send it by ordinary mail, not by
a private courier, and identify the contents
clearly "test instrument, warranty repair".
Otherwise there may be delays at the border.
Warranty is void if the instrument has been
dropped, disassembled, misused, abused, or
exposed to the elements.
       Http:llCamlogix.com
View original page 15Page 16 · Read text
www.butkus.us


                                                                             aq


  Made in Canada by Camlogix Instruments Co.
#175-1,857 West 4th Ave, Vancouver, BC V6J 1M4
      . Ph: 604-73L-1632 Fax: 604-731-26L5
      Http:liCamlogix.com
View original page 16From the M. Butkus archive. Original publisher and archive notices are retained.
Check the model and edition against your equipment.
PDF verified 2026-10-10.