Film cameras
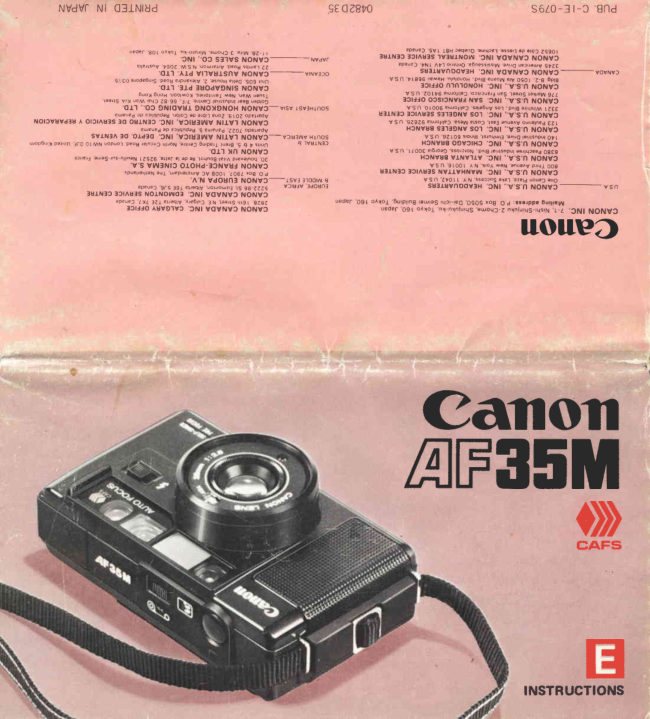
Canon AF 35 User manual
User manual for Canon AF 35. 16 pages in English. Read the original PDF, download or print a copy without registration.
16 pagesEnglish1.9 MB PDF
Loading your manual…Open PDF directly
Document details
- Brand
- Canon
- Model / document
- Canon AF 35
- Document type
- User manual
- Language
- English
- Pages
- 16
- File size
- 1.9 MB
- Category
- Film cameras
- Document date
- Not specified in catalog
Search available document text
Find a term, then jump to its page in the original PDF. Image-only pages may not be searchable; check the PDF for exact wording and diagrams.
Page 3 · Read text
Congratulations on your purchase of  this  matter only of pressingthe shutter button.
Canon product. You have just become the  Never have beautiful pictures been so easy
owner of a truly remarkable camera. With   to take. Before you start shooting, we hope
its auto exposure, autofocusing, auto film  you  will read these few instructions. The
advance,auto film rewind and built-in auto  time spent reading them  is a sound invest-
flash, taking pictures with the AF35M  is a  ment in satisfactionand enjoyment.


         rrrrsCAMERA WILL NOT WORK WITHOUT BATTERIES                  II
Have ready two  new penlight (size AA)   3. Load the two batteriesso that their poles
1.5V batteries which are both of the same    are in the directionsindicatedby the
type and brand. Alkaline-manganese(LR6)     diagrarhinside the battery chamber.  lt
batter ies are recommended.                         is importantthat the polesbe facing in
@ Never use Ni-Cd batteries.                  the correctdirections.
1. Open the battery chamber cover @.        4. Snapthe covershut.
2. Wipe the battery poles with a clean, dry
   cloth to prevent poor contact from dirt.


         WHEN NOT USINGTHE CAMERA FOR SEVERALWEEKSTO MONTHS,REMOVE
          THE BATTERIESTO GIVE THEM NO CHANCEOF LEAKING AND CORRODING
                             www.orphancameras.com          THE CAMERA'SELECTRICALCONTACTS.
View original page 3Page 4 · Read text
Nrila
                                               1. At a normal temperatureof about 2OoC
                                                  (68'f ), a new set of alkaline-manganes
                                             batterieswill take about thirty 36-frame
                                                    rolls of film without flash or about two
                                       36-frame rolls using  f lash for  each
                                        exposure. You can tell the batteriesare
                                        running low when auto film advance
                                     and rewindingand flash recyclingbecome
                                           slower.
                                               2. The batteriesshould be removed if you
Checkthe batteriesbeforeusingthe camera.   do not expect to use the camerafor a
1. With the cap on the lens,pressthe shutter   longtime.
  button O only HALFWAY while looking
  throughthe eyepiece(D .
2.  lf the red lamp glows on the left in the
   viewfinder,thereis enoughbatterypower.            r l                                z-c-3.  lf the red lamp doei not glow, replace                                               /r\       c)   both batterieswith two new ones.
View original page 4Page 5 · Read text
Use color (negative or slide) or black and  5. Make sure the film perforations are en-
white  film  in  standard 35mm  cartridges.   gaged with the teeth of the f ilm sprocket
Shield the film from direct sunlight while      C  and take-up spool and that the film
loading.                                                  is taut.
1. Push the back cover opening latch (E
    in the direction of OPEN.  The back
   cover will f lip open.


2. Insert the upper, flat end of the cartridge
   into the film chamber first.

       OK


                                               6. Close the back cover.  lt will not close
                                                                           if thereis too muchfilm slack.

3. Pull the film leaderacrossthe back and
   insert its tip into any slot of the take-up
  spool O.  Make sure the f ilm restson
  the f ilm guideG  .
4. Press the  shutter
   button  all the way
  down once to wind
   the     f ilm  around
                                                    7. Pressthe shutter button a couple of more   the  take-up spool
                                             times until the frame counter (O reads   automatically.
                                                  "1"  (the dot following zero). As you do
                                                       this, watch the film transport indicator
                                            (D       lf  it jiggles,all is well.   lf  it stays
                             www.orphancameras.comstill, reloadthe film.
View original page 5Page 7 · Read text
@ Povwr Rewind Switch                Popop Flarh


                        @ Viewfinder

       {ftfii


                                                                     Flash Switch
                             @ AutofocusWindow       @ AutofocusWindow
    Neckstrap Rings                                                                       Self -Timer/Prefocus Lever
        @ ExposureMeteringWindow       ASA Film Speed Dial
                          0eSA  Film SpeedScale


                @ Flash Ready-Lamp

               (D Viewfinder  Eyepiece    @  Film Transport Indicator
                                                    (D Bact<CowrlD  Back Cover Opening Latch


                                  @ Film Rewind Button
     @ Battery Chamber Cover
                   O tripoA Socket                      www.orphancameras.com
View original page 7Page 8 · Read text
Each4film has an ASA speed. Exposure To set the ASA, first remove the lens cap.
will not be correct unless you set that  Then turn the film speeddial g  until the
speedon the camera!                ASA speedof your film is alignedwith the
                                        white index.
                                      Reset the film speedeach time you load a
                                               film with a different ASA rating.
                      n5
                          t60
                      250
                       c0


                                    Irrrll
View original page 8Page 9 · Read text
1. Look into the viewfinder and compose 3. Hold the camerafirmly in both hands
   the picture so that your main subject    with at least one elbow steadiedagainst
  coversthe autofocus spot e.  Sincethe    your body. Then GENTLY pressthe
   closestpossibleshootingdistanceis 90cm     shutter button  all the way down to
   (3 ft.), your subject should be at least    take the picture.
  90cm away.
     lf your subjectis between90cm and one
  meter (3.3 ft.) away, shift your com-
   positiona little to the lowerright so that
  your subjectdoesnot overlapthe parallax
   correctionmarks @. Otherwise,part of
  your subiectwill be cut off in the photo.


            @ ParallaxCorrection Mark                                               4. After you let go of the shutter button,
                                           the camera'sbuilt-in power winder will
                                          automaticallyadvancethe film to the
                                         next frame. As the film advances,the
                                      frame counter O will also advanceone
                                          frame. lt can count up to 36 frames.
                            8OO NOT touch the glasssurfacesacross
                                            the top of the front of the camera.Make
                                         sure no disturbances,such as the neck-
                                             strap or your hair, are covering these
                                          surfaceswhile shooting.
                               @rueveR JAB the shutterbutton. Holding
                                            the camera properly and pressingthe
 @ Camera Shake Warning/Battery Check Lamp      shutter button gently are important for
                                             gettingsharppictures.
                                       TIFSF2. Gently pressthe shutter button HALF-
  WAY.  lf the red warninglamp @ lights  1. As the picture is taken, the green zone-
  up  in the viewfinder, switch to  flash.    focus index @  in'the viewfinderwill
  This lamp warns of camera movement     shift to a symbol for the shootingdis-
  whichcausesblurredpictures.             tance which the camera has selected
                                           automatically. By watchingthis index
                                       as you shoot,you can tell approximately
                                                 at what distancethe camerawasfocused.
                                             2. During auto winding, the  red auto-
                                        winding lamp O will glow and the film                                                 '@                                           transportindicator    will jiggle. lf the
                                                  film transport indicator does not move,
                                                                                 it meanseither that you have forgotten
                                                 to load film or,  if film  is loaded,that
                                                                              it is not advancingcorrectly.                             www.orphancameras.com
View original page 9Page 10 · Read text
.{

                     q                                                                                                +*


                                                                  Far distance.                               Very closedistance,such as
                              one needed f or a portrait.

                                               Medium distance,such as
                                                    one needed for a group shot.


You can tell the film  is f inished when auto  3. When  the frame counter reaches"S",
winding stops suddenly before the film  is      let go of  the rewind switch. Open the
completely wound to the next frame. Check    back cover and remove the film cartridge.
the frame counterG) to make sure all frames
have been exposed.
8OO  NOT open the back cover until you
   have rewound the film.
1. Firmly press in the film rewind button
  @ on the bottom of the camera. Once
  you have pressedit, you may immediate-
   ly withdraw your f inger.


2. Push the power rewind switch @.  The
   film  will rewind automatically as long as
   you push this switch. During rewinding,
   the frame counter will count backwards, ITFT
   the auto-winding lamp will glow and the  Shouldauto rewindingstop beforethe frame
   film transport indicator will move.       counter reaches"S",  load new batteries.
8Oo   not touch the shutter button while  Then continueto rewind.
     r e w i n d i n gt h e f i l m .

                                  Rewind the film IMMEDIATELY after
                                          the auto winder suddenlystops to indi-
                                         cate the end of the film. Otherwise,the
                                        auto winding lamp O will stay on and
                                      causebattery drain.
View original page 10Page 11 · Read text
llllllllllllllllllllllllllliltlililillliliiiiiiiirliiiiiliitliitlitiiiiiiiiiiiiiiiiiiiiiiiiii
I  SPECIAL FEATURES


  Switch to  flash photography at the fol-    glow and pressthe shutterbutton.
   lowingtimes:                                                     I  Do not press the shutter button half-
   1. lf the red camerashakewarning lamp   way  continuously while waiting for
     appearson the  left in the viewfinder    the ready-lampto glow or the  f lash
    when you  press the  shutter button      will not charge.
     halfway.  In  this case the  f lash will
-    -prevent the photo from being blurrecl
    and underexposed.
   2.  lf  the sun or a lamp is behind your
     subject.
   3.  lf  there is a bright window at your
     subject'sback.
   4.  lf your subjectis in shadow.
   In cases2-4, the flash will preventyour
   subjectfrom turning out too dark.                                                                                 lf you take the shot before the flash
                                        ready-lampglows, exposurewill be in-
                                                  correct.
   1. Push the flash                      [trE     switch  (E  to-                                    The flash auto shootingdistancerange is
    wards the light-                                 90cm to 5m with a film speedof ASA 100     ning bolt symbo                                     and above,and 90cm to 4m with ASA 64.
    The     built-in
          f lash  will  pop                                          FlashNo LongerNecessary?
     up.                                Push the flash  all  the way down.  Make
                                             double-sure you  do  this when you  are   2. Look  into  the
                                                      finisheci using the camen, since the fiasn     viewfinder  and
                                          always usesbattery power when it is popped    compose    the
                                               up.      picture as you would for normal photo-
     graphy. Make sure the subject is within                                   Backlit Subject,
     the auto flash shooting distance range.                              Without  F lash
     (See [@l   to the risht.)
   3. Wait for the flash ready-lamp O  to


                               www.orphancameras.com
                                                       B a cklit S u bject, With F lash
View original page 11Page 12 · Read text
or How to Focuswhen You Do Not Want Your Subiect in the Center of the Photo
Normally,in order for your subjectto be in   2. Look into the viewfinder and compose
correct focus, it must cover the autofocus     the picture so that your main subject
spot in the centerof the viewfinder. lf you     coversthe autofocusspot (illus.A). Then
want to composethe picture so that your     press the shutter button  all the way
main subject is not coveringthat spot, fol-    down. Now the camerahas memorized
low thesesteps:                              the subjectdistance.
1. Rotate the self-timer/prefocuslever (D   3. Recomposethe  picture so that your
   in the direction of the arrow until  it     subject is where you want  it to be, but
   stops.                       DO NOT changethe shooting distance
                                                  (illus.B).
                                               4. Pressthe shutter button again for ex-
                                          posure.

                   E@
                                          Setting the prefocusleveralso setsthe self-
                                            timer. Unlessyou take the shot soon after
                                        pressingthe shutter button in step 2, the
                                           shutter will be releasedautomaticallyat the
                                   end of about ten secondsby the self-timer.

 lllus.A                                            lllus.B

                  E?J


The CanonAuto FocusingSystemworks by   For thesetypes of subjects,it is best to pre-
measuringthe infrared light rays reflected  focus.  Follow the steps for  prefocusing,
from the subject.  lt focusesmost subjects  but, in step 2, composethe picture so that a
very sharply. There are a couple of types of   substitute subject, which  is at the same
subjectswhich are not so well-suitedto auto-  distance as your main subiect, covers the
focusing.They include:                   autofocusspot.
1. Glossy subjects(exterior of a car, glass, Another time prefocusingis useful is when
   water).                              your subject is too small to cover the auto'
2. Subjectswhich have little or no reflec- focus spot. Prefocuson a largersubstitute
   tance (black hair, fire, fireworks,black- subject.
   out curtains).
View original page 12Page 13 · Read text
or How to Get Yourself in the Picture
1. Rotate the self-timer/prefocuslever (D     the autofocusspot.
   in the directionof the arrow until it stops.  4. Pressthe shutter button  all  the way
                                       down. Recomposethe picture if neces-
                                             sary. The shutter will be releasedauto-
                                             matically after a delay  of  about ten
                                         seconds.


                     SELF-TIMER


2. Look  into the vievtrfinder and press the    I    lf you are usingthe flash,do not press
   shutter button HALFWAY.     lf the red     the  shutter button  until  about   f ive
   lamp in the viewfinder glows, pop up the    secondsafter the flash ready-lampglows.
      f lash.                                  Cancellation
3. Compose the picture so that your main    /t  rs possible to cancel the self-timer before
   sublect covers the  autofocus spot.     lf  you  press the shutter button  simply by
  YOU  will be the main subject, compose  rotating  the  self-timer  lever back  to  ifs
   so that a substitute subject, which is at   original position.
   the same distance you plan to be, covers @ Oo not  try  to cancel the self-timer after
                                        you have pressedthe shutter button.
 lllllllllllllllllllllllllllllGeneralHintsandPrecautionsllllllllllllllllllll

1. When you shoot a subject through glass,
   either press the camera to the glass or
   shoot at an angle of 20o or more to the                              Subject
   g lass.       OK


                           Subject


                                                                                    Subject
       OK
                                                                                  Glass


                              www.orphancameras.com
View original page 13Page 14 · Read text
2. f here is a f ilter threadat the front of the    ment alsorequiresgentlecleaningwith a
    lens for 48mm-diameterscrew-infilters.    blower brush from time to time to re-
   Since the camera meters the exoosure   move film dust which may scratch the
   through the filter, there is no need to      film.
         'an   make           exoosurecorrectionwith filter   5. The best thing you can do for your
    factors. Canon offers a wide variety of    camerais to use it regularly.lf you must
       f iltersfor both colorand blackand white     store it for a long time, f irst removethe
    films. A UV or Skylightfilter is recom-    batteries. Then wrap the camera in a
   mendedfor flash photography.             clean, soft cloth and store it in a cool,
 3. Attach the lens cap to protect the lens     dry. dust-freearea. Always keep the
   wheneveryou are not shooting.           cameraout of direct sunlight and very
 4. Keepthe cameraclean. Dust ruins more    hot spots. such as the trunk or glove
    picturesthan anything else. For the    compartmentof a car. Keep it out of
.   glass surfacesof the camera.obtain a    humidand dustyplaces.
   blowerbrushand cleaningf luid and tissue  6. The battery doesnot work as well in very
   made speciallyfor cameralenses. First    low ternperatures(belowOoC,32oF). lf
.   blow off dust with the blower brush.    you plan to shoot in cold temperatures,
   Then moisten the tissue with a couple    keep the camerawarm until just before
   drops of lens cleaningfluid and gently    you shoot.   lt  i's a good idea to carry
   wipe the surfacef rom centerto edgesin a    spare batteries; keep them warm also
    circular motion. For non-glasssurfaces,    until they are needed.
   brush off dust with a blowerbrush. Then  7. Replacethe batteriesin a year even if
   wipe off smudgeswith a siliconecloth or     they are not used as they discharge
   chamois leather. Never use such cloths    electricitynaturally.
'   on the glasssurfaces!The film compart-
View original page 14Page 15 · Read text
lllllllllllllllllllllllllllllllllllAttachment of Neckstrap lllllllllllllllllllllllllllllll
Attach the strap as illustrated.                                                                        . a


                              www.orphancameras.com
View original page 15Page 16 · Read text
ililililillllllllllllllllllllllllllllllllllllspEcrFrcArroNs   ilililililililililililililililililil

Lens: Canon Lens 38mm t12.8. Construction: 4   Self-Timer:  Delay of about 10 secondsactivated
      elements in 3 groups.                            by  setting self-timer lever and  pressing
Focusing Mechanism: ACTIVE autofocus system.          shutter button.
Shooting Distance Range: 0.9m (3 ft.) to infinity   Automatic  Exposure Coupling Range: EV6  (f/2.8
      (-).                                                    at 118 sec.) to EV17  (f/16 at 1/500 sec.)
Filter Thread Diameter: 48mm.                           with ASA 100 film.
Shutter:  Programmed EE shutter.  Also serves as  ASA Film Speed Scale:'ASA 25-400.
      diaphragm blades.                           Flash: Built-in. Pop-up type.
Viewfinder: Bright frame  finder  with  parallax  Guide Number: 14 (ASA 100, m) or 23 (ASA 25,
       correction frame  for close focusing, 0.5X              ft.)
   -    magnification. 85%overtical and horizontal   Recycling Time:  (lnterval between firing of flash
      coverageof actual picture area. Information        and relighting of pilot lamp with new alka-
      includes: picture frame (1m _ *),  parallax        line-manganesebatteries): About 8 sec.
      correction frame  (0.9m -  1m), autofocus  Number of Flashes:About two rolls of 36-exposure
       spot, zone-focus scale and index  (to check                  f i l m .
       autof ocus), camera shake warning/battery   Flash Duration: Lessthan 1/1000 sec.
      check lamp.                                 Color Temperature: Same as that of averageday-
Prefocus: With self-timer lever.                               light.
Film Winding and Rewinding: Both indicated by  Power Source: Two  size-AA alkaline-manganese
      lamp and film transport indicator. Winding        (LRO) batteries. Ni-Cd batteries cannot be
      automatic upon releaseof  f inger from shut-        used.
        ter button after exposure. Rewinding auto-  Battery  Life:  At  a normal temperature of about
       matic  upon  pressing rewind  button  and       20"C   (68'f),   a  new  set  of  alkaline-
      pushing power rewind switch.                  manganesebatteries will take about thirty
Film Loading: Via multi-slot take-up spool.              36-frame rolls of film without  f lash or about
Back Cover: Opened by pressingback cover latch.        two  36-f rame  rolls using  f lash for each
Frame Counter:  Additive.  Counts back frames as       exposure.
        film rewound. Automatically resetsto "S"   Dimensions: 132.4mm  x  76.9mm  x  53.6mm
      upon opening back cover.                          (5-3/16" x 3" x 2-118"1. -
                                               Weight: 4059 n4-5116 ozs.) inctuding batteries.
                                                                Subject to changewithout notice.
View original page 16From the M. Butkus archive. Original publisher and archive notices are retained.
Check the model and edition against your equipment.
PDF verified 2026-10-10.