Film cameras
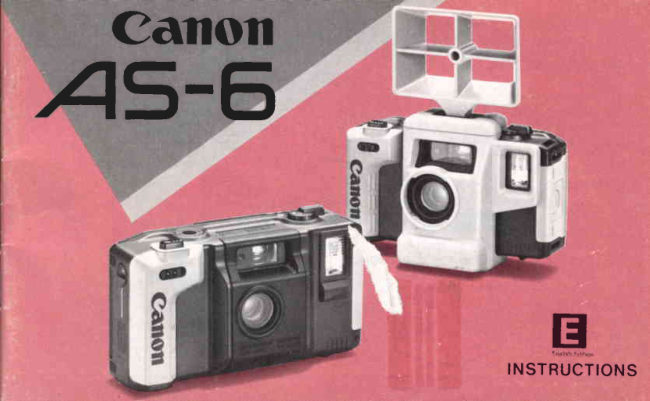
Canon AS-6 User manual
User manual for Canon AS-6. 48 pages in English. Read the original PDF, download or print a copy without registration.
48 pagesEnglish3.8 MB PDF
Loading your manual…Open PDF directly
Document details
- Brand
- Canon
- Model / document
- Canon AS-6
- Document type
- User manual
- Language
- English
- Pages
- 48
- File size
- 3.8 MB
- Category
- Film cameras
- Document date
- Not specified in catalog
Search available document text
Find a term, then jump to its page in the original PDF. Image-only pages may not be searchable; check the PDF for exact wording and diagrams.
Page 2 · Read text
, i+t
                                                                                                                                                                                                                                                n.;                                    ":* *:i                                                                                                          '  i                                                ,

CanonA5-6 is designedfor peoplewho enjoy recordingnature'sbeautyand yourown adven-
outdoorlife,but who don'twant to worryabout tures.
the unpredictable.A sudden shower,a dust Pleasespenda few minutesreadingthrough
storm,an accidentaldrop in the mud -  the these instructionsbefore usingyour new
A5-6will endure.Youcan evenuse it underwa- camera.
terto a depthof ten meters(3.3ft.).           r     lt's a good idea to acquaintyourselfwith the
And there's more.With the close-upunit you-camera by first takingsome pictureswithoul
can fill the whole pictureframewith flow-ers,any film loaded.Load the camera with film
coral, or whatever pleasesyour aesthetic once you feel comfortablewith all the opera-
sense.                                    tions.
Formountainclimbing,camping,diving,in any
situationthe 45-6 will be your best partnerfor


                    Whilereadingtheseinstructionsunfoldthe f rontand backf lapsof
                         this bookletfor easy referenceto the camera'sparts.
                   www.butkus.us          2
View original page 2Page 4 · Read text
;Hyfrj        Fd*{                                :--;5-"1:*
A5-6 Standard Set:
  '1.    45-6
 2. AccessoryBaseAS
 3. SportsFinderAS
 4. Neckstrap
 5. LensCap
 6.  SoftCase.
 7. O-ring,Packing(spare)
Close-up Unit for A5-6:
 B. Close-upLensAS- (lensfor
    close-upphotography)
 9. Close-upFrameAS- (for
    close-upphotographyon land)
10. Close-upRodAS- (forclose-upphotography
    underwater)
1 1  SoftCasefor Close-upLensAS
A5-6 Full Set                                                                                                                                              t l
o 45-6 StandardSet
o Close-uounitfor AS-6
o  FilmCaseASo WaistBag            )+
                   www.butkus.us
View original page 4Page 7 · Read text
''      '+!':::v'4\f;\''':        sttap  and Lan$  g:dp      "::             "':''
1) Firstthreadthe tip of the strapwith one
ring throughthe upper neckstrapbar of
thecameraas shown.
2) Then thread the othertip of the strap
with two ringsthroughthe lowerbar leav-
ing approx.25 cm (10 in.)lengthf romthe
tip as shown.
3) Attacnthe lenscap to the strapin 2) as
shown.
                                                  25 cm (10in.)Movethe neckstrapringto positionA (see
illustration)whenattachingthe lenscap
to the frontof the lens,and moveit to posi-
tion B when removingthe cap in orderto
shoot.
          ^@ffi6=*'m

                                    6
View original page 7Page 9 · Read text
www.butkus.us


                                        1. With a coin turnthe batteryrelease  1. Loadlng the Batteries                                   switchO in thedirectionof thearrowuntil
This camera will not work without   the yellowmarkis alignedwiththe yellow
batteries.                                 line.From the bottomof the camerathe
Use two new size-AAAalkaline bat-  headof the batterymagazine@ willslide
teries of the same brand.               out.Removethebatterymagazine.   '*o Carbon-zinc batteries can also be   2. Loadthe batteries,makingsurethe
  used,but their life is shorter.       and    facein thedirectionindicatedby
o Pleasedo not use Ni-Cd batteries.   thediagraminsidethebatterymagazine
View original page 9Page 10 · Read text
3 . C h e c k t h a t t h e O - r i n g ( t h e b l a c k   4. Checkthat the batterychamberis
rubberring aroundthe batterymagazine clean.Whenit is dirty,wipeit witha clean,
head)is not looseor twisted.ThisO-ring  drycloth.
makesthebatterychamberwaterproof.
                                                                                lf the O-ringor the batterychamberrs dirtyor
                                                  scratched,water and dirt enter the camera and
                                         damage may result
                                                                                            lf this rs the case, see page 39 for further
                                                 mation about care of the O-rrno


                    www.butkus.us
View original page 10Page 11 · Read text
- i t6Tl -        t
                                                                  IN


5. Putthe batterymagazine(D back into
thebatterychamber,makingsurethebat-    2. Releasing the Shutter Button
terychamberclicksclosedlt can be in-    Lock
sertedin onlyonedirection.
                                      Slidethe shutterbuttonlock @ in the di-
                                        rectionof the arrow.

                                               Shootingis rmpossrbleunlessthe shutterbutton
                                                     lock rs released,When the camera is not in use,
                                                please lock the shutterbutton to avoid acciden-
                                                               tallypressingit
View original page 11Page 12 · Read text
Ctt""t i"s thg Batteries         )    3. lf the red lamp does not lightor theG.                                  shutterbuttondoesn'toperate,replace
Always check the batteries before   both batterieswith new onesof the same
using the camera.                   brand.
1. Coverthe exposuremeteringwindow
@ with your hand and pressthe shutter
button O halfwaydown whilelooking
throughtheviewfinder@
2. lf the red lampin the viewfinderblinks
rapidly,batterypoweris sufficient.

                    www.butkus.us         1 0
View original page 12Page 13 · Read text
Battery Life (Number of 24-exposure      two sets of batteries,alternatelywarming each
f i l m r o l l s t h a t c a n b e t a k e n u s i n g       s e t  i n y o u r p o c k e t D o n ' t t h r o w a w a y b a t t e r i e s
new alkalinebatteries.)                                              twheaat thhaevr eObnecceo tmh ee yu an ruesraebs lt eobr ee cdtaour soeoomf tceoml d-
                                                      perature,you may be able to use them again


 (- t o"c,14'F)
                            I   t rott)
o  T h e n u m b e r o f r o l l s m a y c h a n g e d e p e n d i n go n
     t h e b a t t e r i e s T h e s e n u m b e r s a r e o n l y a p p r o x i -
  mations
     lf the batteriesare loaded incorrectly,the lamp
    will not blink Check to make sure they are cor-     4. Loading the Film
   rectlyloaded
           perf   Battery                              is            ormance                                 reduced                          substantially                                                    at                            Use only standard 35 mm color or                       e l       l    o w t e m           p e r              a t u r e s( b                         o w 0 " C , 3 2 " F                                                              ) C a r r y i                                             n g   spare batteriesis thereforerecommended when   black and white f ilm.
   u s i n g t h e c a m e r a  i n c o l d w e a t h e r K e e p t h e   L o a d t h e  f i l m  i n s u b d u e d l i g h t i n g
   c a m e r a w a r m u n t i l j u s t b e f o r e u s i n g r t a n d u s e   only.
                                         1 1
View original page 13Page 14 · Read text
W i t h D X c o d e df i l m ,t h e f i l m c o n t a i n e r
and cartridgeare markedwiththe film's
DXcode.
Thiscamerais designedto automatically
set f ilm speed*by sensingthe DX code
markedon the film cassette,so youdon't
haveto set it. The use of DX code film is
thereforestronglyrecommended.When
usingnegativef ilm,use ISO 100,200,or                                          \---=---
400 film Whenusingslidefilm,use ISO
100or 400film*   F r l m s p e e d r n d r c a t e ss e n s r t i v i t oy f t h e f r l m t o
      I r g h t T h e g r e a t e rt h e n u m b e r a f t e r " l S O " ,t h e
  m o r e s e n s i t r v et h e f r i m ,a n d t h e m o r e q u i c k l yr t
         r o n n r d c       t h o      i m r n o                                                        .-ll o
 W h e n n o n - D X c o d e d f r l m r s u s e d .t h e c a m e r a
  wrll auto.natrcallyset the frlm speed to rso 100
 S o r nt h a t c a s e .u s e I S O 1 0 0 f r l m
                                                                                                                   \ -1 . Slidethe buckle lock (D in the direction
of the arrow, lift it to releasethe buckle
(D , and open the back cover @
                    www.butkus.us
View original page 14Page 15 · Read text
Mike Butkus    Digitally                                                                                                                                                                                                              DN:email=mike@butkus.org,Date:cn=Mike2024.12.06signedButkus,by14:41:01Mikeo, ou=Butkus.org,Butkusc=US-05'00'

FilmChamber


                                                                              www.butkus.us

                                   2. Insertthe lower,protrudingend of the
                                                            f ilm cartridgeintothe bottomof the film
                          chamberfirst,fittingthe orangegear into
                               the film shaftThenswingtheotherendof
                              the cartridgein.Thecartridgeshouldbe
                                                            f ullyseated-not tippedoutward

        FilmLeaderPositioningMark
View original page 15Page 16 · Read text
o o 0 s B o o 0 0 0 0


3. Pullthe film leaderacrossthe back of                                                                                                                                   l f t h e f i l m  l e a d e r e x t e n d s p a s t t h e p o s i t i o n i n gthecameraandalignthetip withtheposi-     mark,manuallyrewind the excess film back into
tioningmark (*t  ) in the lowerright-hand   the cartridge Film will not wind properlyif there
cornerof thefilmchamber.                           is too much f ilm slack


                                         Toomuchf ilm slack         Correct                                      X              OK


                    www.butkus.us
View original page 16Page 17 · Read text
Packing      Back CoverMatingSurface


4. Checkthat.the packing (thebtack   5. Checkthatthe back covermatingsur-
rubber)is notlooseor twisted.           face is clean.lf it is dirty,wipe it witha
The packingmakes the camerabody  clean,drycloth,
waterproof.


                                     1 5
View original page 17Page 18 · Read text
lf the packing or the back cover fitting is dirty or
scratched,water and dirt can enter the camera
and may resultin damage
lf this is the case, see page 40 for furtherinfor-
mation about care of the packing


                                                                                  rocketTeeth


                                                                                 ilm Perforations


                  www.butkus.us
View original page 18Page 19 · Read text
www.butkus.us

6. Make surethat the sprocketteethare   7. Pressthe shutterbuttonO repeatedly
properlyengagedwith the film perfora-  until"1" appearsin thef ramecounter@.
tions,closethe back cover@ and fasten
it withthebuckle(D                                                lf the framecounterdoes not movewhenyou
                                         pushthe shutterbutton,the f ilm is not beingad-
                                         vancedInthiscase,pleasereloadthef ilm. W h e n c l o s i n g t h e b a c k c o v e r ,
 b e c a r e f u l n o t  t o c l o s e  t h e
 neckstrapin the buckle


                                     1 7
View original page 19Page 20 · Read text
The accessory base AS is the base to which the sports finder AS and the
close-upunit can be attached.


    5. Attaching  tfre Accessory Base AS to
      the Camera
1. Putthe accessorybaseAS on the f ront   Makesurethat the rubberstraodoesnot cover
of thecamera.                              theviewfinder(Dor thef lash-readylamp @ .
2.Stretchthe rubberstrap @ all the way
aroundthe back and up to the accessory  Of course you can shoot without the accessory
shoe (E on the top of the camera..Latch    cbasee s s oAS,r y bwhena s e AusrngS i s vnoe r yaccessortese f f e c t i v et n Butp r othet e c ac-t i n g
the rubberstrap'shookO overtheacces-    the lens O, vrewfinder (D or f lash head @ There-
soryshoeso thattheyf it snuglytogether      fore we stronglyrecommendustng tt
                   www.butkus.us
View original page 20Page 22 · Read text
vances,the framecounter@ will alsoad-
                               vanceone f rame.lt can count up to 36
                                                                       f rames.
                             Be surethe f lash head(O, lens O and
To hold the camerasteady,keep one of  exposuremeteringwindow@ are notyour elbows pressedlightlyagainstyour  blockedby yourf ingersor hair.body.
4. Afteryou takeyourfingeroff the shutter  When the batterypower is not sufficient,film
button(O,the camera'sbuilt-inpower   windingdoesn'toperate.In this case replacethe
winderwill automaticallyadvancethe     batteries.
film to the next frame.As the film ad-
                    www.butkus.us       20
View original page 22Page 23 · Read text
ShootingWith the Sports Finder AS     1. Slidethe sportsfinderAS intothe ac-
                                  cessoryshoe (E , in the directionof the
It will be difficultto aim at a movingsub-  arrow,untilyou heara clickindicatingthe
ject: a runningperson,car,bicycle,by   finderis locked.
l o o k i n gt h r o u g ht h e v i e w ifn d e r @ . I n                               To removethe sportsfinderAS,slidethesuch caseswe recommendthe sports                                       finder in the directionof the arrowwhilefinderAS insteadof the camera'sviewfin-                                  pushingthe lockleverC) down.der.


                                    2 1
View original page 23Page 24 · Read text
2. Lookthroughthe centerhole @ of the    The sports finder AS is just a substitutefor thesportsfinderASandaim it at thesubject.     camera's finder,and there is some parallax,The
                                                   best point f rom which to look through the sports
                                                                                                       f i n d e r A S  i s 6 5 c m  ( 2 6  i n ) b e h i n d t h e c e n t e r
                                                   hole From this point,all sides of the sportsfinder
                                               appear to have equal width


                   www.butkus.us       22
View original page 24Page 25 · Read text
In the lastthreecases,the flashwill pre-  7. Flash Photography                                       v e n t y o u r s u b j e c tf r o m t u r n i n go u t t o o
Switch to flash photography at the   darkif it is between1.5m (5 ft ) and 3 m                                       (10 ft,)of youfollowingtimes:
o     l f t h e r e d v i e w fr n d e r l a m p f l a s h e s w h e n y o u   1. TurntheflashswitchO in thedirection
   press the shutterbutton (D haltway ln thrs case   of the arrow,so that the yellowmarkis      t    h e  f l a           s h w                                    i l l p r e v e n t t h e p h o t o f r o m b e r n g  alignedwiththe I  mark.   blurred        and            underexposed
o   lf the sun or a lamp is behrndyour sublect         2. Waitfortheflash-readylamp(Dto light
o   lf there rs a brightwindow at your sublect'sback    3. Lookthroughthe viewfinder(D and
o   lf your sublectis in shadow               frame the subject,then pressthe shutter
                                    buttonalltheway downto takethe picture.
                                 23
View original page 25Page 26 · Read text
4. Afterthe exposureis complete,always
returntheflashswitchto OFF.Leavingthe
flashon wastesbatteryenergy.

        lf the shutter button is pressed halfway down
    a f t e r t h e f l a s h - r e a d yl a m p h a s  l i g h t e d ,t h e
    red vrewfrnderlamp will blink,but the expo-
    sure wrll strllbe correct
   D o n o t p r e s s t h e s h u t t e r b u t t o n b e f o r e t h e
         f lash-readylamp has come on or the picture
      will be underexposed(dark)
    T h e f l a s h - r e a d yl a m p w i l l n o t l i g h t u p  i f y o u
    are holdingthe sh utterbutton halfwaydown


                   www.butkus.us
View original page 26From the M. Butkus archive. Original publisher and archive notices are retained.
Check the model and edition against your equipment.
PDF verified 2026-10-10.