Camera accessories
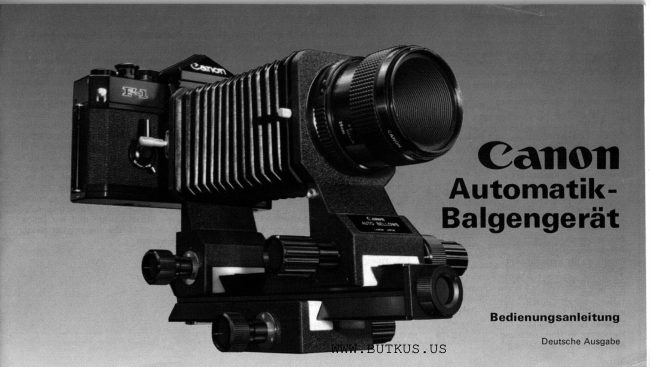
Canon Auto Bellows User manual
User manual for Canon Auto Bellows. 36 pages in English. Read the original PDF, download or print a copy without registration.
36 pagesEnglish10.9 MB PDF

Loading your manual…Open PDF directly
Document details
- Brand
- Canon
- Model / document
- Canon Auto Bellows
- Document type
- User manual
- Language
- English
- Pages
- 36
- File size
- 10.9 MB
- Category
- Camera accessories
- Document date
- Not specified in catalog
Search available document text
Find a term, then jump to its page in the original PDF. Image-only pages may not be searchable; check the PDF for exact wording and diagrams.
Page 3 · Read text
Table of Contents                                       Canon Auto Bellows
AutoBellows(brief explanation). . . . . . . . .2    Tables (for FD lenses without               The Canon Auto Bellows is a high quality
Auto Bellows Composition and                 a locking collar attached                     bellows for use with Canon single-lens
Accessories                   .......3         in standard direction)            .20-23      ref lex cameras which of fers automaticMain FeaturesfortheAuto  Bellows  . . . . . . 3    Shooting with the Lens in Reverse.   . .24-25
Nomencfature....             ....-..4      Table (in millimeters for FD lenses              diaphragm coupling when used with the
AttachmenttotheCamera  .......5      with a locking collar attached                Canon Double Cable Release. lt is the corner-
Vertical/ Horizontal C hange of                        in reversed direction)               ....26     stone around which Canon's close.up system
CameraPosition           .........5       Table (in millimeters for FD lenses                   is built. With the use of a standard macro
LensAttachment .                   .. .....6     without a locking collar attached                   lens, magnifications from around 0.8X to 4XBeffowsAdjustment          ......7       in reversed direction).                   27                                                                               are possible. Many other applications areAttachment  of Canon Double Cable             Table (in inches for FD lenses with
Release.                      .........8       a locking collar attached                          possible with the accessories in the system.
Positioning the Camera on the Bellows.  . . . 8     in reversed direction)                                     ' ,.,28   The Canon Duplicator 35 for copying 35mm
Focusing.                     ........8       Table (in inches for FD lenses                        slides, Macrophoto Lenses for obtaining highExplanationofBellowsScale  .        ....9     without a locking collar attached                                                                                                      magnifications, and photomicrography  usingUsingtheBellowsScale  .          .......   10     in reversed directionl               ....29
Adjusting Canon Double                        Exposure Factor Conversion Table .  . ....30    a microscope, are only few examples of wide
CableRelease...           ...1'l-12     Flash Photography                 ....31     applications with the Auto Bellows.
SimplePhotographic  Procedure  . . . . . . . . 13    Table of Accessory Length                    . ...32
 Deciding lmageMagnification.  . . . . . . . . . 13     lntroduction to System
DecidingExposure         ......14     Accessories for Close-ups and
 Hints and General Precautions in Close-         Photomacrography               33-35
upsandPhotomacrography  .....15
Tables (for FD lenses with a locking collar
attached  in standard direction).      16- 19
                            www.butkus.us
2
View original page 3Page 4 · Read text
3.  Reversing the Lens for AttachmentAuto Bellows & Accessories          Main Features
Auto Bellows Set (includes Canon Double                                         The lens standard can be reversed for
Cable Release)                            1. Automatic Diaphragm Gontrol with       reverse-mounting the lens. This means
Size and Weight: 135mm (W) x 158mm        the Use of Double Cable Release           more than life.size magnification is pos-
   (H)x219mm (L),1,1709                    The lens standard of the Auto Bellows  is         sible without the use of the Macrophoto
Related Accessories: Attachment Rings 52       equipped with a cable release socket. The         Coupler.
  and 55mm for lens reversal, Duplicator        automatic diaphragm of FD or FL lens is     4.  Revolving Mechanism
   35, Duplicator G, Macro Stage, Copy      stopped down when the double cable     A vertical format shot is possible by ro-
                                                        release is pressed halfway and a picture is   Stand 4, Copy Stand 5, Macrophoto Lens                                                      tation of the camera body 90o. With
                                           shot when it is pressed all the way.      power winder accessory attached, the  35mm f/2.8, Macrophoto Lens 20mm
   f13.5, Manual Diaphragm Adapter,       Metering and the confirmation of depth-       Auto Bellows permits camera body rota-
   Macrophoto Couplers FL, Macrophoto          of-field is, therefore, done when the double          tion at the rear of the rail.
                                                      cable release is pressed halfway.                                                                                                                     5. The Bellows Extension of from 39mm   Adapters MA, Vari-Extension Tubes, Exten-
                                       2. Threeway Focusing Systems                                                                                                    to 175mm    sion Tube M Set, etc.
                                      You can independently  alter the lens-to-Specifications subject to change without                                                                6.  Sturdily-built Construction for Dura-                                               subject distance and camera-to-subjectnotice.                                                                                                                        bility.
                                            \                          distance. As there is a supporting runner,        ?)    a\/wtt(r/      ,3'J                                                                     it is also possible to move the whole
                                                   bellows unit back and forth. To achieve a
                                            change in magnification and to make final
                                                 adjustments  in focusing, there is no need
                                                   to move the whole set-up of bellows plus
                                                      a tripod.
View original page 4Page 6 · Read text
Attachment to the Camera    Camera with Winder and        Horizontal/Vertical Change
1.  Rotate the body attachment lever down-   Motor Drive Accessories         of Camera Position
   wards until it stops so that the red dot on   A camera body with a winder or motor.drive ac-    The camera can be changed from a horizontal
   the body attachment mount is right above    cessory can be attached to the bellows. With a     to vertical position  if the camera body is used
   the positioning pin.                       winder attached to the camera body, the    alone without a winder or motor drive acces-
2.  Next align the red dot above the camera    camera can be secured to the bellows more or     sory.  lt does not matter whether the bellows is
   mount with the red dot on the bellows'     less centered on the runner for a horizontal    more or less centered on the runner or its rear
   body attachment mount, push the camera     shot. However, with a motor drive accessory,      plate moved to the rearmost position. However,
   body in and rotate the body attachment     the bellows rear plate should be moved to the   when the camera is used with a winder or
   lever upwards to secure. When removing    rearmost position of the runner for a horizontal    motor drive accessory, change the camera
   the camera, rotate this lever in the op-    shot                                          from a horizontal to vertical position at the rear-
    posite direction,                                                                most position of the runner. Once the camera
                                                                                                                              is changed to a vertical position with a winder
                                                                                                or motor drive attached, the bellows can be
                                                                            moved freely from the rear end to the center of
                                                                                                         the rail.
View original page 6Page 7 · Read text
Recommended Lens                  ture ring of the                                                                      lens from the 'A' mark before-  The Procedure for FD Lens                                              hand. The lens will not mount if its apertureFor professional results in close-up and     ring is set at the'A' mark.               without a Locking Collar:
 photomacrography,  Macro and Macrophoto                                                                                                 Align the positioning key hole of the bellows lenses especially designed for close-up and                                                                                           with the red mount positioning point of themacro work are recommended.         The Procedure for FD Lens                                                                                            and rotate the whole lens clockwise until a                             with a Locking Collar:                 'lens                                                                                                                                     release                                                                                                                       heard. l-ens                                                                                         sound                                                                                                                                              is                                                                                                                                     button                                                                                                                                                                 spr-                                                                                                               click Lens Attachment                                                Align the positioning key hole of the bellows                                                                                        ings                                                                                                                indicate                                                                                                                                                         is firmly                                                                                                               that                                                                                                         the lens                                                                             up to
The basic.method in using the Auto Bellows    with the red dot on the locking collar of the     clamped. Do not apply pressure on this button
is to use the Double Cable Release for     lens. Push the lens straight in and clamp the     while attaching the lens. For dismounting the
automatic diaphragm control. The user also    lens in place by rotating the tightening collar      lens, rotate the lens counterclockwise while
has a choice to operate the diaphragm     clockwise. Rotate the tightening collar counter-     pushing in the lens release button.
manually by locking the automatic/manual     clockwise to remove the lens.
aperture lever in the back of the lens to the
manual position. This is possible with FD
lenses having a locking collar, Macro SOmm
and Macro  l OOmm lenses. However, for
Macro 2OOmm lens and other compact FD
lenses (without the chrome locking collar),
manual diaphragm adapter is used to lock the
lever to the manual position. See page 7 for
the required preparations before actual shoot-
ing.
Remove the aperture ring of the lens from the
'A' mark. The lens is attached to the bellows
front plate in much the same way the lens is
mounted onto the camera body. However,  it
is important to remember removing the aper-      www.butkus.us
6
View original page 7
Page 8 · Read text
tached directly to the Auto Bellows or other   Bellows AdjustmentManual D iaphragm Control                                                   accessories designed to preserve diaph-
When the Double Cable Release is not used,       ragm automation. When the manual diaph-   The whole set-up of lens/bellows/camera
there is no automatic diaphragm coupling of       ragm adapter is attached to the rear of the    body can be moved back and forth by turning
the lenses. The lens must be closed down      FD lenses (which require the use of this     the focusing slide control. When the approxi-
manually and the automatic/manual  aperture        adapter to lock the lever in the manual posi-    mate distance between the camera and the
lever of the lens should be locked to the         tion), do not attempt attaching the lens    subject has already been established, the
manual position before attaching the lens to         directly to the Auto Bellows or other ac-    focusing slide control is useful for camera-
the Bellows unit.                                     cessories designed to preserve diaphragm     to-subject distance  f ine adjustment. The
For FD lenses having a separate locking         automation.
collar, turn the automatic/manual aperture
lever in the back of the lens counter-
clockwise until  it locks in the manual position.
On the FD S0mm f/1.8 S.C. and the FD
35mm fi3.5 S.C. lenses, an additional locking                                                            Camera Adjustment
lever has to be swivelled to lock the                                                        Knob
automatic/manual  aperture lever. The lock
position is marked with a red L. The lenses                          Tightening Knob
used in these ways on the Bellows give
manual operation of the diaphragm. When                                                                Focusing Slide Lock
this function is no longer needed, simply                   Focusing Slide Control
unlock the automatic/manual aperture lever
from the manual position.                                    Lens Adjustment
*  For FD lenses without the chrome locking
   collar, manual diaphragm control  is                                                                  Lens Adjustment Knob
   possible only with the 5Omm, 1O0mm
   Macro lenses (not requiring the use of the                                                                  Tightening Knob
   manual diaphragm adapter to lock the lever
     in the manual position) in case the lens is at-
View original page 8Page 9 · Read text
facility to adjust the movement of the whole   Attachment of Canon               locking collar and FD Somm and 100mm                      proper                                   balance                           weight       also            useful forunit is                               a tri-   Double Cable Release            Macro lenses without a locking collar.                           is mounted                           onwhen         Bellows                    unit      thepod. The knob on the other side is turned   When this double cable release is screwed in-    Positioning the Gamera on
clockwise to lock the movement of the whole     to the cable release socket on the side of the   the Bellows
unit on the focusing slide.                         front plate of the bellows, the diaphragm  is     Ordinarily  it is best to position the rear*  There is a socket for the tripod at the bot-     automatically coupled and will automatically     plate/camera body at the rear part of the
   tom of the Bellows support platform.          close down to the preset aperture upon shut-     scale so that the  f ront edge of the rear plate is                                                        release (see page 11).*   Incidentally, the Bellows unit can be     ter                                                                                             aligned with the "0" mark. This makes  it
   removed from the sliding base by re-       lf you do not use the double cable release,     easier to calculate the amount of bellows ex-
   moving the stopper tightening screw at    manual aperture control is necessary. Before     tension. When the magnification desired calls
   the front end of the scale. When the    you mount the lens, lock the automatic ap-    for only slight bellows extension, set the
   Bellows is fitted back so its front now     erture lever at the rear of the FD lenses with a    camera in the middle of the scale. lf it is
   faces the rear of the sliding base, knobs                                                       positioned at the rear, there is the possibility
   have to be turned in the opposite direc-                                             of the front end of the bellows bumping
   tion for backward/forward movement.                                                          against the subject.
   See page 24 for pictures.


                            www.butkus.us
View original page 9Page 10 · Read text
Focusing                                gradations in the bottom row of this scale                                                 (referring to the picture below) indicatePlease refer to the tables on pages 16-23.                                          image magnifications for a 50mm macro lensThese tables indicate the shooting distance                                         mounted onto the bellows in standard direc-and the required bellows extension for each                                                        tion. The gradations on the top row apply to
type of lens according to the desired magnifi-   a SOmm macro lens which is reverse-cation. First decide the magnification you                                      mounted onto the bellows. Since the imagewant, then read the corresponding shooting                                               magnification values change with lens focaldistance and position the camera. Then                                               length, the magnification scale cannot beadjust the bellows to the specified distance                                          used with lenses having focal lengths otheron the bellows scale. For fine adjustments  in                                            than 50mm macro lens.
focus, move the camera/bellows/lens  unit as   The specific values on both the millimetera whole by turning the focusing slide control.                                      and the magnification scales apply to when
The unit can be locked into position by    the rear plate and camera body are positioned
turning the focusing slide lock knob on the     at the rear of the scale on "0".support platform.                                                 For reverse-mounting the lens, see page 24.
For more details on calculating image magni-
fication, please refer to page 13.
Explanation of Bellows
Scale
There are two scales on the bellows rail. One
scale is calibrated in millimeters from Omm to
175mm and indicates the amount of bellows
extension. The shortest optical length on the
bellows scale is 39mm. The other scale is
calibrated in various image magnifications
possible using a 50mm macro lens. The
View original page 10
Page 14 · Read text
mode and if you wisf to use Double Cable          in the stop-down position. Take a meter
 Release, you must remember to keep the aper-        reading by using the exposure preview
 ture lever in unlocked position.                       switch or by application of slight pressure
                                            on the shutter button. In the case of a non-
Simple Photographic                   through-the lens camera, corect the expo-
Procedure                                       sionsure table.following(See thepageexposure30.)     factor conver-
Refer to your lens instruction booklet and    6. Press the double cable release allthe way
the tables in these instructions while follow-         to trip the shutter.
ing these steps for shooting.                  7. Press down on the knurled ring beneath
1. Choose the image magnification.               the cable release knob to pop out the
2. Read the shooting distance correspond-       knob after the shooting.
   ing to the image magnification from the
   table and position the camera accord-   Obtaining  I mage Magnifi-    ingly.
   Measure the shooting distance from the    cation
    film plane indicator on the camera body to    lmage magnification  is a ratio between the    * The fitm frame size of a 35mm camera  is
   the subject.                                image size and the object size and can be cal-    24 x 36mm.
3. Read the bellows scale setting from the     culated according to the following formula:    You can also obtain image magnification
   table and position the lens by turning the                     M:+                                     by using the following formula: rrr=f    lens adjustment knob.                              M : image magnification                 M : image magnification4. Look into the viewfinder and focus by                                                                                     :lens focal length ("t" is a nominal   turning the shooting distance adjustment     Y': image size                                                                   f
   knob located on the side of the support     Y = object size                                         valuel                                            Example: lf you wish to shoot a flower with a        r: lens extension   platform.
5. Set the camera for stopped-down metering      zlcm diameter so that  it fills up the entire film                                        frame from top to bottom, the resulting    function.  lt means that the stop-down lever                                                     calculations look like the following:    (available on some cameras) or stop-down
    slided (for the New F- 1) must be first locked              ff=o.ox
                                                                                                                                        13
View original page 14Page 15 · Read text
Exposure                           Gamera without through-thelens meter      sure factor as follows. Using formula 2, the
                                 When doing close-up/photomacrography  by    image magnification becomes 2X; putting thisCamera with through-the-lens meter                                                    inserting accessories between the lens and    answer into formula 1 gives B-(1+2)2:9. In When the lens is extended away from the                                          camera body and using a camera without a     other words. an exposure nine times the me- camera body by means of accessories such                                               through-thelens meter, it is necessary to use    tered exposure value must be given. Once you as the bellows, extension tubes, etc., the                                             a separate meter and to increase the metered    have calculated the exposure factor, make the amount of light reaching the film plane                                               exposure. An incident light-reading exposure    exposure correction by multiplying the metered diminishes. Since a camera with a through-
 the-lens meter measures the light after    meter is recommended. The exposure correc-     shutter speed by the exposure factor.                                             tion must be made according to the total   An easier way to find out how much exposure it comes through the lens, the meter auto-
 matically takes the decreased light into ac-     length of all accessories inserted between the     correction  is necessary  is to use the exposure
 count and there is no need to correct ex-    lens and the camera body or according to    factor conversion table included in these                                     image magnification. The amount of ex-     instructions. Simply find the exposure factor posure. Metering  is to be done when the lens is                                             posure correction is called the exposure fac-    which corresponds to the image magnifica- closed down to the pre-set aperture meaning                                                       tor and can be calculated by using the follow-     tion. The table also gives the corresponding that the lens is used in the stop-down mode.
 This can be confirmed by darkening of the     ing equations:                              amounts of exposure correction in exposure                                                                                        degrees.                                                                           One                                                                                                exposure                                                                                                        degree                                                                                                                     equals                                                                                                                    one                                                     1) B-(1+M)2 and 2l M:  {-                   pressing screen       image                                         Cable                after                             the Double                                                                                                                t                                                                                                       speed                                                                                                     Make                                                                                     one shutter                                                                                                                                step.                                                                                                                                            the                                                                                                   f/stop or Release       knob              halfway                    and then                                  turning                                       the   where
                                                                                                                                                                      dia- aperture ring toward the minimum aperture.          B : exposure factor                      exposure correction by opening the                                                                 : lens focal length                      phragm or reducing the shutter speed by thewhen stopping the lens down to a very small              f                                               amount of lens extension                 specified number of exposure degrees or a aperture, the light level may be too low for         r:
meter coupling. In this case, meter the expo-     M = image magnification                    combination of the two. For instance, using
sure at maximum aperture, then close the    To determine the amount of lens extension,    the same above example, and referring to the
 lens down to the desired aperture and figure     read  it from the bellows scale. Add the length   exposure factor conversion table, the
                                                                                                                             3-114the necessary shutter speed according to the    of any additional tubes or other accessories   exposure must be increased by
metered exposure. For example,  if you close    which are inserted between the lens and the    exposure degrees for a magnification  of 2X.
the lens down three f/stops, reduce the     bellows. The exact lengths of these other ac-   One way to make this correction is to open
                                                                                                                                                      theshutter speed by three steps.                       cessories may be found on page 32.           the lens three or 3-1/2 flstops from
                                            Example:  lf you are using a SOmm lens extend-    metered aperture.                            www.butkus.us
                                                    ing up to 1OOmm, you can calculate the expo-
14
View original page 15Page 16 · Read text
*  To compensate for errors in close-up ex-      make any necessary corrections in ex-
    posure adjustment, take extra shot each       posure by reducing the shutter speed
     of about one stop more and one stop less        rather than opening the aperture.
    from the recommended exposure.           When using an ordinary lens, it is also
                                                     necessary to use a small aperture to elimi-
 Hints and General Precau-           nate aberrations due to abnormally close                                              shooting distances. Canon macro and tions in Close-ups and                macrophoto lenses are specially corrected
 Photomacrograph y                     against these aberrations, but using a
 1. Focus before metering the exposure.  lf you        small aperture is still recommended  for
    are using the camera with stop-down lever       good depth of field.  lf it becomes too dark
    or slide, lock the lever or slide in the stop-        to meter or if the shutter speed becomes
   down position. When using a separate        too slow, raise the light level.
   exposure meter, increase the exposure      4. The least bit of camera shake results in
    using the figures in the exposure factor        exaggerated image blur in high-magnifi-
    conversion table.                            cation photography. Make sure the
2. Whether using a through-the-lens or a        shooting site is vibration-free. Always use
   separate exposure meter, some exposure         a tripod or copy stand and a cable release.
    correction may be necessary depending       5.  In case of higher magnification, image
   upon the subject's tone.  lf the subject is        cut-off in the viewfinder sometimes
   composed of many white tones, increase         occurs but it does not affect the exposed
   the exposure. Decrease the exposure  if         image.                                                   VJ       \v*       v-/   the subject has many dark tones. This
   exposure correction must be added to the
.  exposure factor correction made when
    using a separate exposure meter.
3. Depth of field becomes very shallow in
   high-magnification photography. Close
   the diaphragm down to at least f/5.6 and
View original page 16Page 24 · Read text
With FD lens with a locking collar attached in standard direction to Auto Bellows
 (focusing ring at infinityl


* When focusing ring fully extended.
View original page 24
Page 25 · Read text
1. Unscrew and remove the stopper tight-       Turn the lens adjustment knob to moveShooting with the Lens in                                            ening screw and the stopper from the        the front plate forward and pull it off the
Reverse                                           front end of the bellows rail.                     bellows rail.
Mounting a regular lens in reverse when                                                                     4.  Turn the front plate around, slide it onto
shooting with magnifications  larger than life-                                                  the bellows rail and replace the stopper
size improves lens performance at abnormally                                                   and the screw.
close shooting distances. This is especially
true for retro-focus wide-angle lenses. Usu-
ally, except sometimes for telephoto lenses,
reversing the lens also permits higher magni-
fications than when the lens is mounted in
the normal direction. And automatic dia-
phragm function is possible even when the
lens is reversed, by using the Double Cable
Release.
It is possible to reverse the lens on the Auto
Bellows by turning the front plate around.    2. Loosen the bellows tightening screw and
Follow these steps:                                    separate the bellows from the front plate.


                            www.butkus.us

24
View original page 25Page 29 · Read text
With FD lens with a locking collar attached in reversed direction to Auto Bellows
The FD 35mm tlzS.S.C. incorporates a "floating" system for performance  at close focusing and allthe data here are
 based on the results obtained when the focusing  ring is set at infinity.


                                                                                                                                                                              lo-e/"'t I lor%s
                                                                                                         3.1, I  3.3
                                                                                                              s/ux%u  i u/ux'.4,


         Effective when bellows extension is more than 22.5www.butkus.usmm.           ,t*   Effective when bellows extension is more than 33.5mm.
         Effective when bellows extension is more than 33mm.                  *re*Jt Effective when bellows extension is more than 18mm.28
View original page 29Page 32 · Read text
doing the math, make sure both guide   where it is easy to make exposure com- Flash Photography             When                                      number and the flash distance are in the     pensation.
 For close-range work and photomacrogra-    same unit.                                    In photography using electronic flash unit,
 phy, the workable aperture becomes less    With the guide number of f/16 (meter), for     there can be many situations which affect ex-
 than the marked aperture on the lens. The    example, for the flash unit and assuming the    posures. lt is best to obtain fine results
 change in the effective aperture due to fall-     distance between the flash and the subject is    through experience and test shots. After find-
 off in light intensity as the lens is extended    one meter, f/16 is obtained from the equation     ing out the amount of exposure correction
 out is no longer negligible. The usual guide    F:16/1. Next the exposure correction is to   and opening the diaphragm to a certain
 number and f/stop from automatic flash    be made in the same way corrections are     f/stop, take extra shots of one f/stop over
 photography cannot be relied upon and true   made over the metered exposure value in    and under as well.
 aperture must be found out to make the re-     close-range work.  lf the camera is positioned quired exposure compensation. And in order     to obtain 1.5x magnification,  refer to the ex-   Procedures for Flash Pho-
 to prevent irregular light distribution on the    posure factor conversion table on page 30 for    togra phy picture arising from the difference between    the amount of exposure correction to be
the optical axes of the electronic flash unit    made. According to this table, the exposure    1. Position the camera on the Bellows scale
and the lens, the electronic flash unit should    must be increased by 2-314 exposure degrees       in accordance with the magnification
usually be placed off-camera by using a cord.      for a magnification of 'l-1/2x. For making the         quired.
                                                  correction, the lens should be opened 2-314    2. Determine where the flash unit will be
                                                                                              quar-         placed off-camera.Guide Number and                    f/stops from f/16. Since there is no one                                                          ter click stop between the f/stops on the lens,    3. Use guide number to determine the f/stop
Exposure Compensation            set the aperture ring to f/5.6 which is slightly         required for the flash to subject distance.
                                                                              4. Make exposure correction necessary forFor close-range work guide number, use the    more than the required exposure increase but                                                                                                          close-range                                                                                                    work by                                                                                                                                                          f/stops.                                                                                                               opening the                                                    the exposure                                                                          tolerance.                                                                                                  close-                                                                      But infollowing          calculation               on the condition the     within                                                                                                                                     focus                                                                                                                       and                                                                                                 Decide the picture                                                                                                                   composition                                            range magnification                                                                                                                 field    5.                                                               work,                                                                       the depth                                                                                     offlash is used            off-camera.                                       becomes quite shallow and it is desirable to       on the subject.       .     ouide number  aPenure=fush                                               shorten the flash distance instead of opening    6. Press the shutter button.                                                                                   *  For more information, refer to books                 distance                   the aperture. One of the solutions to this
                                         problem is to position the camera on the         especially devoted on the subject.
                                              Bellows unit to a specific magnification from
                                                                                                                                                   31
View original page 32Page 34 · Read text
I  Accessories for Close-ups and Photomacrography
 Canon Macrophoto Gouplers     Tubes FD-U. Focusing is possible with bel-   Macro Auto Ring and Double Cable release
  FL52 and FL 58                            lows movement.                       are attached for automatic diaphragm
  The macrophoto coupler is attached between                                                   control. When the lens is reversed, a
  the lens and the camera body for mounting   Canon Extension Tubes FD 15-U,     Macrophoto Adapter MA and Macro Auto
   the lens in reverse td obtain higher magnifica-   FD 25-U and FD 50-U               Ring (or Macro Hood) are used in
   tions with improved image quality. They are    These tubes are 15,25, and Somm in length.    combination.
   available in the two diameters of 52mm and    Their special merit is that they are in-
  58mm corresponding  to the lens filter size.       termediate tubes with full FD functions.  In   Canon Duplicator 35
 When an FD lens is reverse-mounted onto    other words, full aperture metering and    This is an accessory designed for use with the
  the Auto Bbllows by means of the macro-    automatic diaphragm coupling are possible'    Auto Bellows which reproduces a 35mm
  photo coupler, automatic diaphragm coupl-    The Extension Tubes can be used with any     slide, mounted or unmounted. Trimming  is
  ing is possible by attaching the Macro Auto   Canon FD lens having a focal length from     possible by reproducing only a part of the
  Ring and using the Canon Double Cable   35mm to 200mm except for the FD 85mm   35mm film frame.  lt will also duplicate 110
  Release.                                             l/1.2 L. The FD 15-U can also be used with     slides into 35mm slides. And to make dupli-
                                    FD 28mm lenses. Only one Extension Tube    cation of slides in long strip form easier, the
                                     FD-U should be used between the FD lens   Canon Roll Film stage attaches to the front ofl Canon Macrophoto Adapters          and the camera.                                 the Duplicator 35.
 MA-52 and MA-58
  These accessories are for attaching the lens   Canon Vari-Extension Tubes       Canon Roll Film Stage
  in reversed position to obtain higher magnifi-   M15-25 and M30-55                    This accessory is used with the Canon
  cations in close-up photography. The adap-   The Vari-Extension Tubes M15-25 and M30-     Duplicator 35 when duplicating from 35mm
  ters are available in the two diameters of   55 are used between the camera body and    bulk film to make handling the bulk film
 52mm and 58mm. Macrophoto Adapter may    the lens. With extensions up to 10mm and      easier.
  be interposed between the lens and a bellows   25mm for the M15-25 and M30-55 tubes
  unit. between the lens and extension tubes    respectively, a wide range of image
                                                                                                                    page 32 for the  such as Extension Tubes M (of 5mm, 1Omm.    magnifications is  attainable' Manual     * Please refer to the table on
I or 20mm length) or one of the Extension    diaphragm control is necessary unless the      extension length for various attachments.
                                                                                                                               33
View original page 34Page 35 · Read text
Canon Duplicator G               Ganon Macro photo Lenses         Canon Macro Stage                                                   #This is an accessory for duplicating and   20mm t/3.5 and 35mm t12.8             This accessory, which has a built-in diffusion
enlarging single frames of a gastro camera.     Ordinary lenses are not designed for photo-    screen helps to hold the subject in place for
The Duplicator G is used in combination with    macrography calling for great magnifications.     close-ups and photomacrography.   lt is princi-
Macrophoto Lens 20mm f/3.5 and a bellows   When they are used for high-magnification      pally designed for use with the Canon macro-
                                                                                                                            Autounit. In place of a bellows, other accessories     photomacrography, image quality tends to    photo lenses when attached to the
such as Extension Tubes M and Macrophoto     decrease with increased magnification. The     Bellows, but  it can also be used with a Canon
                                                                      50mm standard tens.                                                                                 and                                                                                         f/3.5                                                 20mm                                                                    lenses                                               macroohoto                    used. Focusing is                                     CanonCouplers         may be      FL                                                                                                       I,tu_f/<re. 0 .s                                                                                             give                                                                                       op-                                                                                       to                                                                          corrected                                                                                                                                            f 12.8                                                                    are specially                  movement.                                   35mm             bellowspossible with
                                       timum image quality in such high magnifica-   Canon Copy Stand 5
                                                  tion photography. When used with the Auto    This is a sophisticated copy stand for holding
Canon Duplicators 16 and 8              Bellows, macrophoto lens 20mm f/3.5 gives 4   the camera seady during delicate photo-
These accessorieg are used with the Canon     to 10X magnifications and the 35mm tl2'8,2   graphy such as copying and photomicro-
macrophoto lenses and the Auto Bellows for     to 5X magnifications.                          graphy. A weight balance built into its pole
duplicating a movie film frame into a 35mm                                                 ensures smooth, light operation of the arm
film frame. Duplicator 16 duplicates 16mm                                                     for changing the position of the camera tomovie film into 35rnm film while Duplicator 8   Canon Macro Auto Ring                  vary the shooting distance.
reproduces &nm movie film into 35mm film.     When the Macro Auto Ring is attached to the
                                                  lens mount and used with the Canon Double   Canon Copy Stand 4                                         Cable Release, automatic diaphragm coup-                                                                                                This is a high-quality copy stand with simpler                                                       ling is possible even when non-automatic ac-                                                                                             design but made to the same exacting stand-
                                                   cessories, such as Extension Tubes M or a    ard as the Copy Stand 5.
                                              Vari-Extension Tube, are inserted between
                                            the lens and the camera body or when the   Canon Focusing Rail                                                     t                                                  lens is mounted in reverse, using Macrophoto                                                                                                This accessory can be attached to the arm of
                                                 Coupler FL.                                           either Copy Stand 4 or Copy Stand 5to facili-
                                                                                                             tate fine adjustments in camera position.  Please refer to the table on page 32 for the      www.butkus.us  extension length for various attachments.
View original page 35Page 36 · Read text
Canon Macro Lenses FD 50mm   Lens Mount ConverterA             Extension Tube M Set
                                                   This accessory contains a female breech-lock     This set includes one 5mm tube, one 10mm    f 13.5, FD 1O0mm t/4, and FD                                                   ring and female screw thread for mounting    tube and two 20mm tubes. With the at-  2OOmm                           f /4                                         canon screw mount accessories onto canon    tachment to the standard lens, they are used          lenses                are high-quality lenses specially   These
   aberration-corrected to give excellent image    breech-lock mounts of single-lens reflex     for making possible reproduction  ratios up to
   quality at close shooting distances. Alone,    cameras and bellows.  lt is also used to con-      1:1. Used in conjunction with the bellows unit                                          nect the Microphoto Hood necessary in    and Macrophoto Coupler FL (the latter for   the 50mm and 10Omm Macro lenses are                                                photomicrog raphy using the bellows.              reversing the lens), reproduction ratios may   capable of magnification up to O.Sx and with                                                                          be increased. Manual diaphragm control is  one of the Extension Tubes FD, the mag-
     nif ication increases to life-size. With the   Lens Mount Converter B                necessary whether the lens is normally or
  20Omm Macro, new system is used, and the   This accessory contains a male breech-lock     reverse-mounted unless the Macro Auto Ring
   focusing range extends far enough for 1:1   mount and male screw thread for mounting    and Double Cable Release are attached.
    life-size photography without the use of an   Canon lenses and accessories with a breech-
   accessory tube. All three Macro lenses can be   lock mount onto Canon screw-mount ac-
  used in general photography as well at    cessories.
   shooting distances up to infinity and the   lenses also feature full aperture metering and   Extension Tubes (Screw-Mountl   automatic diaphragm control coupling. The  A (6mml, B (9mml, C (12mm1,25,
   lenses are optically ideally suited for close-   il,75,100, 150 and Z)0mm
   ups and photomacrography  and give top per-   These tubes of fixed lengths have a screw
                                                                                    breech-lock  formance in copying when used with a   mount and are attached to a
   bellows.                              mount bellows by using Lens Mount Con-
                                                        verter B at the rear of the tube. When using a
                                          number of tubes,  it is practicable to limit the
                                                  extensions within 300mm.t

                                                                                                    Please refer to the table on page 32 for the
                                                                                                    extension length for various attachments.
View original page 36Related documents and language editions
From the M. Butkus archive. Original publisher and archive notices are retained.
Check the model and edition against your equipment.
PDF verified 2026-10-10.