Film cameras
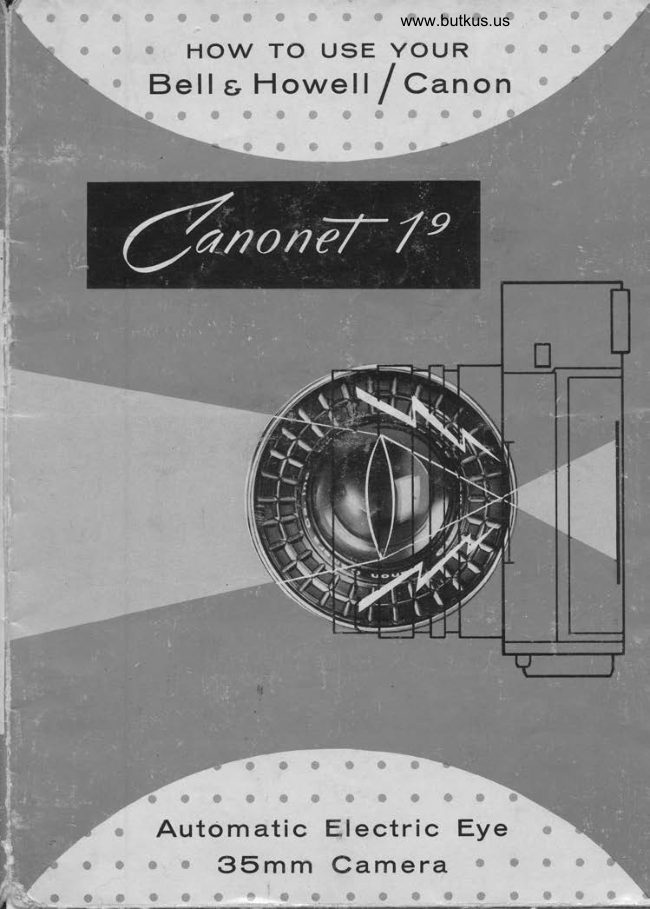
Canon Canonet 1.9 User manual
User manual for Canon Canonet 1.9. 24 pages in English. Read the original PDF, download or print a copy without registration.
24 pagesEnglish2.2 MB PDF
Loading your manual…Open PDF directly
Document details
- Brand
- Canon
- Model / document
- Canon Canonet 1.9
- Document type
- User manual
- Language
- English
- Pages
- 24
- File size
- 2.2 MB
- Category
- Film cameras
- Document date
- Not specified in catalog
Search available document text
Find a term, then jump to its page in the original PDF. Image-only pages may not be searchable; check the PDF for exact wording and diagrams.
Page 3 · Read text
www.butkus.us


Fully Aulomolic Exposure Syslem. Extremely sensitive
"Around the Lens" Electric Eye assures perfect
exposure control  . . . won't let you take a bad picture.
Shutter locks if lighting is incorrect. Completely
automatic with fiIm speeds ASA 10-200 plus manual.
"Dolo Center" Viewflnder. Frames exact picture area .  .
shows you the lens setting . . . warns you of improper
lighting . . . and shows how to correct for
perfect exposure. Parallax corrected.
Belween The Lens Shutter. Shutter speeds from 1 second
to L/iOO second plus Bulb and Time Exposure.
Stop motion or take beautiful night scenes.
Fulty synchronized for flash bulbs or electronic flash.
Buill-ln Self Timer. Allows 10 second time to get into
the picture yourself before shutter is snapped.
Shorp 45m tll.9 Lens. Color corrected semi-wide
angle lens allows greater coverage and produces
brilliant color or sparkling black and white pictures.
Convenient, Built-ln Rongefinder. Double image type
rangefinder is quick and easy to use. Sets distance
accurately from 3' to infinity to produce corner to
corrrer sharlrness.
Other Convenient-Quolify Feofures. Self-resetting
exposure counter . . . single stroke "trigger lever" film
wind . . . rapid crank system film rewind.
View original page 3
Page 5 · Read text
www.butkus.us


              Evereody Cqse.
                The front of the cose swings out of the woy for
               comero operotion without removol, or moy be
                removed entirely,  if desired.


                                                 Cqble Releqse.
                                                      Sturdy, oll-metol releose
                                                            coble is ovoiloble with screw
                                                down lock for time exposure
                                                                               control.


      Godgel Bog.
       The godget bog in block full groin cowhide,
        crofted by Bell &  Howell, is ideol for con-
        veniently corrying  comero occessories ond
        extro film.


J\
View original page 5Page 6 · Read text
Venmo @mike-butkus-camera  Ph. 2083
PayPal Name  Lynn@butkus.org      www.PayPal.me/lynnbutkus
View original page 6
Page 7 · Read text
Screw-in Type Filters.
                            An ossortment of filters for color ond block ond
                                   white film ore ovoiloble. These 55 mm filters
                                   screw into the lens rim. Exposure compensotion
                                                       is outomotic, os they cover the electric-eye photo-
                                                 cell os well os the lens. Avoiloble types for color
                                          film o.re: lA, 8OC, 8OB, 8lA, 82A, 858, 85C.
                                        Avoilqble"'types for block ond white film ore:
                                 UV, Yl, Y3, Ol, Rl ond Gl in plostic cose.    ffi@


                                Flqsh Unit.
                              The flosh unit is convenient ond compoct with
                                         folding-ty,pe reflector. lt ottoches to the occes-
                                       sory clip ond locks in ploce. Cose included.


            lens hood is olwoys desirqble tof    AClomp-on Type lens Hood.
          eliminote reflections ond other light out-
        side the photogrophic ronge of  the
         subiect. The lens hood clomps on wiih
       o single thumb-screw. lt is self storing,
       ond moy be pui on in reverse position
          for corrying when not in use.
View original page 7Page 8 · Read text
www.butkus.us


The name BelI & Howell /Canon combines
the best American and Japanese imagi-
nation with engineering and painstaking
craftmanship, famous the world over. No
expense has been spared, no detail con-
sidered too minor for the loving attention
of these camera specialists in meeting the
challenge of this original design. With the
Canonet 1s we are proud to welcome you
to Bell & Howell ownership.
         THE BELL & HOWELL COMPANY
View original page 8Page 9 · Read text
This new Bell & Howell product is guaranteed to be free from
imperfections in both material and workmanship for one year
from date of original purchase. Should any part of this equip-
ment be defective, it will be replaced or repaired free of charge
(except for transpottation), providing the equipment has been
operated according to the instructions accompanying  it.
 No liability is assumed for film which is damaged or is un-
satisfactory for any reason and no liability is assumed for
interruptions in operation of equipment. This guarantee is
void:
  a) If equipment has been damaged by accident or
     mishandling;
  b) If equipment has been serviced by other than
      Bell & Howell approved service stations*;
  c) If adaptations or accessories other than Bell &
     Howell.have been made or attached.
The foregoing is in lieu of all other warranties expressed or
implied and Bell & Howell Company neither assumes nor
authorizes any person to assume for it any other obligation
or liability in connection with this product.
 *Location of nearest approued seruice station wiII be furnished
 on request
View original page 9Page 10 · Read text
tffir r r!r
       ROTATE SAFETV LEVFR                       www.butkus.us
                                                          F{OCK


                                                            FILM SLOT

                                             TAKE-UP SPOOL


                                        KNURLTD FLANGE

PI.Js}.I OPENING BUTTON


     1. Open the camera back by            2. Rotate the takeup spool by
    moving the back-cover safety           rneans of the knurled flange at
     lever counterclockwise as far as          the bottom until the film slot
        it witl go and then pressing the               is at the outside of the spool and
     back-cover opening button. The            the hook, which engages the film
    back cover will spring open.                   perforation, is at the top.
View original page 10Page 11 · Read text
CASSETTE             FILA/t SPEED
                                                                                    INDICATOR WINDCW


SPROCKET

                                               Digitally signed by Mike Butkus                             REWIND CRANK
  Mike Butkus DN:org, cn=Mikeemail=mike@butkus.org,Butkus, o, ou=Butkus.c=US
                                         Date: 2025.03.02 02:44:35 -05'00'
                                             4; Pull the rewind crank out all           5" Set ASA fitrm speed nurnber
                                           the way and insert the cassette.           of the fiIm into the film speed   3. fnsert the end of the film into          Push the rewind crank back. See                                                                                               indicator window by moving the                                                                                                                                                                                                                                                                                        '   the loading slot of the takeup           that the teeth of the sprocket             film speed indicator lever. IT tfre
   spool. See that the hook engages            accurately engage the perfora-             film speed desired is between the  one of the sprocket holes, as           tions before closing the back          numbers in the window, set be-  shown. Then- rotate the spool             cover.                                   tween numbers.   to 'see that the film is securely   attached.                                 6. Move the aperture ring from AU'"[O to some number on the scale. Press
                                             the shutter release button. Wincl the film and press the shutter-fh;"*po"or*release                                                button ag-d-asain wind the fiIm     p"""*th" releate n"tton.
                                                 counter dial will now have advanc,::d"nd  to 0 rnd your camera is ready fbr use.
                                           (The exposure counter dial auto'natical y reJets when the back           is                                             opened.) Reset the aperture ring to AU'IO.                     ".n*"
View original page 11Page 14 · Read text
www.butkus.us


                                                   Set Flosh-Setting Lever
Cononel with Flosh Unit in Ploce                               for Type of Bulb
View original page 14Page 16 · Read text
www.butkus.us


Distonce Scole is Useful                        Push Self Timer Lever Down
  for Flqsh Exposures                              for Time-Deloyed Exposurer
View original page 16
Page 17 · Read text
Preparation for Automatic
Electric-Eye Operation

                       loqd the Film.
                              It's easy, follow the steps on the flap
                     below. Be sure to set the film speed
                             indicator to the correct speed of the film
                      you load into your camera.

              o Set for Automqtic Operolion.
                Move the aperture ring to AUTO
                              position.

              o Set lhe Shutler.
  Turn the shutter-speed ring to line up the correct shutter speed.
  with the index mark. Always set the shutter-speed ring so that
  one of the numbers lines up with the index mark. Neuer set be-
  tween numbers. Shutter speed should be fast enough to stop
  any motion of the subject, but slow enough to get the required
  depth of field. See the Shutter Speed and Depth of Field Tables
  on the back of this sheet.
   (Wlrcn turning th,e aperture ring or the shutter-speed ring, grip it by
  the raised finger-grips on either side, using care not to rnoue the
   fi.lm-speed lener.)
                   Neuer set the shutter-speed ring to B for auto-
                   matic electric-eye operation. If this is done by
                   mistake, the shutter will lock. Correct as
                       follows:
                     1. Turn the aperture ring from AUTO to
                 some number on the aperture scale (1.9,
                            2.8, etc.
                     2. Press the shutter-release button.
                 -  S:-Tuiilthe shutter-speed{.    ring froui B To
                  number on the shutter-speed scale. (15,
                        30, 60, etc.)
                    4. Reset the aperture ring to AUTO to return
                       to automatic operation.
View original page 17Page 18 · Read text
www.butkus.us
  Manual Exposure Setting and                 tr
                                                                                                                                                                                         iffi        Flash Operation
                                                                                      1W
                                                                                         ,m
When there is not enough light for automatic operation, the use of
flash bulbs is recommended. The manual exposure setting can also             {ffi
be used for special photographic effects. To do this, simply turn the      -
aperture ring from the AUTO position to some other position on             tiun
the lens-aperture ring. Then                             -
l. Set the lens Opening. Move the aperture ring to the F stop
   for the required exposure, as shown below, left.

2. Set the Shutter Speed. T\rrn the shutter speed ring to the cor-
   rect shutter speed for the required exposutre, as shown below.

3. Wind lhe Film ond Gock the Shutter. Swing the film advance lever
   toward you until it stops, just as in automatic operation step 1,
   above. This winds the fiIm, cocks the shutter and advances the
   exposure counter dial.

4. Compose Your Piclure ond Focus. This is done exactly as for           I
   automatic operation step 2, above.                                                                                                                                                                                TI
                                                                                                 --l
5. Toke lhe Picture. Press the shutter release button as for automatic                   I
   op€ra+isn' step ft above. Thristrips the sinrbter to-take the-pictErs. --  I*'!'
View original page 18Page 22 · Read text
www.butkus.us
T
I   Shutter-Release Button Operation


   j     The shutter-release button operates in two stages for automatic
      operation. As it moves downward on its first stage, it sets the
       electric-eye mechanism for correct exposure at the shutter speed
      previously set with the shutter-speed ring. As it does this you
     can see the black needle move across, the indicator scale in the
      viewfinder to show you the aperture at which the picture will be
      taken. As the button moves all the way down in the second stage,
         it releases the shutter to record the picture on the film.
                          If the shutter release button locks after the first stage
                 and will not move down to release the shutter, this is
      NOTE    your warning that correct exposure cannot be made at
                       this shutter setting or with existing light. See "View-
                       finder Data Center" below.
View original page 22Page 23 · Read text
Viewfi nder Data Center
The data center in the viewfinder shows you everything you need
to take perfect pictures. It is visible through the eyepiece at the
lower edge of the picture composition frame. The red arrows on
the left and right are shutter speed-change marks. The numbers
across the center are lens-aperture scale (F/stop) numbers.

Normal Operolion.
As the shutter-release button is pressed through
its first stage, the black needle moves from the
extreme right to the left until it indicates the
aperture at which the picture is being taken.

Shutter Speed Too Fost.
If the black needle remains within the right
hand shutter speed-change arrow the shutter
will lock as the shutter-release button is press-
ed through its first stage. This is your warning
that there is not enough light for proper ex-
posure at the shutter speed set on the shutter-
speed ring. The red speed-change arrow points
to the ieft, so turn the shutter-speeo. ring to
the left to select a slower shutter speed. Then
take the picture in the usual manner.

Shutter Speed Too Slow.
If the black needle moves all the way into the
left hand shutter-speed change arrow the
shutter will lock as the shutter-release button
is pressed through its first stage. This is your
warning that there is too much light for proper
exposure at the shuttqr speed set on the shutter-
speed ring. The red speed-change arrow points
to the right, so turn the shutter-speed ring to
the right to select a faster shutter speed. Then
take the picture in the normal manner.

Eleclric-Eye Mechonism Not Operoting.
If there is so much light or so little light that
the amount of light is outside the operating
range of the film in the camera the black
needle will move to the left to some position
on the scale, but a red warning appears within
the viewfinder frame and the shutter locks as
the shutter-release button is pressed thrcugh
its first stage. Automatic operation is not
possible under these conditions. When this
happens, use a time exposure or flash.
View original page 23
Page 24 · Read text
www.butkus.us
    Ti me-Delay Exposures
    The self timer can be used \Mith automatic electric-eye operation
     or-manual exposure-setting and electronic flash operation to pro-
     vide a time-delay shutter release of about 10 seconds. put the
     c^amera_on a tripod to enable you to get into the picture yourself,
        if you choose. Use the self timer as follows:
     o Prepare for Automatic operation or set the lens opening and
           shutter speed for Manual or Flash Operation.
          .  Set the flash-setting lever to X.
     o wind the film and cock the shutter with the film advance
            lever.
          .  Push the self timer lever all the way down (berow, right).
     o T\rrn the time ring so that the dot is at the T.
     o Press the shutter-release button. After a delay of about        -{#l7          10 seconds the shutter will release to take the picl're.
         . Move the time ring clockwise away from the T.!>*                                                                                             TIe.         I mportant : A l,way s set  t lrc flas h - setttng Leuer to i,  6ef ore rnout'ng
       setf timer leuer. In automatic operation, incorrect exposure will re-
      sult if the time ring is not set to T or if your shadow is on the
     photocell when the shutter release button is pressed. M type flash
     bulbs can not be used with the self timer.
View original page 24From the M. Butkus archive. Original publisher and archive notices are retained.
Check the model and edition against your equipment.
PDF verified 2026-10-10.